
How to Fix a Slow Windows Computer
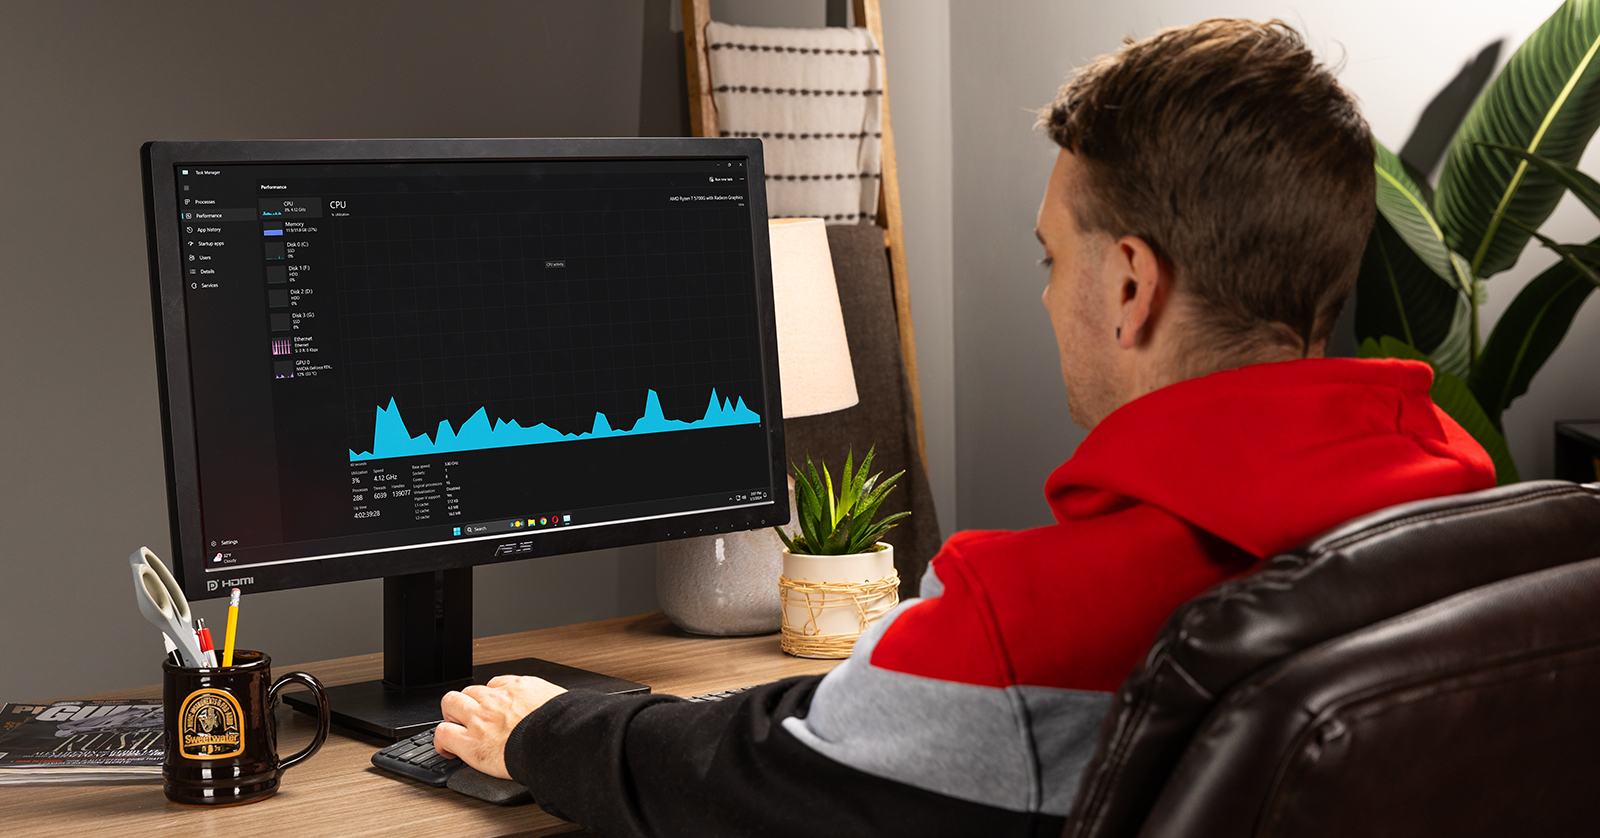
There’s nothing worse (and annoying) than a slow Windows computer. It can cause headaches and can ruin your workflow. While it may seem a little overwhelming, narrowing down the cause is pretty easy. In this guide, we’ll show you how to get your PC running fast and smoothly again. Let’s get started.
- Reboot Your Computer
- Disable Fast Startup and Adjust Power Settings
- Check Task Manager
- Clean Up Hard Drive Space
- Keep Software and Drivers Updated
- Viruses and Malware
- Run Windows Diagnostics
- Reinstall Windows
- Faulty or Outdated Computer Components
Reboot Your Computer
There’s a reason why Windows tech support specialists around ask, “Have you tried turning it off and back on again?” Before you spend hours finding out where the issue lies, restart your computer.
The more you use your computer, the computer RAM cache (temporary RAM files) can begin to build up to a point where it just can’t handle much more. When restarting your computer, you’re clearing the RAM cache. Think of RAM as a kitchen countertop. The more you place on the countertop, the less efficient you can work, so by cleaning the countertop, you have more space to work.
Restarting your computer also gives you a clean slate if you need to troubleshoot further.
To reboot your computer correctly, click the Windows start icon, click the Power icon, and select Restart.
IMPORTANT: A hard reboot should only be performed in a worst-case scenario. Your hard drive(s) are constantly reading and writing data, so performing a hard restart will result in data corruption and data loss.
Disable Fast Startup and Adjust Power Settings
Another reason why your computer may be running slow is that you need to disable Fast Startup and optimize your power settings. Just by adjusting some of these settings, you will see a boost in performance.
Disable Fast Startup
Fast Startup makes it faster for your computer to boot into Windows when you first turn it on. However, it enables both shutdown and hibernation, so it just takes a snapshot of the current system and driver files, so when you turn your computer back on, it doesn’t load a fresh session. Because of this, you can run into the same issues before you power down your computer.
If your Windows computer has an SSD, the difference is already negligible. However, if the computer has an HDD, it may be a slower boot, but your overall performance can improve.
- Click the Windows start icon and open Control Panel.
- Click Power Options and select Choose what the power button does.
- In Shutdown Settings, click Turn on fast startup (recommended) if it’s enabled.
- If it’s enabled and the box is greyed out, click Change settings that are currently unavailable. You should now be able to disable it.
Adjust Power Settings
When you install Windows, the default settings are often the ‘recommended’ settings. However, not all computers are built the same, so these options may need to be adjusted. These power settings are especially important for laptops.
- While in the Power Options settings, select High Performance and Change plan setting.
- Set the computer’s sleep time to Never.
- Click on Changed advanced power settings.
- Click on the + next to USB settings, then click + next to USB selective suspend settings.
- Double-click where it says Enabled, then choose Disabled.
- Click + next to Processor power management, click + next to Minimum processor state, and type 100 in the text field.
- Click Apply, select OK, and finally, Save Changes.
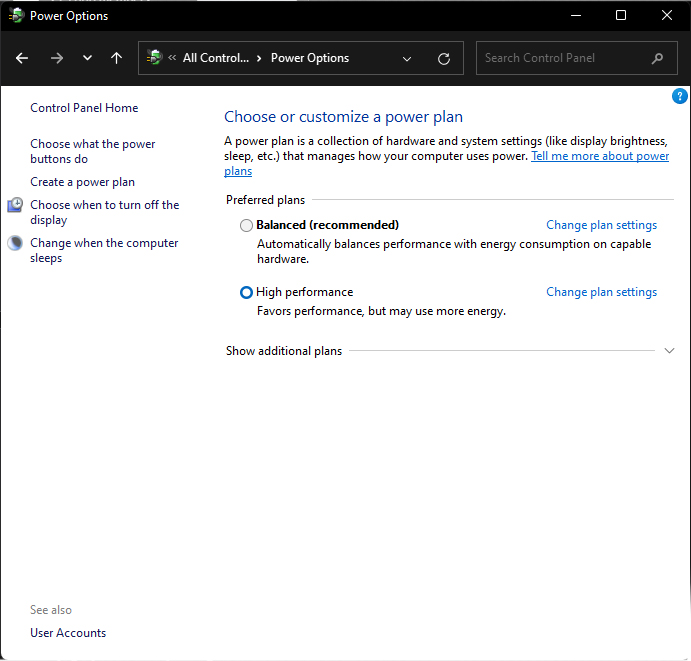
Windows Power Options
Check Task Manager
Task Manager is one of your best friends when troubleshooting a slow computer. Not only can you view what processes and applications are running, but you can also view real-time performance and what applications automatically start upon boot.
Let’s open Task Manager and check some of the settings. Click the Windows start icon, then type and select Task Manager.
Processes
IMPORTANT: Only disable trusted applications and processes you recognize. If you’re not sure of the process, do a quick search to see if it’s a necessary local or Windows process.
The Processes view lets you see all applications and foreground and background services running. Sort the CPU, Memory, and Disk percentages to show the application or process that uses the most resources.
If you see an application or process that’s hogging up a lot of resources, right-click it and select End task to see if that solves the issue.
- Third-party antivirus software will always run and can bog your system down. Disable the process only if you’re not actively performing a scan.
- You may see at least 10-15 instances if your browser is open. This is because browsers will use multiple processes from open tabs and UI, graphics, extensions, etc. While this may help create a faster browsing experience, it can bog down the system. If you notice it taking up a lot of memory, disable any extensions and close tabs to see if anything changes.
- Make sure to clean your browser’s cache, as well!
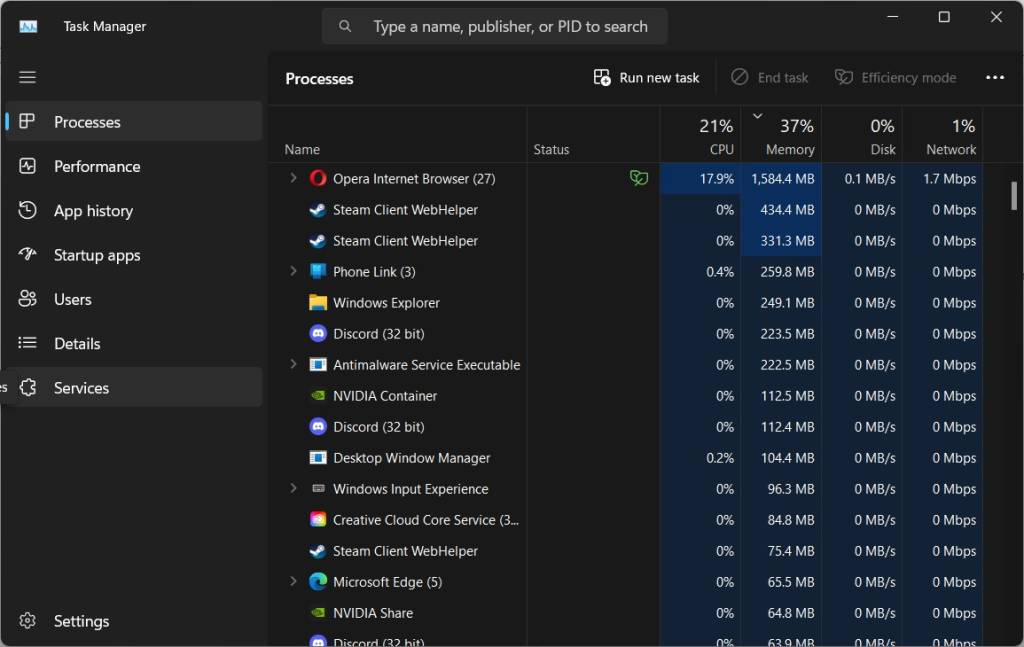
Processes view in Task Manager.
Startup
The Startup view will display every application and process loading once logged into Windows. The more processes and applications enabled, the slower your computer can become. Some Windows processes are necessary, but if third-party applications are enabled (like OneDrive, Spotify, or your browser), you can disable them.
To do so, right-click the process/app and click Disable.
- Third-party Antivirus software will always bog down system resources upon startup. Disable it as a startup process and only launch it when you want to perform a virus scan.
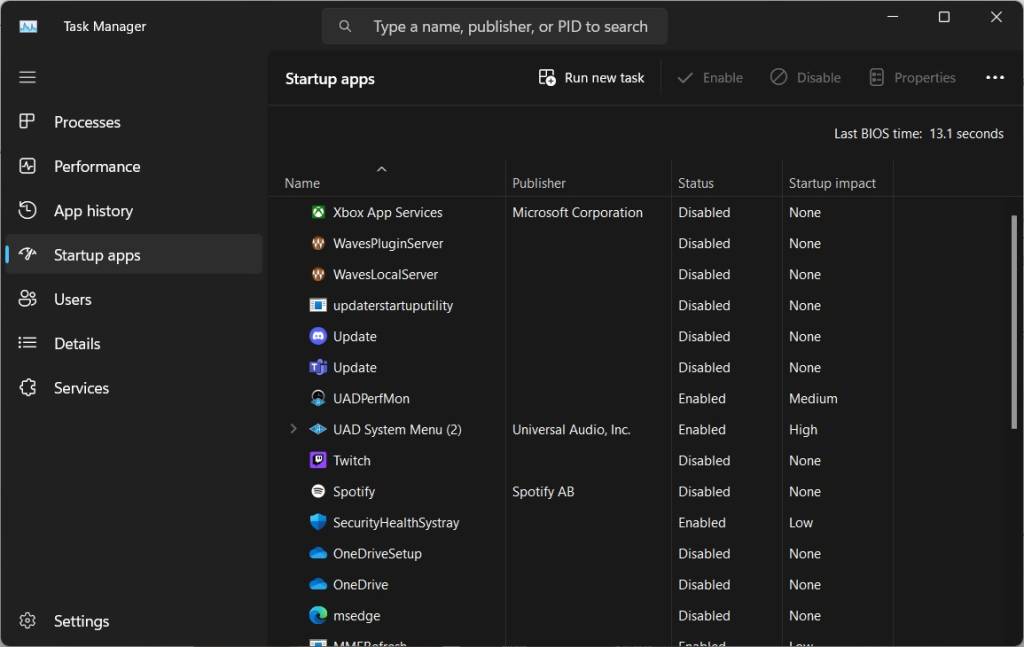
Startup view in Task manager.
Clean Up Hard Drive Space
When your hard drive becomes full, your computer can run slower, so monitoring and cleaning up hard drive space is always good practice. The first and most obvious solution is to uninstall any software you haven’t used in a while. It could be a DAW, video editor, or even video game; every little bit of space helps.
Besides uninstalling programs, you may be unaware of some background files that Windows can safely delete. To do this, you will use the Disk Cleanup tool.
- In the Windows search bar, type, then click Disk Cleanup, and use the dropdown box to select what drive you want to clean. The C: drive is what you’ll want to select.
- Click Cleanup System files.
- Highlight all the boxes and click OK. Once complete, the Disk Cleanup window will disappear.
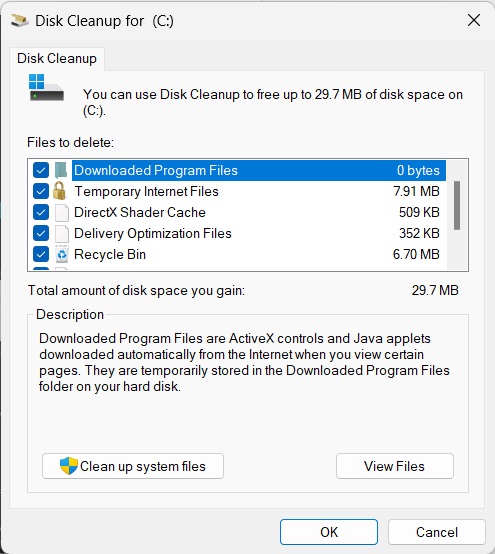
Windows Disk Cleanup.
Delete those Temporary Files!
Windows will create temporary files that may help improve your computer performance. However, those files are used once, thus making them useless afterward. All those temporary files add up, resulting in useless disk space.
- Type %temp% in the Windows search bar. This should take you to this folder directory: C:\Users\username\AppData\Local\Temp.
- Highlight all of the files and press the Delete key on your keyboard. If you receive a prompt stating a file or folder is currently in use, check the Do this for all current items box, and then click Skip.
- Empty the Recycle Bin.
Uninstall Bloatware
When you buy a computer from a big-box retailer, it will always have bloatware installed. Bloatware is software that is often useless but is installed by the computer’s manufacturer and can cause the computer to slow to a crawl. So, if there’s software you don’t recognize or don’t find useful, uninstall it off the bat and you should see your performance (and disk space) improve.
Keep Software and Drivers Updated
Manufacturers will often update software and drivers to address bugs that may affect computer performance. So, keeping your software up to date can fix your computer performance.
Viruses and Malware
If the computer is running slowly, or you receive random pop ups, are missing files, or your system crashes, your computer may unfortunately have a virus or malware. Microsoft takes security seriously, and Windows Defender is more than enough to get the job done. However, we recommend running a scan periodically with free antivirus software like Malwarebytes. This ensures you’re fully protected.
- Practice safe Internet usage by only downloading software and drivers from trusted websites.
- Don’t click unverified links in your email inbox or visit questionable websites.
- Antivirus software can find viruses and malware that affect performance. However, because of this, you may see a hit in performance while it’s scanning.
Run Windows Diagnostics
Using Command Prompt commands is a great way to troubleshoot sluggish performance. These commands test both Windows-related and hardware-related issues. Check out our Windows Troubleshooting Guide to learn everything you can try in Command Prompt to fix the problem.
Reinstall Windows
Sometimes you may need to wipe the slate clean and back up and reinstall Windows. We’ve created backup and installation guides for Windows 10 and Windows 11, so check those out and see if they solve the problem.
Back Up Windows
Install Windows
Faulty or Outdated Computer Components
While most performance issues are software-related, your Windows computer can also run slow because of faulty hardware. The Processes window in Task Manager is one good way to determine if a component is faulty because the CPU, Memory, or Disk will stay at 100%.
How to Test Hard Drives
Testing a hard drive is pretty simple. You can use the chkdsk prompt in Command Prompt. You can also open an elevated instance of command prompt and enter wmic diskdrive getmodel,status. This will show you the health status of your hard drive.
- If you have an HDD (spinning disc drive), listen to it. If you hear it clicking, that means its on its last legs.
How to Test RAM
Testing RAM takes a little time, but these tests give you a definitive indication of whether your RAM sticks are going bad. Check out our guide to learn how to test RAM on Windows.
Clean your PC!
The easiest thing you can do to future-proof the computer components is to clean them periodically. We highly recommend cleaning everything more frequently if you have pets that wander in the room. The more dust (and pet hair) accumulates, the more clogged the vents and fans can become, which results in overheating.
All you need is some compressed air, isopropyl alcohol, cotton swabs, and a microfiber cloth. If you don’t feel comfortable opening your desktop’s case, take it to a local computer shop for cleaning.
Related Articles
When you need help, Sweetwater has the answers!
Our knowledge base contains over 28,000 expertly written tech articles that will give you answers and help you get the most out of your gear. Our pro musicians and gear experts update content daily to keep you informed and on your way. Best of all, it’s totally FREE, and it’s just another reason that you get more at Sweetwater.com.

