
Universal Audio Volt Setup Guide
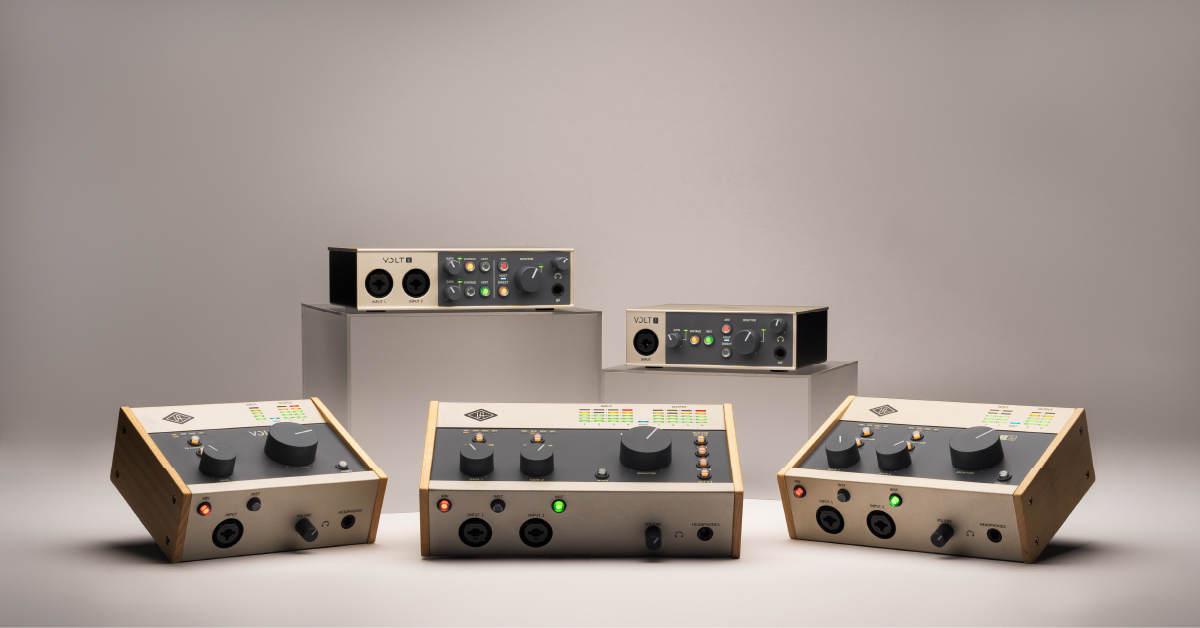
In this guide, we will show you how to register, set up, and connect a Universal Audio Volt interface for the first time. Follow the sections below to get started.
Register the interface
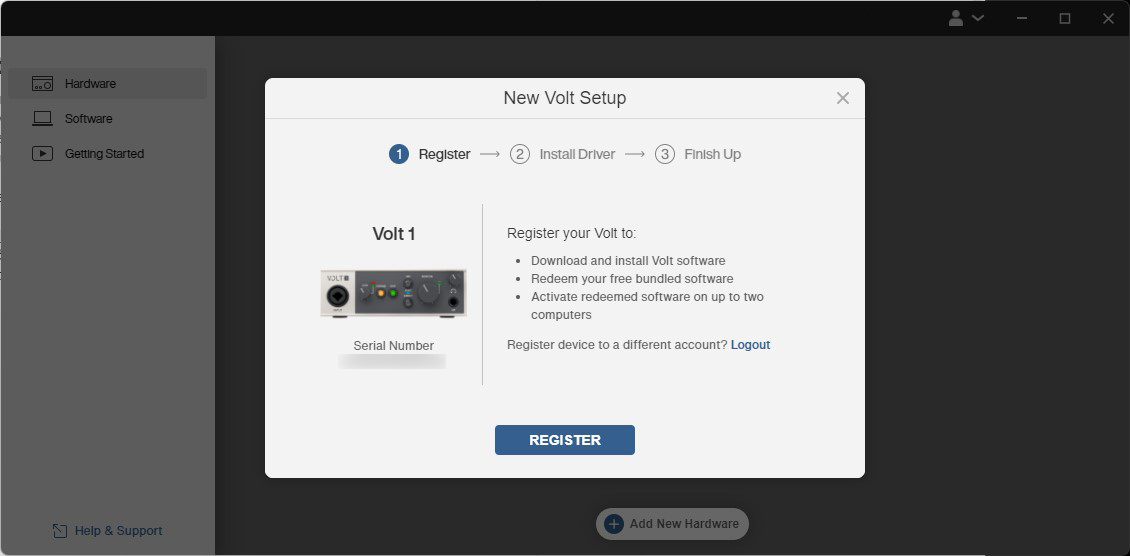
While it’s always exciting to open up the box and start using your interface right away, you must register your Volt interface with Universal Audio beforehand. Upon registration, you’ll receive free licenses to the Ableton Live Lite DAW, as well as a suite of effects plugins and virtual instruments from manufacturers like Softube, Celemony, ujam, Spitfire Audio, Plugin Alliance, and Relab.
- Log in to your Universal Audio account. If you don’t have one yet, you can create one here.
- Go to the Software Download page, and download the latest version of UA Connect for your OS.
- Go to your Downloads page, launch the installer, and follow the on-screen instructions.
- Launch the UA Connect app, connect the Volt to your computer, then follow the on-screen instructions to complete the registration process.
- During the registration process, you will be asked to install the driver. This must be installed, as it enables essential hardware features that are necessary to operate the Volt.
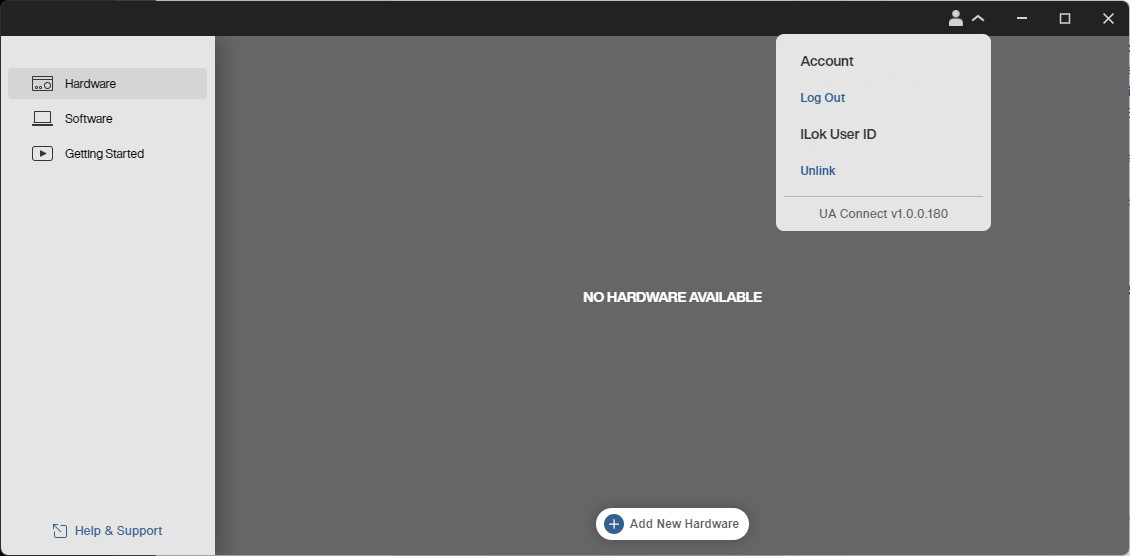
- If you don’t see a registration window appear when you launch UA Connect, click Hardware located to the side of the screen, then click Add New Hardware.
Create an iLok account
The bundled Softube and ReLab software are both licensed with iLok. That means to use them, you will need to sync its iLok license to your computer. If you don’t already have an iLok account, you’ll need to create one and install the iLok License Manager app. Check out our iLok Setup Guide to learn more.
- Visit iLok’s registration page and complete the registration form.
- Please take note of your User ID and password as these are case-sensitive.
- Open the iLok Account Activation email and click on the verification link.
- Download and install the iLok License Manager.
- Launch the iLok License Manager app and sign in.
- Click the “..I” button (top right), click the Available tab, locate your license, and drag it to the computer icon.
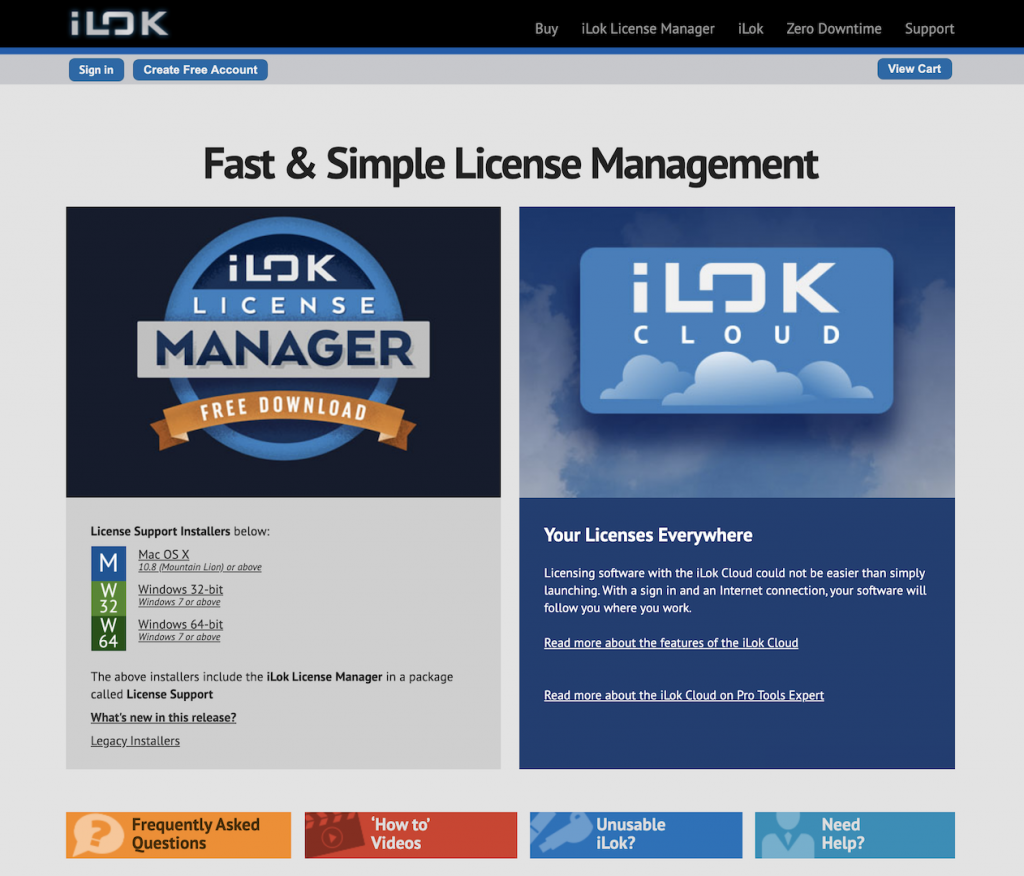
Click the image to create an iLok account
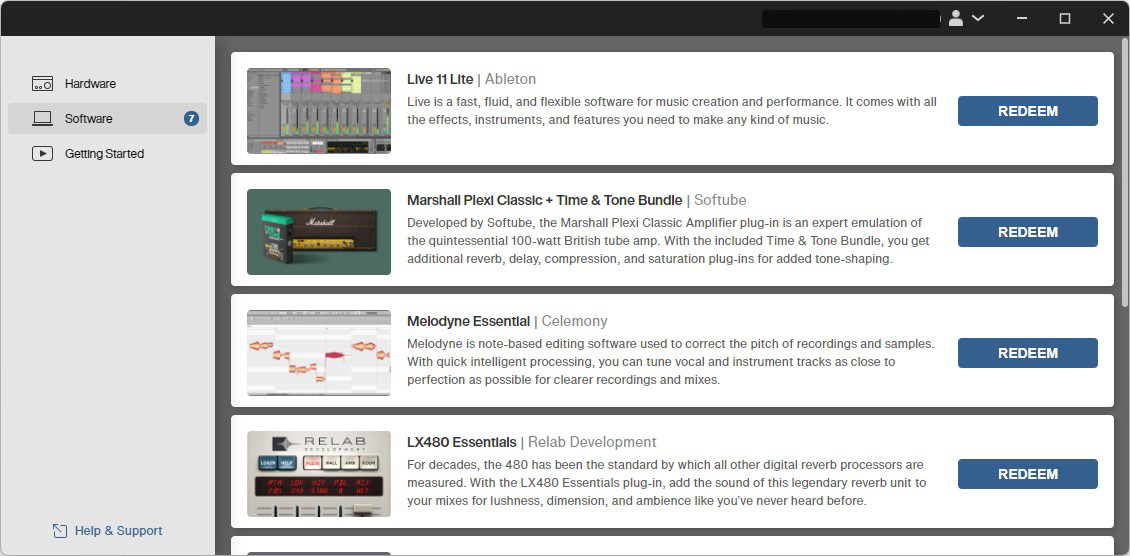
Redeem the bundled software
After you’ve registered the Volt and have installed its driver, the next step is to redeem the free bundled software. The process is straightforward. You simply need to click the Software tab located to the left of the UA Connect app, click the Redeem button associated with the software you wish to install, and click Claim your code. From there, follow the on-screen instructions.
- If you’re redeeming the Spitfire Audio LABS virtual instrument, you will first need to download and install the Spitfire Audio App software.
Updating the firmware
Universal Audio will release firmware updates which will often include new features and fixes for bugs present in the current firmware version. Fortunately, UA has made the Volt’s firmware update process simple. All you need to do is launch the UA Connect app, click the Hardware tab, then click Update located to the right of the Firmware section.
Link your iLok account
Registering your UA Volt
Redeeming your bundled software
Setup and connections
After you’ve registered the Volt with Universal Audio, it’s time to get set up and connected. Setup is a breeze, too.
TIP: If you’re using a condenser microphone, turn Phantom Power on AFTER connecting it, then turn it off BEFORE unplugging it. Connecting a condenser microphone to your interface while Phantom Power is turned on can result in a loud pop which may cause damage to your speakers.
- Turn the Volume knob all the way down, then connect your speakers.
- If you have headphones connected, turn its volume knob all the way down, as well.
- Connect the USB cable from the interface to your computer, then power it on. The USB LED on the interface will light up.
- Navigate to your OS sound settings and set it as the default input and output device.
- PC: Right-click the Speaker icon on the Windows taskbar, select Sounds, then click the Playback tab. Locate and select the Volt, click Set Default, then click OK to close the menu. Do the same in the Recording tab.
- Mac: Click the Apple icon from the Menu Bar and select System Preferences. Click Sound, then select the Volt under the Input and Output tabs.
- If applicable, connect your headphones.
- Play some music or a video, and slowly turn the main Volume (and headphone) knob up until it’s at your desired listening level.
- Launch your DAW, select your Universal Audio interface as the primary playback and recording device.
- Press the Host/Direct button (direct monitoring/input monitoring) to switch between monitor sources. Check out our guide on the difference between direct and input monitoring to learn more!
- Press the INST button when connecting instrument-level gear (e.g., guitar, bass).
- Press the VINTAGE button to engage the Volt’s discrete preamp, which is derived from the famous 610 tube preamp!
Universal Audio and Windows on Arm
All Universal Audio software and hardware are not compatible with Windows on Arm devices. In addition, for USB devices, Universal Audio recommends connecting to an Intel USB Host Controller, or one that meets the Intel xHCI 1.1 specification. Furthermore, AMD on earlier AM4 platforms may have limited functionality.
iOS devices
IMPORTANT: The Volt can be bus-powered while connected to a computer. Unless you have an iPad Pro, you will need to use a USB power adapter, such as Apple’s 5W USB Power Adapter, as iOS devices can’t provide enough power to the device.
The Volt can also connect to iPads and iPhones, which is great for the musician who’s on the go. All you need is the external power supply and an official Apple Lighting to USB Camera Adapter cable. iPad Pro’s with USB-C connections do not require the adapter. To learn how to get your Volt interface to work with iOS devices, check out our article below!
UA Support: How to Connect a Microphone to Volt
Related Articles
When you need help, Sweetwater has the answers!
Our knowledge base contains over 28,000 expertly written tech articles that will give you answers and help you get the most out of your gear. Our pro musicians and gear experts update content daily to keep you informed and on your way. Best of all, it’s totally FREE, and it’s just another reason that you get more at Sweetwater.com.


Offer applies only to single-receipt qualifying purchases. Select manufacturers may require that only the manufacturer’s products qualify towards the minimum purchase amount needed to be eligible for promotional financing. Otherwise, an invoice that meets the minimum purchase amount and contains at least one qualifying manufacturer product is eligible for promotional financing. No interest will be charged on promo purchase balance, and equal monthly payments are required on promo purchase until it is paid in full. The payments equal the amount financed divided by the number of months in the promo period, rounded up to the next whole dollar. These payments may be higher than the payments that would be required if this purchase was a non-promo purchase. During the last month(s) of the promo period the required monthly payment may be reduced due to the prior months’ rounding. Regular account terms apply to non-promo purchases. New Accounts as of 07/31/2025: Purchase APR is 34.99%. Penalty APR is 39.99%. Min Interest Charge is $2. Existing cardholders: See your credit card agreement terms. Subject to credit approval.
Offer applies only to single-receipt qualifying purchases. No interest will be charged on the promo balance if you pay it off, in full, within the promo period. If you do not, interest will be charged on the promo balance from the purchase date. The required minimum monthly payments may or may not pay off the promo balance before the end of the promo period, depending on purchase amount, promo length and payment allocation. Regular account terms apply to non-promo purchases and, after promo period ends, to the promo balance. New Accounts as of 07/31/2025: Purchase APR is 34.99%. Penalty APR is 39.99%. Min Interest Charge is $2. Existing cardholders: See your credit card agreement terms. Subject to credit approval.
The estimated required monthly payment shown which excludes taxes and delivery equals the amount financed divided by the number of months in the promo period, rounded up to the next cent. During the last month(s) of the promo period the required monthly payment may be reduced due to this rounding. These payments apply only with the financing offer shown. If you make these payments by the due date each month, you should pay off this amount financed within the promo period, if it is the only balance you are paying off. If you have other balances on your account, this payment will be added to any other minimum monthly payments.
Applies only to select items from this manufacturer. Ask your Sweetwater Sales Engineer for more details.