
AKAI MPD Quickstart Guide
Getting started with the Akai MPD
In this guide, we’ll take you through the registration process, and show you how to use your Akai MPD for the first time. Follow the sections below to get started.
- Register the Akai MPD
- Download and install the bundled software
- Setup and connections
- Customize the pad controls
Register the Akai MPD
Before we start, the first thing you’ll need to do is create an account with Akai and register the MPD to your account. When you register your device, you’ll gain access to the MPD software, drivers, and a premium collection of sounds. Follow these steps to register your device and then continue to Setup and connections.
- Log in to your Akai account. If you don’t have an account yet, you can create one here.
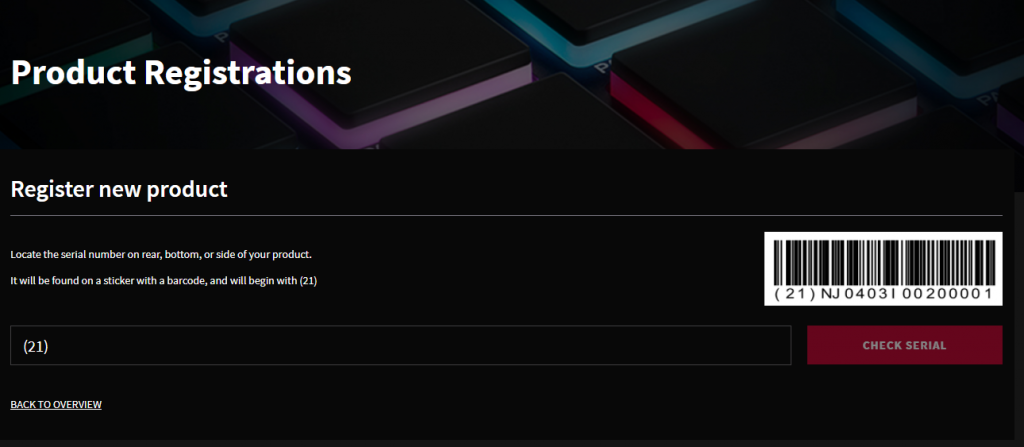
- On the My Account page, click My Registered Products and enter the serial number located on the bottom of your device, then click Register Product. The serial number begins with (21).
- Follow the on-screen instructions to complete your registration.
Download and install the bundled software
Once you’ve registered the MPD, you’ll be able to download and install the bundled software. The MPC Renaissance DAW, Big Bang Drums, and Big Bang Cinematic Percussion sound libraries. Please note that you’ll need to create an iLok account to activate the Big Bang plug-ins, so if you’re new to iLok, keep this tab open and check out our iLok Quickstart Guide and iLok License and Activation article.
MPC Essentials
- On your account page, locate the latest version of MPC Essentials, and choose the installer for your OS.
- Go to your Downloads folder, and extract the installer.
- PC: Right-click the .zip file, select Extract All…, then launch the installer.
- Mac: Double-click the .zip file, then launch the installer.
- Fill out the information, including the MPC Beats serial number located on your account page, to complete the authorization.
Big Bang
IMPORTANT: At the end of the Big Bang installation, you will be prompted to restart your computer. DO NOT restart your computer. Rather, download and install the latest version of iLok License Manager. If you already have iLok License Manager, uninstall that version, then install the latest version.
If you don’t have an iLok account, you’ll need to create one at this time. Check out our iLok Quickstart Guide for more information.
- On your account page, locate the latest version of Big Bang Drums and Big Bang Cinematic Percussion 2.5, and choose the installer for your OS.
- Go to your Downloads folder, and extract the installer.
- PC: Right-click the .zip file, select Extract All…, then launch the installer.
- Mac: Double-click the .zip file, then launch the installer.
- Launch the iLok License Manager app.
- Click the “..I” button (next to the search bar) to view the prompt.
- Enter the codes located in your Akai account and click Next.
- Select where you want to activate the licenses, then click Activate.
Learn more about how to get up and running with iLok and iLok License manager!
Learn More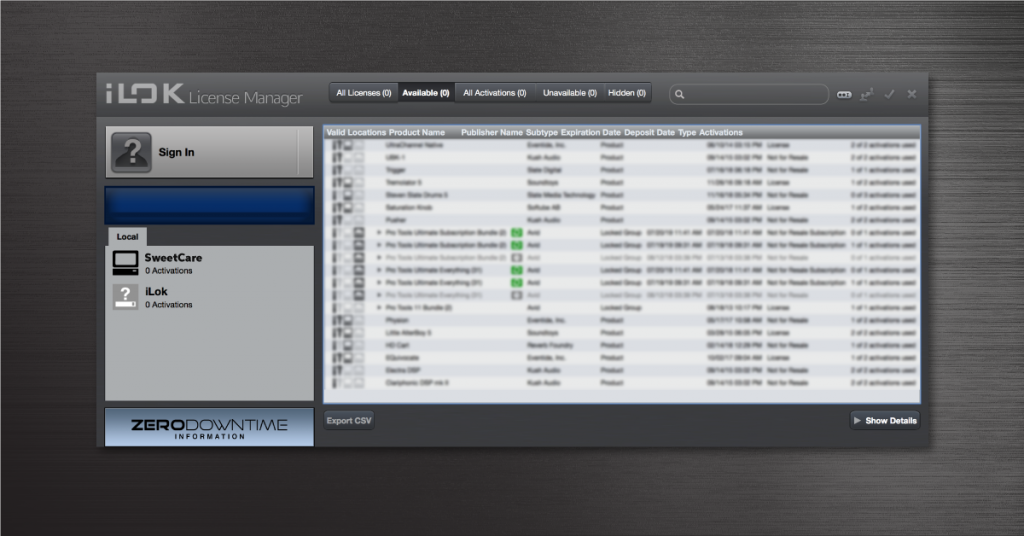
Learn more about how to get up and running with iLok licenses and activation!
Learn MoreSetup and connections
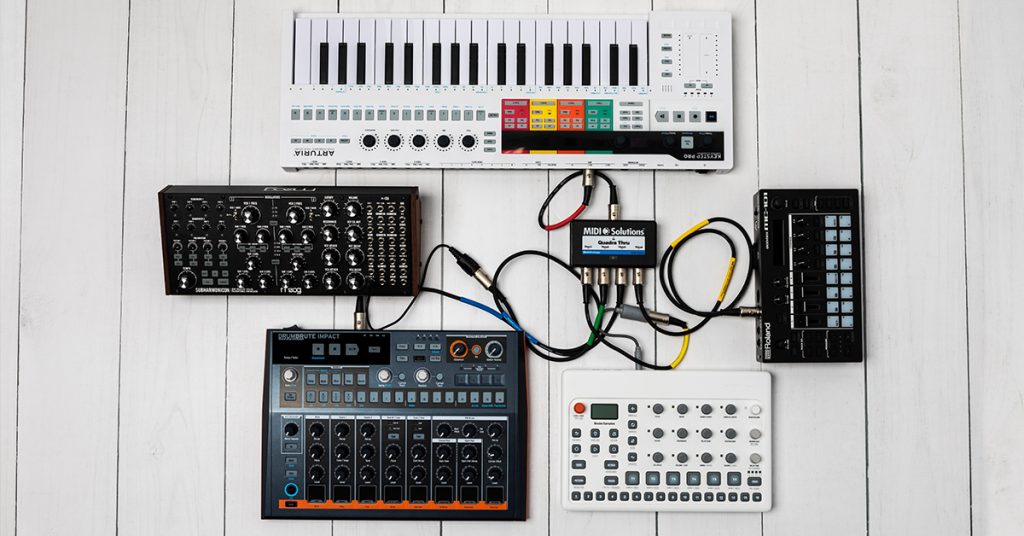
Once you’ve registered the MPD with Akai, we’ll walk you through the different types of connections you can make on the device. From external synths and drum machines to computers, the way you can create music is endless. Depending on what gear you’re connecting, no additional setup is required, either.
USB
The MPD is typically used as a drum machine connected to a computer. All you need to do is use the included USB cable and connect it to your computer. It’s class-compliant as well, meaning no additional drivers are necessary.
It’s also bus-powered, but we recommend connecting it directly to the computer, using the AKAI MP6-1 power supply, or using a powered USB hub. Connecting it to an unpowered hub can result in loss of connectivity and performance.
My MPD isn’t showing up!
If the device is powering on but not being recognized by your computer, try a different USB port and USB cable. Also, be sure that they are fully connected at both ends. If neither of these solutions works, check out our guide for more information on how to troubleshoot MIDI devices on PC and Mac.
Learn more about how to resolve MIDI device issues on PC and Mac.
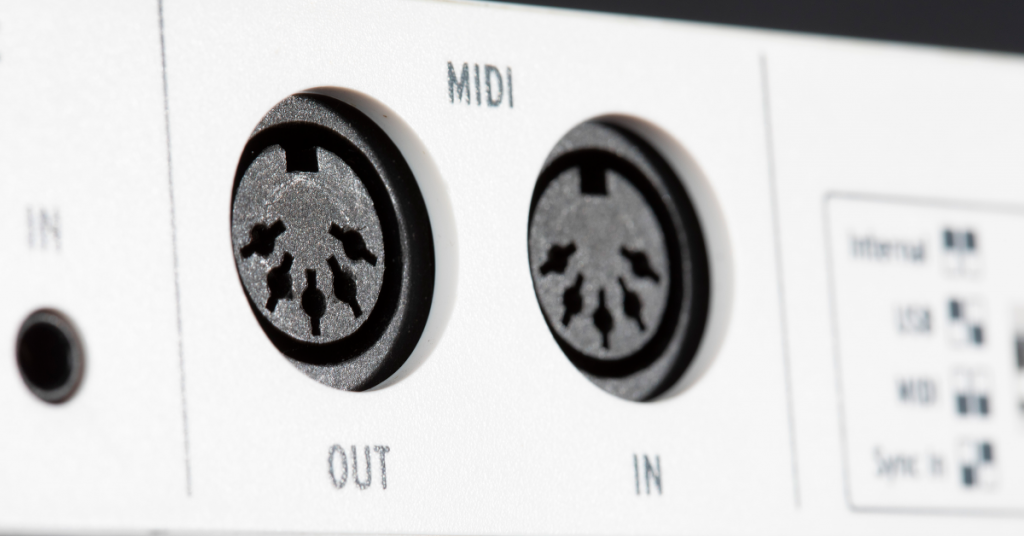
MIDI
NOTE: The MIDI physical MIDI connections are only available on the MPD226, but the process outlined below applies to both the MPD218 and 226.
The MPD comes with two 5-pin MIDI to 3.5mm cables for you to connect external MIDI devices such as a synth or drum machine. Just like USB connections, the MIDI connections are straightforward.
- If an external device is connected to the MIDI Out, your computer can send MIDI messages out along this path: Computer > MPD226 > External Device.
- If an external device is connected to the MIDI In, the external device sends MIDI messages in along this path: External Device > MPD226 > Computer.
How do I change the clock source on my MPD?
If you have something tempo-based that you want to sync the MPD to, you’ll need to change the MIDI clock source. You can change the clock of your MPD from Internal to External at any time you want. For example, if you want your MPD to follow the tempo of your DAW, you would need to set the clock to External.
- To change it on the MPD218, press Pad 15. If the light is on, it means the MPD218 is set to external.
- To change it on the MPD226, press the Global button, then use the arrow buttons until you get to the Clock GLOBAL display. Use the knob to switch between internal and external.
iOS device
If you’re an iOS user, then you’re in luck. You can connect your MPD to your iOS device and create music on the fly! All you need is an official Apple Lightning to USB Camera Adapter. No additional power supply is necessary, either.
- Turn your iPad on and launch the MIDI app you’ll be using.
- Press and hold the Note Repeat button (MPD218) or the Up cursor button (MPD226).
- Connect the MPD to the iPad via the Lighting to USB Camera Adapter.
- The MPD should now be in low-power mode and ready to use!
Customize the controls
Another great thing about the MPD is that it has dedicated standalone software to edit pad, fader, and knob parameters outside of your DAW. Having the ability to customize everything is especially useful if you’re using a different DAW, different plugins, or other sets altogether.
TIP: If you’re planning on assigning a drum to a pad, change its Trigger Mode to Momentary. Or, if it’s a loop or a pad, select Toggle. Momentary is essentially a “one-shot” where Toggle is like a light switch. The loop/pad won’t stop until you press the pad it’s assigned to again.
- Go to your MPD’s product page on the Akai website, locate the MPD Editor in the Downloads section, and choose the download for your OS.
- Navigate to your Downloads folder, launch the installer, and follow the on-screen instructions.
- Connect the MPD to your computer and launch the MPD Editor app.
- Click on the pad/fader/knob you wish to edit to change the parameters.
- Click any parameter at the top right of the window (PRESET section) to make global changes to your preset.
- Once complete, go to File, then click Send To Hardware.
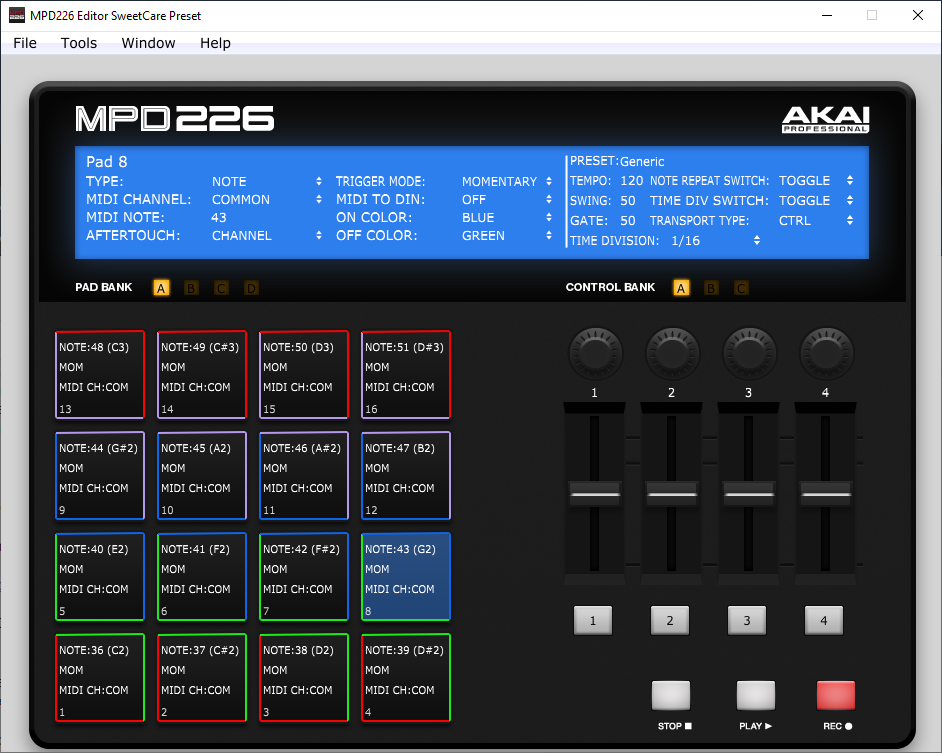
MPD Editor home screen
Related content
MIDI Keyboard setup guides
Additional resources
When you need help, Sweetwater has the answers!
Our knowledge base contains over 28,000 expertly written tech articles that will give you answers and help you get the most out of your gear. Our pro musicians and gear experts update content daily to keep you informed and on your way. Best of all, it’s totally FREE, and it’s just another reason that you get more at Sweetwater.com.


Offer applies only to single-receipt qualifying purchases. Select manufacturers may require that only the manufacturer’s products qualify towards the minimum purchase amount needed to be eligible for promotional financing. Otherwise, an invoice that meets the minimum purchase amount and contains at least one qualifying manufacturer product is eligible for promotional financing. No interest will be charged on promo purchase balance, and equal monthly payments are required on promo purchase until it is paid in full. The payments equal the amount financed divided by the number of months in the promo period, rounded up to the next whole dollar. These payments may be higher than the payments that would be required if this purchase was a non-promo purchase. During the last month(s) of the promo period the required monthly payment may be reduced due to the prior months’ rounding. Regular account terms apply to non-promo purchases. New Accounts as of 07/31/2025: Purchase APR is 34.99%. Penalty APR is 39.99%. Min Interest Charge is $2. Existing cardholders: See your credit card agreement terms. Subject to credit approval.
Offer applies only to single-receipt qualifying purchases. No interest will be charged on the promo balance if you pay it off, in full, within the promo period. If you do not, interest will be charged on the promo balance from the purchase date. The required minimum monthly payments may or may not pay off the promo balance before the end of the promo period, depending on purchase amount, promo length and payment allocation. Regular account terms apply to non-promo purchases and, after promo period ends, to the promo balance. New Accounts as of 07/31/2025: Purchase APR is 34.99%. Penalty APR is 39.99%. Min Interest Charge is $2. Existing cardholders: See your credit card agreement terms. Subject to credit approval.
The estimated required monthly payment shown which excludes taxes and delivery equals the amount financed divided by the number of months in the promo period, rounded up to the next cent. During the last month(s) of the promo period the required monthly payment may be reduced due to this rounding. These payments apply only with the financing offer shown. If you make these payments by the due date each month, you should pay off this amount financed within the promo period, if it is the only balance you are paying off. If you have other balances on your account, this payment will be added to any other minimum monthly payments.
Applies only to select items from this manufacturer. Ask your Sweetwater Sales Engineer for more details.