
Yamaha reface DX Quickstart Guide
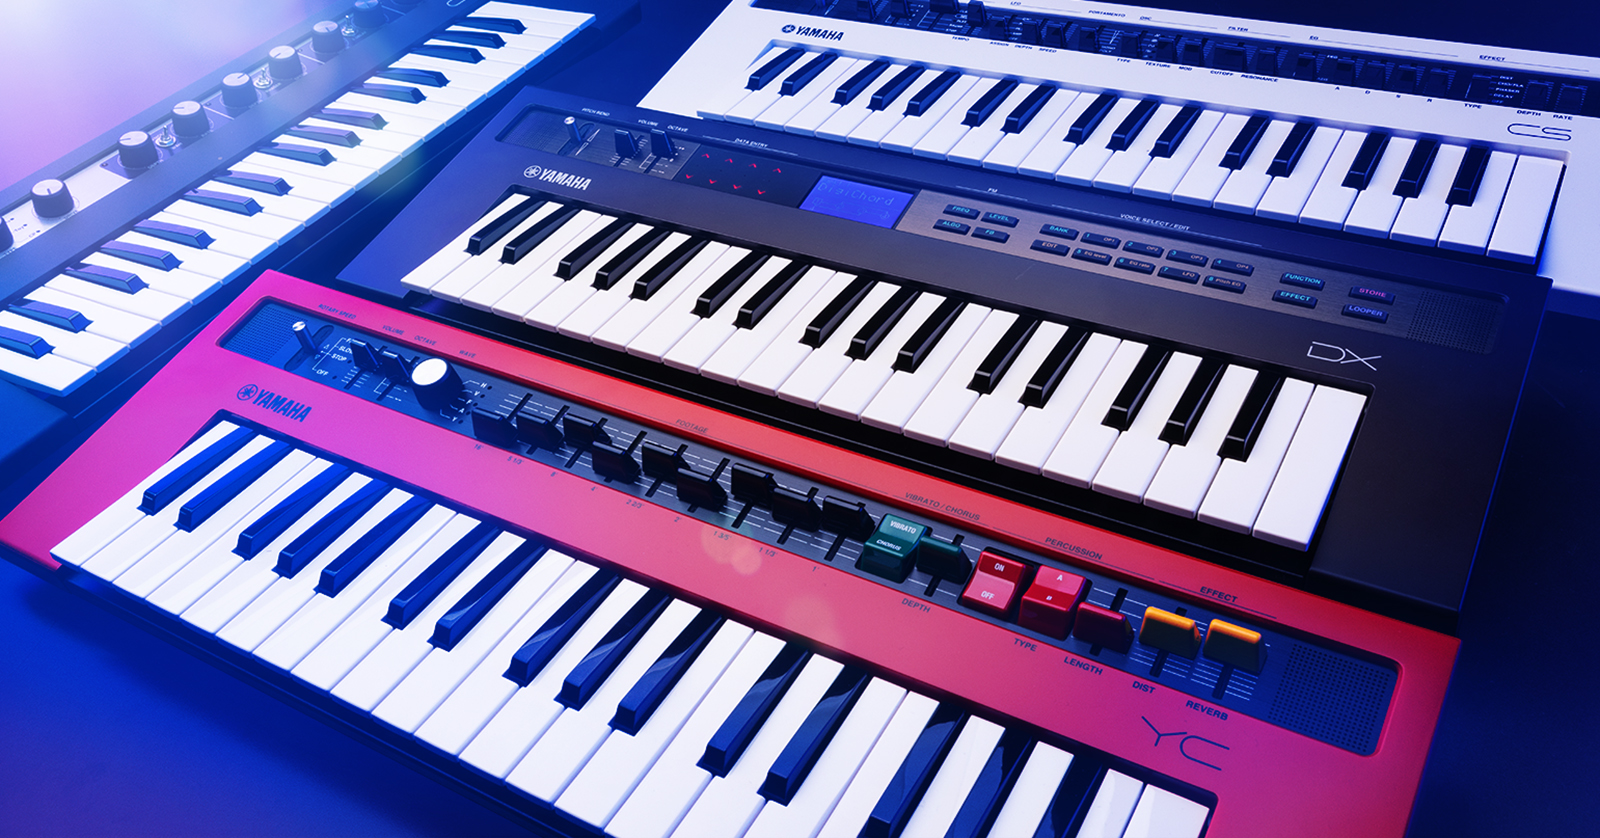
Congratulations on buying the Yamaha reface DX, the portable digital Frequency Modulation (FM) synthesizer keyboard in Yamaha’s family of four reface instruments.
The reface can be used as a stand-alone portable keyboard, battery-powered and with its own internal stereo speakers and headphone jack. It can also be powered by the included external power supply, connected to professional audio systems through the left and right output jacks, and connected to other instruments, computers, and devices through MIDI and USB.
- Register Your Purchase with Yamaha
- Setting Up Your Yamaha reface DX
- Yamaha reface DX Controls and Effects
- Programming the reface DX: Four-Operator FM Synthesis
- Connect Your reface to a Full-size MIDI Keyboard
- Connect Your reface to a Mac or a Windows PC
- Store and Recall Presets and Set Lists with Yamaha Soundmondo
- Play Your reface Like a Keytar
Register Your Purchase with Yamaha
Go to https://usa.yamaha.com/.
Create an account if you don’t have one already.
After you log in, click the Product Registration link, and on the following page, Register My Product. Fill out your information and record the reface serial number found on the bottom of the unit.
The owner’s manuals, reference materials, and software downloads for the reface are at this link on the Yamaha website. In addition to the reface Owner’s Manual, be sure to download a copy of the reface DX Reference Manual.
Setting Up Your Yamaha reface DX
Batteries and speakers
You can power your reface with six AA batteries. Open the battery lid on the underside and make sure the batteries are oriented according to the diagram. Your reface also has small stereo speakers built in.
Connections
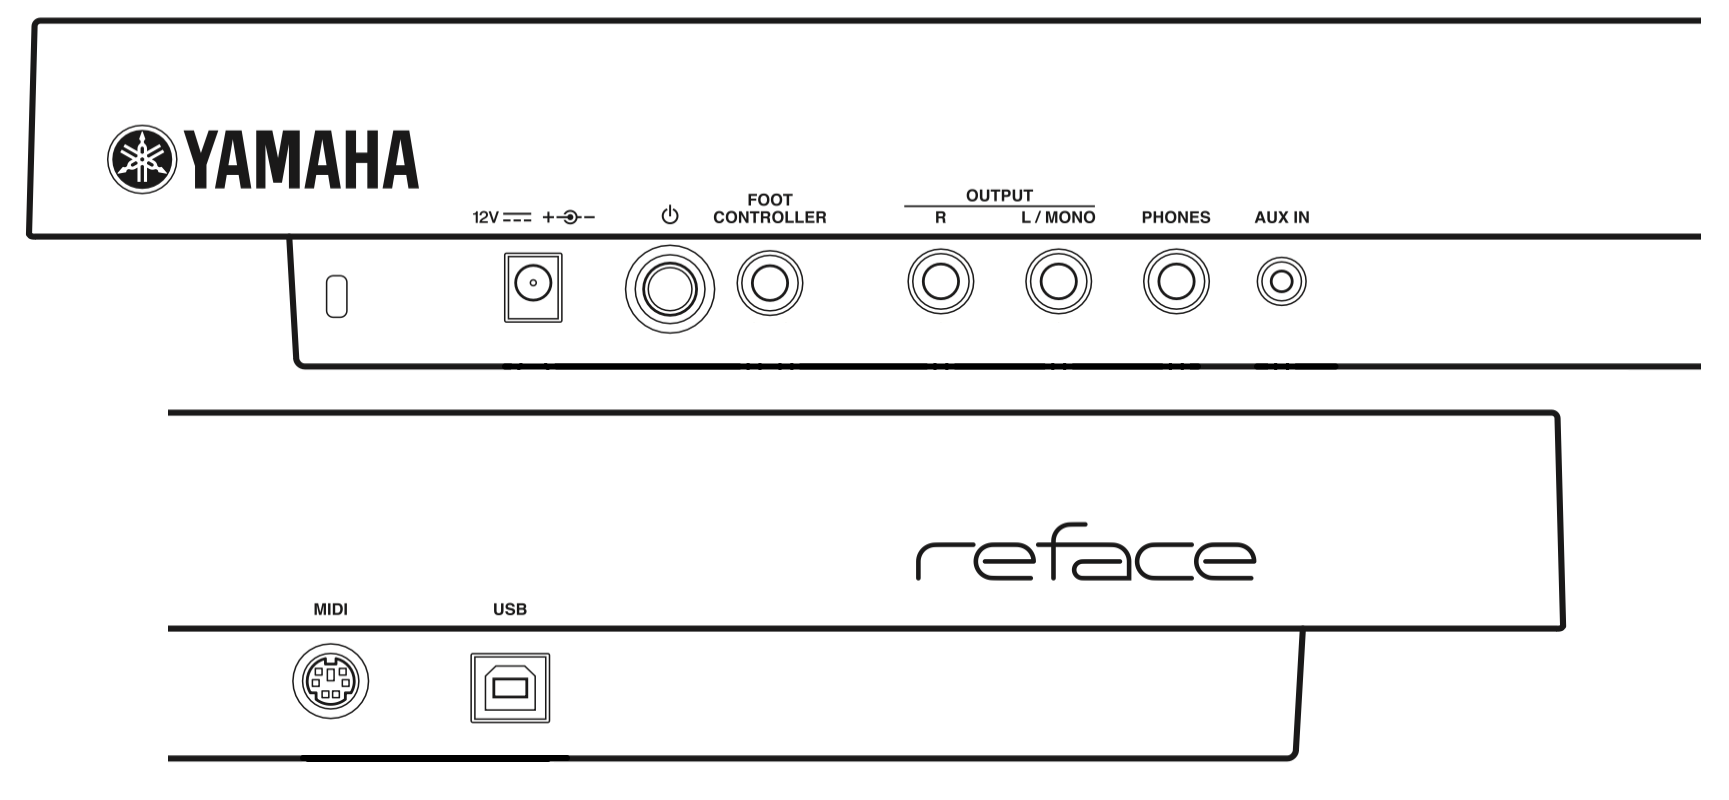
Yamaha reface back panel connections
On the back panel, you will see the connections for:
- Power supply. Attach the included 12V center-positive power supply.
- Power button
- Foot Controller. With the reface DX, you can connect a sustain pedal. You can use a Yamaha FC4A, a FC5 footswitch, or another brand of momentary footswitch.
- Output, L/Mono, and R. Connect 1/4-inch TS cables to your speakers, amp, mixer, or audio interface.
- Phones. Connect headphones with a 1/4-inch TRS plug.
- Aux In. Insert a stereo 1/8-inch TRS cable as an input from an external music player so you can play along on the reface through headphones or the built-in speakers.
- MIDI. This proprietary connection accepts the included Yamaha MIDI break-out adapter to connect standard MIDI cables.
- USB. Connect a USB cable to send and receive MIDI over USB to a Mac, a Windows PC, or an iOS or iPad device.
Powering Up your reface DX
Connect the power supply to an outlet.
Before you turn the power on, connect the Outputs to your mixer, speakers, or audio interface. Connect your headphones if you need them.
Make sure the Master knob on the front panel is turned all the way down.
Press the Power button. The unit will take a few seconds until the lights come on indicating it has powered up.
Now you can gradually turn up the Volume slider on the front panel and play some keys.
To turn the unit off, turn the volume all the way down, and press the Power button again.
Disabling internal speakers
When you attach headphones, the internal speakers in the reface will be turned off.
The speakers will still be engaged if you connect cables to the L/Mono and R Outputs. If you want to disable the speakers, do this:
- Turn the power off.
- While holding down the lowest “D” key on the keyboard, turn the power back on and wait until the lights stop blinking.
Auto power off
By default, if you don’t touch your reface DX for 30 minutes, the instrument will turn itself off. If you want to disable this:
- Turn the power off.
- While holding down the lowest key on the keyboard, “C,” turn the power back on and wait until the lights stop blinking.
If you are running on batteries, conserve battery life by turning the unit off using the power button on the back whenever you are not playing it.
Yamaha reface DX Controls and Effects
The reface DX provides a new implementation of Yamaha FM synthesizers that first appeared in the 1980s.
Basic controls
- Pitch Bend
- Volume
- Octave, with center position and transpositions for plus and minus two octaves
Data entry sliders and switches
The reface DX provides four touch-type data entry sliders that light up with red arrows. You can use them to alter parameters in real time and even control them simultaneously with your fingers. They respond to a flick, a tap, or a tap-and-hold, either up or down. These are explained in the reface Owner’s Manual section reface DX: Functions of Front Panel Components.
Display screen
The display screen is not touch sensitive. It displays different pages of information depending on the functions selected by the buttons on the right. The data entry sliders are used to change the parameters displayed on the screen at the moment.
Presets
The reface DX has internal memory to save 32 Presets, also called Voices. They are organized into four Banks of eight Voices each. Press the Bank button repeatedly to page through the four Banks. Press the Voice Select buttons, 1 through 8, to select a Voice within a Bank.
Effects
The reface DX lets you select two effects for each preset. Choose from:
- Thru (no effect applied)
- Distortion
- Touch Wah (a kind of envelope filter)
- Chorus
- Flanger
- Phaser
- Delay
- Reverb
Effects are selected by pressing the Effect button. Select Effect 1 by tapping the left-most Data Entry slider. Each effect has two parameters that can be adjusted using the two right-most Data Entry sliders. Then tap the Effect button again to select Effect 2 and choose it and its settings in the same fashion. You can manipulate effects in real time using the touch sliders while you play. You can save different effects settings with each preset using the Store button.
Looper
The Looper section is a sequencer that can record a phrase, play it back, and adjust its tempo. The Phrase Looper can record up to 2,000 notes or 10 minutes at 120 BPM. It permits you to overdub phrases and modify synthesizer parameters on the notes being played back. Yamaha does not provide a means to save or restore a loop, so you will lose a loop when you power the unit off. For information on using the Looper, consult the reface Owner’s Manual in the section reface DX: Using the Phrase Looper.
Programming the reface DX: Four-Operator FM Synthesis
Digital FM synthesis is an interesting and unusual method of creating sounds. The reface DX provides a great learning platform.
Consult the reface Owner’s Manual in the section reface DX: Functions of Front Panel Components: The FM tone generator, on page 19, for an explanation of how to access all the parameters using the front panel buttons, the display screen, and the data entry sliders.
Further information on using the Edit mode to make detailed settings for individual operators and Voices can be found in the reface DX Reference Manual.
Yamaha provides a series of tutorials explaining FM synthesis on the reface DX, beginning here:
A great way to learn synthesis on the reface DX is to use the Yamaha Soundmondo editor/librarian platform, explained below, to search for different kinds of synth presets and download them into the reface DX one at a time. Then, with each preset you select, you can play around with the parameters and controls and learn how each affects the sound.
Connect Your reface to a Full-size MIDI Keyboard
Playing the reface DX’s 3-octave, 37-key miniature keyboard is fun, but you can play the reface across a wider range more expressively by connecting an external MIDI keyboard controller with full-size, full-travel keys.
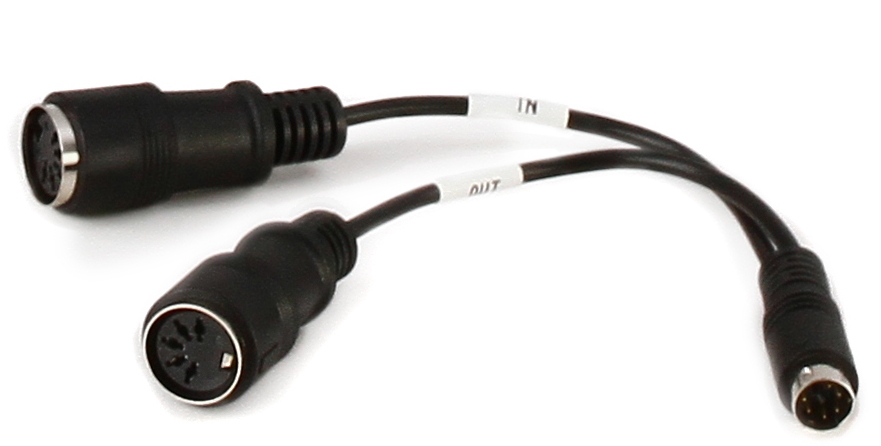
The included, proprietary Yamaha break-out adapter provides MIDI In and MIDI Out for the reface.
- Connect the included proprietary Yamaha break-out adapter to the MIDI port on the back of the reface.
- Connect a 5-pin MIDI cable to the jack labeled In on the break-out adapter.
- Connect the other end of your 5-pin DIN cable to the MIDI Out port on your controller keyboard.
Now you can play the reface from your external MIDI controller keyboard.
The reface also outputs MIDI over the MIDI ports and USB, so you can play its built-in keyboard and use it to control other instruments.
Connect Your reface to a Mac or a Windows PC
To connect your reface to your Mac or your Windows PC via MIDI over USB, you need to download and install the appropriate driver from the Yamaha website.
Connect a USB cable to your computer. You can now transmit and receive MIDI from the reface to your DAW.
Consult Appendix: Keyboard Settings in the reface Owner’s Manual for configuration.
Store and Recall Presets and Set Lists with Yamaha Soundmondo
The reface DX has internal memory to save 32 Preset Voices.
Yamaha provides the Soundmondo editor/librarian and preset-sharing app, which you can use on your Mac, your Windows PC, or an iPhone or iPad.
Soundmondo provides thousands of presets for the reface DX, with patch diagrams, shared by users around the world. Downloading presets for the reface DX from Soundmondo would be a good way to learn how the different synthesis parameters work.
You can also use Soundmondo to store your Preset Voices and share them with other users around the world.
Play Your reface Like a Keytar
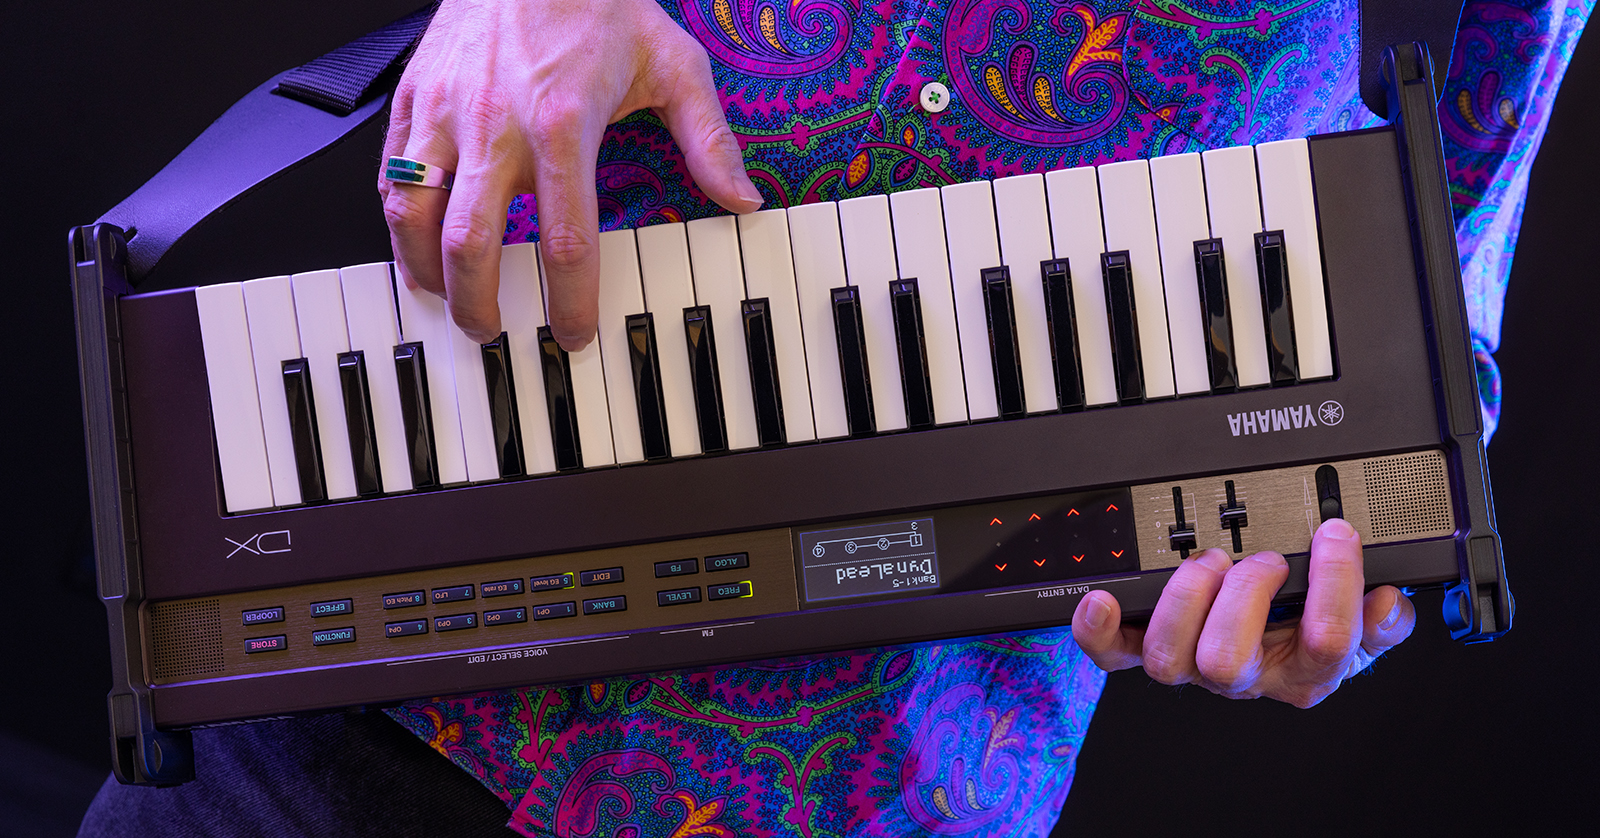
The Yamaha Strap Attachment Kit for reface enables you to attach a guitar strap and play any model reface like a keytar.
Just for fun, Yamaha sells an optional Strap Attachment Kit for reface. It consists of brackets you attach to any model reface. The brackets have strap buttons for you to attach your own guitar strap.
Related Content
Related Articles
When you need help, Sweetwater has the answers!
Our knowledge base contains over 28,000 expertly written tech articles that will give you answers and help you get the most out of your gear. Our pro musicians and gear experts update content daily to keep you informed and on your way. Best of all, it’s totally FREE, and it’s just another reason that you get more at Sweetwater.com.

