
Behringer 2600 Setup Guide
The Behringer 2600 is a faithful clone of the classic ARP 2600 and fits into your synth rig perfectly. In this guide, we’ll show you how to register, connect, and set up the Behringer 2600 for the first time. Follow the sections below to get started.
Warranty Registration
By default, Behringer gives you a 1-year warranty. However, if you register your item on the website within 90 days of purchase, Behringer gives you an additional two years on your warranty. It’s free. Follow these instructions.
How to Register Your Behringer to Get the Full Warranty
TIP: Everything you purchase from Sweetwater comes with our 2-year Total Confidence Coverage (TCC) warranty. However, three years is even better than two, so please register with Behringer today.
Connections on the Behringer 2600
The Behringer 2600 is a semi-modular synth. Instead of physically inserting modules to alter the sound as you do with modular synths, you’ll use patch cables for the routing. This guide barely scratches the surface, so be sure to check out Behringer’s quick start guide to learn more about the individual controls and the original ARP 2600 manual to learn more about the advanced functionality.
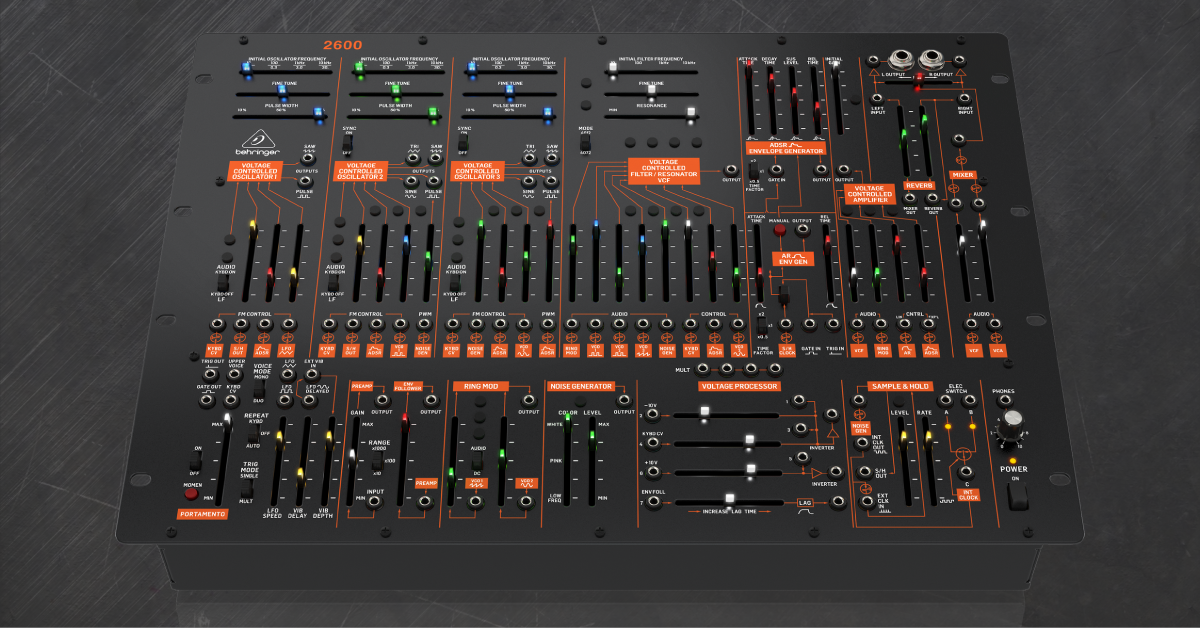
Front panel
The 2600 has plenty of patch points, switches, and faders that allow you to create unique synth sounds. Just changing one patch point or moving one of the faders can have a drastic impact on your sound! At its core, though, everything on the Behringer is based on basic synthesis. If you’re not too familiar, keep this tab open and check out our article explaining the basics of synthesizers.
If this is your first time using a synthesizer, visit our guide which talks about the basics of how they work.
Repeat
The Repeat switch controls how a signal is triggered when you press a key down. When set to KYBD, the pulse signal will be sent repeatedly (like a loop) when you hold down the key. If it’s set to Off, the signal will only be triggered once, like when you play a regular keyboard or piano. Lastly, the Auto setting will send a signal based on the 2600’s LFO setting.
Trig Mode
There are two options to select from using the Trig Mode switch: Single and Mult. It’s a pretty self-explanatory function. If the Trig Mode switch is set to Single, then only one note (pulse) can be played at a time (no chords). While in Mult mode, it sends notes (pulses) to all keys being played.
Voice
The Voice section is also pretty straightforward. When you use this, you can control whether one (Mono) or two voices (Duo) are triggered at one time. If you want a simple lead sound, you’ll typically need it set to Mono. If you have a more complex, layered lead, or pad sound, then setting it to Duo is the best choice.
Sync
The Sync switch gives you the ability to create some unique and complex sounds. When turned on, VCO 2 (and/or VCO 3) will be combined (synced)to VCO 1, which means it will behave as one big oscillator instead of acting as two or three separate oscillators.
Range
When adjusting the range, you are simply adjusting the base amplification to the input, which is then adjusted by theGainslider.
Time Factor
The Time Factor slider, located in the ADSR section, adjusts the duration of the envelope. This is good to adjust when you’re looking for a specific lead or pad sound.
Audio/LF
The last control on the front panel we’ll talk about is the Audio/LF switch. When this is set to the KYBD Off section, the keyboard functionality is disabled. When set to KYBD On, it will be enabled.
Back panel
The hardware connections on the back of the Behringer 2600 are pretty basic. There is the USB port, as well as the MIDI In and Thru ports. The MIDI channel must be changed using the dip switches located next to them. Lastly, there are two 1/4-inch jacks for footswitches.
The first footswitch is labeled “Portamento.” Just connect a momentary footswitch, and you’ll be able to turn the portamento on or off.
The other footswitch is labeled “Interval Latch.” This allows you to turn the interval function on the Sample & Hold section of the 2600. The Sample & Hold section takes input and converts that signal to a stepped output by taking the signal at specific intervals. When you press the Interval Latch down, and if the Voice Mode is set to Duo, it will keep the two-note interval while you play additional single notes. A momentary footswitch is recommended.
How to set up the 2600
Once you’ve become accustomed to all of the features and controls, it’s time to get everything connected!
MIDI
It’s simple to incorporate the Behringer 2600 into your external synth rig using MIDI connections. It’s just a matter of connecting a controller’s MIDI Out to the 2600’s MIDI In. If you have additional external gear you want to control via MIDI, just use the MIDI Thru port and connect to the next device’s MIDI In.
How to change MIDI channels
You’ll want to change the MIDI channel on your 2600 whenever you want it to play an individual part. For example, you probably wouldn’t want your drum machine triggered by a fast arpeggiator lead on your 2600.
On most modern MIDI controllers, changing MIDI is done digitally, through a DAW, a standalone app, or a built-in menu. The Behringer, however, relies on dip switches to change the MIDI channels. Here is the diagram of where the MIDI dip switch should be for each channel.
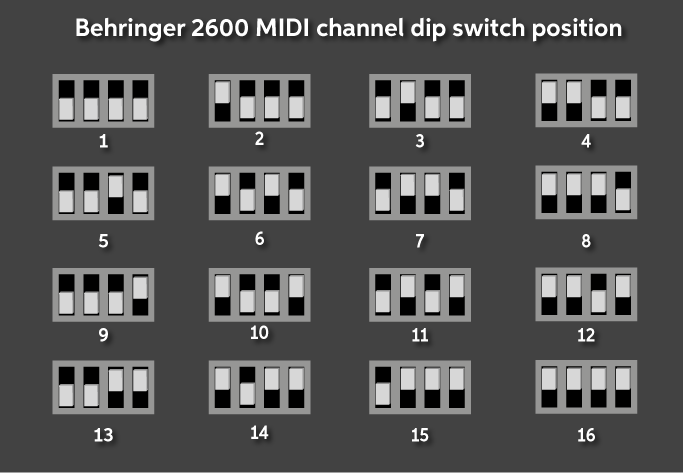
Dip switch position for each MIDI channel
USB
The Behringer 2600 is class-compliant on both Mac and PC, which means no additional driver software is required. You’ll need to connect your 2600 to your computer when you need to perform firmware updates, factory resets, and calibrations. A great thing about the Behringer 2600 is that it can also receive MIDI via USB, so you can send MIDI signals from your computer (i.e., a MIDI track you recorded in your DAW) and trigger the sounds of the 2600, which you can then record as audio.
Related content
Synth Clips with Daniel Fisher playlist
Learn more about how to get sound out of a Behringer 2600!
Learn More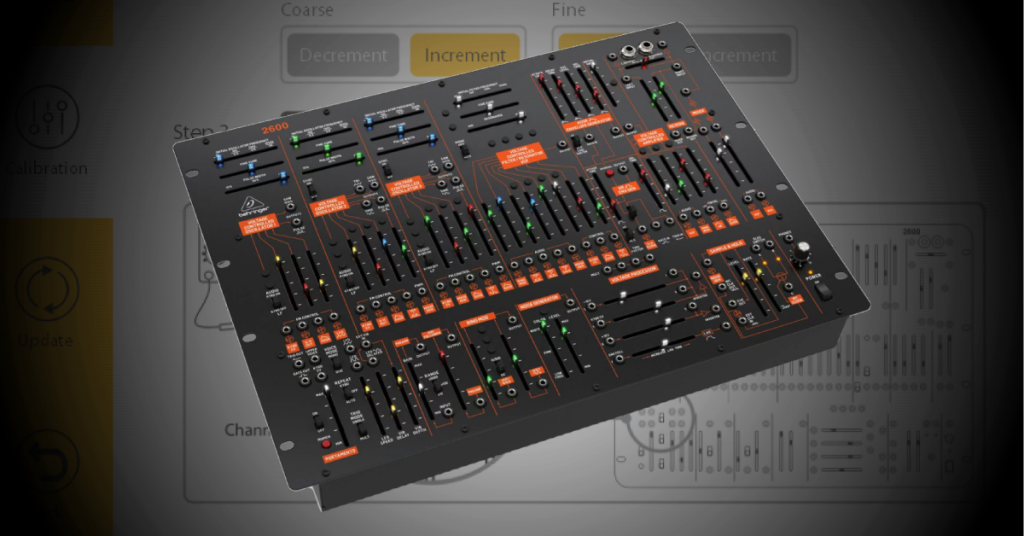
Learn more about how to use Behringer’s Synthtribe application!
Learn More
Learn more about how the basics of envelope generators!
Learn More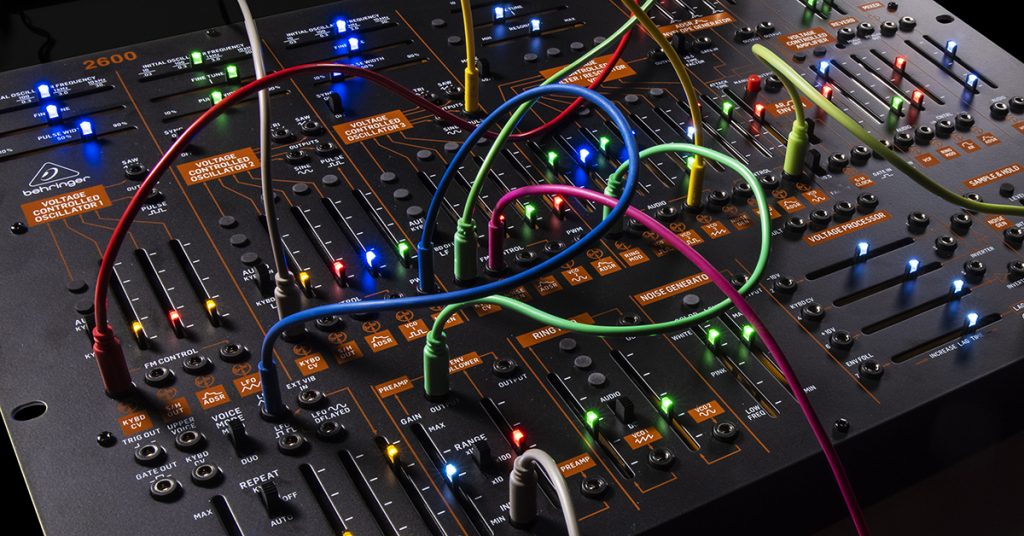
Learn more about the concepts of sample and hold in modulation!
Learn MoreWhen you need help, Sweetwater has the answers!
Our knowledge base contains over 28,000 expertly written tech articles that will give you answers and help you get the most out of your gear. Our pro musicians and gear experts update content daily to keep you informed and on your way. Best of all, it’s totally FREE, and it’s just another reason that you get more at Sweetwater.com.


Offer applies only to single-receipt qualifying purchases. Select manufacturers may require that only the manufacturer’s products qualify towards the minimum purchase amount needed to be eligible for promotional financing. Otherwise, an invoice that meets the minimum purchase amount and contains at least one qualifying manufacturer product is eligible for promotional financing. No interest will be charged on promo purchase balance, and equal monthly payments are required on promo purchase until it is paid in full. The payments equal the amount financed divided by the number of months in the promo period, rounded up to the next whole dollar. These payments may be higher than the payments that would be required if this purchase was a non-promo purchase. During the last month(s) of the promo period the required monthly payment may be reduced due to the prior months’ rounding. Regular account terms apply to non-promo purchases. New Accounts as of 07/31/2025: Purchase APR is 34.99%. Penalty APR is 39.99%. Min Interest Charge is $2. Existing cardholders: See your credit card agreement terms. Subject to credit approval.
Offer applies only to single-receipt qualifying purchases. No interest will be charged on the promo balance if you pay it off, in full, within the promo period. If you do not, interest will be charged on the promo balance from the purchase date. The required minimum monthly payments may or may not pay off the promo balance before the end of the promo period, depending on purchase amount, promo length and payment allocation. Regular account terms apply to non-promo purchases and, after promo period ends, to the promo balance. New Accounts as of 07/31/2025: Purchase APR is 34.99%. Penalty APR is 39.99%. Min Interest Charge is $2. Existing cardholders: See your credit card agreement terms. Subject to credit approval.
The estimated required monthly payment shown which excludes taxes and delivery equals the amount financed divided by the number of months in the promo period, rounded up to the next cent. During the last month(s) of the promo period the required monthly payment may be reduced due to this rounding. These payments apply only with the financing offer shown. If you make these payments by the due date each month, you should pay off this amount financed within the promo period, if it is the only balance you are paying off. If you have other balances on your account, this payment will be added to any other minimum monthly payments.
Applies only to select items from this manufacturer. Ask your Sweetwater Sales Engineer for more details.