
Zoom H1n Quickstart Guide
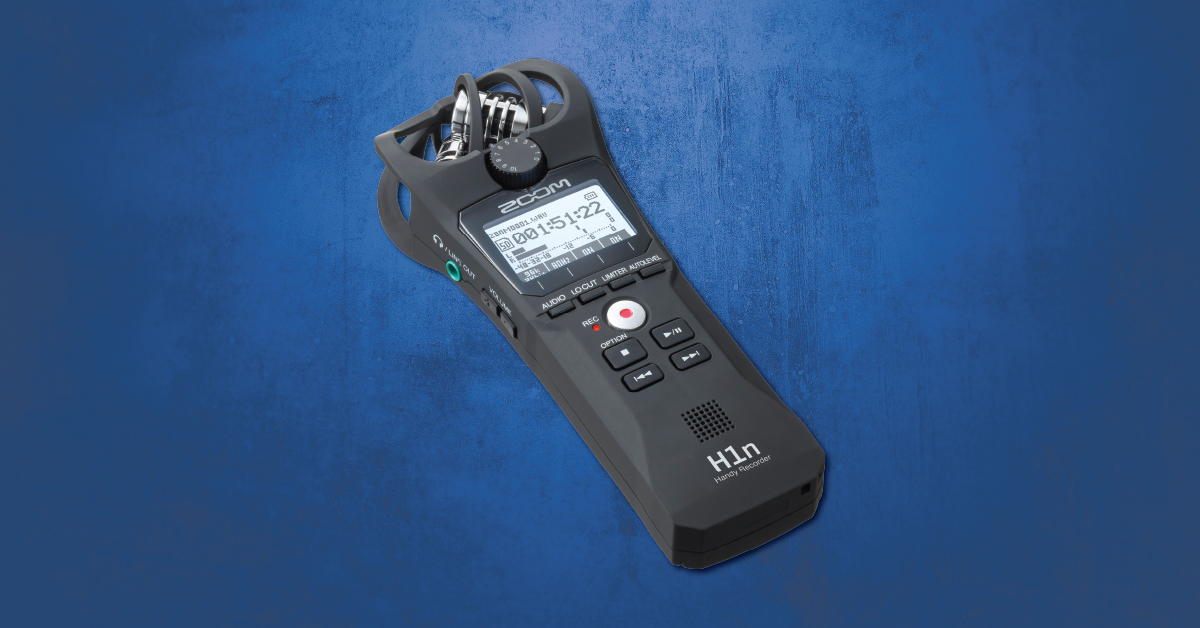
In this article, we will show you how to get up and running with the Zoom H1n. You’ll learn how to register the H1n, format the SD card, and how to record audio. Follow the sections below to get started.
How to register the Zoom H1n
Before we begin, you’ll first want to register the H1n with Zoom. To register the H1n, you’ll need the serial number, which is located on the back of the unit.
- Go to the Zoom product registration page.
- Fill out the necessary information, including the serial number (located on the back of your H1n), and then click Submit.
Format the Zoom H1n SD card
IMPORTANT: Formatting an SD card will erase any data that is currently stored. Please make sure to back up any important files before formatting your SD card.
Before you begin recording with your Zoom H1n, you’ll need to format the SD card so the recorder recognizes it. You can use microSD/SDHC cards with up to 32GB storage capacity. If the SD card isn’t compatible or more than 32GB, it won’t be recognized. For the full list of compatible SD cards, check out Zoom’s SD card compatibility list. Please note that SD cards that haven’t been used before must be formatted on the H1n for it to be recognized.
- Insert the SD card, press and hold the Garbage Can button, and turn on the H1n.
- Use the LO CUT and LIMITER buttons to navigate to SD Card, then press the AUTO LEVEL button.
- On the next screen, select Format, then press the AUTO LEVEL button.
- Lastly, select Execute and press the AUTO LEVEL button to format the SD card.
Testing SD card performance
If you’re receiving SD card errors on your H1n or performance is a little sluggish, you can test it two ways for its reliability: Quick Test and Full Test. Performing a test will scan the SD card for usability. Please note that you will need to connect the H1n to a power supply to perform a Full Test.
- Insert the SD card, press and hold the Garbage can button, and turn on the H1n.
- Use the LO CUT and LIMITER buttons to navigate to SD Card, then press the AUTO LEVEL button.
- On the next screen, select Test, then press the AUTO LEVEL button.
- Use the LO CUT and LIMITER buttons to select either Quick Test or Full Test and then press the AUTO LEVEL button.
- Select Execute to begin the test. Do not turn off the Zoom H1n while the test is being performed, as it may corrupt SD card data.
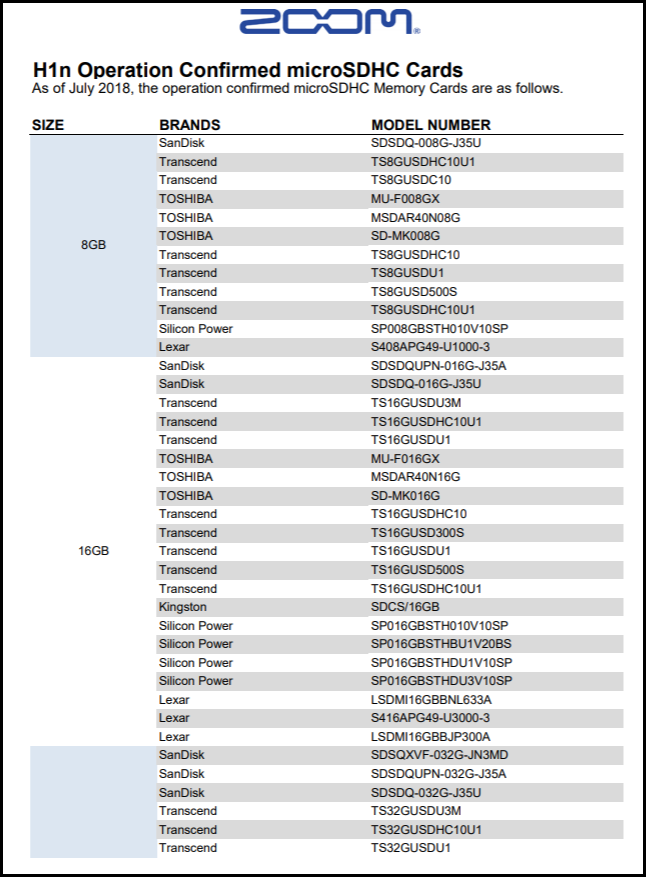
Click the image to view the Zoom H1n SD card compatibility list
Recording audio with the Zoom H1n
There are a few different ways you can record with the Zoom H1n. Either directly to the SD card, or it can be used as a standard audio interface to record audio into a DAW. No matter which way, you’ll first want to set the levels.
If the levels aren’t set correctly on your Zoom H1n before recording, the audio can begin to clip or be too quiet. You can either adjust the levels manually by using the front volume dial or press the AUTO LEVEL button while on the main page to adjust to the current input signal. When you do use the Auto Level feature, the volume dial will have no effect.
Recording to an SD card
Recording audio to an SD card on the H1n is straightforward. After you set the levels, all you need to do is press the Record button. The main recording screen allows you to change the audio format, enable the Lo-Cut and Limiter features, and engage Auto Level discussed above. When you’re not recording, you can access even more options by pressing the Stop (Option) button:
- Auto Rec: Recording will start automatically when the input level is greater than the set level.
- Pre Rec: The input can be recorded for two seconds before pressing the Record button.
- Self Timer: Recording will automatically begin after the set amount of time of your choosing.
- Sound Mark: When Sound Mark is enabled, it will insert a tone signal when you begin and stop recording. This is particularly useful if you’re planning on using the recorded audio for video since you’ll be able to align the audio and video much more quickly.
Recording to a computer
The great thing is that not only is this great for capturing audio on the fly, you can also use it as an audio interface. This means you can record meetings, podcasts, and anything else with it connected to your computer! It’s class-compliant on Mac which means no additional drivers are necessary. Windows users will need to download the H1n’s dedicated ASIO driver for it to communicate correctly.
- Connect the H1n to your computer, then use the LO CUT and LIMITER buttons to select Audio I/F.
- Windows users: Download the driver before connecting the H1n.
- Use the LO CUT and LIMITER buttons to select what device you’re connecting to (PC/Mac or iOS), then press the AUTO LEVEL button.
- Select how you want to power the device, then press the AUTO LEVEL button once more.
- Launch your recording software then set the H1n as the primary playback and recording device.
Is the H1n not showing up on your computer?
If your Zoom H1n isn’t showing up, disconnect and reconnect the device and also a different USB cable. If neither of those things work, check out our guides on how to resolve audio device issues on Windows and Mac.
Additional resources
Zoom H1n: Overdubbing
Zoom H1n: Transferring Files To Your Computer
Zoom H1n: Updating the Firmware
Using Lavalier Microphones with Zoom Handy Recorders
When you need help, Sweetwater has the answers!
Our knowledge base contains over 28,000 expertly written tech articles that will give you answers and help you get the most out of your gear. Our pro musicians and gear experts update content daily to keep you informed and on your way. Best of all, it’s totally FREE, and it’s just another reason that you get more at Sweetwater.com.

