
Mallet Percussion Quickstart Guide
In this guide, you will learn the fundamentals of your mallet percussion instrument. Follow the sections below to get started.
IMPORTANT! For all things related to your mallet instrument, please ask your band director or private teacher, as they can provide specific guidance and create custom lesson plans for you.
Parts of a Mallet Instrument
There are five primary types of mallet instruments: chimes, xylophone, marimba, glockenspiel, and vibraphone. While each instrument has distinct features, they all have one thing in common: tone bars, which produce the notes. The tone bar area will often be referred to as the keyboard since it’s laid out like a piano.
- Vibraphones, xylophones, and marimbas have additional hardware. This includes a damper pedal, rails, and resonators (sometimes called resonator tubes or pipes).
- Resonators are tuned specifically for each bar and help project the sound.
- Vibraphones also have fans that give them their signature vibrato sound. The fans are attached to a driver, which is attached to a controller. This allows you to adjust the speed of the fan rotation.
- Like a piano, the natural tone bars are closest to you. The accidental (also known as chromatic) tone bars are further away.
- While all mallet instruments have the same keybed layout, the range and tuning differ.
Tone bed material
Tone bed (keyboard) material will differ depending on the mallet instrument. The material used plays a significant role in the overall tone of your instrument.
- Marimbas and xylophones traditionally have rosewood tone beds, which provide a warm sound. Synthetic materials are also used, but they are less common.
- Vibraphone tone bars are often made of aluminum alloy, and glockenspiel and bell tone bars are usually some type of steel. These materials give the instruments their bright percussive sounds.
- Mallet material matters! Not only can it affect tone, but using incorrect materials can result in damage. For example, metal mallets on a marimba or xylophone can dent or crack the wooden tone bars.
- Ask your band director or private teacher for specific guidance on mallet material for the instrument you will be playing.
Mallet Instrument Assembly
Assembly is dependent on the mallet instrument you own, so refer to your instrument’s assembly manual for specific instructions. Here are several tips to get you up and running.
- Assembly can be labor-intensive, especially for larger mallet instruments such as the marimba. The larger instruments can also be quite heavy, so we recommend getting a second set of helping hands to make setup easier and less physically demanding.
- Some tone bars, particularly on bells and glockenspiels, can be individually removed. They often have note names stamped on them, making it easier to identify and assemble.
- Keep everything organized and laid out in a way that makes the setup process faster and helps you keep track of everything.
- Some mallet instruments use “X-style” stands. If this is the case, then make sure it’s wide enough to support the entire instrument.
- Always assemble your mallet instrument on a smooth, flat surface. If the instrument has casters, then make sure they’re in the locked position and assemble it on a rug or carpet if possible.
- Set the mallet instrument to an appropriate height. If set too high or low, then it may be difficult to play.
Keyboard Percussion 2: Setup & Playing Position
Getting Ready to Play
Now that you know the ins and outs of your mallet instrument and you have everything assembled, you’re ready to start playing.
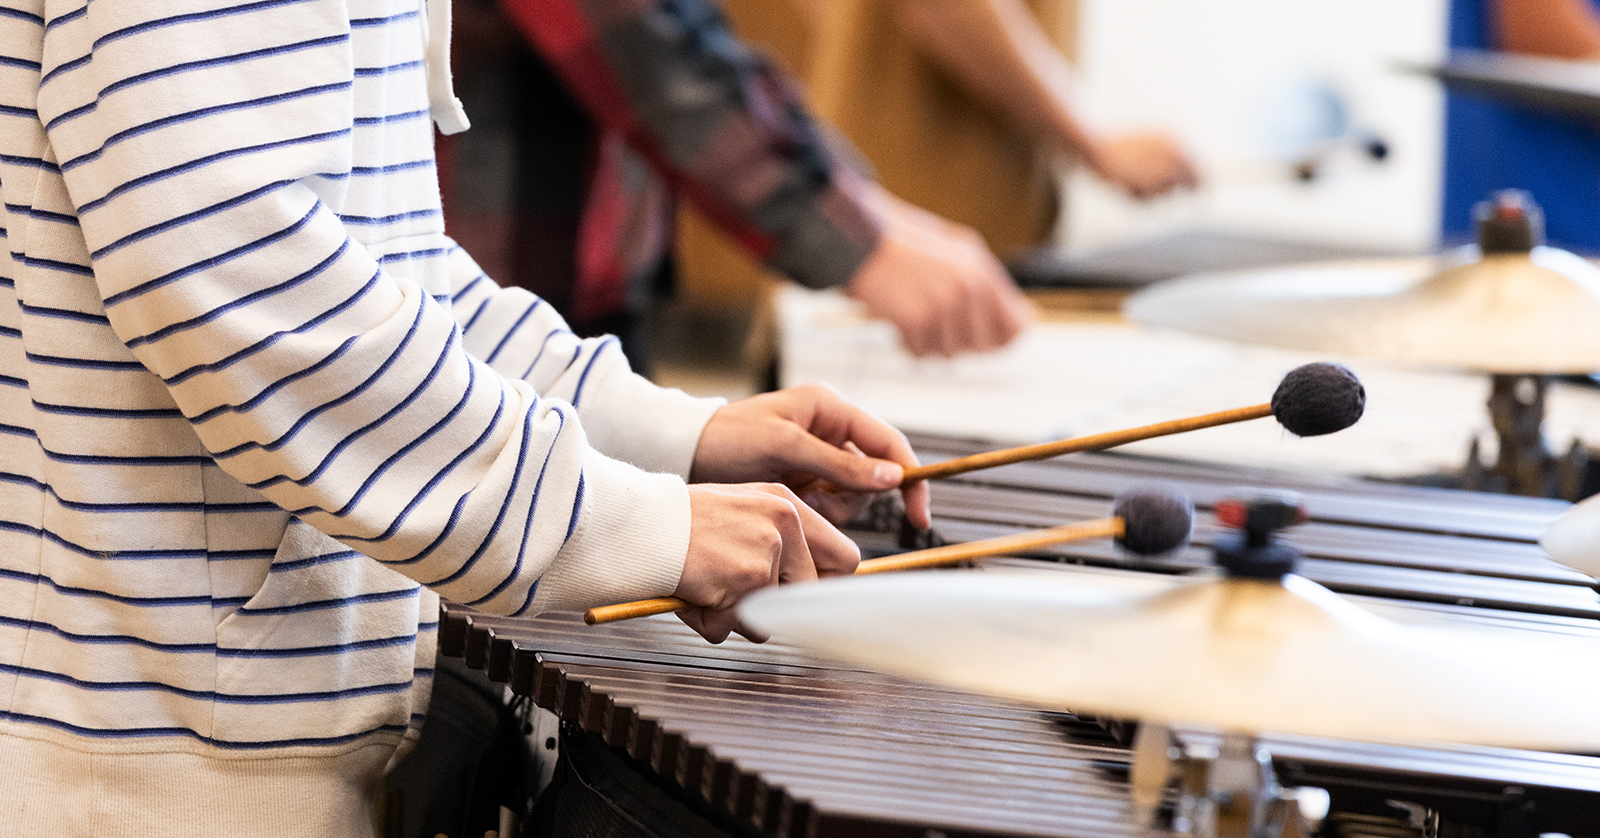
Grip style
Gripping a pair of mallets is different than standard drumsticks because they are heavier due to the mallet head material. You must compensate by choking up on the stick just a bit further.
- Pinch the stick with your thumb and forefinger then loosely wrap your other three fingers around it. Don’t squeeze too tight, though, as this can cause unnecessary tension and affect your playing.
- Play with full strokes and strike the center of the tone bar, as this is where you’ll get the best sound.
- Stand up straight in a comfortable playing position. Remember to have your elbows out but not too far.
Keyboard Percussion 3: Grip and Basic Strokes / Vic Firth Percussion 101
Related Articles
When you need help, Sweetwater has the answers!
Our knowledge base contains over 28,000 expertly written tech articles that will give you answers and help you get the most out of your gear. Our pro musicians and gear experts update content daily to keep you informed and on your way. Best of all, it’s totally FREE, and it’s just another reason that you get more at Sweetwater.com.


Offer applies only to single-receipt qualifying purchases. Select manufacturers may require that only the manufacturer’s products qualify towards the minimum purchase amount needed to be eligible for promotional financing. Otherwise, an invoice that meets the minimum purchase amount and contains at least one qualifying manufacturer product is eligible for promotional financing. No interest will be charged on promo purchase balance, and equal monthly payments are required on promo purchase until it is paid in full. The payments equal the amount financed divided by the number of months in the promo period, rounded up to the next whole dollar. These payments may be higher than the payments that would be required if this purchase was a non-promo purchase. During the last month(s) of the promo period the required monthly payment may be reduced due to the prior months’ rounding. Regular account terms apply to non-promo purchases. New Accounts as of 07/31/2025: Purchase APR is 34.99%. Penalty APR is 39.99%. Min Interest Charge is $2. Existing cardholders: See your credit card agreement terms. Subject to credit approval.
Offer applies only to single-receipt qualifying purchases. No interest will be charged on the promo balance if you pay it off, in full, within the promo period. If you do not, interest will be charged on the promo balance from the purchase date. The required minimum monthly payments may or may not pay off the promo balance before the end of the promo period, depending on purchase amount, promo length and payment allocation. Regular account terms apply to non-promo purchases and, after promo period ends, to the promo balance. New Accounts as of 07/31/2025: Purchase APR is 34.99%. Penalty APR is 39.99%. Min Interest Charge is $2. Existing cardholders: See your credit card agreement terms. Subject to credit approval.
The estimated required monthly payment shown which excludes taxes and delivery equals the amount financed divided by the number of months in the promo period, rounded up to the next cent. During the last month(s) of the promo period the required monthly payment may be reduced due to this rounding. These payments apply only with the financing offer shown. If you make these payments by the due date each month, you should pay off this amount financed within the promo period, if it is the only balance you are paying off. If you have other balances on your account, this payment will be added to any other minimum monthly payments.
Applies only to select items from this manufacturer. Ask your Sweetwater Sales Engineer for more details.