
How to Install a Thunderbolt Card on a Windows PC
In this guide, we will show you how to install and configure a PCIe Thunderbolt 3 or Thunderbolt 4 expansion card into a desktop PC with PCIe expansion slots. Follow the sections below to get started.
- Before You Start
- Install the Thunderbolt Card
- Download the Latest Driver
- Enable the Thunderbolt Card in the BIOS
- Verify That Your Expansion Card Is Detected
Before You Start
Thunderbolt is used for a variety of functions, including connecting high-bandwidth video equipment, hard disk arrays, and audio interfaces.
If you are a Windows PC user and you need to use Thunderbolt peripherals, you can purchase a laptop or desktop PC that already has Thunderbolt on the motherboard. This will provide the broadest compatibility with Thunderbolt peripherals.
However, if you have a desktop PC that does not have Thunderbolt built in, and you have available PCIe expansion slots, you can install a PCIe Thunderbolt 3 or 4 expansion card. But, particularly if your purpose is to connect a Thunderbolt audio interface, you need to be aware of these important points:
IMPORTANT! COMPATIBILITY WARNING
Any given model of Thunderbolt expansion card is not universally compatible with all makes and models of PCs. Only specific cards will be compatible with specific PC motherboards. Furthermore, installing a particular Thunderbolt expansion card in a particular PC may not provide the capability to connect to a given model of Thunderbolt audio interface.
Contact the manufacturer of your motherboard for information about compatible Thunderbolt cards.
Contact the manufacturer of your Thunderbolt audio interface for information about compatibility with third-party Thunderbolt expansion cards.
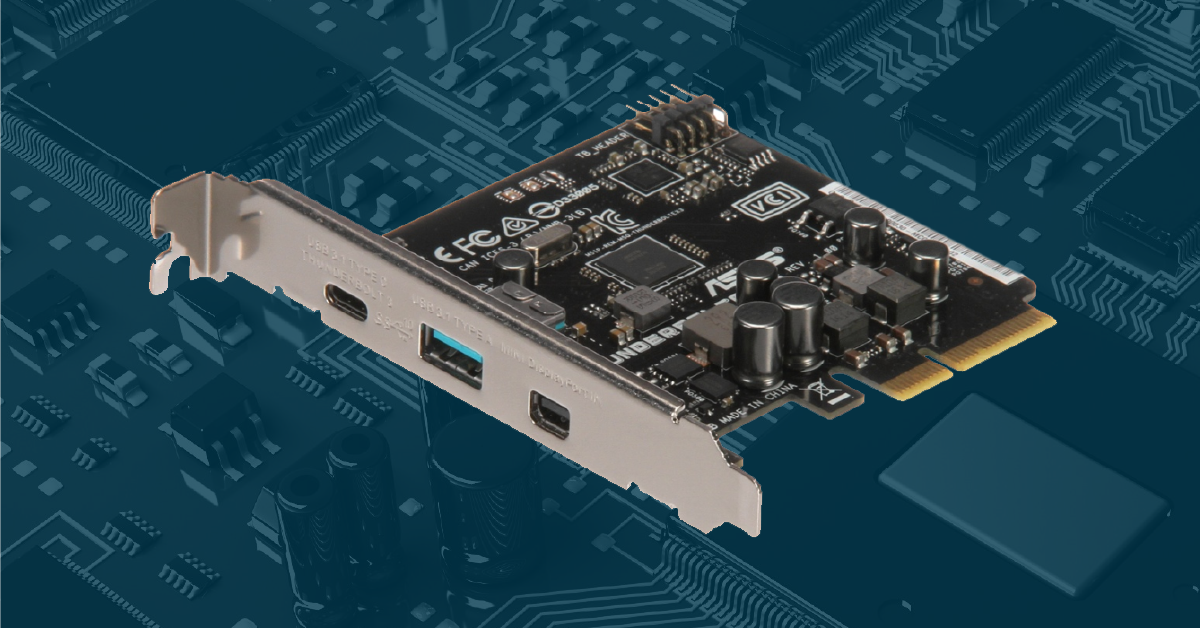
Install the Thunderbolt Card
IMPORTANT: Before you do anything, make sure that you are grounded, that your computer is turned off completely, including the switch on your power supply, and that all cables and USB devices are disconnected, including the power cable. Wait a minute before installing the Thunderbolt card so the computer has time to discharge.
- Set your computer on its side and remove the top panel to access the motherboard so you can install the Thunderbolt card into the PCIe slot.
- If the thumbscrews are too tight, use a Phillips-head screwdriver to loosen them.
- Locate the PCIe slot farthest from the power supply.
- You will install the Thunderbolt card into this slot. Remove the PCIe cover plate on that slot.
- Install the PCI card into the slot and make sure that it is firmly seated. Be sure that the ports on the Thunderbolt card are centered. If they are not, cables may not fully connect.
- Attach the screw to the top flange of the card’s plate to lock it into position.
- The Thunderbolt card will come with a header cable. Use this cable to connect the card to the motherboard according to the card’s instructions. Be careful when connecting the header cable, as the header pins can bend easily.
- Replace the case lid and re-connect your peripherals and power cable.
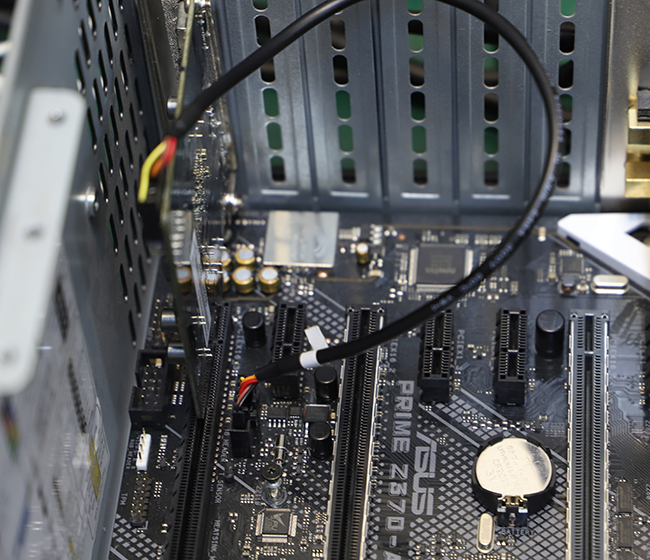
Fully connected Thunderbolt card
Download the Latest Driver
Before your PC can recognize the ports in your Thunderbolt card, you must first download and install the latest drivers from the Thunderbolt card’s manufacturer’s website. If you have not already, you should create a user account on the website and register your card.
- Reboot your PC as usual.
- On the manufacturer’s website, locate the appropriate drivers for your version of Windows and follow the instructions for installing them.
Enable the Thunderbolt Card in the BIOS
On a PC, the BIOS (Basic Input/Output System) holds the computer code that runs when the PC first boots up and before it loads Windows. Normally your computer boots up without your needing to be aware of the BIOS settings. But having just installed a PCIe expansion card, you need to modify your computer’s BIOS settings in order to enable the computer to establish communication with the card each time it boots up.
For many PCs, you can access the BIOS settings by continually pressing the F2 function key on your keyboard as soon as you turn on the power to your PC. Follow the prompts on the screen to get to the BIOS settings.
Some PC manufacturers provide a different method to access BIOS. If the F2 method doesn’t work, consult your owner’s manual.
Once in the BIOS settings, the series of steps you need to go through to enable the system to recognize your Thunderbolt card will depend upon the make and model of your computer and its motherboard. Every motherboard has a different user interface for BIOS settings. You will need to consult the instructions that come with your Thunderbolt card, as well as the owner’s manual for your PC or its motherboard.
Below we have provided screenshots of a BIOS user interface as an example to show you what configuring access to a Thunderbolt card looks like. Your system’s BIOS layout will be different.
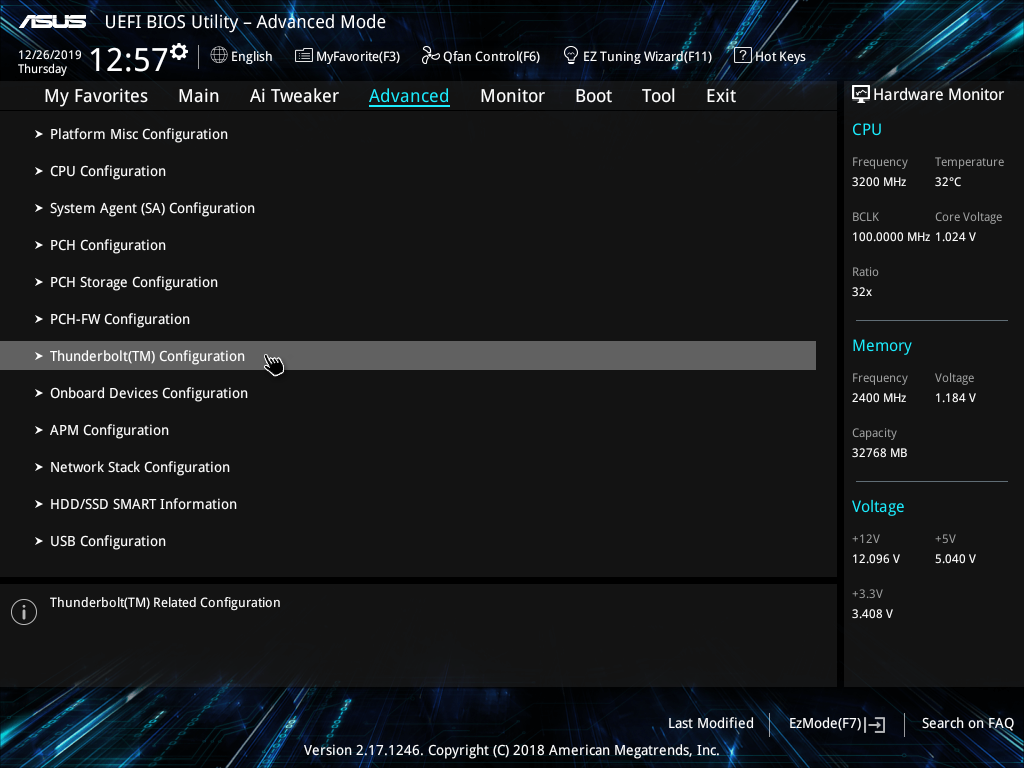
Select Advanced Mode

Enable Thunderbolt Support
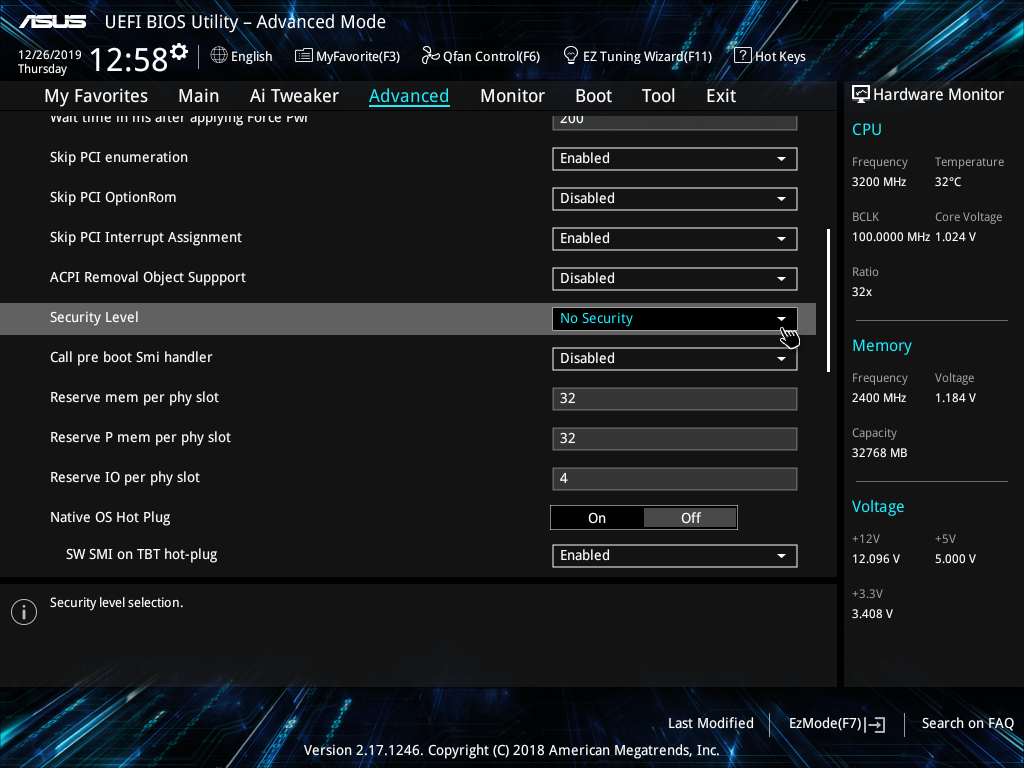
Change the Security Level
Verify That Your Expansion Card is Detected
After you have completed all these steps and you boot into Windows, open the Windows Device Manager. If the Thunderbolt card and the drivers were installed successfully, you should see a listing for the Thunderbolt Controller under System Devices.
Connect your Thunderbolt peripheral, making sure you are using the Thunderbolt cable connected to the Thunderbolt port on the expansion card, and power it on. Windows should alert you that the device is detected and prompt you to allow access to the device.
Manually Approve Thunderbolt Devices
Sometimes, your PC may not prompt you to approve the connected Thunderbolt device. If this is the case, follow these steps.
- Right-click the Thunderbolt icon on the system tray, select Approve Attached Devices, then select Port 1.
- Use the dropdown box located next to the connected Thunderbolt device, select Always Connect, then click OK.
Related Articles
When you need help, Sweetwater has the answers!
Our knowledge base contains over 28,000 expertly written tech articles that will give you answers and help you get the most out of your gear. Our pro musicians and gear experts update content daily to keep you informed and on your way. Best of all, it’s totally FREE, and it’s just another reason that you get more at Sweetwater.com.


Offer applies only to single-receipt qualifying purchases. Select manufacturers may require that only the manufacturer’s products qualify towards the minimum purchase amount needed to be eligible for promotional financing. Otherwise, an invoice that meets the minimum purchase amount and contains at least one qualifying manufacturer product is eligible for promotional financing. No interest will be charged on promo purchase balance, and equal monthly payments are required on promo purchase until it is paid in full. The payments equal the amount financed divided by the number of months in the promo period, rounded up to the next whole dollar. These payments may be higher than the payments that would be required if this purchase was a non-promo purchase. During the last month(s) of the promo period the required monthly payment may be reduced due to the prior months’ rounding. Regular account terms apply to non-promo purchases. New Accounts as of 07/31/2025: Purchase APR is 34.99%. Penalty APR is 39.99%. Min Interest Charge is $2. Existing cardholders: See your credit card agreement terms. Subject to credit approval.
Offer applies only to single-receipt qualifying purchases. No interest will be charged on the promo balance if you pay it off, in full, within the promo period. If you do not, interest will be charged on the promo balance from the purchase date. The required minimum monthly payments may or may not pay off the promo balance before the end of the promo period, depending on purchase amount, promo length and payment allocation. Regular account terms apply to non-promo purchases and, after promo period ends, to the promo balance. New Accounts as of 07/31/2025: Purchase APR is 34.99%. Penalty APR is 39.99%. Min Interest Charge is $2. Existing cardholders: See your credit card agreement terms. Subject to credit approval.
The estimated required monthly payment shown which excludes taxes and delivery equals the amount financed divided by the number of months in the promo period, rounded up to the next cent. During the last month(s) of the promo period the required monthly payment may be reduced due to this rounding. These payments apply only with the financing offer shown. If you make these payments by the due date each month, you should pay off this amount financed within the promo period, if it is the only balance you are paying off. If you have other balances on your account, this payment will be added to any other minimum monthly payments.
Applies only to select items from this manufacturer. Ask your Sweetwater Sales Engineer for more details.