
Getting Started with Thunderbolt Audio Interfaces
In this guide, we’ll help you set up and start working with your Thunderbolt audio interface. We’ll go over the broad details. The specifics will be different depending on the brand of audio interface you use and whether you are on Mac or Windows PC, so we will provide links to other articles that give you more information about your platform. Follow each section below to get started.
- Update your Computer
- Register your Thunderbolt audio interface with the manufacturer
- Download the Driver, Control App, and Bundled Software
- Setup and Connections
- Computer Settings
Update your Computer
If you are on a Mac, you are good to go, because Thunderbolt is natively supported in the Mac operating system and the hardware.
If you are on a Windows PC that comes with a Thunderbolt port, first make sure that your computer’s Thunderbolt software is up-to-date.
Before you connect your Thunderbolt audio interface, run Windows Update and install all updates that it reports are available. Look for additional or optional updates that pertain to the video drivers and the motherboard chipsets. Install them according to the prompts.
Next, go to the PC manufacturer’s website, or the motherboard manufacturer’s website if it’s a custom-built PC. Look up your PC’s model number and locate the download area for chipset drivers. Now look for the latest Thunderbolt driver, firmware and software. Download and install each component according to the manufacturer’s instructions.
If your PC did not come with Thunderbolt and you need to install a third-party Thunderbolt PCIe expansion card, check out this SweetCare article, “How to Install a Thunderbolt Card on a Windows PC.”
Register your Thunderbolt audio interface with the manufacturer
Thunderbolt audio interfaces are highly specialized pieces of gear. Each manufacturer provides custom software that you need to download from the manufacturer’s website and install on your computer before you can start using the audio interface.
You will need to register your hardware with the manufacturer in order to access the software required to use your Thunderbolt audio interface. In the box, the manufacturer will provide you with instructions for doing this, but basically, when you get your audio interface out of the box, find its serial number. Take a photo or write it down. Open your web browser and go the manufacturer’s website. If you already have an account there, log in. If you have forgotten your password, click on the “Forgot your Password?” link and reset it according to the email instructions they send you. If you have not done business with this company before, you will need to create a new account, verify it, and then log in. Look for the section for registering new hardware.
Links to Registration pages for different brands of Thunderbolt audio interfaces:
TIP: By registering your gear, you also ensure that you get the manufacturer’s full warranty. Since you bought this gear from Sweetwater, you also have our 2-year Total Confidence Coverage (TCC) warranty, so never fear. But some manufacturers give you even longer coverage.
Download the Driver, Control App, and Bundled Software
Now that you have registered your hardware on the manufacturer’s website, navigate to the area where you can download and install the software that the manufacturer makes available.
Tip: Install the software before you connect your Thunderbolt audio interface to your computer for the first time.
The Driver
For your computer to recognize your Thunderbolt audio interface, it requires the installation and configuration of a driver, which is a piece of computer code provided by the manufacturer that enables the computer to communicate with this specific make and model of device. Select the correct version for your operating system. Download it and follow the instructions to install it.
The Control App
Most Thunderbolt audio interfaces require that you install the manufacturer’s control app, which performs several functions, including providing an interface for customizing the signal routing within the interface, like an on-screen mixing board. With some manufacturers’ control apps, running the installer will also automatically install the all-important driver. It may also prompt you to update the firmware of your Thunderbolt audio interface to the newest version. So locate the control app on the website and download and install it.

The Universal Audio Apollo line of Thunderbolt audio interfaces requires the UA Console control app for configuring signal routing.
Bundled Software
If your Thunderbolt audio interface has DSP (computer chips dedicated to Digital Signal Processing) and runs proprietary DSP plug-ins, you will want to download and install them at this time. Depending on the manufacturer, the DSP plug-ins may be automatically installed with the control app.
Most manufacturers provide additional software that comes with your Thunderbolt audio interface. Some provide a dizzying array of products. Examples include starter versions of different DAWs, plug-ins for signal processing, and virtual instruments. Some will be fully functional, some will be “lite” versions with an offer to upgrade to a full version, and some will be trial versions that will expire. These are all optional. For third-party products, to use each one, you will need to create a user account at the website of each company and register and activate each piece of software separately. That will take a lot of time.
Take our advice: right now you want to get up and running with your Thunderbolt audio interface. Don’t get bogged down with bundled products. Just download the things you know you want to use. You can always come back later and try the others.
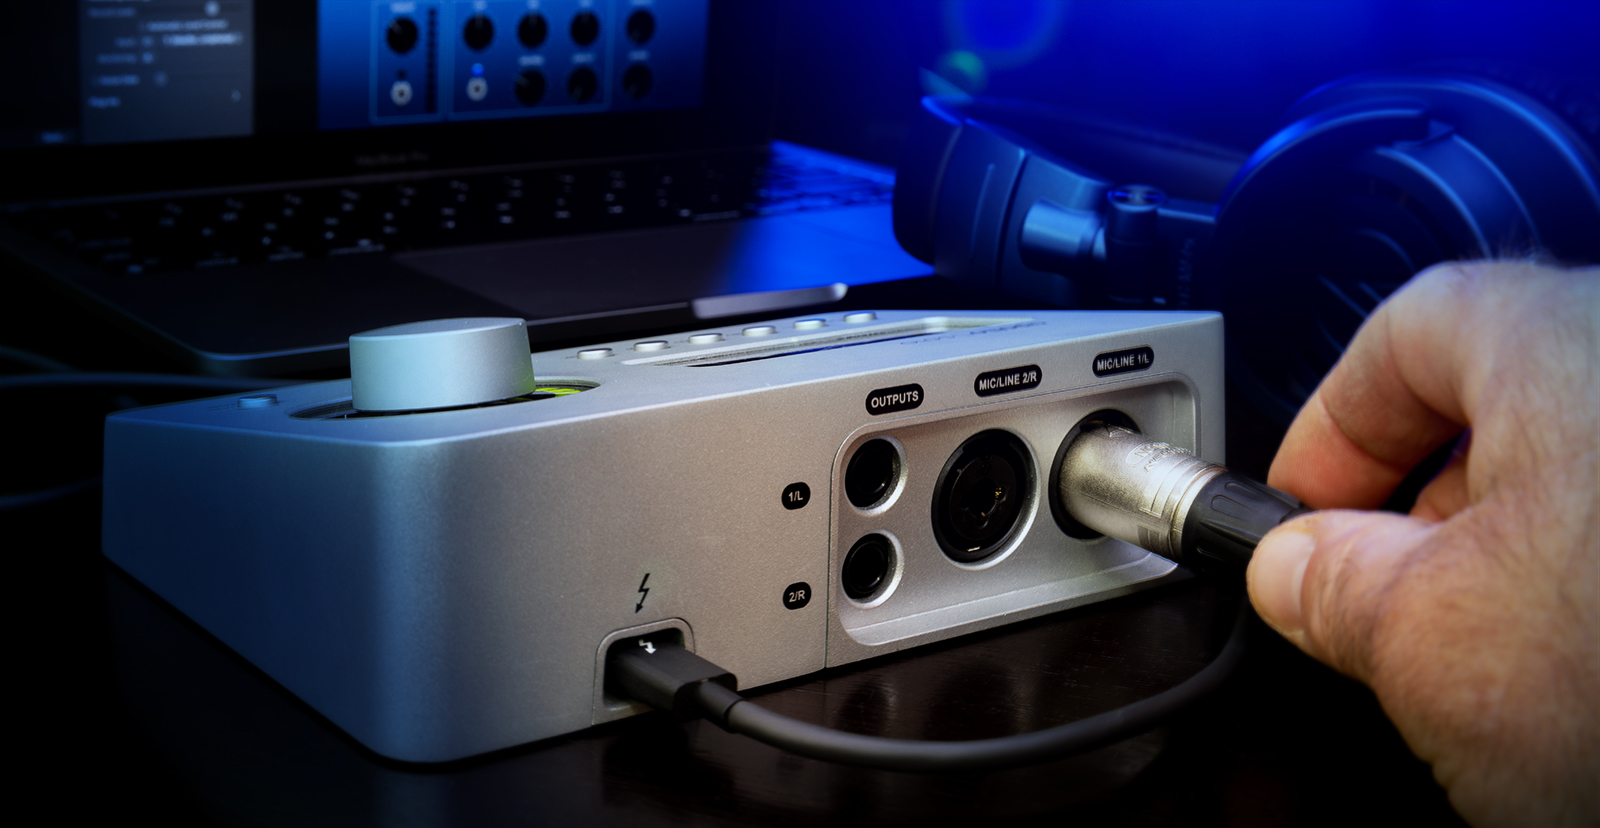
Setup and Connections
Your Thunderbolt audio interface may require an included external power supply. Hook it up. A few devices are bus-powered, meaning they get their power from your computer over the Thunderbolt cable connection instead.
Using an appropriate Thunderbolt cable, connect your Thunderbolt audio interface to a Thunderbolt port on your Mac or Windows PC. Choosing the correct cable and connecting to the correct port are essential. Make sure that you are not connecting to a USB port. If you need more information about this, check out this SweetCare article:
On a Windows PC
On a Windows PC, when you first connect your Thunderbolt audio interface, you may get a notification in the lower-right-corner of the screen asking you to grant permission for Windows to connect to the device. Follow the prompts and choose “Always connect.”
On a Mac
On a Mac, Thunderbolt audio interfaces connect by using a piece of software called a kernel extension. There are special security procedures which have to be followed to enable macOS to permit a kernel extension to function.
The procedures will depend on whether you have an Intel-based Mac or a Mac with Apple silicon. If you don’t know, check out our SweetCare guide: How to tell if you have an Intel-based Mac or a Mac with Apple silicon.
If you have an Intel-based Mac, when you reboot after installing drivers, you may see a prompt saying that a system extension was blocked, and that you need to open System Settings > Privacy & Security and allow access to it. Follow the prompts and grant access.
If you have a Mac with Apple silicon, you have to first shut down your Mac, boot into macOS Recovery mode, and make a change to the computer’s security settings. Then when you reboot into macOS, you have to allow access in Privacy & Security.
Learn more in our SweetCare article Enabling Kernel Extensions on Mac with Apple silicon.
Consult your manufacturer’s instructions for detailed installation steps.
Computer Settings
Now that your Thunderbolt audio interface is physically connected, you need to:
- Configure your operating system to use the device for input and output. If the device is not recognized, you will need to do some troubleshooting.
- Start up the control app and confirm that it can detect your device. Follow any prompts about updating the firmware, the driver, and the control app itself
- Start up your DAW and select the appropriate driver to connect it to your device. Configure the DAW to recognize the device’s inputs and outputs.
Now you can hook up a microphone or line-level signal and start recording. The individual steps you will need to follow will depend upon the make and model of your Thunderbolt audio interface and whether you are using it with a Mac or a Windows PC. Sweetwater provides installation and setup instructions for many devices, but there is no substitute for following the instructions provided by your manufacturer.
Optimizing your Mac or PC
While we’re at it, Sweetwater provides guides for Mac and PC that show you how to optimize the system settings on your computer to maximize performance for audio and recording.
Related Articles
When you need help, Sweetwater has the answers!
Our knowledge base contains over 28,000 expertly written tech articles that will give you answers and help you get the most out of your gear. Our pro musicians and gear experts update content daily to keep you informed and on your way. Best of all, it’s totally FREE, and it’s just another reason that you get more at Sweetwater.com.


Offer applies only to single-receipt qualifying purchases. Select manufacturers may require that only the manufacturer’s products qualify towards the minimum purchase amount needed to be eligible for promotional financing. Otherwise, an invoice that meets the minimum purchase amount and contains at least one qualifying manufacturer product is eligible for promotional financing. No interest will be charged on promo purchase balance, and equal monthly payments are required on promo purchase until it is paid in full. The payments equal the amount financed divided by the number of months in the promo period, rounded up to the next whole dollar. These payments may be higher than the payments that would be required if this purchase was a non-promo purchase. During the last month(s) of the promo period the required monthly payment may be reduced due to the prior months’ rounding. Regular account terms apply to non-promo purchases. New Accounts as of 07/31/2025: Purchase APR is 34.99%. Penalty APR is 39.99%. Min Interest Charge is $2. Existing cardholders: See your credit card agreement terms. Subject to credit approval.
Offer applies only to single-receipt qualifying purchases. No interest will be charged on the promo balance if you pay it off, in full, within the promo period. If you do not, interest will be charged on the promo balance from the purchase date. The required minimum monthly payments may or may not pay off the promo balance before the end of the promo period, depending on purchase amount, promo length and payment allocation. Regular account terms apply to non-promo purchases and, after promo period ends, to the promo balance. New Accounts as of 07/31/2025: Purchase APR is 34.99%. Penalty APR is 39.99%. Min Interest Charge is $2. Existing cardholders: See your credit card agreement terms. Subject to credit approval.
The estimated required monthly payment shown which excludes taxes and delivery equals the amount financed divided by the number of months in the promo period, rounded up to the next cent. During the last month(s) of the promo period the required monthly payment may be reduced due to this rounding. These payments apply only with the financing offer shown. If you make these payments by the due date each month, you should pay off this amount financed within the promo period, if it is the only balance you are paying off. If you have other balances on your account, this payment will be added to any other minimum monthly payments.
Applies only to select items from this manufacturer. Ask your Sweetwater Sales Engineer for more details.