
Roland TD-07 Setup Guide
The Roland TD-07 is a perfect compact electronic drum kit for any drummer, so in this guide, we will show you how to register, set up, and get started with it for the first time. Follow the instructions below to get started! Be sure to also check out the TD-07 Owner’s Manual to learn more.
Register the TD-07
Before setting up your Roland TD-07 kit, you must register it with Roland. Upon registering the kit, you’ll gain access to Roland support, training videos, an extended warranty, and drum clinic information.
- Log in to your Roland Backstage account. If you don’t have one yet, you can create one here. Roland will send an account-activation email to the registered email address to complete the account-creation process.
- Check your spam folder if you don’t see the email.
- On your account home page, click My Gear, then select Register a Product.
- Fill out the required information, including the serial number located on the drum module, and click Register.
- Keep your Sweetwater invoice handy, as you must enter the purchase date, the purchase method, and your Dealer (Sweetwater).
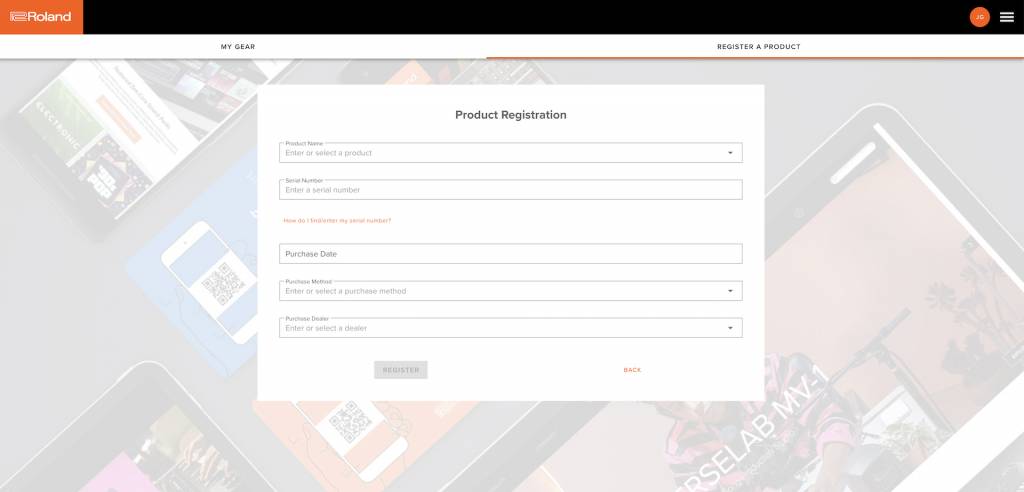
Click the image to register your Roland TD-07 drum kit.
Setup and Connections
One great thing about the Roland TD-07 kit is its ease of setup. Depending on your model of TD-07, setup and assembly may differ slightly, but the concept is the same. Check out the videos from Roland to learn how to assemble your kit! This video shows how to assemble the TD-07KV, but the process is similar with other models. Check out our electronic drum setup guide to learn more.
Here are a few tips for setting up your electronic kit:
- Use hook-and-loop cable ties to secure the cabling to the drum rack and to keep the wiring harness neat. This will also ensure that the cables don’t get tangled up.
- Place the TD-07 kit on a carpet or a drum rug. While you can adjust sensitivity and crosstalk settings, playing the kit on a hard surface can cause vibrations, leading to mistriggering.
- Don’t overtighten parts!
- Make sure the cables are fully and securely inserted into the pads.
Unboxing and Assembling the Stand
How to Assemble the TD-07KV
Connect the TD-07 to Your Computer
You can connect the TD-07 kit to your computer to record audio and MIDI. You just need to download the driver and attach a USB Type A to Type B high-speed cable to an available USB 2.0 port on your computer.

Click the image to download the TD-07 USB driver.
Connecting to mobile devices
TIP: Make sure the mobile device is close to the module so it can connect properly.
The TD-07 has Bluetooth capability, so it can pair with mobile devices that support Bluetooth MIDI. If you’re not sure how to navigate your mobile device settings, check out our Android and iOS guides to learn more!
- Press the Bluetooth button on the module, use the < and > buttons to choose BT MIDI, and use the dial to turn Bluetooth on.
- Enable Bluetooth on your mobile device, but don’t pair the device yet!
- Launch the Bluetooth- and MIDI-capable app, go back to your mobile device’s Bluetooth settings, and complete the pairing process.
Working with the TD-07 Module
Now that everything is set up and connected, it’s time to sit down and start playing!
Adjust Pad Settings
While the factory pad settings are a great starting point, not all drummers have the same play style, so taking time to adjust the settings will set you up for success. Check out our electronic drum terms guide to learn more about parameter behavior.
- Press the GEAR (SETUP) button, use the < and > buttons to select PAD, and press ENTER.
- Strike the pad you want to adjust, then use the < and > buttons to select the parameter you wish to edit.
Hi-hat offset
Hi-hat offset is the hi-hat’s open-and-close range. This affects how sensitive the hi-hat’s open-and-close function sounds when using the pedal.
- Turn on the module. Make sure the hi-hat pad isn’t resting on the motion sensor.
- Once the module is turned on, loosen the hi-hat clutch. Let the pad rest on the motion sensor.
- Press the GEAR (SETTINGS) button, use the < and > buttons to navigate to PAD, and press the ENTER button.
- Strike the hi-hat pad, use the < and > buttons to navigate to VH Set, then press the ENTER button.
- Use the black offset screw and follow the on-screen prompts. If the display shows Turn screw L, turn the offset screw clockwise. If it says Turn screw R, turn it counterclockwise.
- Once you see OK! on the display, tighten the clutch screw. The high-hat offset adjustment should be at approximately 80. Press the DRUM button to exit out of the Settings menu.
Create a Custom Kit
TIP: Any change you make to the kit is automatically saved and will be stored, even if you exit out of a specific menu.
The TD07 module holds 143 samples that can be assigned to any kit. You can then save custom kits to one of the 25 user kit slots available.
- Press the DRUM KIT (KIT EDIT) button, then use the dial to navigate to an empty user kit slot.
- Press the DRUM (SAMPLE EDIT) button to the right of the metronome, use the < and > buttons to navigate to Instruments, and press the ENTER button.
- Strike the pad you want to change, then turn the knob to adjust the sound. Check out page 12 of the Roland TD-07 Data List to view the samples available on the TD-07.
- Press the < and > to adjust the sample parameters (e.g., sample level, panning, tuning, and head type).
- Once you’re happy with your changes, press the DRUM KIT (KIT EDIT) button, use the < and > buttons to navigate to KIT NAME, and press the ENTER button.
- Use the dial to change the character and < and > to change the cursor position.
- Press the DRUM KIT (KIT EDIT) to exit out of the KIT EDIT menu.
Related Articles
When you need help, Sweetwater has the answers!
Our knowledge base contains over 28,000 expertly written tech articles that will give you answers and help you get the most out of your gear. Our pro musicians and gear experts update content daily to keep you informed and on your way. Best of all, it’s totally FREE, and it’s just another reason that you get more at Sweetwater.com.


Offer applies only to single-receipt qualifying purchases. Select manufacturers may require that only the manufacturer’s products qualify towards the minimum purchase amount needed to be eligible for promotional financing. Otherwise, an invoice that meets the minimum purchase amount and contains at least one qualifying manufacturer product is eligible for promotional financing. No interest will be charged on promo purchase balance, and equal monthly payments are required on promo purchase until it is paid in full. The payments equal the amount financed divided by the number of months in the promo period, rounded up to the next whole dollar. These payments may be higher than the payments that would be required if this purchase was a non-promo purchase. During the last month(s) of the promo period the required monthly payment may be reduced due to the prior months’ rounding. Regular account terms apply to non-promo purchases. New Accounts as of 07/31/2025: Purchase APR is 34.99%. Penalty APR is 39.99%. Min Interest Charge is $2. Existing cardholders: See your credit card agreement terms. Subject to credit approval.
Offer applies only to single-receipt qualifying purchases. No interest will be charged on the promo balance if you pay it off, in full, within the promo period. If you do not, interest will be charged on the promo balance from the purchase date. The required minimum monthly payments may or may not pay off the promo balance before the end of the promo period, depending on purchase amount, promo length and payment allocation. Regular account terms apply to non-promo purchases and, after promo period ends, to the promo balance. New Accounts as of 07/31/2025: Purchase APR is 34.99%. Penalty APR is 39.99%. Min Interest Charge is $2. Existing cardholders: See your credit card agreement terms. Subject to credit approval.
The estimated required monthly payment shown which excludes taxes and delivery equals the amount financed divided by the number of months in the promo period, rounded up to the next cent. During the last month(s) of the promo period the required monthly payment may be reduced due to this rounding. These payments apply only with the financing offer shown. If you make these payments by the due date each month, you should pay off this amount financed within the promo period, if it is the only balance you are paying off. If you have other balances on your account, this payment will be added to any other minimum monthly payments.
Applies only to select items from this manufacturer. Ask your Sweetwater Sales Engineer for more details.