
RODECaster Video Setup and Connections
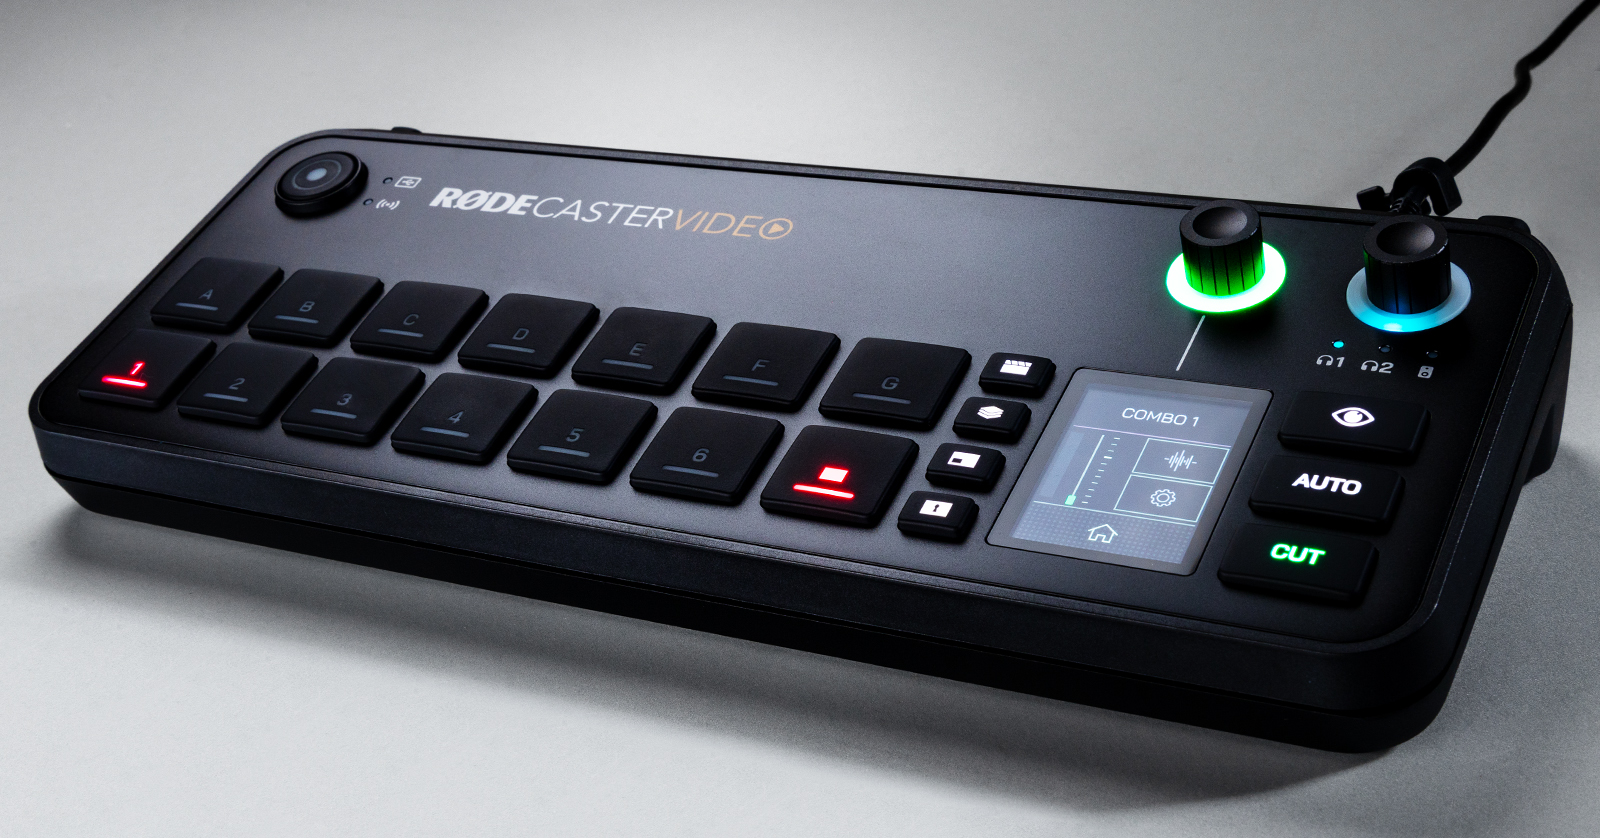
The RODECaster Video is a fantastic all-in-one switcher that allows you to control video and audio throughout your streaming setup. In this guide, we will show you how to set up and connect it for the first time, and we’ll also provide a few tips to get you up and running! Be sure to check out the RODECaster Video user guide for more information. Follow the sections below to get started.
RODECaster Setup and Connections
There are plenty of connections available on the RODECaster Video, but we’ll break them down into four sections: Network, Audio, HDMI, and USB. Not all setups are the same, so take note when connecting your streaming gear.
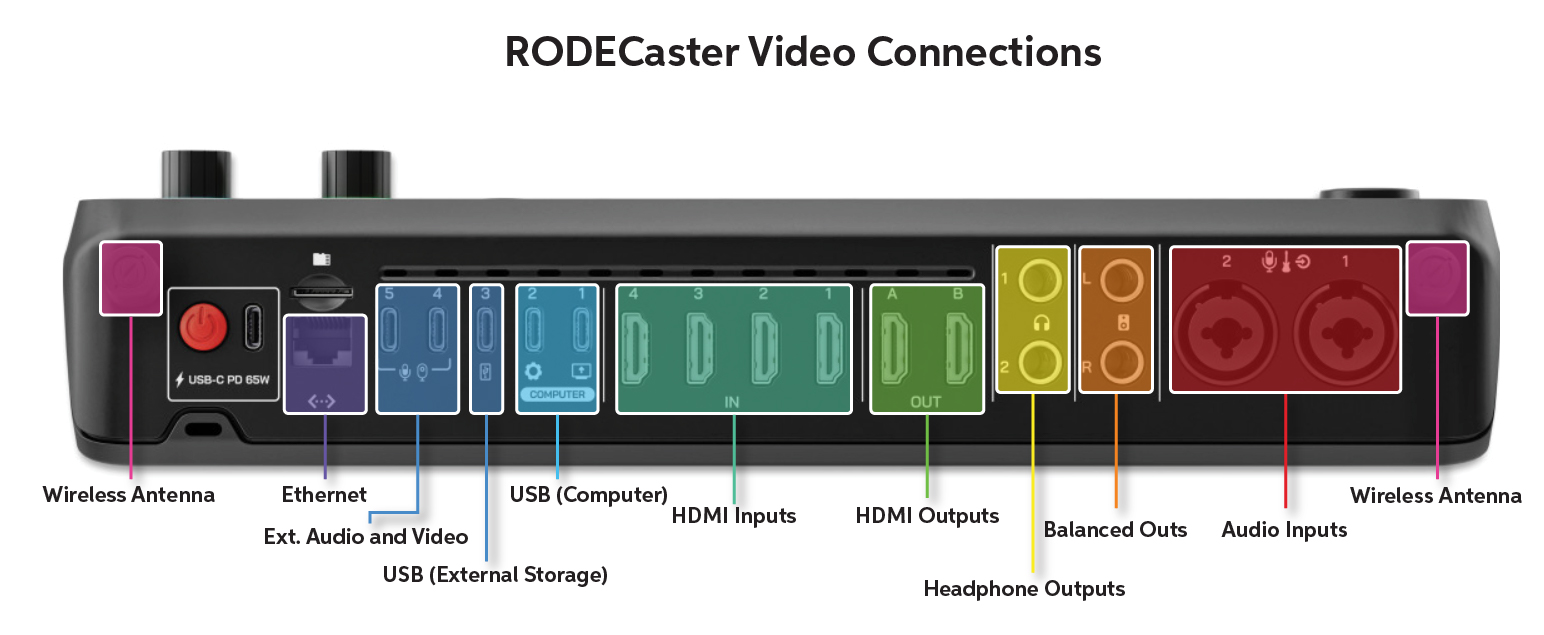
RODECaster Video connections
Network
There are two types of Network connections on the RODECaster Video: Ethernet and Wi-Fi. You can configure and control the device remotely using the RODE Central app via the Network connections. This app also lets you stream your production directly from the RODECaster Video.
You will also need to use one of these Network connections to update the RODECaster Video’s firmware.
Audio
The audio connections on the RODECaster Video are straightforward. The two combi jacks are for microphones, instruments, and line-level devices, and the two sets of balanced outputs are for speakers and headphones.
- You must enable phantom power within the RODE Central application after connecting microphones that require it. Enabling phantom power before connecting the mics could result in damage.
- Update the audio output level by pressing the Audio Encoder button until the LED above headphone 1, headphone 2, or the speaker icon is lit, and then rotate the encoder to adjust the output level.
HDMI
You can use four HDMI inputs and two HDMI outputs for your streaming setup.
- The HDMI inputs are routed to buttons 1–4, respectively. However, you can customize the settings within the RODE Central application.
- The HDMI outputs are dedicated to outputting all the source settings. You can customize the routing using the RODE Central software.
- If you don’t see a video source, make sure that the device is capable of outputting 1920×1080 video stream.
USB
IMPORTANT! You must use USB-C SuperSpeed cables. Also, USB external storage devices must be in the exFAT format.
The RODECaster Video has five USB-C jacks, each serving a specific purpose.
- USB 1–2 jacks are what you’ll use to connect to your computer.
- USB 1 will send the audio and video streams.
- USB 2 is for controlling and configuring RODE Central.
- USB 3 connects an external storage device, such as a USB-C thumb drive. You can record and store your production’s video and audio tracks as single or multitrack files.
- You can use the USB 4–5 connections to connect USB video devices, such as capture cards, UVC webcams, and RODE audio devices.
UVC Compatibility
The RODECaster Video only supports USB video devices that use the UVC (USB Video Class) standard, which provides an uncompressed UVC signal that can stream at least 1080p24.
Here is a list of tested, compatible devices, but any device that can provide at least 1080p24 uncompressed UVC stream should be compatible. Check a video device’s owner’s manual to view its specifications.
- AnkerWork C310
- Elgato 4K X
- Elgato Cam Link 4K
- Elgato Facecam
- Elgato Facecam MK.2
- Elgato Facecam Pro
- Elgato HD60 X
- Logitech BRIO Stream
- Logitech BRIO ULTRA HD Pro
- Logitech C920 HD Pro
- Logitech StreamCam
- OBSBOT Tiny 2
- Razer Kiyo Pro
- Sony FX30
- Sony FX3
- Sony ZV-E1
microSD
The microSD slot can store media files for use in production. It is recommended that you use UHS-I class or higher with a write speed of at least 30MP/s.
Set Up Your Production Gear
Setting up your production gear with the RODECaster Video is straightforward. Not all setups are the same, but the setup instructions below will be a great starting point to get up and running!
- Connect your camera, your computer, or your other HDMI device that can output HDMI to the HDMI inputs. Make sure that the input device supports at least 1080p.
- Connect the RODECaster Video to your computer via the USB 1 port. This will let you send the video stream and the multitrack audio to other software.
- Launch RODE Central and begin setting up your software routing.
Related Articles
When you need help, Sweetwater has the answers!
Our knowledge base contains over 28,000 expertly written tech articles that will give you answers and help you get the most out of your gear. Our pro musicians and gear experts update content daily to keep you informed and on your way. Best of all, it’s totally FREE, and it’s just another reason that you get more at Sweetwater.com.


Offer applies only to single-receipt qualifying purchases. Select manufacturers may require that only the manufacturer’s products qualify towards the minimum purchase amount needed to be eligible for promotional financing. Otherwise, an invoice that meets the minimum purchase amount and contains at least one qualifying manufacturer product is eligible for promotional financing. No interest will be charged on promo purchase balance, and equal monthly payments are required on promo purchase until it is paid in full. The payments equal the amount financed divided by the number of months in the promo period, rounded up to the next whole dollar. These payments may be higher than the payments that would be required if this purchase was a non-promo purchase. During the last month(s) of the promo period the required monthly payment may be reduced due to the prior months’ rounding. Regular account terms apply to non-promo purchases. New Accounts as of 07/31/2025: Purchase APR is 34.99%. Penalty APR is 39.99%. Min Interest Charge is $2. Existing cardholders: See your credit card agreement terms. Subject to credit approval.
Offer applies only to single-receipt qualifying purchases. No interest will be charged on the promo balance if you pay it off, in full, within the promo period. If you do not, interest will be charged on the promo balance from the purchase date. The required minimum monthly payments may or may not pay off the promo balance before the end of the promo period, depending on purchase amount, promo length and payment allocation. Regular account terms apply to non-promo purchases and, after promo period ends, to the promo balance. New Accounts as of 07/31/2025: Purchase APR is 34.99%. Penalty APR is 39.99%. Min Interest Charge is $2. Existing cardholders: See your credit card agreement terms. Subject to credit approval.
The estimated required monthly payment shown which excludes taxes and delivery equals the amount financed divided by the number of months in the promo period, rounded up to the next cent. During the last month(s) of the promo period the required monthly payment may be reduced due to this rounding. These payments apply only with the financing offer shown. If you make these payments by the due date each month, you should pay off this amount financed within the promo period, if it is the only balance you are paying off. If you have other balances on your account, this payment will be added to any other minimum monthly payments.
Applies only to select items from this manufacturer. Ask your Sweetwater Sales Engineer for more details.