
Akai MPC XL Quickstart Guide

The Akai MPC XL is the perfect centerpiece for your beat-production rig, both onstage and in your studio. This guide will walk you through how to register, set up, and use the MPC XL for the first time. Follow the sections below.
- Register the MPC XL
- Setup & Connections
- Navigate the Hardware
- Akai MPC3 OS Quickstart Guide
- Additional MPC XL Resources
Register the MPC XL
Before you set up, you must register the MPC XL. After registering the unit, you will receive free licenses for the MPC software and plug-ins as well as a three-year extended warranty.
- Log in to your inMusic account. If you don’t have an account yet, then you can create one here.
- On your account home page, click “REGISTER NEW PRODUCT,” enter the serial number located on the unit (excluding the “21”), and complete the registration process.
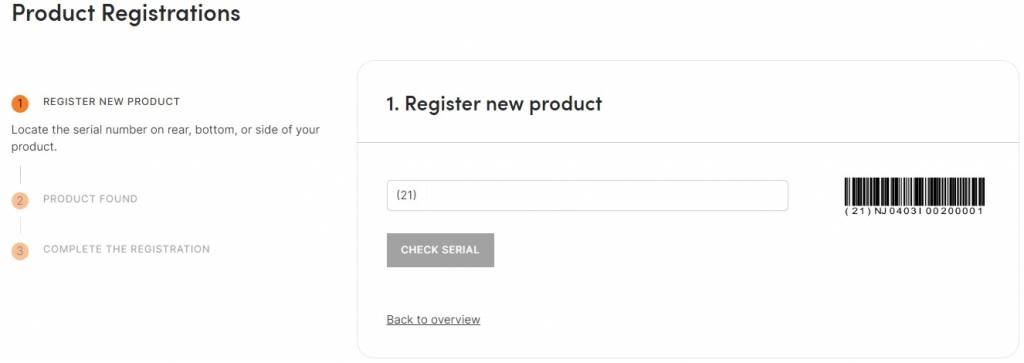
Click the image to register your MPC XL.
Activate MPC Software
The MPC XL comes with free software, including the MPC DAW. This requires iLok License Manager and an iLok account to be activated. If you already have an iLok account, then verify and sign in before proceeding. If this is your first time activating an iLok license, then create a new iLok ID to deposit your licenses.
Check out Akai’s video below to learn how to activate your MPC software. Also, be sure to check out our “iLok Setup Guide” to learn more about iLok!
Akai MPC Software | How to Download, Install, & Activate
MPC XL Firmware Updare
Akai releases firmware updates periodically, which will often add new features and further optimize your MPC XL. Learn how to update the MPC XL firmware in our guide below.
Setup & Connections
The Akai MPC XL offers a wide range of connections to cater to musicians of all genres, making it the perfect centerpiece for both home and live use. It’s your studio on the go!
USB
The MPC XL features four USB connections: one USB-C and three USB-A ports.
- Use the USB-C port to connect to your computer or mobile device for audio sampling.
- Connect the MPC XL directly to the computer (not a USB hub) to ensure connectivity.
- Use the USB-A ports only for connecting class-compliant audio devices, MIDI controllers, and external storage devices.
- You must download and install the latest MPC driver before connecting the MPC XL to your computer for the hardware to work properly.
- Press USB Select to choose and route the track to the desired USB outs. Hold the button to open the window and select outputs.
MIDI
If you have external MIDI hardware, then the MPC XL has you covered. Not only can you use the three USB-A ports, but you can also utilize the 5-pin MIDI jacks located on the back of the unit.
Audio
The MPC XL has four analog inputs and eight analog outputs. This makes it perfect for all musicians!
- Audio inputs 1 and 2, located on the front, are designed for instrument-level TS inputs, such as guitars or basses.
- Audio inputs 3 and 4 are split between the two 1/4-inch TRS jacks and RCA jacks. Only one source can be used at a time.
- When using line-level gear with the 1/4-inch TRS inputs, flip the PHONO/LINE switch to LINE. If you connect a turntable or CD player that uses RCA cables, then switch to PHONO.
- If you use the phono inputs and your external gear has a grounding wire, then ensure that you connect it before powering on the MPC XL. Failing to do so can result in a low-level hum.
- Use the Rear/Front switches on the MPC XL to select which input gain the encoders control: set to Front for inputs 1 and 2, or Rear for inputs 3 and 4.
- When connecting a condenser microphone, ensure it is connected to the MPC XL before turning on phantom power. Turn off phantom power before disconnecting it.
Navigate the Hardware
A great thing about the MPC XL is it’s easy to use. Almost every feature and function is laid out in front of you, so no menu diving is necessary!
Expressive Pads
NOTE: Effects are per layer.
The 16 performance pads are pressure- and velocity-sensitive and are fully customizable, thanks to Akai’s “3D-sensing” technology. You can assign samples or effects to each corner of a pad, unlocking your creativity in no time.
- Add a new track then press the performance pad you want to edit.
- Locate Track Edit then press the second tab on the screen until you reach Tune/Mix. You can then add and layer samples then assign them to specific corners of the performance pad.
Touch Strip Controller
The touch strip on the MPC XL isn’t just for pitch bends and modulation! It’s fully customizable, allowing you to control various parameters with just the slide of your finger.
- Press the Touch FX button to control effects with the touch strip.
- Hold Shift and press Touch FX to select the parameter you wish to add.
- Press Touch Strip to cycle through the touch strip controller modes (Note Repeat, Pitch Bend, etc.)
- Hold Shift and press Touch Strip to edit the touch strip mode configuration.
- Hold Shift, press Touch FX, and then press Touch FX Setup to edit the touch strip parameters.
Step Buttons
The 16 step buttons, located above the performance pads, are multipurpose. To change parameters (e.g., Step Edit, Note Select, Sequences), press the Set/Follow button so the words underneath the buttons flash.
- When the words flash, you can select the pad’s associated function.
- When the words are solid, you can work with the function you selected.
Akai MPC3 OS Quickstart Guide
Now that you’re familiar with the Akai MPC XL hardware, check out our article about how to get up and running with its installed MPC3 OS.
Additional MPC XL Resources
Akai MPC XL Deep Dive | Sweetwater
Akai MPC XL Overview | Akai Professional
Related Articles
When you need help, Sweetwater has the answers!
Our knowledge base contains over 28,000 expertly written tech articles that will give you answers and help you get the most out of your gear. Our pro musicians and gear experts update content daily to keep you informed and on your way. Best of all, it’s totally FREE, and it’s just another reason that you get more at Sweetwater.com.

