
Behringer TD-3: Getting Started
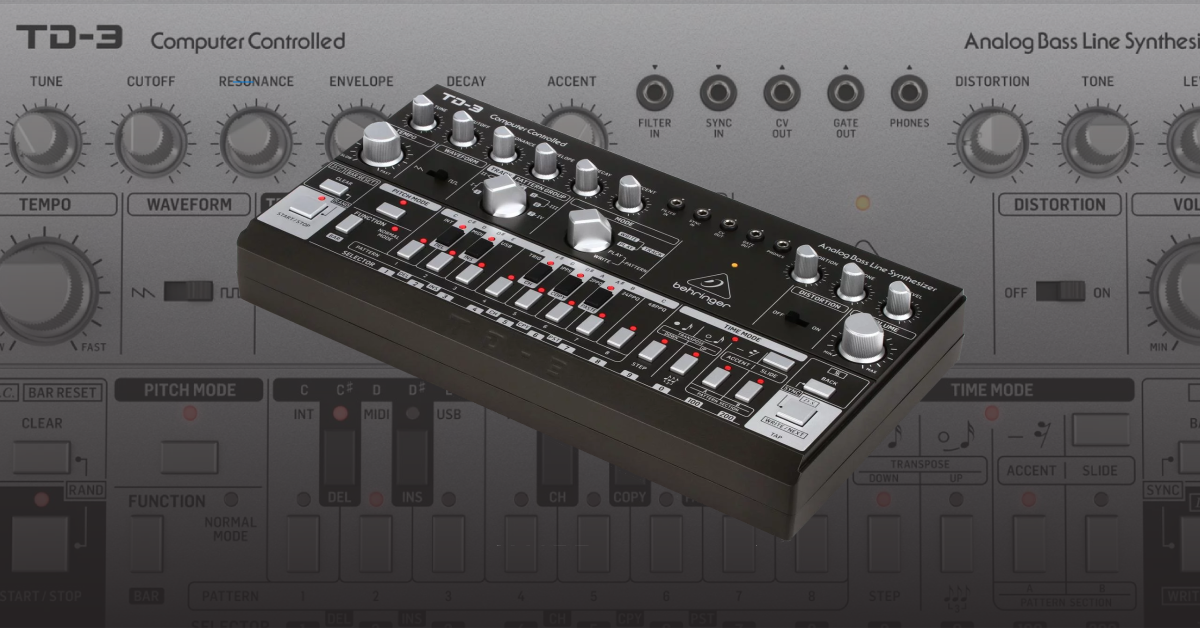
In this guide, we will show you how to get started with the Behringer TD-3. Designed after the Roland TB-303 bass sequencer, the TD-3 is a faithful remake that’s great for creating bass lines and synchronizing with your other synthesizers and MIDI gear. We’ll cover how to set up, connect, and program patterns on your TD-3. Follow the sections below to get started.
- Behringer TD-3 setup and connections
- Programming TD-3 patterns with Behringer Synth Tool
- Programming TD-3 patterns on the Behringer TD-3 hardware
- Create tracks using TD-3 patterns
Behringer TD-3 setup and connections
The TD-3 is a bass synthesizer and sequencer with an unbalanced ¼” TS output jack. It also has MIDI and CV inputs for synchronizing to an external MIDI clock or voltage pulse. Notes can be programmed from the sequencer or played manually by connecting a keyboard controller to the CV OUT and GATE OUT jacks.
- OUTPUT: 1⁄4″ TS audio output; connect to mixer or audio interface.
- MIDI OUT/THRU: 5-pin DIN jack for outputting MIDI OUT data. It also passes through MIDI data received from the MIDI INPUT.
- MIDI IN: 5-pin DIN jack that receives MIDI data from a MIDI keyboard, external hardware sequencer, or a computer with a MIDI interface.
- USB PORT: Connect to a computer to transmit/receive MIDI in and out.
Let the Behringer TD-3 warm up!
While it’s exciting to start using your TD-3 right out of the box, the audio components are all analog, which means they’re sensitive to their environment and need to warm up to operating temperature before use. Fifteen minutes should be enough, but more time may be necessary for the temperature to stabilize. If the synthesizer does not sound correct after starting up, try calibrating the oscillator.
External hardware
There are a few ways you can incorporate your Behringer TD-3 into your synth setup. Using the 3.5 mm TS patch points, and also using the MIDI CV connections.
3.5mm TS patch points
IMPORTANT! Do not overload the 3.5 mm inputs. They can only accept the correct level of voltages, as shown in the specification tables. The 3.5 mm outputs should only be connected to inputs capable of receiving the output voltages. Failure to follow these instructions may damage the TD-3 or external units. If you’re not sure about the voltage on your external controller, check out its owner’s manual for detailed ratings.
Connect other synthesizer devices to the patchbay to control the filter (FILTER IN), tempo (SYNC IN), and pitch (CV OUT and GATE OUT). Each jack accepts a 3.5 mm TS patch cable, and their exact voltage requirements are shown below.
- FILTER IN: (+12 dBu) connect an external audio signal instead of the TD-3’s VCO oscillator.
- SYNC IN: (greater than 2.5 V) connect an external clock and start/stop signal. See MIDI and CV Synchronization.
- CV OUT: (+1 V – +5 V) connects to a keyboard controller’s CV IN, 1 V per octave.
- GATE OUT: (off= 0 V, on= +12 V) connect to a keyboard controller’s GATE IN.
- PHONES: 3.5 MM TRS headphone jack.
MIDI and CV synchronization
Your TD-3 can be synchronized to an external device’s tempo via MIDI or CV. You need to configure both devices to listen to a single clock source. An external drum machine would be the master clock (set to internal), and the TD-3 is set to the connection type receiving the clock signal (MIDI, CV, or USB). The TD-3’s settings can be adjusted manually or with the Behringer SynthTool application.
Change clock source or rate
Set the TD-3’s clock source to its connection type. Select INT when NOT syncing to an external clock, otherwise, the TD-3’s sequencer won’t play.
- Connect a SYNC OUT or MIDI OUT from another device to the TD-3’s corresponding SYNC IN or MIDI IN.
- Manually adjust the clock source and rate by pressing the BACK and WRITE/NEXT buttons at the same time:
- Clock Source: Press Selector 1 (INT/TD-3), 2 (MIDI/DIN), 3 (USB/COMPUTER), or 4 (TRIG/SYNC IN).
- Clock Rate: Press Selector 5 (1PPs), 6 (2PPQ), 7 (24PPQ), or 8 (48PPQ).
- The tempo will not match unless all interconnected devices are set to the same PPQ Rate. 24 or 48 PPQ (Pulses per quarter) are recommended.
- Hit play on the master clock device (clock source). The TD-3 will follow the Play command and tempo. The TEMPO knob will not work, and you can use the pattern and Pattern buttons to create an arrangement.
Connecting Behringer TD-3 to a computer
The TD-3 is a USB Class Compliant MIDI device, and no driver installation is required. Connect it, and the TD-3 will be recognized right away, you need to select its MIDI IN or OUT ports in your audio software.
- Connect the TD-3 to your computer via USB.
- Use a DAW to record MIDI data from the TD-3 or send MIDI data to it and record the audio output.
- Use the MIDIOX (PC) or MIDI Monitor (Mac) utilities to verify and troubleshoot your MIDI connections.
Programming TD-3 patterns with the Behringer SynthTool
The Behringer SynthTool app is a software utility for creating synth patterns and configuring the TD-3’s settings, so if you don’t want to create your patterns on the hardware itself, you can use the Behringer SynthTool. This is particularly useful to see the pitch length and whether or not a specific pitch has an accent or slide. You can create up to 250 user patterns, but only 16 can be used at a time: 8 on Pattern Section A and 8 on Pattern Section B.
- Download and install the latest version of the Behringer SynthTool for your OS.
- Connect the TD-3, launch the Synth Tool app, then click Sequencer to pull up the piano roll.
- Use the dropdown boxes on the top of the window to select the pattern group, pattern number, and pattern group to assign the pattern to your TD-3.
- Change the length of the pattern using the SEQ Length box.
- Click the notes on the piano roll to enter notes.
- Change the length of the note by double-clicking it.
- Right-click a note to apply a slide or accent.
- Once complete, click Store. The pattern will then be sent to your TD-3.
Sending patterns to the Behringer SynthTool
If you want to edit any patterns stored on the Behringer TD-3 using the Behringer Synth Tool app, select the Pattern group, Pattern section, and Pattern where the pattern is stored, then click Recall.
Sequencer-Editor & Secret Settings on your Synth
Programming patterns on the Behringer TD-3
There are two components to a pattern: the rhythm and changing the pitch’s attributes (accent, transposition, etc.). You can create up to 250 user patterns, but only 16 can be used at a time: 8 on Pattern Section A and 8 on Pattern Section B.
Enter the pattern rhythm
- Use the Mode knob and select Write.
- Press the pattern group (A or B) and select the pattern number (1-8) you want your pattern to reside.
- Hold function + press step to select the number of steps you want the pattern to be (i.e., hold the function button, then press the step button four times to create a four-step pattern).
- You can have up to 16 steps per pattern.
- Press Pitch to enter pitch mode.
- Use the silver and black keys to enter the pitch.
- Press the time mode button, then use the transpose up to enter 16th notes, and transpose down to enter triplets to enter the rhythm.
- It will automatically exit time mode once the amount of steps has been reached (i.e., after entering the fourth step, you will automatically exit time mode)
- All rhythms are based on 16th notes.
Edit pattern pitches
If you need to change a pitch in your pattern, you will need to go into pitch mode and go through each step manually.
- Press PITCH MODE to return to the start of the pattern.
- Press WRITE/NEXT to play the notes one at a time.
- Press BACK to go back to the last note played.
- Enter the new note.
- Hold either TRANSPOSE button and then press the note.
- Press WRITE/NEXT until all notes have been played.
- Press FUNCTION to exit.
Change the pitch attributes
- Press the Pitch mode button.,
- Press the press Write/Next to go through the steps.
- Press and hold the Write/Next button, and press the silver Transpose, Accent, and Slide to apply the parameter to the selected step.
- Once you’re finished, turn the Mode knob to Pattern Play.
Pattern tips
- Press Start/stop and Clear at the same time to create a random pattern.
- While a pattern is playing, press the Clear button to turn on the metronome. Once the metronome begins playing, you can just tap your rhythm in.
Create tracks using patterns
Once you’ve created your patterns, you can then assign them to tracks. There are a total of seven tracks you can create.
- Use the Track Pattern group knob to select the track your pattern(s) will be played. There are seven tracks to choose from.
- Turn the mode wheel up to Track Write, then press Bar Reset.
- Press start and select the first pattern you want in your track.
- Press the next pattern you want on your track, then press Write/Next.
- Once you’re finished creating your track, press Clear, Write/Next, then Start/Stop.
- Turn the Mode knob to Track Play to hear the arrangement.
Backing Up Your Synth Patches
Adjusting Velocity to Filter Cutoff
Related Articles
When you need help, Sweetwater has the answers!
Our knowledge base contains over 28,000 expertly written tech articles that will give you answers and help you get the most out of your gear. Our pro musicians and gear experts update content daily to keep you informed and on your way. Best of all, it’s totally FREE, and it’s just another reason that you get more at Sweetwater.com.


Offer applies only to single-receipt qualifying purchases. Select manufacturers may require that only the manufacturer’s products qualify towards the minimum purchase amount needed to be eligible for promotional financing. Otherwise, an invoice that meets the minimum purchase amount and contains at least one qualifying manufacturer product is eligible for promotional financing. No interest will be charged on promo purchase balance, and equal monthly payments are required on promo purchase until it is paid in full. The payments equal the amount financed divided by the number of months in the promo period, rounded up to the next whole dollar. These payments may be higher than the payments that would be required if this purchase was a non-promo purchase. During the last month(s) of the promo period the required monthly payment may be reduced due to the prior months’ rounding. Regular account terms apply to non-promo purchases. New Accounts as of 07/31/2025: Purchase APR is 34.99%. Penalty APR is 39.99%. Min Interest Charge is $2. Existing cardholders: See your credit card agreement terms. Subject to credit approval.
Offer applies only to single-receipt qualifying purchases. No interest will be charged on the promo balance if you pay it off, in full, within the promo period. If you do not, interest will be charged on the promo balance from the purchase date. The required minimum monthly payments may or may not pay off the promo balance before the end of the promo period, depending on purchase amount, promo length and payment allocation. Regular account terms apply to non-promo purchases and, after promo period ends, to the promo balance. New Accounts as of 07/31/2025: Purchase APR is 34.99%. Penalty APR is 39.99%. Min Interest Charge is $2. Existing cardholders: See your credit card agreement terms. Subject to credit approval.
The estimated required monthly payment shown which excludes taxes and delivery equals the amount financed divided by the number of months in the promo period, rounded up to the next cent. During the last month(s) of the promo period the required monthly payment may be reduced due to this rounding. These payments apply only with the financing offer shown. If you make these payments by the due date each month, you should pay off this amount financed within the promo period, if it is the only balance you are paying off. If you have other balances on your account, this payment will be added to any other minimum monthly payments.
Applies only to select items from this manufacturer. Ask your Sweetwater Sales Engineer for more details.