
What Is MIDI Clock?
MIDI clock, or MIDI beat clock, is a signal that is sent over MIDI that allows the user to sync several devices together so they stay in synchronization. In simpler terms, it’s a way to set two or more MIDI devices to one tempo. This can be done with devices like MIDI controllers, drum machines, synthesizers, software/apps, or sequencers (a.k.a. DAWs). MIDI clock runs at a rate of 24 ppqn (pulses per quarter note). This means that the actual speed of the MIDI clock varies with the tempo of the clock generator (as contrasted with SMPTE time code, which runs at a constant rate).
Syncing a device to a DAW via clock is achieved basically the same way, across the board, but various combinations of DAWs and devices will inevitably have slight differences in procedure. In the following step-by-step process, the goal is to get a DAW to send clock via its MIDI output and for a MIDI device to receive that clock. For example, a synthesizer with an arpeggiator would have its arpeggiator rate or tempo synced with the DAW project tempo.
Here are the basic steps for syncing a device to a DAW via MIDI clock:
-
- Connect your MIDI device via MIDI cable or USB. If you use USB, make sure your device can send/receive MIDI data over USB, a.k.a. MIDI over USB.
- Be aware that you may need to install a USB driver from the manufacturer’s website to allow your DAW to recognize your MIDI instrument.
- Find your DAW’s MIDI setting in the preferences or settings menu.
- Set the DAW’s output settings to send the clock to your MIDI instrument. In Ableton, for example, you do this by finding the output port for your instrument in the MIDI Ports list and switching Sync to On.

-
- Next, set your MIDI device to receive MIDI clock. Be sure to check your device’s manual or tutorial videos for specific instructions on how to navigate the clock settings.
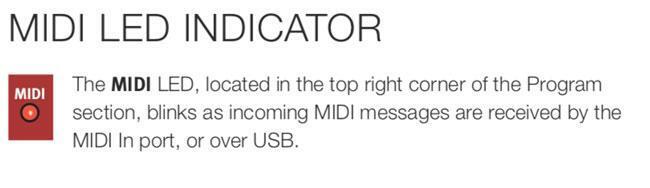
- Many MIDI devices and DAWs have some type of indicator that shows clock is being sent and/or received. On the Nord Electro 6D 61, for example, there is an LED indicator simply called MIDI.
- Now when you start playback in your DAW, your device should start simultaneously and be synced to your DAW’s clock.
You can also sync your DAW to another device. In this case, your device sends the clock and your DAW receives that clock. For instance, if you have a MIDI controller with master clock/tempo, every change you make to your keyboard’s clock setting will also change in your DAW. In this case, the setup is similar to the previous step-by-step process, but the clock is sent the opposite way.
It is also worth noting that many devices and DAWs can both send and receive MIDI simultaneously. For example, this could be useful if you wanted to receive MIDI clock from your DAW to your digital piano while sending MIDI back to your DAW to record your performance. In other words, the DAW is sending clock and receiving MIDI note data, while the keyboard is receiving clock and sending MIDI note data.
Syncing Multiple Devices
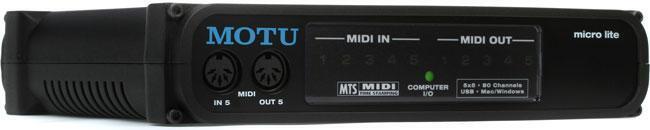
What if you want to sync multiple devices to a DAW? The best way is to use a MIDI interface with enough I/O to handle all your devices, USB connectivity, and the speed to provide extremely low latency. An interface also gives you the ability to change your signal path without switching cables, as you would have to do with daisy chaining. For instance, if you have a hardware synth, drum machine, and MIDI controller all synced with your DAW, you could easily arrange your synth to send clock to your DAW and other devices, or the DAW to send clock to all three devices, or any configuration that works best for you. If you’re looking to configure your own MIDI setup for live shows or your home studio, you’ll need a great MIDI interface. The MOTU micro lite USB MIDI interface is an excellent option with five MIDI In and five MIDI Out ports, 80 MIDI channels, USB connectivity, USB bus power, and Mac/Windows compatibility. So now that you have MIDI clock being transmitted from your DAW or keyboard, what else can you do with it besides locking sequencer timings? Well, you can synchronize arpeggiators, LFOs, envelopes, and effect parameters to magically create complex rhythms and sonic animations in ways that would be quite difficult without MIDI clock.
An arpeggiator can either run at a tempo chosen directly from the keyboard’s or module’s clock or it can be synchronized to an external MIDI clock via MIDI or USB. (And some can synchronize to an external analog clock signal as well.) When the arpeggiator is not running from its own internal clock, the rate or tempo knob usually switches to units of the beat, such as 1/16, 1/8, 1/8 triplet, 1/4 note, etc. This allows you to lock to the external MIDI clock with the freedom of not needing the arpeggiator to always play quarter notes.
The same goes for LFOs and envelopes. They both can be free running, but if you set them to BPM instead of Hz, you can have LFOs and envelopes that each can repeat based on chosen units of the master clock. Some can go as fast as 1/64 notes and as slow as four measures per LFO or envelope cycle. Multiple LFOs and envelopes that are affecting filters, amps, panning, etc., with each having different units of the beat, will create satisfying complex rhythmic patterns that move around the stereo field.
Now add clock-sync’d effects! Imagine having choruses, flangers, phase shifters, and tremolos all adding even more interesting complexity that will always be in sync, regardless of where you set the MIDI clock’s tempo.
But the single-most interesting effect to lock to MIDI clock is the delay. Whether you use a simple delay, a left/right delay, or a stereo ping-pong delay (my all-time favorite!), you will discover so many interesting variations as you set the delay time to BPM and then experiment with all the various units of the beat.
Obviously, you probably shouldn’t use all of these tricks all the time, as that particular type of complexity will quickly become old if overused. But careful and tasteful uses of MIDI synchronization will elevate all types of music to new levels of beauty. Have fun!