
Arturia PolyBrute Quickstart Guide

NOTE: This guide is for the original Arturia PolyBrute. If you have the Arturia PolyBrute 12, released in 2024, our SweetCare guide is at this link.
The Arturia PolyBrute is a very complex and powerful synth that is a perfect fit for your studio and live rigs. The number of features available is nearly endless, so that’s why in this guide, we’ll go over the basics of the PolyBrute to get you up and running. For a deep dive, be sure to check out its user manual, as well! Here’s how to get started.
Register the PolyBrute
You must register the PolyBrute with Arturia before plugging it in and turning it on. Once registered, you’ll gain access to its firmware as well as to PolyBrute Connect, which is the software you’ll use to control and manage the PolyBrute on your computer — in your DAW and also in standalone mode. You’ll also update your PolyBrute firmware using Connect.
- Log in to your Arturia account. If you don’t have an account yet, create one here.
- Click Register New Product, enter the PolyBrute’s serial number and the unlock code, then click Register.
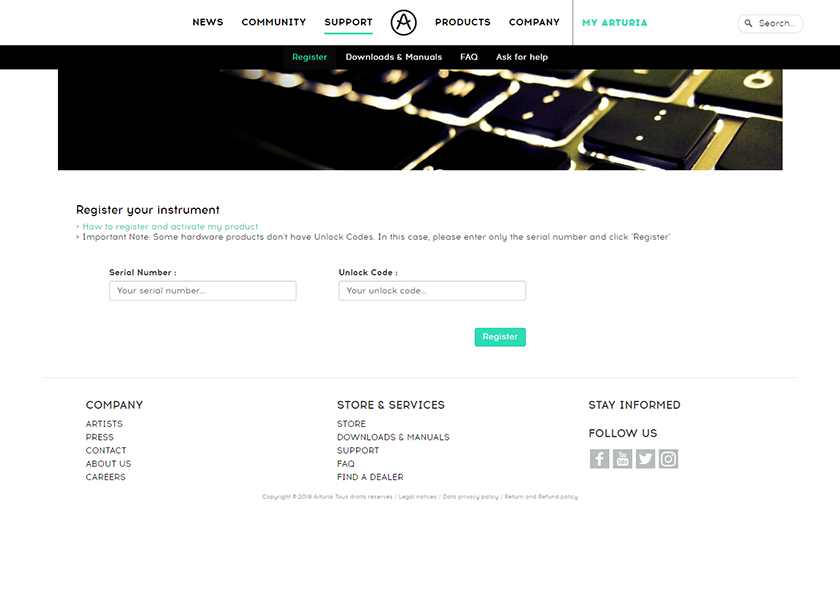
Click the image to register your PolyBrute
Download and install PolyBrute Connect
Please note that PolyBrute Connect is only available for registered Arturia PolyBrute users.
Next, you’ll need to download and install Arturia Software Center and PolyBrute Connect. You can access the PolyBrute Connect download from Arturia’s website, but we recommend using Arturia Software Center, as you’ll receive automatic updates for your software and/or firmware.
- Go to Arturia’s Download page and download the latest Arturia Software Center (ASC) version for your OS.
- Navigate to your Downloadsfolder, launch the installer, and follow the on-screen instructions.
- Launch ASC and enter your Arturia account credentials.
- Locate the PolyBrute Connect download, then click Install to complete the process.
Update the firmware
It’s great practice to update the firmware on your PolyBrute from time to time, particularly when you first take it out of the box. Firmware updates often add new features, update the internal software for compatibility, and address any bugs that may have been present in the current build. It’s also a great step when troubleshooting any issues you might have. Be sure to check out Arturia’s firmware update FAQ page for more information.
- Navigate to the top right of the PolyBrute Connect page and click Upgrade to Latest.
- Once the update is complete, it will automatically reboot.
If your computer doesn’t have an internet connection
If, by any chance, your computer isn’t connected to the internet, then you’ll need to update it manually.
- Connect an external storage device, such as a USB thumb drive, to a computer with an internet connection.
- Navigate to the PolyBrute Resources page, scroll all the way down, and download the latest firmware file. Transfer the downloaded firmware file to the external storage device.
- Connect the external storage device to the computer without an internet connection, launch PolyBrute Connect, then click Update FW, located at the bottom right-hand corner of the window.
- Select the firmware file from your external storage device, then click Open to begin the firmware update process.
What is PolyBrute Connect?
PolyBrute Connect is software that allows you to save and manage presets, update your firmware, adjust parameters, and much more! Any changes you make within the software will also be applied to your PolyBrute (and vice versa).
Check out these tutorial videos from Arturia to learn more about how to work with PolyBrute Connect!
Tutorials | PolyBrute Connect – Tutorial Episode 1: Get Started
Tutorials | PolyBrute Connect – Episode 2: DAW Workflow
Tutorials | PolyBrute Connect – Tutorial Episode 3: Morphing Visualized
Tutorials | PolyBrute Connect – Episode 4: Sounds Management
Create a patch
The PolyBrute is just like other polyphonic synths but has some very unique features that will affect how you create music. Unlike other polyphonic synths, you can create two separate parts (Part A and Part B) and morph them together in plenty of different ways. Let’s make things simple for now and create an initialized preset with one patch (Part A).
TIP: The signal flow of a preset is typically left (VCO) to right (Effects) unless otherwise routed within the matrix.
Before we begin creating a patch
The Arturia PolyBrute is a true analog synthesizer, which means the internal components need time to warm up to operating temperature. This typically takes 5–10 minutes, depending on the ambient temperature. A great feature is the option to either warm up specific sections of the PolyBrute or warm up the entire synth itself. For instructions on how to do this, check out page 10 of the PolyBrute user manual.
- Turn on the PolyBrute and wait a few minutes for it to warm up.
- Press and hold the LEFT arrow Panel button, then press the PRESETS button.
- Alternatively, go to Settings, navigate to Preset Info, then select Init with the Assign 1 button.
- Adjust the knobs and faders to your liking, starting from VCO 1 and moving right, ending at the Effects section.
Once you’re finished, name your preset and save it. You can name and save it in multiple ways, so check out Section 6.5 in the PolyBrute user manual for detailed instructions on saving and managing initialized presets.
Tutorials | PolyBrute – Episode 1: Voice Architecture
Tutorials | PolyBrute – Episode 2: Modulation
How to morph Parts
One of the many things that sets the PolyBrute apart from the rest is that you can “morph” two parts, Part A and Part B, together. Morphing allows you to blend two Parts in an almost endless number of ways to give a sense of never-ending motion and uniqueness to your sound! There are plenty of ways to morph, too, so follow these steps to get started with morphing. For a deep dive on how to morph on your PolyBrute, check out Arturia’s tutorial video below.
- Load the patch you created from the section above.
- Turn the MORPH knob all the way to B, and adjust all of the sounds and faders to your liking for an alternate sound for Part B.
- After you’ve created a sound for Part B, turn the MORPH knob to the desired position between A and B, and save the patch.
Tutorials | PolyBrute – Episode 3: Morphing
Related content
Synth Clips with Daniel Fisher (Playlist)
Additional resources
Arturia PolyBrute User Manual
Arturia PolyBrute Connect User Manual
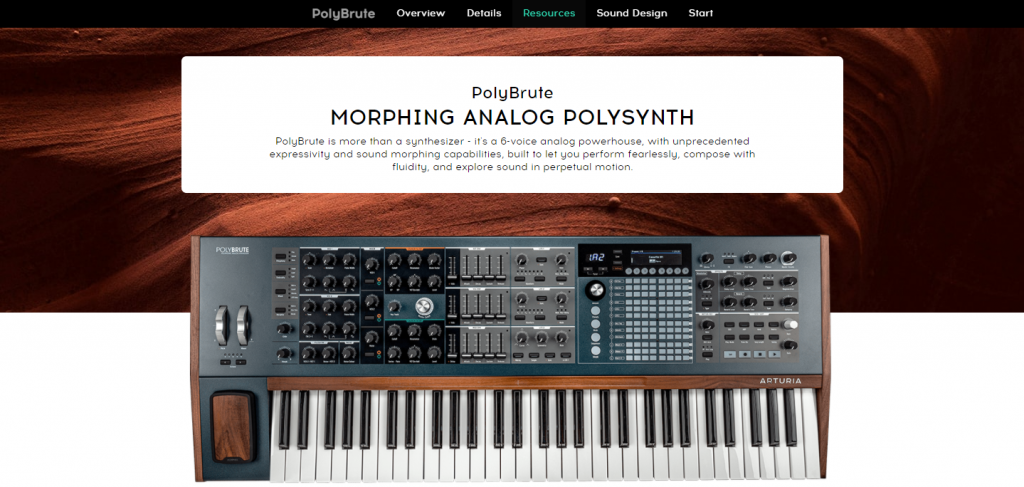
Arturia PolyBrute Resource Page
Related Articles
When you need help, Sweetwater has the answers!
Our knowledge base contains over 28,000 expertly written tech articles that will give you answers and help you get the most out of your gear. Our pro musicians and gear experts update content daily to keep you informed and on your way. Best of all, it’s totally FREE, and it’s just another reason that you get more at Sweetwater.com.


Offer applies only to single-receipt qualifying purchases. Select manufacturers may require that only the manufacturer’s products qualify towards the minimum purchase amount needed to be eligible for promotional financing. Otherwise, an invoice that meets the minimum purchase amount and contains at least one qualifying manufacturer product is eligible for promotional financing. No interest will be charged on promo purchase balance, and equal monthly payments are required on promo purchase until it is paid in full. The payments equal the amount financed divided by the number of months in the promo period, rounded up to the next whole dollar. These payments may be higher than the payments that would be required if this purchase was a non-promo purchase. During the last month(s) of the promo period the required monthly payment may be reduced due to the prior months’ rounding. Regular account terms apply to non-promo purchases. New Accounts as of 07/31/2025: Purchase APR is 34.99%. Penalty APR is 39.99%. Min Interest Charge is $2. Existing cardholders: See your credit card agreement terms. Subject to credit approval.
Offer applies only to single-receipt qualifying purchases. No interest will be charged on the promo balance if you pay it off, in full, within the promo period. If you do not, interest will be charged on the promo balance from the purchase date. The required minimum monthly payments may or may not pay off the promo balance before the end of the promo period, depending on purchase amount, promo length and payment allocation. Regular account terms apply to non-promo purchases and, after promo period ends, to the promo balance. New Accounts as of 07/31/2025: Purchase APR is 34.99%. Penalty APR is 39.99%. Min Interest Charge is $2. Existing cardholders: See your credit card agreement terms. Subject to credit approval.
The estimated required monthly payment shown which excludes taxes and delivery equals the amount financed divided by the number of months in the promo period, rounded up to the next cent. During the last month(s) of the promo period the required monthly payment may be reduced due to this rounding. These payments apply only with the financing offer shown. If you make these payments by the due date each month, you should pay off this amount financed within the promo period, if it is the only balance you are paying off. If you have other balances on your account, this payment will be added to any other minimum monthly payments.
Applies only to select items from this manufacturer. Ask your Sweetwater Sales Engineer for more details.