
TC-Helicon Harmony Amplifier Setup Guide
In this guide, we will show you how to register, set up, and connect a TC-Helicon Harmony guitar amp. Follow the sections below to get started.
Register the amp
IMPORTANT: By default, TC-Helicon gives you a 1-year warranty. However, if you register your item on the website within 90 days of purchase, TC-Helicon gives you a 3-year warranty. It’s free.
TIP: Everything you purchase from Sweetwater comes with our 2-year Total Confidence Coverage (TCC) warranty. However, three years for your TC-Helicon product is even better than two, so please register with TC-Helicon today.
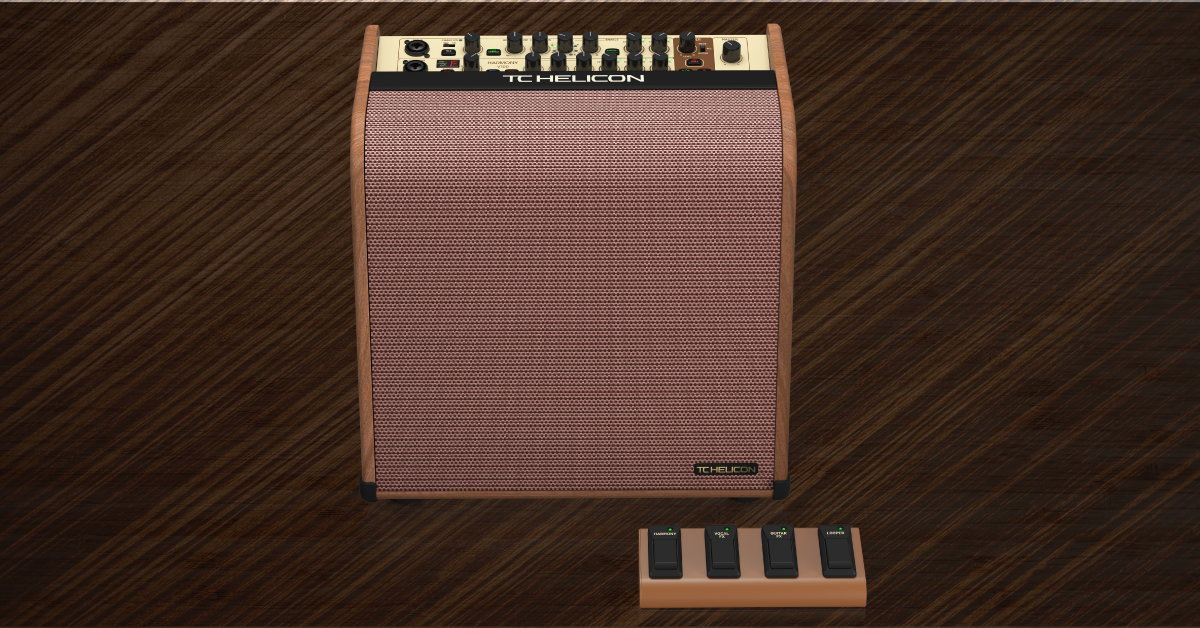
Setup and connections
The Harmony guitar amp is an excellent piece of gear for your studio and live arsenals. What’s better is that it’s simple to set up and connect. While it shares connections similar to your typical amplifier, let’s cover the unique settings that set the Harmony apart from the rest.
Microphone
The top input channel of the Harmony is for microphones.
- When using a condenser microphone, connect it before turning on Phantom Power. Once finished, turn off Phantom Power before disconnecting the microphone.
- Press the Talk button to bypass all effects. This is particularly useful when you don’t want effects like reverb or echo while talking to a crowd.
- The Adaptive Tone knob will add compression, de-essing, gate, and EQ to your vocals. The more you turn it up, the more prominent the processing will be.
- The Correction knob will analyze and adjust pitch chromatically. Like the Adaptive Tone knob, it will be more prominent the more you turn it up.
- Use the Harmony, Reverb, and Echo knobs to switch through different presets for their respective effect.
Guitar
The bottom input of the Harmony amp is for guitars and instruments.
- The BodyRez switch will affect the tone of guitars that use piezo pickups.
- Turning the Chorus, Reverb, and Echo knobs will switch through different presets of their respective effect.
Master
- Use the DI/FX/Mix switch to change between unprocessed, fully processed, or mixed signal of the guitar output. The microphone output will not be affected.
- Use the Mic/Left output when connecting a microphone to an external speaker or PA system. Use the Guitar/Right output when connecting a guitar or other instrument.
- The Top Tweeter button will enable the internal tweeter, which is located inside the top of the amp.
- When connecting to the 5-pin MIDI jack, only use the included footswitch. Third-party footswitches will not function properly.
- Use the USB port to connect your Harmony amplifier to a computer for recording.
- If you’re connecting your amp to a Windows PC, you must download and install the USB driver. Look up your product on the Products page on the TC Electronic website. Go to your product page, and click Downloads. Download the Harmony V100 driver, and run the installer.
Harmony V60/V100 Amps Quickstart Manual
Programming the footswitch
Programming the footswitch on the Harmony guitar amp is straightforward. Out of the box, the footswitch controls the looper function and the harmony, vocal, and guitar effects. However, you can customize the mapping to suit your personal needs.
You can control a group of parameters with the footswitch, as well. All you need to do is press and hold the switch of your choice, then turn the knob (or press the button) of the function you wish to assign it to. To do so, press the footswitch, then turn each control you’d like to engage and disengage.
- If you assign a footswitch to the Harmony function, it will enable and disable the voicing that is currently selected.
- If the Echo effect is assigned to a footswitch, hold down the footswitch and use the Tap Tempo button to adjust the tempo of the echo.
Footswitchable controls
The following parameters can be assigned to the footswitch. Please take note of what parameter (or group of parameters) is stored, as they can be assigned to any of the switches.
Microphone
- Talk on/off
- Harmony on/off at the current setting
- Reverb on/off
- Echo on/off
Guitar
- Mute on/off
- Chorus on/off
- Reverb on/off
- Echo on/off
- Harmony on/off at the current setting
Looper
- Tap Tempo
- Play/record
- Stop
Related Articles
When you need help, Sweetwater has the answers!
Our knowledge base contains over 28,000 expertly written tech articles that will give you answers and help you get the most out of your gear. Our pro musicians and gear experts update content daily to keep you informed and on your way. Best of all, it’s totally FREE, and it’s just another reason that you get more at Sweetwater.com.


Offer applies only to single-receipt qualifying purchases. Select manufacturers may require that only the manufacturer’s products qualify towards the minimum purchase amount needed to be eligible for promotional financing. Otherwise, an invoice that meets the minimum purchase amount and contains at least one qualifying manufacturer product is eligible for promotional financing. No interest will be charged on promo purchase balance, and equal monthly payments are required on promo purchase until it is paid in full. The payments equal the amount financed divided by the number of months in the promo period, rounded up to the next whole dollar. These payments may be higher than the payments that would be required if this purchase was a non-promo purchase. During the last month(s) of the promo period the required monthly payment may be reduced due to the prior months’ rounding. Regular account terms apply to non-promo purchases. New Accounts as of 07/31/2025: Purchase APR is 34.99%. Penalty APR is 39.99%. Min Interest Charge is $2. Existing cardholders: See your credit card agreement terms. Subject to credit approval.
Offer applies only to single-receipt qualifying purchases. No interest will be charged on the promo balance if you pay it off, in full, within the promo period. If you do not, interest will be charged on the promo balance from the purchase date. The required minimum monthly payments may or may not pay off the promo balance before the end of the promo period, depending on purchase amount, promo length and payment allocation. Regular account terms apply to non-promo purchases and, after promo period ends, to the promo balance. New Accounts as of 07/31/2025: Purchase APR is 34.99%. Penalty APR is 39.99%. Min Interest Charge is $2. Existing cardholders: See your credit card agreement terms. Subject to credit approval.
The estimated required monthly payment shown which excludes taxes and delivery equals the amount financed divided by the number of months in the promo period, rounded up to the next cent. During the last month(s) of the promo period the required monthly payment may be reduced due to this rounding. These payments apply only with the financing offer shown. If you make these payments by the due date each month, you should pay off this amount financed within the promo period, if it is the only balance you are paying off. If you have other balances on your account, this payment will be added to any other minimum monthly payments.
Applies only to select items from this manufacturer. Ask your Sweetwater Sales Engineer for more details.