
BOSS Katana Gen 3: Setup Guide
Note: This article is about the Katana Gen 3 line of products released in 2024. If you have an original BOSS Katana or a Katana Mk II, see our BOSS Katana Setup Guide.
Congrats on your new BOSS Katana Gen 3. You’re eager to plug in a guitar and rock out, and we are here to help you get set up. We’ll go over its front panel features and its connections. We’ll refer you to another Sweetwater guide on how to use the BOSS Tone Studio for Katana Gen 3 apps for your computer and your mobile device to access a huge range of effects and features that you can’t reach from the front panel. And there’s more, so let’s get started.
- Register with BOSS and Download the Manuals
- Setup and Connections
- Boss Tone Studio for Katana Gen 3 App
Register with BOSS and Download the Manuals
Register Your Purchase
Before we get everything set up, the first thing you’ll need to do is register your Katana amplifier with BOSS. You’ll get access to BOSS product support, an extended warranty, training videos, and more.
- Log in to your Roland Backstage account. If you don’t have one yet, you can create one here.
- On your account home page, click My Gear, then select Register a Product.
- Fill out the required information, including the serial number that is located on the back of the Katana, and click Register. Keep your Sweetwater invoice handy, as you will need to enter the purchase date, method, and dealer (Sweetwater).
Download the Manuals
With the Katana, it’s easy to plug in a guitar and start playing. But the Katana has a great deal of features, and tons of effects, that you can’t access from the control panel. While you are on the BOSS website, download the owner’s manuals and guides. You’ll need them for reference. Look for these:
- Katana 3 Startup Guide
- Katana 3 Reference Manual
- Using BOSS Tone Studio for Katana Gen 3 (for PC)
- Using BOSS Tone Studio for Katana Gen 3 (for mobile)
- Connecting the BOSS Tone Studio for Katana Gen 3 iOS App to the Katana Unit
- Connecting the BOSS Tone Studio for Katana Gen 3 Android App to the Katana Unit
Setup and Connections
The Katana Gen 3 family contains many models, and not all of them have the same features on the control panel. These diagrams are of the Katana Artist Gen 3 1 x 12-inch 100-watt combo.
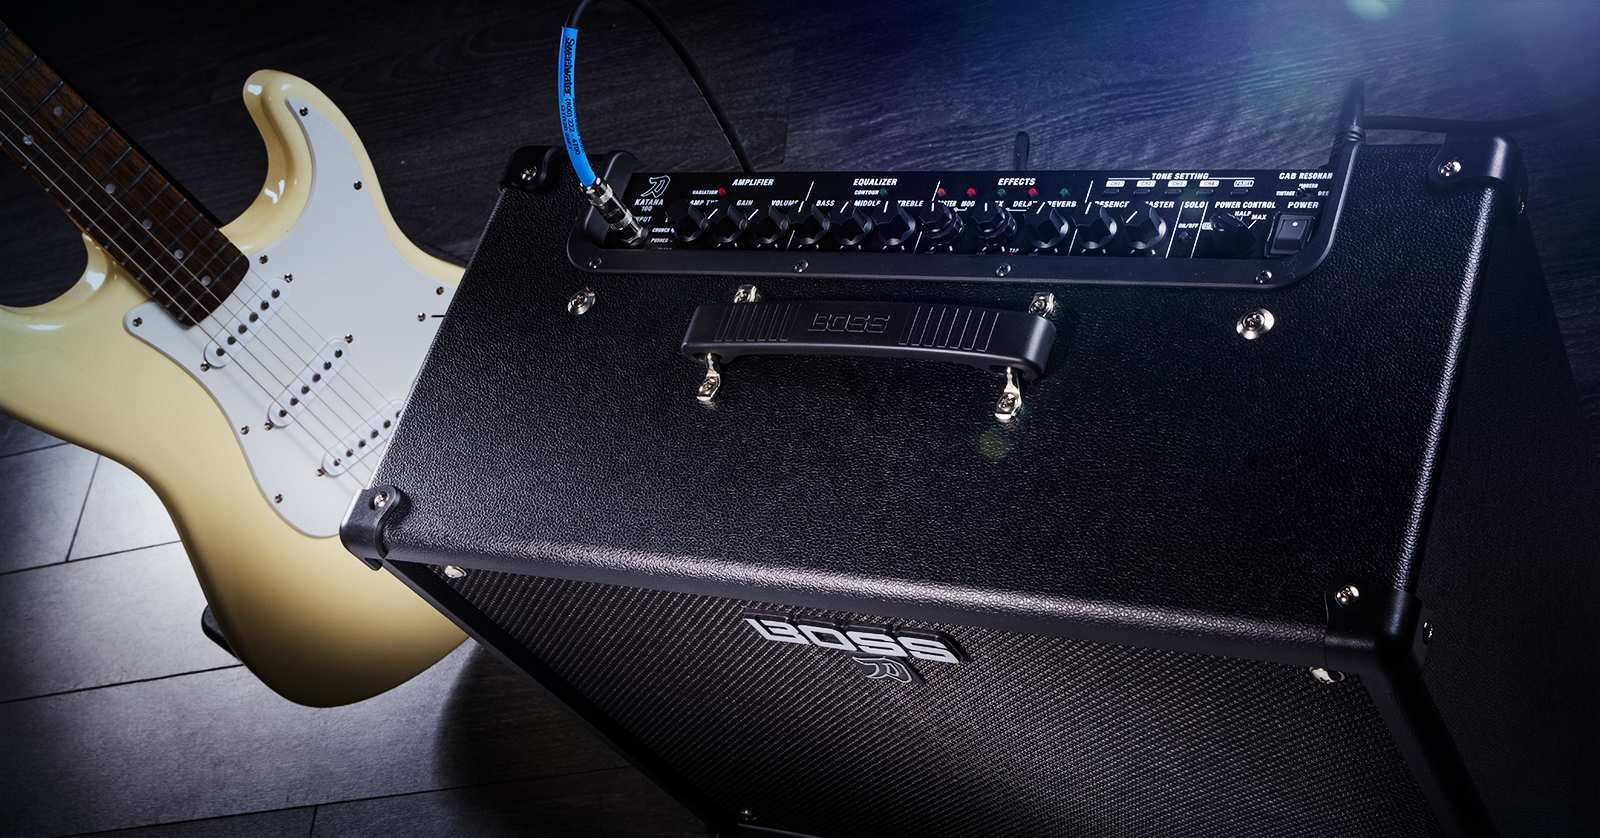
Front Panel
Turn the Master knob all the way down before you connect your guitar or your headphones.

BOSS Katana Gen 3 front panel
Input
Plug in your guitar here.
Tone Setting
Use these buttons to recall presets. A preset is an amp model, several effects both before and after the amp model, settings for speaker cab and microphone modeling, settings for the functions of external footswitches and expression pedals (sold separately), and more.
The Katana Gen 3 50 and 50 EX give you two banks, A and B, of two presets each. The other Katana models give you two banks of four presets each.
Each preset calls up sounds set to specific parameters without respect to the actual position of the knobs on your Katana. You can further modify settings by turning knobs.
The Panel button switches modes so that all the parameters are set to the actual position of each knob.
Amplifier
Select from six preamplifier models. The Variation button gives you a different sound for each model. Gain adjusts preamplifier level, introducing distortion. Volume is for the amp model. (To the right, there is another Master volume knob for the entire signal chain.)
Equalizer
Adjust the Bass, Middle, and Treble controls. The Contour button gives you three alternate midrange settings, with LEDs that light green, red, and orange and turn off.
Resonance
Changes the definition of the low-frequency range on the amp model.
Presence
Adjusts the mid- to high-frequency range on the amp model to improve the definition of the sound.
Solo
Provides controls for a preset solo boost, which you can engage by pressing the Solo button or using an external footswitch (sold separately).
Power Control
Set the Katana’s power amplifier to standby, 0.5 watts, half the rated output, or the full output.
Cab Resonance
Three settings model the resonance of different speaker cabinets.
Line Out
Switch between different settings to model virtual microphones on the virtual speaker when you send a line-out signal to a PA system or an audio interface.
On the Katana Gen 3 50 and 50 EX, you can access the Line Out parameters using the app.
Effects
Each preset stored in the Katana has effects assigned in the categories Booster, Mod, FX, Delay, and Reverb. Adjust the intensity of each effect with its knob. The buttons are also LEDs. Pressing them toggles between three different effects in each category, lighting up in green, red, and orange. Learn more in the Katana 3 Reference Manual > Using the effects.
Note that when you connect your Katana to the BOSS Tone Studio for Katana Gen 3 app, you can choose from dozens of effects, control the parameters for each one, and save your own presets.
The Tap button lets you set a tap tempo for a time-based effect. You can also control this from a footswitch (sold separately).
Global EQ
Turn the global equalizer for the entire signal chain on and off. Using the app, you can configure three different global EQ settings.
Master
This is the master volume for the entire signal chain. This knob also controls headphone volume.
Power Switch
Turn the unit on and off.
Learn more in the Katana 3 Reference Manual > Panel descriptions.
Rear Panel
Again, not all models have the same features. These diagrams are of the Katana Artist Gen 3 1 x 12-inch 100-watt combo.
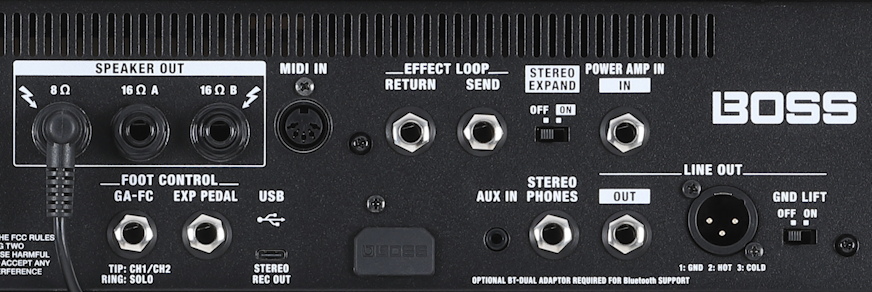
BOSS Katana Gen 3 back panel
AC IN jack
Connect the power cable.
Speaker Out
Using a speaker cable, connect an external speaker cabinet of the correct impedance. Do not use a shielded guitar instrument cable.
Learn more in the Katana 3 Reference Manual > Panel descriptions > Rear panel.
Foot Control
The Katana Gen 3 50 can accept a BOSS FS-6, FS-7 or FS-5L footswitch (sold separately) to switch between Channel 1 and Channel 2 and engage the Solo function.
The other Katana Gen 3 models can accept the footswitches listed above in addition to the BOSS GA-FC or GA-FC EX multi-footswitch units to change channels and engage effects. These footswitches can in turn accept one or more Boss or Roland expression pedals for real-time control of many effects parameters. The functions can be programmed in the BOSS Tone Studio for Katana Gen 3 app.
Exp Pedal
Connect a BOSS EV-30, FV-500L, or Roland EV-5 expression pedal (sold separately) directly to this jack to control the volume, wah, or pitch bend parameters, as configured in the app.
MIDI In
Connect a 5-pin DIN MIDI cable to an external MIDI controller for additional control options. Learn more in the Katana 3 Reference Manual > Panel descriptions > Rear panel.
Learn more about Foot Control, Expression Pedal and MIDI connections in our SweetCare guide BOSS Katana Gen 3: Footswitches and Expression Pedals.
USB Stereo Rec Out
Connect a USB-C data cable to your Mac or your Windows PC to use the BOSS Tone Studio for Katana Gen 3 app.
You will first need to install the BOSS USB driver for Katana Gen 3 for macOS or Windows.
You can then use the Katana as an audio interface with stereo output for recording to your DAW at 32-bit floating point and up to 96kHz. You can also receive stereo audio from the computer, and there’s a loopback function for digital re-amping.
Learn more in our SweetCare BOSS Tone Studio for Katana Gen 3 Quickstart Guide.
Effect Loop
Connect 1/4-inch TS cables for the monaural effect loop. The effect loop can be engaged by an external footswitch, configured in the app.
Bluetooth Adapter Jack
To use Bluetooth for external audio auxiliary input, or to control your amp with the BTS for Katana Gen 3 app for iPhone, iPad, and Android, you need to install the BOSS BT-Dual Audio MIDI adapter (sold separately). The jack is beneath the plastic plug labeled “BOSS.” Learn more in our SweetCare BOSS Tone Studio for Katana Gen 3 Quickstart Guide.
Aux In
Connect a 1/8-inch stereo TRS cable to an external device for analog audio auxiliary input to play practice tracks through your Katana’s speaker and to monitor over headphones so you can play along.
Stereo Phones
Connect headphones using a 1/4-inch TRS cable. Be sure to turn the Master volume control all the way down before connecting them. Connecting headphones will mute the power amplifier’s output to the built-in speaker.
Line Out
Use a 1/4-inch TS cable to connect this mono output to a PA system or an audio interface. Some models also have a balanced XLR output and a ground lift switch.
Power Amp In
Connect a 1/4-inch TS cable to input sound from an external preamp. The Katana will only work as a power amp and a speaker, and all controls will be deactivated except the Master knob and the Power Control switch. You can’t use the Input jack on the front panel; if you plug something into the Input, the Power Amp In signal will be defeated and the amp will operate as normal.
Stereo Expand
Turn this switch on to bridge two Katana Gen 3 units for stereo live sound. Connect a 1/4-inch TS mono cable to the Line Out jack of the first amp (to which your guitar is connected) and run it to the Power Amp In on the second Katana amp. Turn on the Stereo Expand switch on both amps.
There’s also a method for doing this with the Katana 50 EX, which does not have a Stereo Expand switch.
Learn more in the Katana 3 Reference Manual > Panel descriptions > Rear panel.
Boss Tone Studio for Katana Gen 3 App
Now that you know how to control the features of your amp that you can see on the front and back panels, let us show you the host of additional effects and features that you can only access through the free Boss Tone Studio for Katana Gen 3 app, available for your computer and your mobile device. Let’s keep going.
Related Articles
When you need help, Sweetwater has the answers!
Our knowledge base contains over 28,000 expertly written tech articles that will give you answers and help you get the most out of your gear. Our pro musicians and gear experts update content daily to keep you informed and on your way. Best of all, it’s totally FREE, and it’s just another reason that you get more at Sweetwater.com.

