
Softube Console One Fader Mk III Quickstart Guide

In this guide, we will show you how to register and set up the Softube Console 1 Fader Mk III for the first time. Follow the sections below to get started.
- Create an iLok Account
- Register the Console 1 Fader Mk III
- Install Softube Central and Console 1 Application
- Console 1 Fader Mk III Setup and Connections
- Console 1 Mixing System DAW Tutorials
Create an iLok Account
If you already have an account, skip these steps and continue to register your hardware. Learn more about iLok licensing in our iLok Quickstart Guide.
Softube software is licensed with iLok, so you’ll need to connect the license to your computer’s hard drive or to an iLok USB dongle. If you don’t already have an iLok account, you must create one and install the iLok License Manager app. Follow the steps below to get started.
- Visit iLok’s registration page and complete the registration form. Take note of your User ID and password, as they are case sensitive.
- Open the iLok Account Activation email. Click on the verification link.
- Download and install the iLok License Manager app.
- Launch iLok License Manager. Sign in to your iLok account.
- Optional:Connect an iLok USB dongle and, when prompted, click Yes to register it to your account.
- Once you’ve created your iLok account, continue to Link iLok and Register License Code.

Click the image to create an iLok account.
Register the Console 1 Fader Mk III
Before getting set up and connected, you must register the Console 1 Fader Mk III with Softube. After creating the account, you must link your iLok account so Softube can send you iLok licenses. Once you have an account and you log in, you can enter the License Code on the registration page.
- Sign into your Softube account. If you don’t have an account, fill out the necessary information on the right side of the page, then click Sign Up.
- On your account homepage, click ILOK ACCOUNT, enter your iLok User ID, and click LINK ACCOUNT.
- After your iLok account is sync’d with Softube, click REGISTER LICENSE.
- Enter the License Code inside the Console 1 Fader Mk III’s box, then click REGISTER LICENSE.
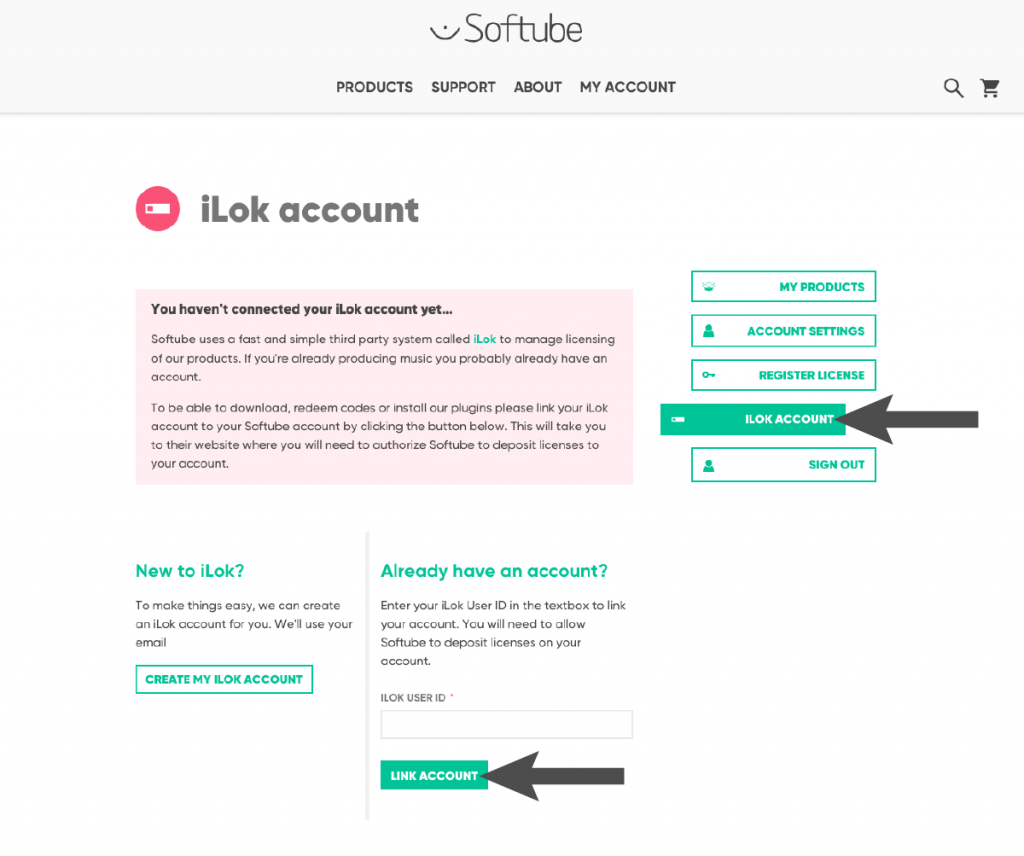
Click the image to register your Console 1 Fader Mk III.
Install Softube Central and Console 1 Application
IMPORTANT! You must activate the Console 1 software before using the hardware.
The Softube Central app lets you easily install and license your Softube software. Once your Console 1 Fader Mk III is registered, you can download the Softube Central app from the My Products page. Follow the instructions below to install Softube Central and your Softube software.
- Go to the Softube download page. Click the Softube Central download for PC or for Mac.
- Open your Downloads folder, double-click the .exe (PC) or .pkg (Mac) installer file, and follow the on-screen instructions.
- Launch Softube Central, log in using your Softube account credentials, and find the Console 1 System app to install and activate it.
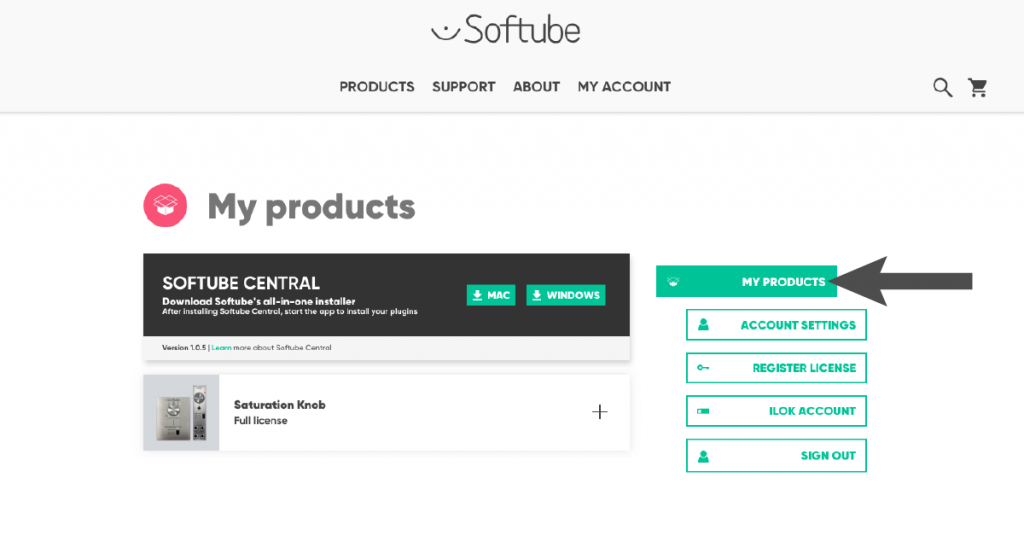
Click the image to download Softube Central.
Console 1 Fader Mk III Setup and Connections
Once the Console 1 Fader Mk III is registered and the software is activated, the next step is to set it up and connect it, which is fast and easy.
- Go to the Softube installer download page, then install Console 1 System.
- Launch the Console 1 System software and connect the device to your computer.
Daisy-chaining multiple Console 1 MkIII devices
NOTE: If you are daisy-chaining, make sure the included power supply is connected to the device that’s not connected to the computer.
One great feature of the Console 1 Fader Mk III is the ability to daisy-chain it to a Console 1 Channel Mk III. When daisy-chaining the units together, you’ll have near full control of your DAW, so your keyboard and mouse will rarely need to be used! Just connect the included USB-C to USB-C cable to your Console 1 Mk III using one of the ports, and connect the other end to your computer.
Update Console 1 Fader Mk III Firmware
TIP: When you’re updating the firmware, it’s recommended that you connect the device to your computer without the power supply connected.
Softube will periodically release firmware updates for the Console 1 Fader Mk III. These often introduce new features and address bugs that may be present in the current version. Softube simplifies the firmware process, so you’ll have almost zero downtime operating it.
- Launch the Console 1 System application.
- Press and hold the On and Shift buttons while connecting the device to your computer.
- Once it’s powered on, let go of the buttons. You should now see the Softube logo on the Fader’s display. You will now see a firmware window appear in the Console 1 System application.
- Don’t disconnect the Console 1 Fader Mk III from your computer while the firmware is being updated!
Console 1 Fader Mk III Walkthrough – Softube
Console 1 Mixing System DAW Tutorials
Pro Tools
Ableton Live
FL Studio
Digital Performer
LUNA
Logic Pro
Reaper
Related Articles
When you need help, Sweetwater has the answers!
Our knowledge base contains over 28,000 expertly written tech articles that will give you answers and help you get the most out of your gear. Our pro musicians and gear experts update content daily to keep you informed and on your way. Best of all, it’s totally FREE, and it’s just another reason that you get more at Sweetwater.com.

