
Roland Fantom Setup Guide

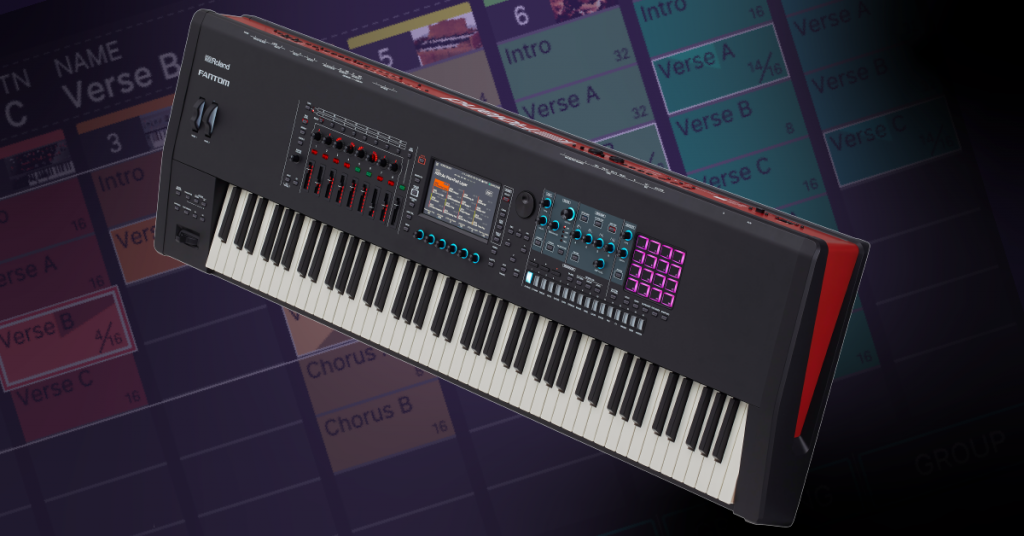
Getting started with the Roland Fantom
In this guide, we will show you how to get up and running with a Roland Fantom in no time. You’ll learn how to register and navigate the workstation, and also how to set it up for the first time. Follow the sections below to get started.
Setup and configuration
There are many ways you can incorporate your Roland Fantom into your studio or live rig. With just a few cable connections and menu setting changes, you will be creating music in no time. Follow the sections below for instructions on how to connect external hardware, cables, and also how to set it up with a computer.
Hardware
There are quite a few ways to connect external devices to the Roland Fantom. When making any audio connections, be sure that the Fantom is powered off and have the input gain and master volume all the way down. Doing this prevents any sudden pops, which can cause damage to the external gear.
Inputs
You can connect microphones, external synthesizers, and audio devices via the two balanced input jacks. The signal is sent through the Fantom where you can adjust the panning, EQ, and routing. Once connected, you will then use the level knobs next to the jacks to adjust the input signal level.
- Depending on the device that’s connected, Go to the Effects Edit settings within the Menu, press the Audio In tab and change the input source between Mic and Line. If a condenser microphone is connected, be sure to press Phantom to engage +48v phantom power.
- If you wish to record a sample using the input device, you first need to change the sampling mode and set it to INPUT or KBD+INPUT.
Outputs
There are four different sets of outputs available on the Fantom; two sets of Main outs and two sets of Sub outs. Output routing is fully customizable, which means you can send audio input devices, samples, USB audio, and click tracks to all to different outputs if necessary.
- To access audio output routing, press the Menu button, select Effects Edit, and use select the signal you wish to change the output routing for (Audio, Pad, USB, Click).
- Use the Sub outs to send audio sources to different places. For example, you can send the Click track and USB audio to a stage monitor on Sub out 1 and the audio inputs to the front-of-house mixer on Sub out 2.
Foot pedals
The Fantom has four foot pedal jacks which you can connect. Depending on which jack the foot pedal is connected to, you can assign it to control a particular parameter or function. Be sure to only use the specified expression pedal, as improper connections may lead to malfunction.
- You can use a pedal to act as a damper by connecting it to the HOLD/R jack. Roland DP series pedals are recommended.
- To change the parameter assignment for the foot pedal, Go to System within the Menu, and navigate to the Pedal settings.
- For a full list of which parameters can be changed, visit the user reference guide.
MIDI and USB
You can connect external gear to the Fantom via the MIDI and USB (EXT DEVICE) ports. With MIDI devices connected, you can then split the sound between the external synthesizer and the Fantom.
- You can control an external MIDI device or analog synthesizer on a specific zone by switching the zone from internal to external. To do this, hold the SHIFT button and press the zone number button above the fader. The light will turn green when in EXT mode.
- Visit the user guide to learn more about how to control external MIDI devices and analog synthesizers.
Computer
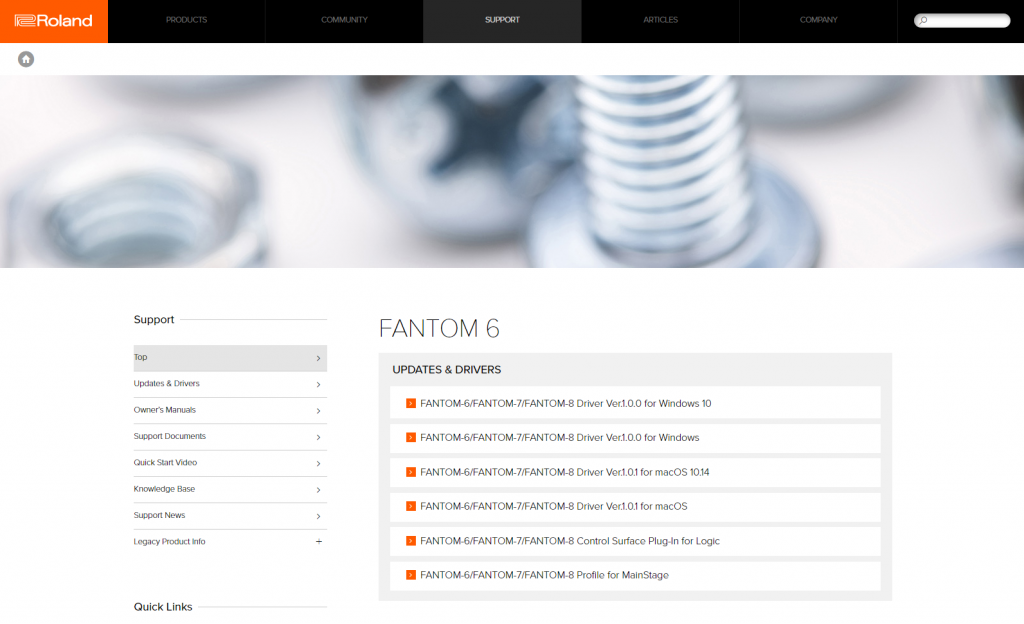
Connecting the Fantom to a computer is easy. Just download Fantom driver software from Roland’s website, connect it to the computer, and then change the USB settings. If you use Logic Pro X or MainStage, you can also install the Fantom plug-in and turn your workstation into a DAW controller. Learn how to use the Fantom plug-in within Logic and Mainstage in this guide.
- Press the Menu button, go to System, and navigate to the General settings.
- Select USB DRIVER, use the blue knob to switch it to VENDOR, and then connect the Fantom to an available USB 2.0 port.
- If connecting the Fantom to a MIDI interface, leave the USB driver set to GENERIC.
- Got to the Fantom driver download page, and download the latest driver for your OS.
- Windows 10 Users: The driver is automatically downloaded and installed once you connect your Fantom to the computer.
- Navigate to your Downloads folder, launch the installer, and follow the on-screen instructions.
- Mac: Double-click the .zip file, open the uncompressed folder, launch the installer, and follow the on-screen instructions.
- Windows 7 & 8: Right-click the .zip file, select Extract all…, and then click Extract. Open the uncompressed folder, launch the installer, and follow the on-screen instructions.
Navigating the Fantom
The Roland Fantom can be broken down into three sections; The Synthesizer, Sampler, and Sequencer. All three sections can be deeply integrated with each other, making it great for both live and studio applications.
Synthesizer
The synthesizer (sound engine) section, is what produces and modifies the tones. You can change parameters either with the knobs or with the touchscreen. Although you can create and layer sounds in an endless amount of ways, it breaks down to three elements. Tones, which is an individual sound, Zones which are a container for Tones, and then Scenes which is a group of Zones, effects, sequences, and settings. You can have up to 16 Zones per preset.
- Press any of the PARAM buttons to open the Tone Edit screen. This allows you to make further parameter changes such as oscillation, LFO, and add effects.
- Layer multiple tones by pressing the zone number buttons located above the faders.
- Press the Motional Pad to morph between four separate zones using the touchscreen. You’ll need to engage zone number buttons located above the faders.
Roland Fantom Synthesizer: Sound
Sampler
The sampler allows you to record internal and external sounds which can then be played on a pad. Once recorded, you can then assign it to a specific pad, loop and trim the file, and also export it as a .WAV file to a USB thumb drive. You can have up to four banks of 16 samples.
- Change the import source of the sample by pressing the Sampling Mode drop-down box. You can set it to keyboard only, input only, or keyboard and input.
- Export samples to a USB thumb drive by pressing SAMPLE UTILITY on the touchscreen, and then selecting either Export (individual sample) or Export All (all samples in the bank).
How do I import samples onto a Fantom?
With a USB thumb drive connected, you can import .WAV, .AIFF, and .MP3 files onto the Fantom. Follow these steps to import audio files.
- Connect the USB thumb drive to the USB MEMORY port on the back of the workstation
- Hold down the SHIFT button and press SAMPLING.
- Touch IMPORT located on the bottom right hand of the touchscreen, select the file or folder you wish to import, and then select the import method.
- AUTO IMPORT: Samples will automatically be assigned to pads that do not have any samples currently loaded on them.
- IMPORT: Samples are loaded onto a specified pad. If there is a sample already loaded, the imported file will overwrite the current one.
Sequencer
The Sequencer allows you to record your performances as MIDI data, which you can then group together, and arrange them as a song. You can either record in real time, Step record, or use the 16 Tone Category buttons to trigger instruments on a specific beat (TR-REC). This is particularly useful when recording drums. After recording, the files can then be exported as a .SMF (Standard MIDI File) and imported into a DAW.
Learn more about how to record sequences and songs on the Fantom!
Roland Fantom Synthesizer: Sequencing
Additional resources
Roland Fantom Synthesizer: Overview
Roland Fantom Synthesizer: Performance
When you need help, Sweetwater has the answers!
Our knowledge base contains over 28,000 expertly written tech articles that will give you answers and help you get the most out of your gear. Our pro musicians and gear experts update content daily to keep you informed and on your way. Best of all, it’s totally FREE, and it’s just another reason that you get more at Sweetwater.com.


Offer applies only to single-receipt qualifying purchases. Select manufacturers may require that only the manufacturer’s products qualify towards the minimum purchase amount needed to be eligible for promotional financing. Otherwise, an invoice that meets the minimum purchase amount and contains at least one qualifying manufacturer product is eligible for promotional financing. No interest will be charged on promo purchase balance, and equal monthly payments are required on promo purchase until it is paid in full. The payments equal the amount financed divided by the number of months in the promo period, rounded up to the next whole dollar. These payments may be higher than the payments that would be required if this purchase was a non-promo purchase. During the last month(s) of the promo period the required monthly payment may be reduced due to the prior months’ rounding. Regular account terms apply to non-promo purchases. New Accounts as of 07/31/2025: Purchase APR is 34.99%. Penalty APR is 39.99%. Min Interest Charge is $2. Existing cardholders: See your credit card agreement terms. Subject to credit approval.
Offer applies only to single-receipt qualifying purchases. No interest will be charged on the promo balance if you pay it off, in full, within the promo period. If you do not, interest will be charged on the promo balance from the purchase date. The required minimum monthly payments may or may not pay off the promo balance before the end of the promo period, depending on purchase amount, promo length and payment allocation. Regular account terms apply to non-promo purchases and, after promo period ends, to the promo balance. New Accounts as of 07/31/2025: Purchase APR is 34.99%. Penalty APR is 39.99%. Min Interest Charge is $2. Existing cardholders: See your credit card agreement terms. Subject to credit approval.
The estimated required monthly payment shown which excludes taxes and delivery equals the amount financed divided by the number of months in the promo period, rounded up to the next cent. During the last month(s) of the promo period the required monthly payment may be reduced due to this rounding. These payments apply only with the financing offer shown. If you make these payments by the due date each month, you should pay off this amount financed within the promo period, if it is the only balance you are paying off. If you have other balances on your account, this payment will be added to any other minimum monthly payments.
Applies only to select items from this manufacturer. Ask your Sweetwater Sales Engineer for more details.