
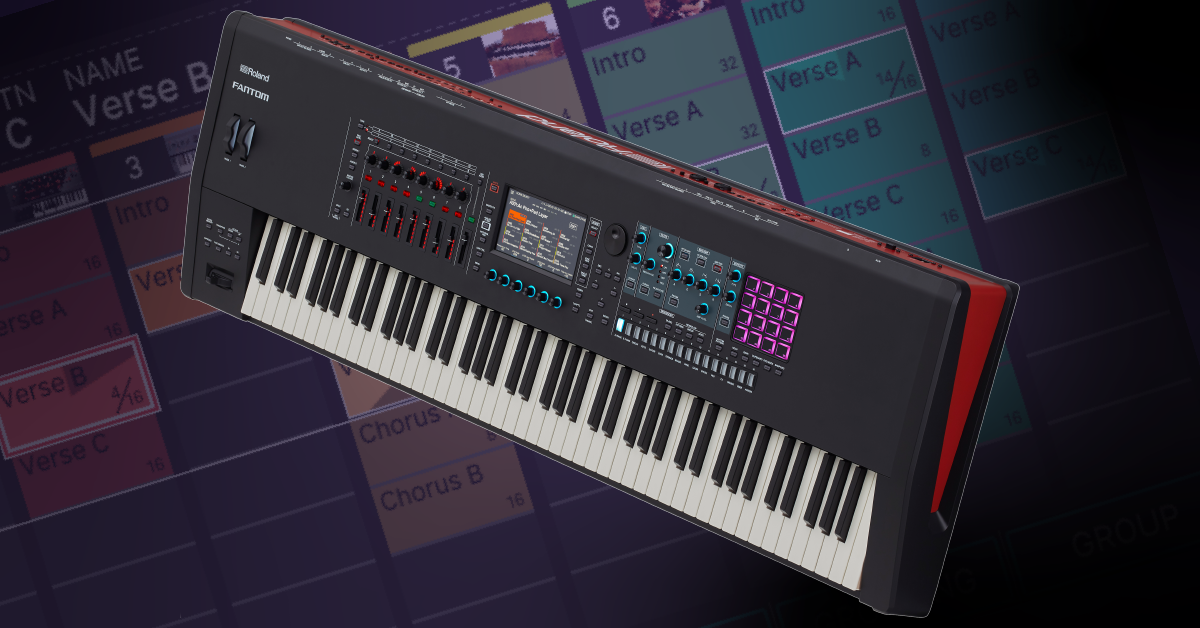
Roland Fantom Sequencer and Recording Songs
Getting started
In this guide, we will show you how to use the sequencer and record songs internally on the Roland Fantom. Follow the sections below to get started.
Fantom sequencer explained
The Roland Fantom has a built-in sequencer that allows you to create and record patterns and songs. Unlike the Pads which record audio, the sequencer records MIDI data internally that can then be saved as a .SMF (Standard MIDI File) and exported. You can also import .SMF files via USB thumb drive. The sequencer structure consists of four parts; tracks, patterns, groups, and finally, songs.
Track
Tracks are what hold the patterns. Each track corresponds to its respective Zone. For example, Track 1 is assigned to Zone 1.
Pattern
The pattern is the recorded performance data. You can record up to eight patterns per track and each pattern can be up to 32 measures long.
Group
A group is a combination of tracks and patterns. Creating groups is helpful when arranging your song. For example, the first group can be the intro; the second group can be the verse, etc.
Song
Songs will play back the groups in the arrangement you create. You can save one song per scene, but they can also be exported as MIDI files to a USB thumb drive.
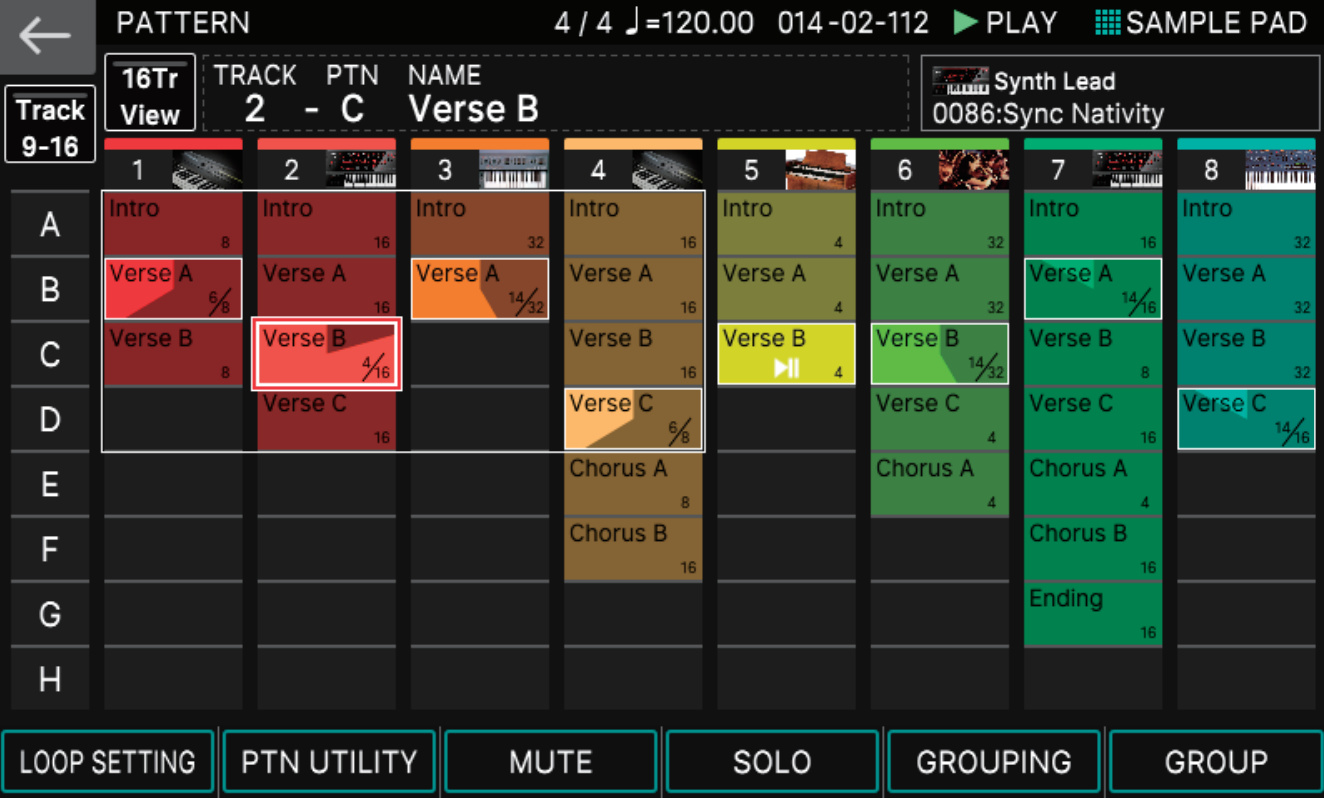
Track & Pattern screen
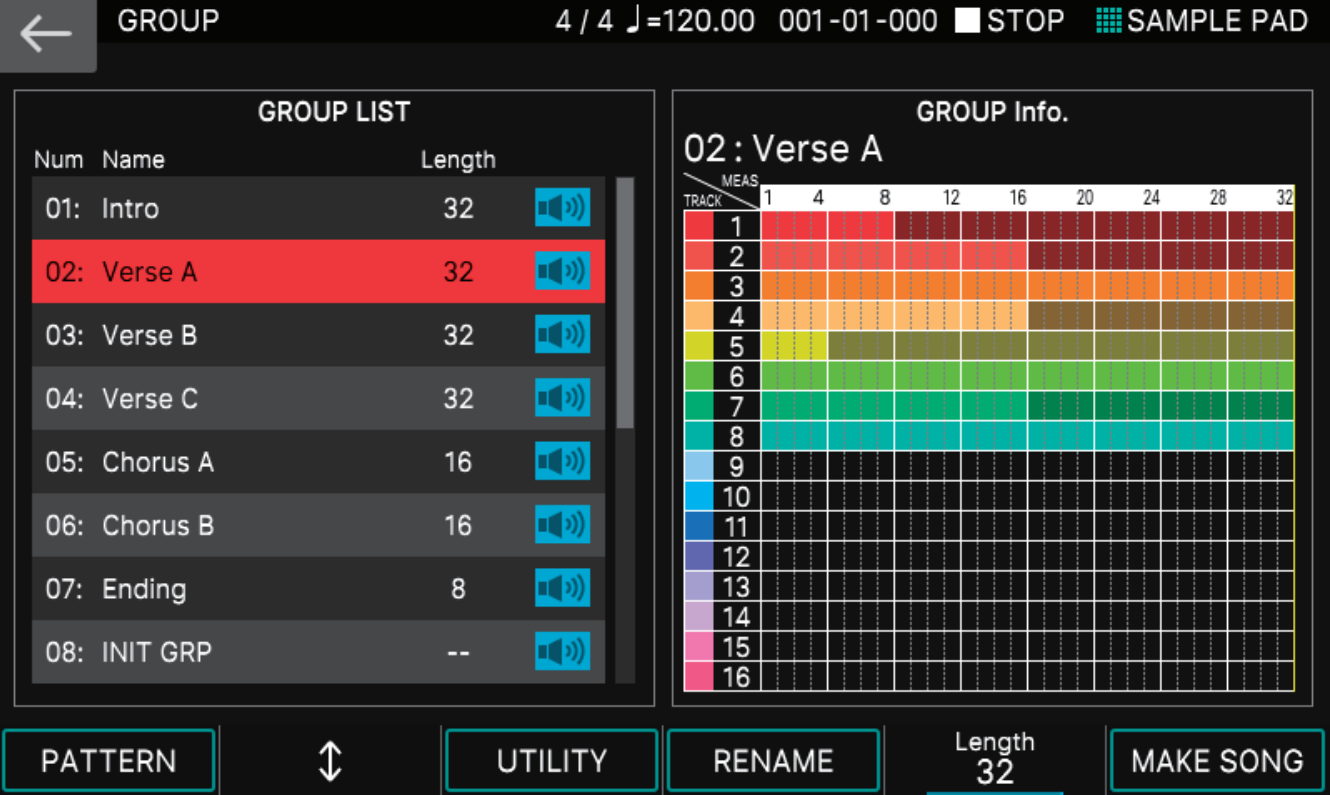
Group screen
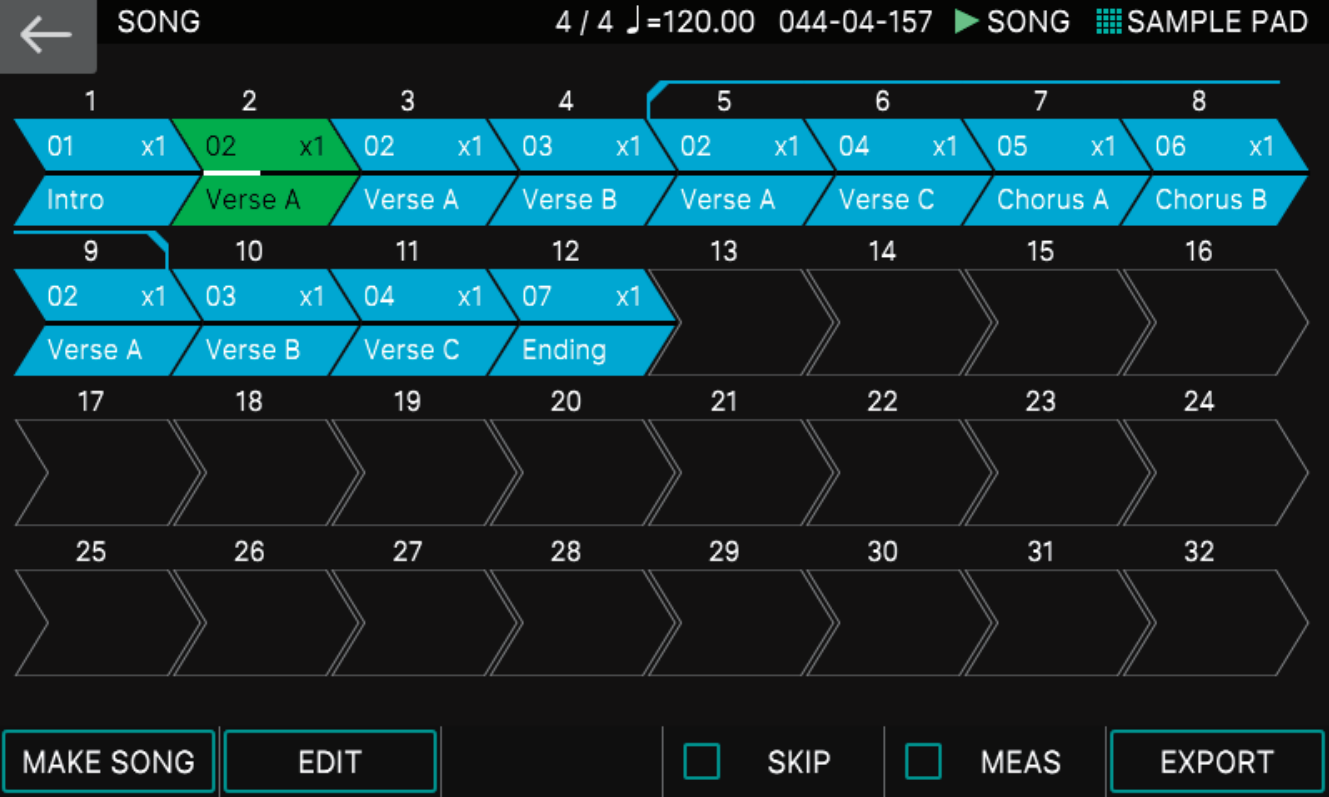
Song screen
How to record a pattern
Recording patterns are simple on the Fantom. You can either record in Realtime, or perform a Step or TR recording. When you record patterns, each Zone will record data on its corresponding track. Once recorded, you can then edit the pattern, and then assign them to a group and song.
How can I edit patterns?
Once you’ve finished recording a pattern, you can apply various edits to it, such as copy-pasting, transposing, quantizing, and velocity and duration changes. For detailed instructions on how to apply these edits, visit the user manual.
Realtime recording
Realtime recording is straightforward. Just press the record button, adjust the recording settings, and begin playing. If multiple Zones are selected when recording in real-time, the same MIDI data will print on each track. This is useful in situations where you wish to layer sounds. You can also transpose a track to harmonize a lead, for example.
- Select the tone(s) you wish to record by pressing the Zone number button above the fader.
- Press the Record button and adjust the following settings:
- Recording Destination: Select the Pattern letter to record to.
- Mix/New: Selecting Mix will overdub recordings onto the pattern. New will record onto an empty pattern of the track.
- Input Quantize: Will quantize the recording in real-time.
- Count In: Choose whether or not to have a pre-click before it begins recording.
- Length & Tempo: Choose how long the pattern will be and use the jog wheel to adjust the tempo.
- Press Start to begin recording. If Loop Rec SW is disengaged, the recording will stop once the pattern reaches the specified length.
How can I edit data in Realtime Recording mode?
To edit data that was recorded in real-time, you will need to access the Realtime Recording screen. Follow these steps to edit real-time recording data.
- Select the track you need to edit, press the Record button, and then press Start to enter the Realtime Recording window.
- Press Erase, and then either press Erase All, press and hold a specific key you need to erase, or press and hold two separate keys to erase that range of notes.
- Press Stop to exit the window and stop playback.
Step recording
Step recording allows you to record one note at a time. It’s particularly useful in situations where notes need to be on time; such as synth lead or arpeggiator. While in Step Record mode, you can adjust the length of each note, velocity, and also add ties and rests. Follow these steps to step record.
- Select the tone you wish to record by pressing the Zone number button above the fader.
- Press the Record button, and then press STEP REC to enter Step Record mode.
- Use the knobs to adjust the following settings:
- Note type: Changes the length of the note (ie 1/8th note, 1/16th note)
- Gate time: Fine-tunes the length from note-on to note-off.
- Velocity: The volume in which the note is played. If set to REAL, the note will be played at the force you pressed the key.
- Press the note (or chord) you wish to record. Each time you press a note, it will be placed on the next step.
- If the wrong note is played, you can delete it by pressing the STEP BACK knob.
- Press the EXIT button once you’ve finished recording.
TR-REC
TIP: If you set the length of the pattern to two measures or more, you can quickly navigate to a specific measure by holding SHIFT and pressing one of the lit Tone Category buttons.
TR-REC is similar to Step recording in that you will input one note at a time. However, instead of using the keys to input each note, you will use the 16 Tone Category buttons to specify when a note will sound. Using TR-REC is very useful when programming drum beats. Follow these steps to use TR-REC.
- Select the tone you wish to record by pressing the Zone number button above the fader.
- Press the TR-REC button to enter TR-REC mode. Alternatively, you can press the Record button, and then press TR-REC on the touchscreen.
- Use the knobs to adjust the following settings:
- Scale: Changes the length of the note.
- Length: Sets the number of measures the pattern will be.
- Gate time: Fine-tunes the length from note-on to note-off.
- Velocity: The volume in which the note is played. If the Velocity is set to REAL, the note will be input at the force you pressed the key.
- Press the note on the keyboard you want to trigger. Alternatively, you can press a note on the keyboard displayed on the touchscreen.
- When a drum kit tone is selected, press a different key to specify the instrument you want to trigger. This will allow you to enter a new pattern for that specific sound.
- Press the Tone Category button(s) to place the note on that specific beat.
- Press EXIT to get out of TR-REC mode once complete.
Rename the pattern
Renaming the pattern will help you distinguish one over the other, which is helpful when you have multiple patterns. To rename a pattern, press PTN UTILITY, select the pattern and then press RENAME.
Create a group
Once patterns are recorded, you can combine them by creating a group. To create a group, select a row of tracks, or you can choose individual patterns of each track. Once grouped, you can then rename and export them, and also create a song. Follow these steps to create a group.
- Press the PATTERN button to enter the Pattern screen.
- Select the individual patterns for each track you want to group together. To select an entire row of patterns, press the pattern letter on the left side of the touchscreen.
- To deselect a specific pattern, press an empty pattern block on the track.
- Press GROUPING, use the first knob which is lit red to select the group you want to assign the patterns to, and then press SET.
- You can change the length of the group by turning the knob located underneath LENGTH displayed on the touchscreen.
- Press RENAME to rename the group and press OK to confirm.
Deleting a scene
If you need to delete a scene and start over, open the GROUP screen, press UTILITY, and then select INITIALIZE.
Create a song
Now that you have all of your groups created, you’re ready to arrange them and create a song. After making your song, you can then edit it further by rearranging, repeating, and setting up loops for a selected group. Once the song is finished, you can export it to a USB thumb drive as a MIDI file or save it as a scene. Follow these steps to create a song.
- Press the GROUP button and press ADD SONG.
- Select the group you wish to add and then press ADD.
- If you need to replace one group with another, press ADD/REPLACE, select the group you want to swap and then press REPLACE.
- Once you’ve added all of the groups, press SONG.
Editing a song
If you need to rearrange groups, set repeats, or loop a particular section of your song, press the SONG button, press EDIT and then select the group you need to edit. Learn more about how to edit songs in the user manual.
Additional resources
Roland FANTOM Synthesizer: Sequencing
When you need help, Sweetwater has the answers!
Our knowledge base contains over 28,000 expertly written tech articles that will give you answers and help you get the most out of your gear. Our pro musicians and gear experts update content daily to keep you informed and on your way. Best of all, it’s totally FREE, and it’s just another reason that you get more at Sweetwater.com.

