
Ableton Move Quickstart Guide

The Ableton Move is the perfect controller to have on the road or at your computer. This guide will show you how to register, set up, and use the Move for the first time. Let’s get started. This article only scratches the surface, so check out the Ableton Move manual for more information!
- Register the Ableton Move
- Update the Ableton Move Firmware
- Setup and Connections
- Creating a New Set
- Additional Ableton Move Resources
Register the Ableton Move
IMPORTANT: You must download and install the latest version of Ableton Live (12.1 or above) to unlock all the features available on the Move.
Before getting set up and connected, you’ll need to register the Move with Ableton. Upon registration, you’ll get a free copy of Ableton Live Intro.
- Log in to your Ableton account. If you don’t have one yet, you can create one now.
- Go to the product registration page, enter the serial number located underneath the unit, and click Submit. The Move will now be registered, and a Live Intro license will be deposited in your account.
- If you purchased an Ableton Live upgrade, you must activate it after the Move is registered.
- Follow the on-screen instructions to download, install, and authorize Ableton Live Intro.
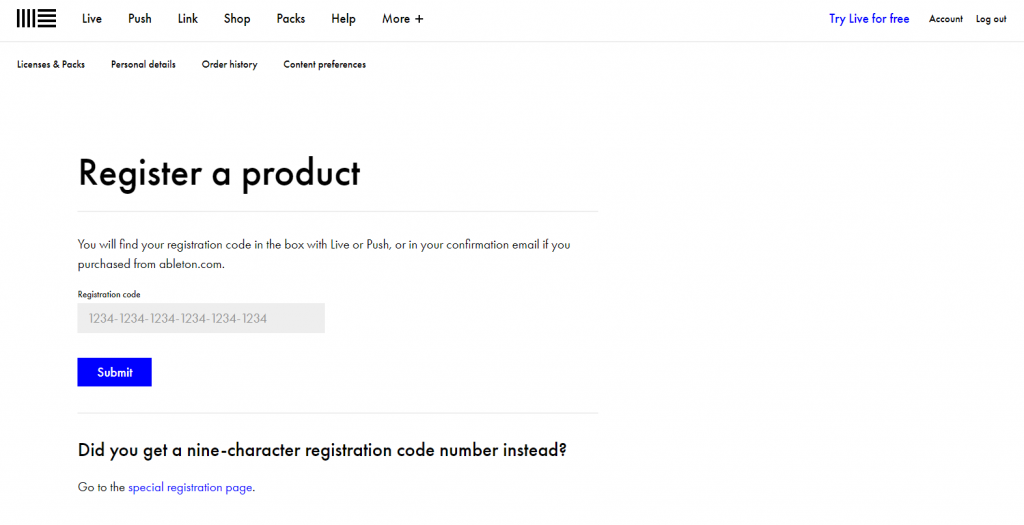
Click the image to register the Ableton Move.
Update the Ableton Move Firmware
TIP: Turn on Notify in the Update menu to get notified whenever new firmware is available.
Ableton releases firmware updates for the Move, which often add new features and address any bugs present in the current version. You can update the firmware on your computer or via Wi-Fi.
Computer
IMPORTANT! If you are a Windows 10 user, you must perform the first firmware update via Wi-Fi before you’ll be able to update it via Move Manager.
Updating the Ableton Move firmware on your computer is a breeze. All you need to do is connect it to your computer, then use the Ableton Move Manager host with Google Chrome, Microsoft Edge, Firefox, or Safari.
Ableton Move Tutorial: Move Manager
Wi-Fi
TIP: When you first turn on the Ableton Move, you will be asked to connect to Wi-Fi. If you chose to skip this during the initial setup process, press and hold the … (Shift) button while pressing the second step (Function) button, then use the main encoder to select Wi-Fi. You can then follow Wi-Fi pairing procedure from there.
If you don’t have access to your computer, you can update the Move’s firmware via Wi-Fi.
- With the Move turned off, connect the power supply to your Ableton Move, then press the Power button to turn it back on.
- Press and hold the … (Shift) button. You should now see icons below the functions at the bottom.
- Press the second Function button, turn the main encoder to enter Setup, and press it to select Wi-Fi.
- Locate your Wi-Fi, press the main wheel, and enter the Wi-Fi password. Once Wi-Fi is connected, you should be taken to the Update screen. If not, back out to the Setup page, press the main wheel, navigate to Update,and press the main wheel again.
- Use the main encoder to highlight and select Update. The firmware update process will begin.
- Once the update is finished, the Move will power cycle.
Perform a Factory Reset
If you ever run into issues or just want a fresh start, you can perform a factory reset of the Move.
- Press and hold the … (Shift) button, press the second Function button, and use the main encoder to navigate to Advanced.
- Press the main encoder, scroll to Factory Reset, and press the main wheel again. You will then be asked if you want to perform the reset.
- Press the main wheel once more to perform a factory reset on the Move.
Setup and Connections
The Ableton Move has a few connections and fully integrates with Ableton Live.
- Although the Ableton Move is partially charged when you first take it out of the box, we recommend fully charging it before its first use.
- The Move has two USB ports: USB-C and USB-A. The USB-C port is used for computer and charging connections. The USB-A is for MIDI.
- Use the Audio In jack to input audio for recording samples.
MIDI
You can connect external MIDI devices to the Ableton Move via the USB-A (MIDI) port. Please note that the Ableton Move can only send MIDI (MIDI Out).
- Hold the … (Shift) button, then press the second step (Function) button to enter the Settings menu.
- Use the main encoder and navigate to MIDI, then press the main encoder to enter the MIDI settings. You can then update the MIDI Out settings to either all or MIDI track 4.
Creating a New Set
Now that you’re familiar with navigating the Ableton Move, let’s create a new Set. When you first power on the Move, you will be taken to Set Overview. The first four Sets (illuminated) are demo Sets. The other 28 Sets are blank.
TIP: When you hold the … (Shift) button, you will see different buttons illuminate. This means those specific buttons have secondary functions.
- Press and hold the … (Shift) button and press the first Function button (page icon).
- Choose an empty Set, then press one of the four Track buttons to create the Set.
- Press a track button, and press the main encoder to change the track’s sound. Once you’ve found the one you like, press it again to select it.
- The icons above the sample name indicate the parameters you can change (e.g., reverb, delay, and saturation).
Ableton Move Tutorial: Making a New Set
Recording Songs
You can record songs in two different ways: step recording and real-time recording. Step recording is the preferred method for drums or synth leads where exact timing is needed. Real-time recording is best if you want more flow or groove to your track.
- Press the Loop button, then change the loop length using the main encoder.
- After you have recorded your track, use < and > to navigate.
Step recording
Step recording is straightforward.
- Select the instrument you wish to record by pressing one of the four track buttons.
- With the instrument track selected, press the pad you want to trigger.
- You can change the length of the note by pressing and holding the sixth step (Function) button indicated by the two circles underneath.
- Press one of the 16 step buttons to input a note. Remove it by pressing it again.
Real-time recording
To record in real time, press the Record button. You will then have a one-measure count-in before the track begins recording. The audio will continue recording until you press the Record button again.
Ableton Move Tutorial: Browsing for Instruments and Using Effects
Ableton Move Tutorial: Making a Beat and Recording
Audio Sampling
TIP: The Ableton Move has 64GB of internal storage, so you have plenty of space to upload custom samples.
Along with the Audio In jack, the Ableton Move also has an onboard microphone for recording audio for sampling.
- Press the Sample Record button located beneath the volume knob, then press a pad.
- Press the Record button. Begin performing.
- Once you have finished sampling, the track will be converted to a Sampler track, which you can tweak like any other track type.
Ableton Move Tutorial: Using Move’s Microphone to Record Samples
Ableton Move Tutorial: Using Move’s Audio Input to Record Samples
Additional Ableton Move Resources
Ableton Move Tutorial: Getting Started with Move’s Views
Ableton Move Tutorial: Session Mode
Ableton Move Tutorial: Playing Different Instrument Layouts
Ableton Move: The Next Generation of Live Performance Controllers
Related Articles
When you need help, Sweetwater has the answers!
Our knowledge base contains over 28,000 expertly written tech articles that will give you answers and help you get the most out of your gear. Our pro musicians and gear experts update content daily to keep you informed and on your way. Best of all, it’s totally FREE, and it’s just another reason that you get more at Sweetwater.com.


Offer applies only to single-receipt qualifying purchases. Select manufacturers may require that only the manufacturer’s products qualify towards the minimum purchase amount needed to be eligible for promotional financing. Otherwise, an invoice that meets the minimum purchase amount and contains at least one qualifying manufacturer product is eligible for promotional financing. No interest will be charged on promo purchase balance, and equal monthly payments are required on promo purchase until it is paid in full. The payments equal the amount financed divided by the number of months in the promo period, rounded up to the next whole dollar. These payments may be higher than the payments that would be required if this purchase was a non-promo purchase. During the last month(s) of the promo period the required monthly payment may be reduced due to the prior months’ rounding. Regular account terms apply to non-promo purchases. New Accounts as of 07/31/2025: Purchase APR is 34.99%. Penalty APR is 39.99%. Min Interest Charge is $2. Existing cardholders: See your credit card agreement terms. Subject to credit approval.
Offer applies only to single-receipt qualifying purchases. No interest will be charged on the promo balance if you pay it off, in full, within the promo period. If you do not, interest will be charged on the promo balance from the purchase date. The required minimum monthly payments may or may not pay off the promo balance before the end of the promo period, depending on purchase amount, promo length and payment allocation. Regular account terms apply to non-promo purchases and, after promo period ends, to the promo balance. New Accounts as of 07/31/2025: Purchase APR is 34.99%. Penalty APR is 39.99%. Min Interest Charge is $2. Existing cardholders: See your credit card agreement terms. Subject to credit approval.
The estimated required monthly payment shown which excludes taxes and delivery equals the amount financed divided by the number of months in the promo period, rounded up to the next cent. During the last month(s) of the promo period the required monthly payment may be reduced due to this rounding. These payments apply only with the financing offer shown. If you make these payments by the due date each month, you should pay off this amount financed within the promo period, if it is the only balance you are paying off. If you have other balances on your account, this payment will be added to any other minimum monthly payments.
Applies only to select items from this manufacturer. Ask your Sweetwater Sales Engineer for more details.