
Elektron Digitone II Quickstart Guide
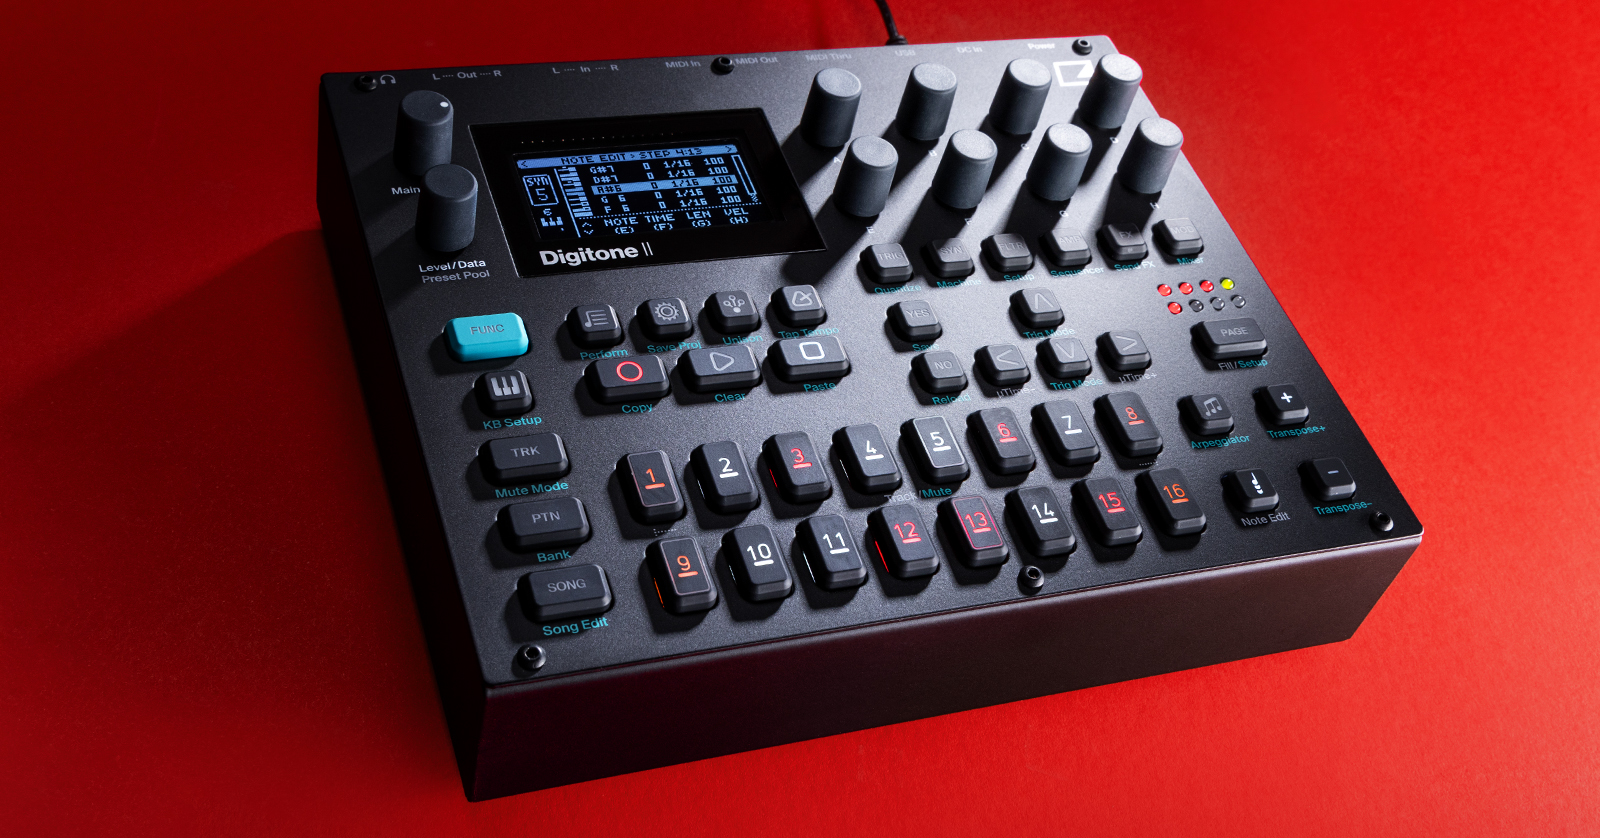
The Elektron Digitone II is a great synthesizer to have in your studio. It’s packed full of features, so in this guide, we will show you how to navigate and use the device for the first time. Follow the sections below to get started, and make sure to check out the Elektron Digitone II reference page to learn more!
Navigating the Elektron Digitone II
The Digitone II is easy to navigate. Before we get up and running, let’s take some time to get familiar with the controls and the workflow. We’ll also provide some tips and tricks to get you up and running!
Front Panel
TIP: Any buttons with blue text beneath them have a secondary function. These can be accessed by holding the blue FUNC button.
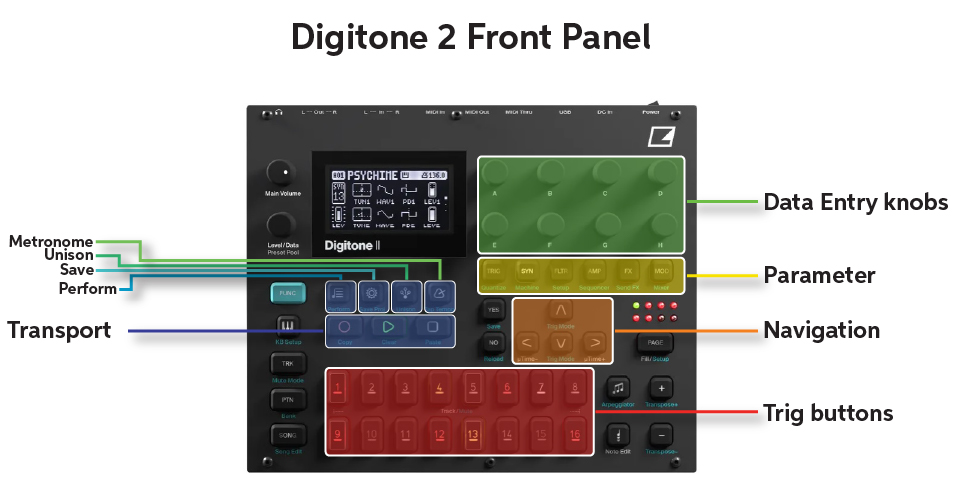
Elektron Digitone II diagram
Transport Controls
The transport control buttons allow you to record, to play, and to stop patterns and songs.
- Pressing the RECORD button will activate or deactivate Grid Recoding mode. Press and hold the RECORD and PLAY buttons for Live Recording mode. Press and hold the RECORD and STOP buttons for Step Recording.
- Hold FUNC and press the RECORD button to copy.
- The PLAY and STOP buttons are self-explanatory. Hold FUNC and either button to clear or paste, respectively.
Data Entry Knobs
The data entry knobs (A–H) are used for changing different parameters. These parameters correlate to the parameters you see on the Digitone II’s display.
Parameter
The page buttons (located directly beneath the data entry knobs) let you access the pages associated with that button (SYN takes you to the SYN machine page, FLTR takes you to the FILTER page, etc.).
- If you see three dots on the right of the display, this means there are multiple pages. Use the UP and DOWN buttons to navigate through the pages.
Trig Buttons
Depending on the function, the Trig buttons will control specific parameters allocated to the buttons.
- Use the Trig buttons with data entry knobs to enter or remove parameter locks and sequencer triggers.
- Use the Trig buttons along with the TRK, PTN, and SONG buttons to choose tracks, banks, patterns, and songs.
- Press the KEYBOARD (KB SETUP) button to turn the Trig buttons into a chromatic keyboard.
Other buttons
While most buttons are grouped together and share common functionality, there are a few that have specific controls.
- The PRESET/KIT (music note) button opens the preset/kit menu, where you can manage any presets and kits. If you hold FUNC and press this button, you will enter PERFORMANCE KIT mode.
- The SETTINGS (gear) button opens settings for managing global settings. If you hold FUNC and press this button, you can save the current project selected.
- The VOICE SETUP (four dots) button opens the voice menu, which allows you to work with a track’s voice settings. Press and hold FUNC and this button to toggle unison on and off.
- The TEMPO (metronome) button lets you set the global/pattern tempo and swing. Press and hold FUNC with this button to tap tempo.
Elektron Digitone II Projects and Kits
Now that you know how to navigate the Digitone II, it’s time to start creating some music! This guide will teach you the basics to get up and running, so make sure to check out the Digitone II user manual for more information!
Create a Project
To start off, let’s create a project.
- Press the SETTINGS (gear)button, use the UP and DOWN arrows or the Level/Data knob to highlight Project, and press the YES button.
- Select Load Project and choose CREATE NEW.
- Please note that if you load a new project, it will replace the active one, so make sure you save the active project before creating a new one!
Record a Pattern
Once you’ve set everything up, you can record patterns. You can record patterns using step recording or live recording.
Live Recording
NOTE: Auto-quantize is enabled by default. You can disable it at any time by pressing the RECORD button twice.
Live recording on the Digitone II is perfect when you want to record leads or bass lines. This gives your melodies flow and allows them to sound natural.
- Press and hold the RECORD button and press the PLAY button. The Digitone II will begin playing, and the RECORD button will flash red.
- Start playing by using the TRIG buttons. Changes to the Parameters mage will also be recorded and will add lock trigs where needed.
- Press the PLAY button to stop recording and keep the sequencer playing. Press the STOP button to stop recording and the sequencer.
Step Recording
Step recording is the preferred method when you want to lay down drum tracks that need to be right on time. This is helpful for genres like EDM.
- Press the RECORD and STOP buttons to enter Step Recording mode.
- Press the TRIG button to select the track to which you wish to start adding steps. The active step will illuminate and blink green.
- Press the FUNC button while pressing one of the TRIG buttons to add a step on the track. The step will then advance to the next step.
- Press and hold the KEYBOARD button, then press any lit TRIG button to add a note with the note to the selected step. The step will automatically advance to the next step.
- Press the +, –, UP,or DOWN buttons to change the note on the chromatic keyboard.
- To remove a step or to add a rest, choose the active step and press the NO button.
- Once you’re finished, press the RECORD button.
Related Articles
When you need help, Sweetwater has the answers!
Our knowledge base contains over 28,000 expertly written tech articles that will give you answers and help you get the most out of your gear. Our pro musicians and gear experts update content daily to keep you informed and on your way. Best of all, it’s totally FREE, and it’s just another reason that you get more at Sweetwater.com.

