
MBOX Studio Setup Guide
The Avid MBOX Studio is a great addition to your studio, so in this guide we will show you how to register, set up, and connect the interface. Follow the sections below to get started.
Create an iLok Account
You need to activate Avid software and hardware via iLok. If you don’t already have an iLok account, you’ll need to create one and install the iLok License Manager app before registering your MBOX Studio. If you already have one, skip these skips and continue to register the interface with Avid.
- Visit iLok’s registration page and complete the registration form.
- Please take note of your User ID and password, as they are case sensitive.
- Open the iLok Account Activation email and click on the verification link.
- Download and install the iLok License Manager.
- Launch the iLok License Manager app and sign in to your account.
- (Optional) Connect an iLok and click Yes to register the dongle to your account when prompted.
Register the Interface with Avid
Before getting set up and connected, you must register the interface with Avid. Upon registration, you’ll receive a copy of the MBOX Control software, which is needed to update and edit hardware settings, create and edit custom software routing, and adjust system and hardware levels. You’ll also receive a free copy of Pro Tools Artist and over 2GB of additional software and plug-ins!
- Log into your Avid Master account. If you don’t have an account, you can create one here.
- Go to the Avid product registration page, enter the redemption code serial number on the Welcome card, and click Register.
- You can also scan the QR code on both the Welcome Card and the bottom of the interface.
- Enter the Serial Number at the bottom of the interface.
- Enter your iLok credentials, then click Use This Account.
Download and install the software
Once registered, you will need to download and install the MBOX Control software, which is necessary to create and update your routing. It also includes the drivers you need for the interface to correctly communicate with your computer.
- Navigate to the My Products section of your AVID account and locate the latest download for the MBOX Control software.
- Click View Software Download Links & Product Details for your OS. This will show the download links for all of your new software.
- Download the MBOX Control and Pro Tools software.
- You can also download the bonus plug-in packs and demo sessions, but this isn’t necessary.
- Navigate to your Downloads folder. Locate and launch the MBOX Control software.
- Once installed, run the Pro Tools installer. After completing the installation, you will be prompted to restart your computer.
- At this time, install any bonus software you downloaded.
Setup and Connections
Now that you’ve registered the MBOX Studio with AVID, it’s time to get set up and connected. What’s great about the interface is the number of connections available. From basic connections to creating FX loops, the possibilities are endless! In this guide, we’ll cover the hardware connections. Before we move forward, here are a few tips:
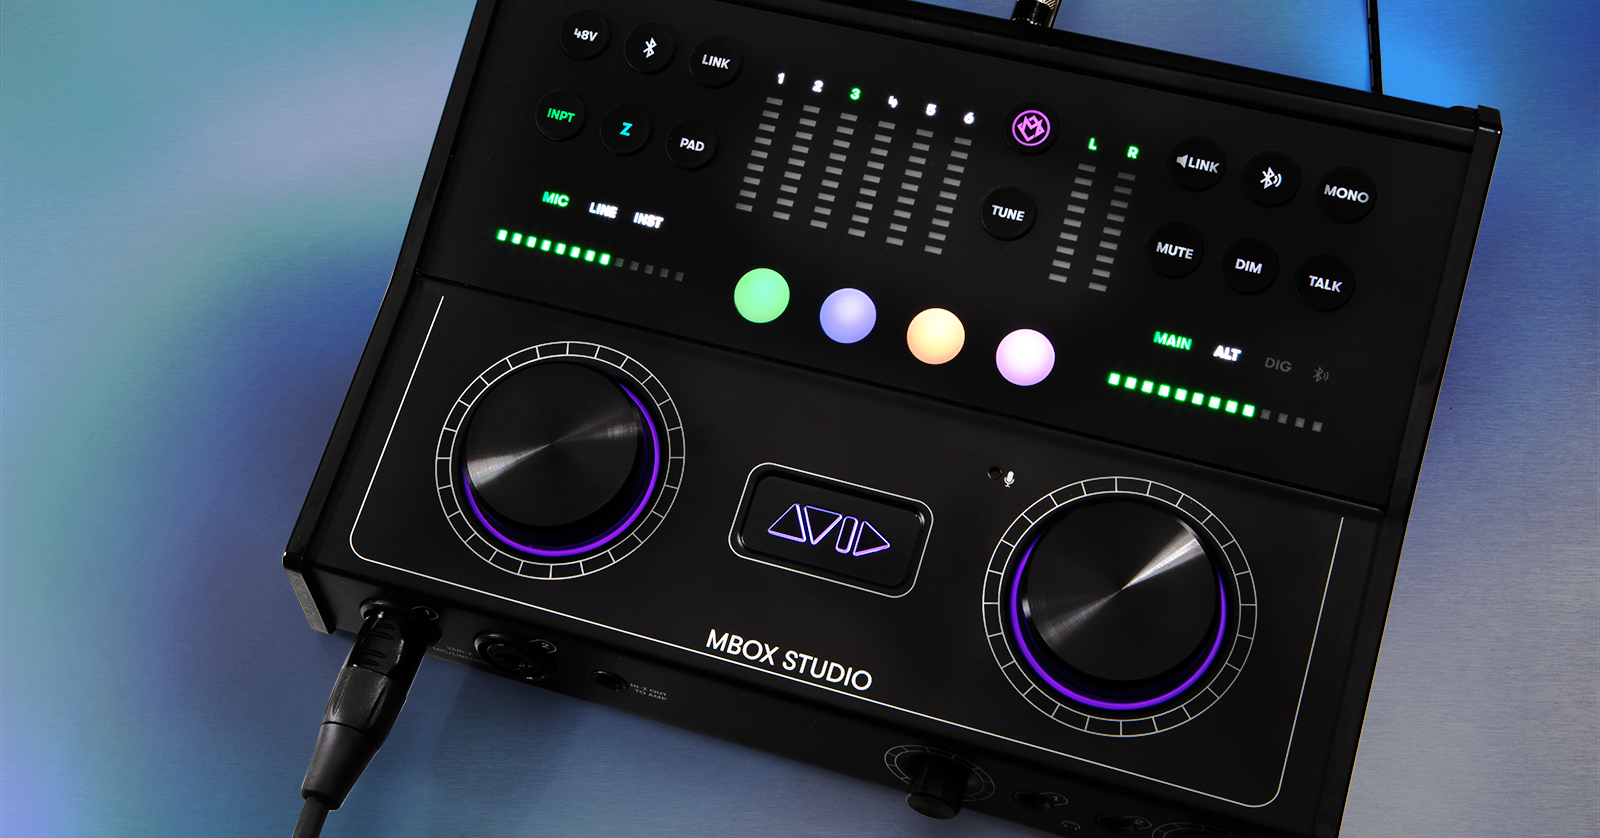
- Press the LEFT encoder to select through channels 1–6, then press the INPT button. Turn the LEFT encoder to then select between the input type (Mic, Line, Inst.).
- Press and hold the Bluetooth button to enable Bluetooth. Once the Bluetooth LED is flashing, locate and select the MBOX Studio on your mobile device to pair.
- Line Out 8 and Hi-Z Out (on the front of the unit) share the same output mix.
Once your hardware is connected, check out our guide about the MBOX Control software to learn about the software routing. Also, check out our guide to learn more about connecting your audio interface.
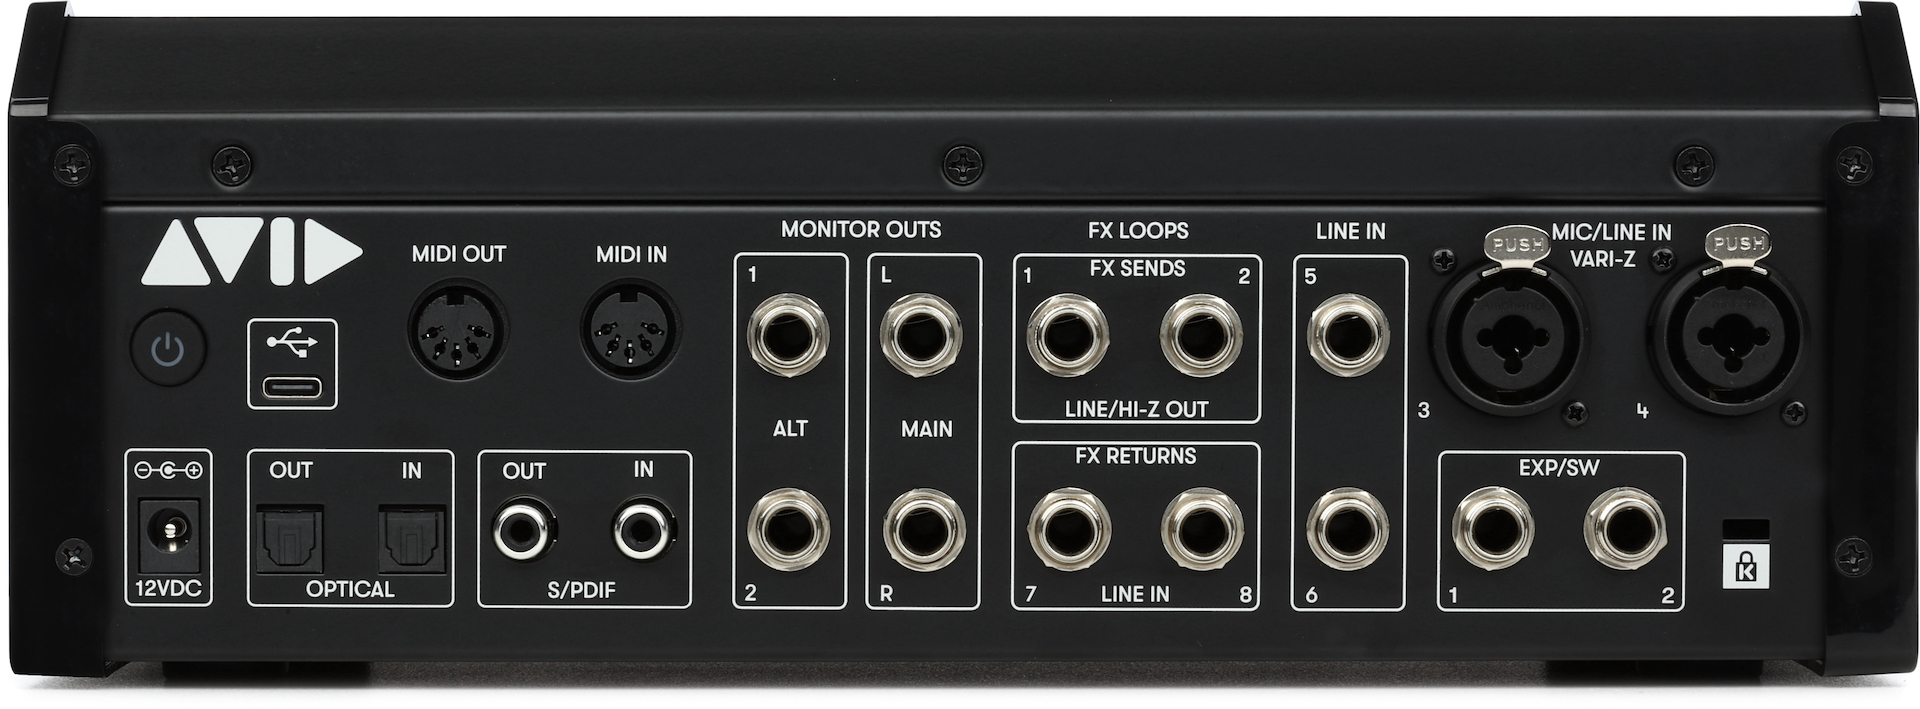
MIDI
The MBOX Studio comes with 5-pin MIDI ports that allow you to connect MIDI devices. While some MIDI devices require their USB connections for full functionality, the interface MIDI ports are helpful if your external device has MIDI ports, plus you’ll save a USB port. For example, you can connect a MIDI keyboard to play virtual instruments or connect an external synthesizer and play/trigger it with a MIDI track inside your DAW.
Digital I/O
To connect, use the ADAT and S/PDIF ports to expand your input and output count. You will then need to update the settings within the Control software. Check out our guide about the basics of digital clocking to learn more!
Monitoring
When connecting your speakers, connect your primary monitors to the MAIN L/R. If you have an additional pair, connect them to the ALT 1/2.
- Push the RIGHT encoder to cycle through the available monitoring outputs.
- When one monitoring output is selected, MBOX Studio will auto mute the one that isn’t currently selected.
- Turn the RIGHT encoder to adjust the level of the selected output.
- Press the LINK button to link the monitoring level to all outputs. This helps prevent any unexpected jumps between different monitor types (Main and Alt).
- Press and hold the right Bluetooth button to stream audio from the MBOX Studio to a device such as a Bluetooth speaker or your car, if it has Bluetooth capability. This helps you check your mix in different environments.
FX Loops
One feature of the MBOX Studio that sets it apart from the rest is its ability to create hardware effects loops. These allow you to integrate external effects like guitar pedals or effects processors that you can add to the interface or to tracks in your Pro Tools project.
- Connect a 1/4-inch instrument cable from the input of the external device to the FX 1 Send input on the MBOX Studio. If you have another mono external device you wish to connect, hook it up to FX 2 Send.
- If you have an external stereo device, connect it to FX 1 and FX2 Send.
- Connect another 1/4-inch instrument cable from the FX 1 Return on the MBOX Studio to the external device’s output. If you have another mono external device you wish to connect, hook it up to FX 2 Return.
- If you have an external stereo device, connect it to both FX 1 and FX2 Send.
- Once the hardware is connected, update the routing within MBOX Control.
EXP/SW
Another unique feature of the MBOX Studio is connecting expression pedals and footswitches for remote control. You can control the following operations, which you can change at any time within the MBOX Control software.
- Talkback
- Monitor Mute, Dim, and Alt Switch
- Bluetooth
- Tuner
- FX Bypass 1 and 2
When you need help, Sweetwater has the answers!
Our knowledge base contains over 28,000 expertly written tech articles that will give you answers and help you get the most out of your gear. Our pro musicians and gear experts update content daily to keep you informed and on your way. Best of all, it’s totally FREE, and it’s just another reason that you get more at Sweetwater.com.


Offer applies only to single-receipt qualifying purchases. Select manufacturers may require that only the manufacturer’s products qualify towards the minimum purchase amount needed to be eligible for promotional financing. Otherwise, an invoice that meets the minimum purchase amount and contains at least one qualifying manufacturer product is eligible for promotional financing. No interest will be charged on promo purchase balance, and equal monthly payments are required on promo purchase until it is paid in full. The payments equal the amount financed divided by the number of months in the promo period, rounded up to the next whole dollar. These payments may be higher than the payments that would be required if this purchase was a non-promo purchase. During the last month(s) of the promo period the required monthly payment may be reduced due to the prior months’ rounding. Regular account terms apply to non-promo purchases. New Accounts as of 07/31/2025: Purchase APR is 34.99%. Penalty APR is 39.99%. Min Interest Charge is $2. Existing cardholders: See your credit card agreement terms. Subject to credit approval.
Offer applies only to single-receipt qualifying purchases. No interest will be charged on the promo balance if you pay it off, in full, within the promo period. If you do not, interest will be charged on the promo balance from the purchase date. The required minimum monthly payments may or may not pay off the promo balance before the end of the promo period, depending on purchase amount, promo length and payment allocation. Regular account terms apply to non-promo purchases and, after promo period ends, to the promo balance. New Accounts as of 07/31/2025: Purchase APR is 34.99%. Penalty APR is 39.99%. Min Interest Charge is $2. Existing cardholders: See your credit card agreement terms. Subject to credit approval.
The estimated required monthly payment shown which excludes taxes and delivery equals the amount financed divided by the number of months in the promo period, rounded up to the next cent. During the last month(s) of the promo period the required monthly payment may be reduced due to this rounding. These payments apply only with the financing offer shown. If you make these payments by the due date each month, you should pay off this amount financed within the promo period, if it is the only balance you are paying off. If you have other balances on your account, this payment will be added to any other minimum monthly payments.
Applies only to select items from this manufacturer. Ask your Sweetwater Sales Engineer for more details.