
How to Use MBOX Studio Control
In our MBOX Studio Quickstart Guide, you learned how to register, set up, and connect the interface for the first time. In this guide, you will learn how to use its companion software, MBOX Control. Follow the sections below to get started.
Navigate MBOX Control
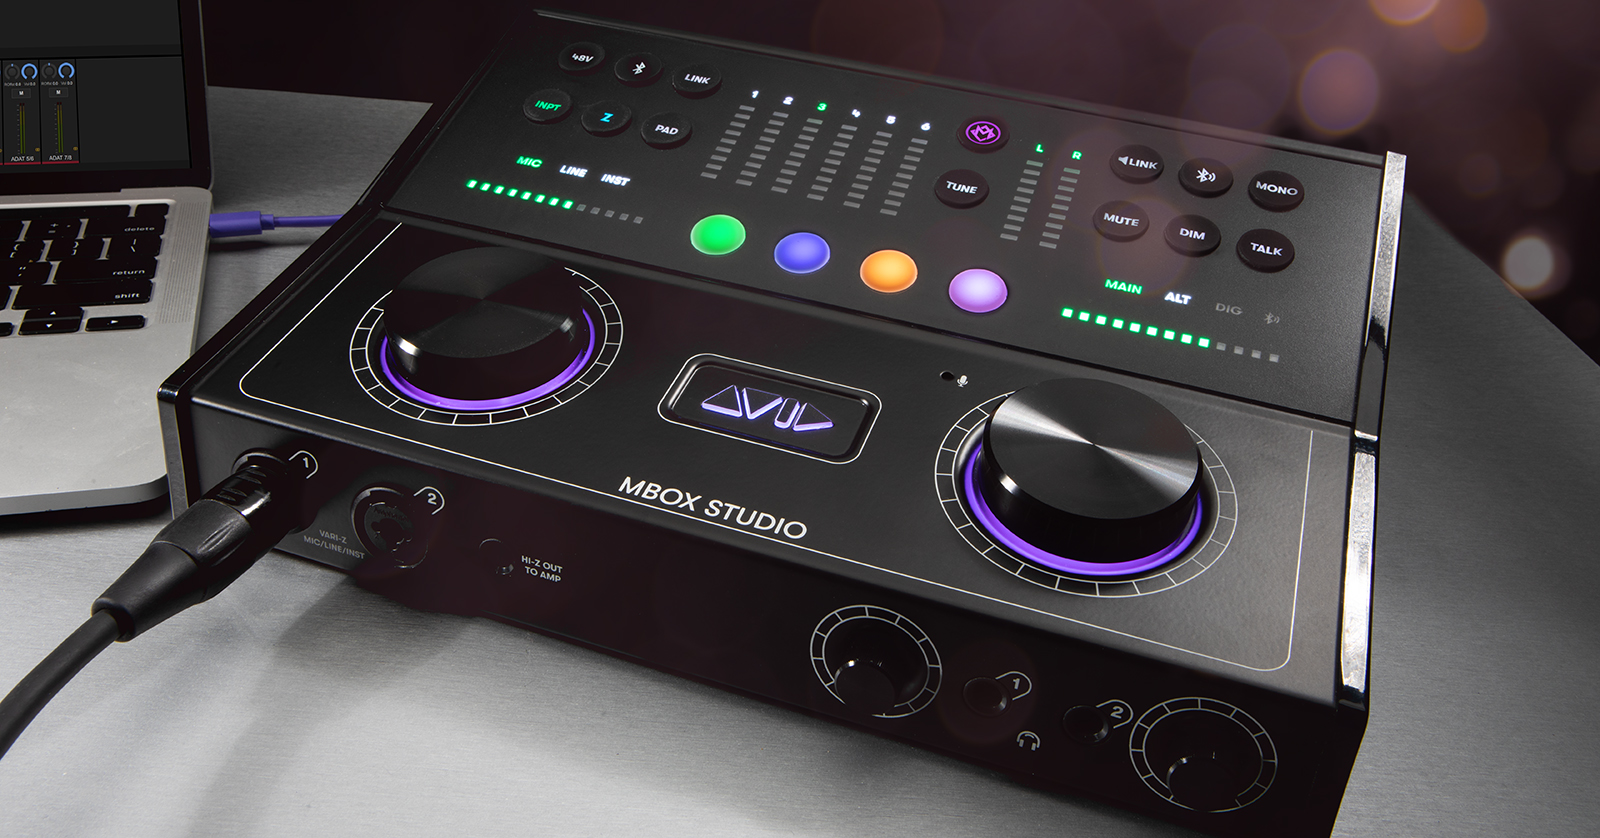
TIP: You can launch MBOX Control directly from your desktop or by pressing the MBOX button on the interface, which is located above TUNE.
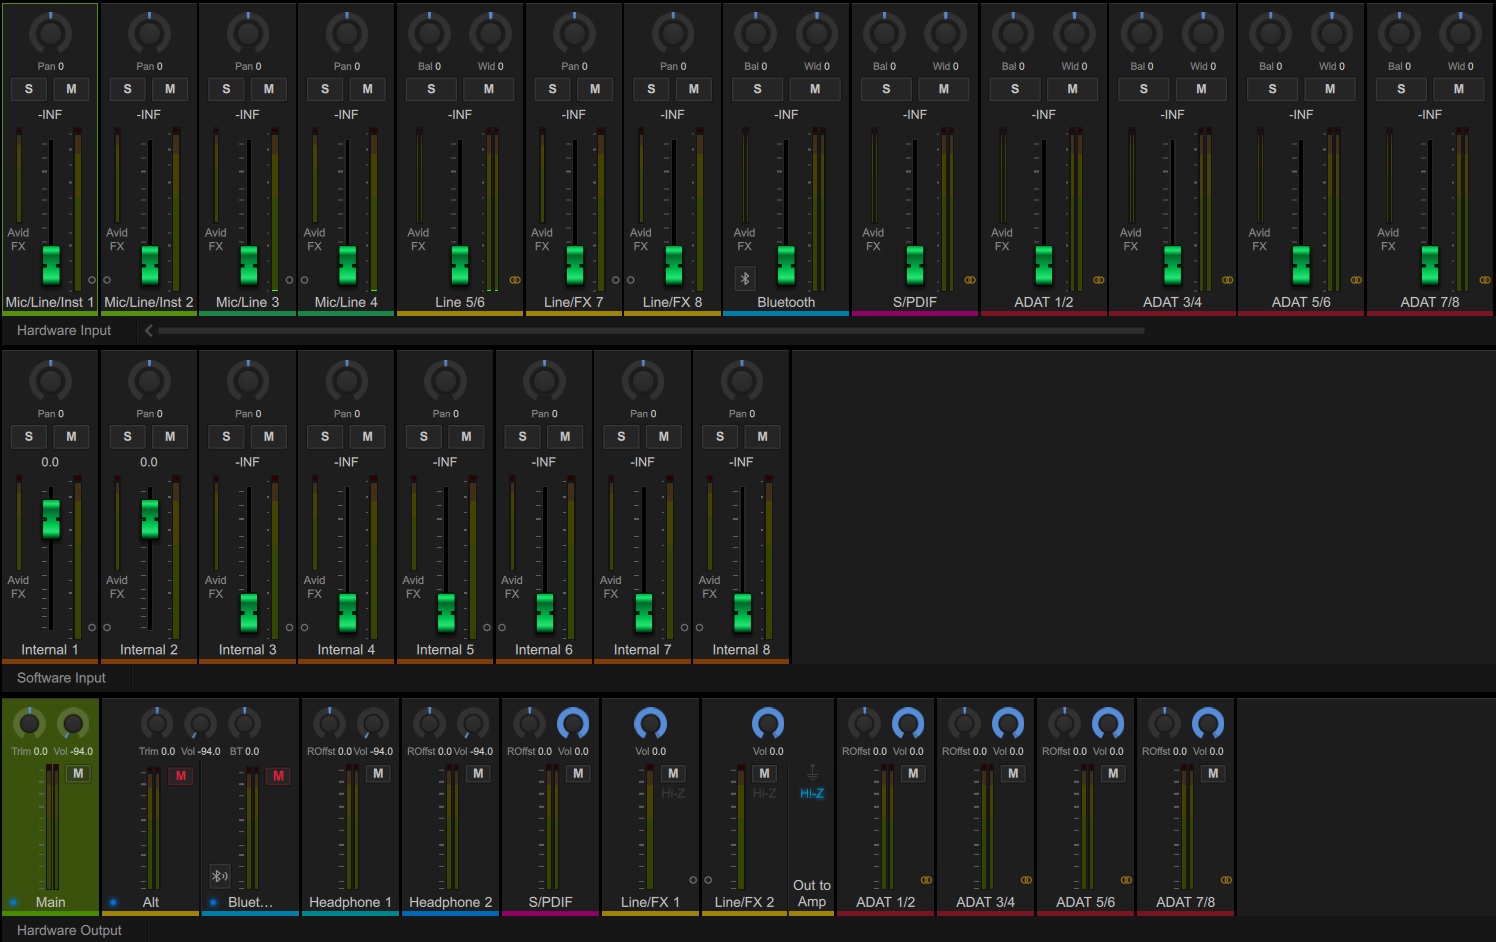
MBOX Control is the standalone software where you will make various changes with the Avid MBOX Studio interface. This includes changing clock sources, input and output routing, and sample rate. When you launch MBOX Control, there are three primary sections you’ll be working with: Hardware input, Software output, and Hardware output.
- Hardware inputs: The top row of MBOX Control is dedicated to the physical inputs of the MBOX Studio.
- Software outputs: This section displays eight software outputs that are routed from your DAW and will be displayed as outputs within your DAW.
- Hardware outputs: These are the physical outputs of your MBOX Studio, such as the Main, Alt, Headphone, and Digital.
- The Alt Mix and Bluetooth outputs are linked together.
- You can use S/PDIF to mirror the Main output to directly connect to digital monitors, but note that those, too, will be linked together. All other outputs can have their own mix.
Options menu
The top part of MBOX Control is dedicated to the global options available.
Preferences
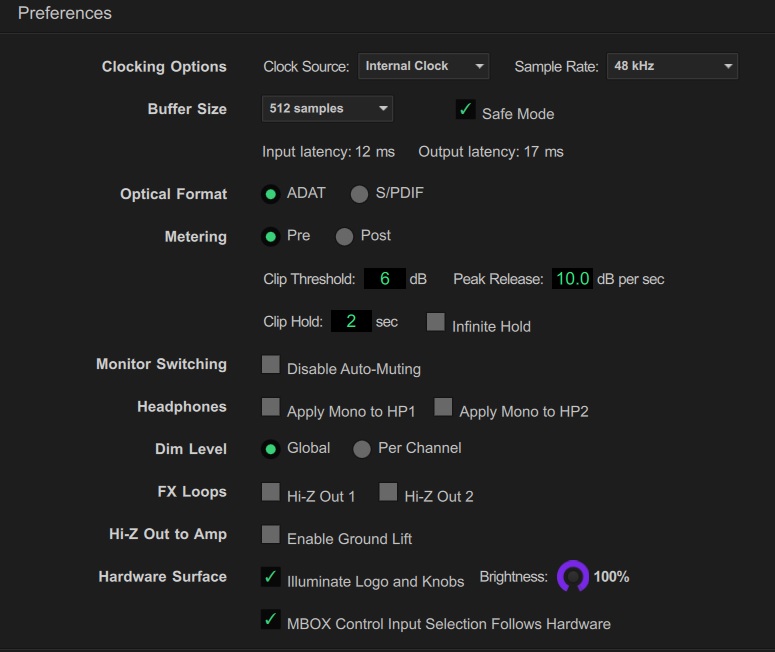
If you click the gear icon, this will pull up the audio preferences, where you will adjust options such as Sample Rate, Clock Source, Buffer Size, and Digital Connection Formats.
Audio routing hints
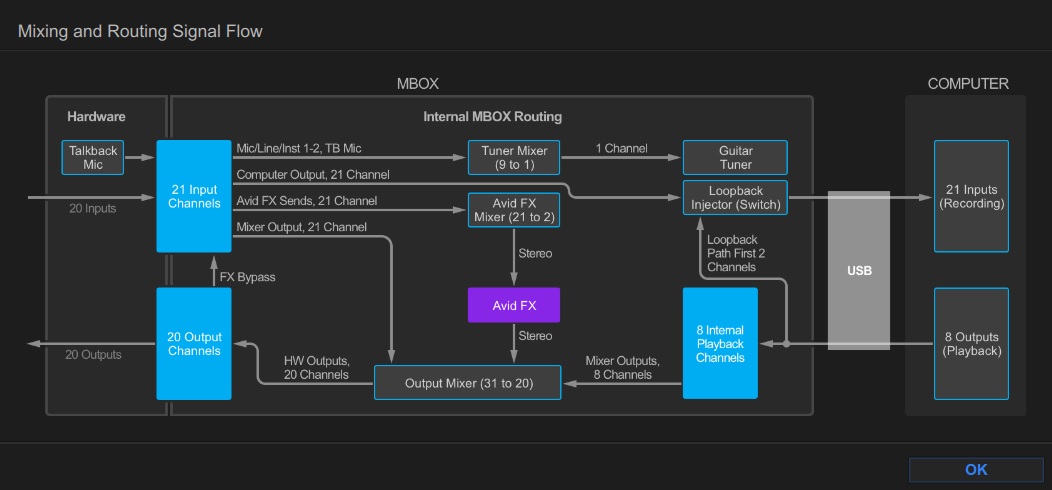
Clicking the ? icon will pull up the Mixing and Routing Signal Flow window. This is very useful if you need to refer to how audio is routed within MBOX Control.
Button controls
The four center buttons on the MBOX Studio are shortcuts within MBOX Control. The color and shortcut functions are fully editable, making the interface customizable.

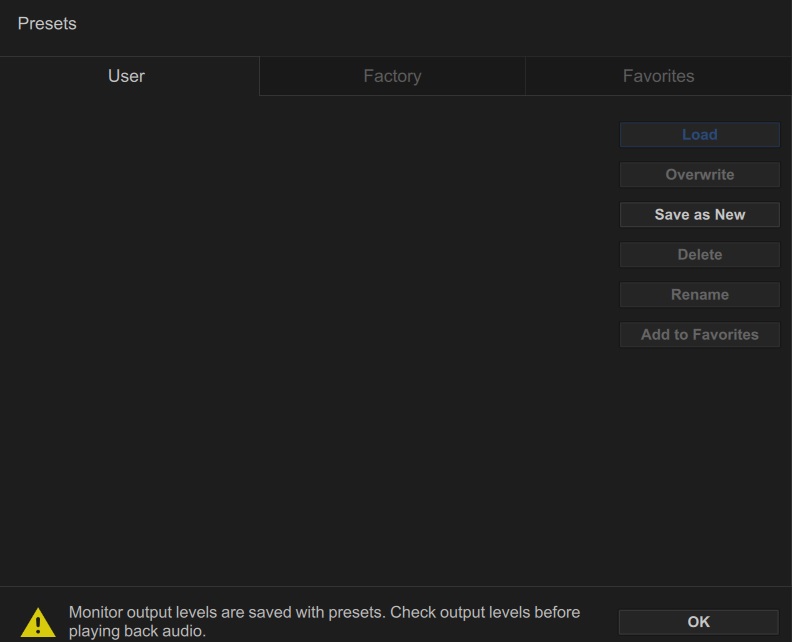
Presets
Clicking the Presets dropdown box will allow you to save, name, and reload any mixing presets you have created.
How to Route Audio
Now that you know how each main section works, let’s cover how to create audio mixes and monitor within MBOX Control.
Create cue mixes
When you click on the physical outputs, the faders change colors to mirror the selected physical output. This allows you to create a custom mix from scratch. Creating a custom mix is useful when using outboard gear or recording a band that wants individual headphone mixes. Let’s make a custom mix for routing specific software outputs to a headphone input without affecting the Main Mix.
- Click the Main Mix at the bottom of MBOX Control and adjust the hardware inputs as necessary.
- Click Headphone 1 at the bottom of MBOX. This will allow you to control the hardware inputs and software outputs.
- Use the faders in MBOX Control to adjust the levels as necessary.
- If you want the same custom mix for all monitoring mixes, click Std Mix Mode (located at the top left of MBOX Control), click Group All Monitor Mixes, then click Apply.
- If you click Advanced Mix Mode, this will disable the custom monitoring mix, which means changes will affect the inputs and outputs globally.
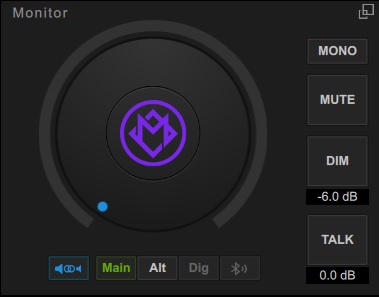
Monitoring
NOTE: Monitor output levels are saved along with every preset you create.
By default, the Main and Alt monitoring are helpfully linked together so you don’t expect any unexpected level jumping. However, there may be a time when you need to adjust and separate these. To link and unlink monitoring levels, click the Link (located next to Main, Alt, Dig, and Bluetooth)button in the Monitor section of MBOX Control and adjust the levels as necessary.
- You can set the Monitor section as a scalable floating window by clicking the box icon at the top right of the Monitor section. Please note that this will always be the top window if detached.
When you need help, Sweetwater has the answers!
Our knowledge base contains over 28,000 expertly written tech articles that will give you answers and help you get the most out of your gear. Our pro musicians and gear experts update content daily to keep you informed and on your way. Best of all, it’s totally FREE, and it’s just another reason that you get more at Sweetwater.com.


Offer applies only to single-receipt qualifying purchases. Select manufacturers may require that only the manufacturer’s products qualify towards the minimum purchase amount needed to be eligible for promotional financing. Otherwise, an invoice that meets the minimum purchase amount and contains at least one qualifying manufacturer product is eligible for promotional financing. No interest will be charged on promo purchase balance, and equal monthly payments are required on promo purchase until it is paid in full. The payments equal the amount financed divided by the number of months in the promo period, rounded up to the next whole dollar. These payments may be higher than the payments that would be required if this purchase was a non-promo purchase. During the last month(s) of the promo period the required monthly payment may be reduced due to the prior months’ rounding. Regular account terms apply to non-promo purchases. New Accounts as of 07/31/2025: Purchase APR is 34.99%. Penalty APR is 39.99%. Min Interest Charge is $2. Existing cardholders: See your credit card agreement terms. Subject to credit approval.
Offer applies only to single-receipt qualifying purchases. No interest will be charged on the promo balance if you pay it off, in full, within the promo period. If you do not, interest will be charged on the promo balance from the purchase date. The required minimum monthly payments may or may not pay off the promo balance before the end of the promo period, depending on purchase amount, promo length and payment allocation. Regular account terms apply to non-promo purchases and, after promo period ends, to the promo balance. New Accounts as of 07/31/2025: Purchase APR is 34.99%. Penalty APR is 39.99%. Min Interest Charge is $2. Existing cardholders: See your credit card agreement terms. Subject to credit approval.
The estimated required monthly payment shown which excludes taxes and delivery equals the amount financed divided by the number of months in the promo period, rounded up to the next cent. During the last month(s) of the promo period the required monthly payment may be reduced due to this rounding. These payments apply only with the financing offer shown. If you make these payments by the due date each month, you should pay off this amount financed within the promo period, if it is the only balance you are paying off. If you have other balances on your account, this payment will be added to any other minimum monthly payments.
Applies only to select items from this manufacturer. Ask your Sweetwater Sales Engineer for more details.