
Getting Started With the Alesis Surge

Alesis Surge Setup Guide
This article will show you how to register the Alesis Surge and then set up, connect, and update the Surge’s drum module settings. Follow the sections below to get started.
Register the Alesis Surge
Before we get started, the first thing you will need to do is register the Surge kit with Alesis. When you register the device, you’ll gain access to software downloads and a coupon code for 40 free drum lessons from Melodics. Keep your Sweetwater invoice handy, as you will need to enter the purchase date. Follow the steps below and then continue to the Surge setup and connections.
- Log in to your Alesis account. If you don’t have one yet, you can create one here.
- Navigate to the Alesis registration page, use the Product drop box and select the Surge.
- Enter the serial number (located on the module packing box, underneath the module, and on the front page of the manual), enter the purchase date on your Sweetwater invoice, and then click Register My Product.
- Go to the Melodics homepage and download the free app for your OS. Once downloaded, go to your Downloads folder, run the installer, and then launch the app.
- When prompted to enter your promo code, go to your Alesis account’s My Products section, then copy the code listed.
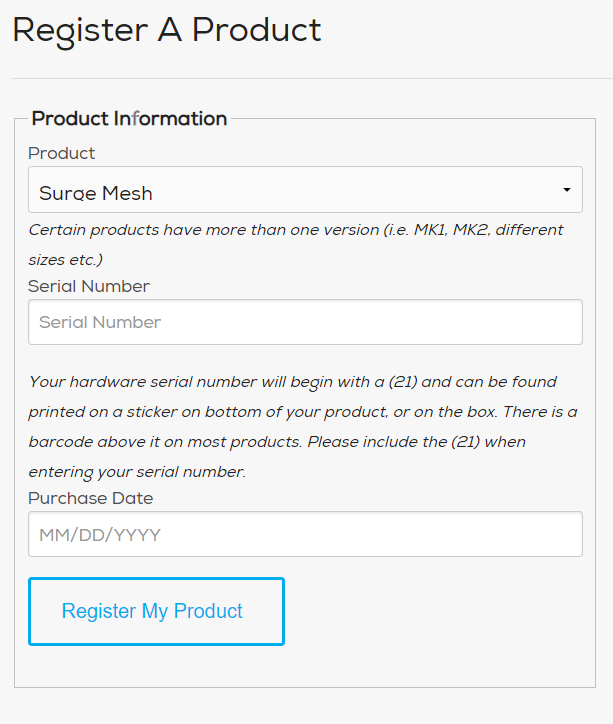
Click the image to register your Alesis Surge drum kit.
Click the image to download your free copy of Melodics.
Alesis Surge setup and connections
Now that your Alesis Surge has been registered, the next step is to assemble it and get connected. When you open the box, you will notice smaller ones that contain each part of the drum kit. To build the Alesis Surge, follow the included assembly guide. Be sure to check out this useful video from and support guide from Alesis, as well.
Alesis Surge pad and module connections
Once your kit has been assembled, you’ll use the included wiring harness to connect your pads to the module. The cables on the wiring harness are labeled, so make sure that each cable is plugged into the correct corresponding drum or cymbal pad to trigger the right sound. Also, be sure that the connection to the module is secured in place.
Connecting additional pads and cymbals
If you want to expand your Surge kit, two additional connections are located on the back of the module: one for a tom and one for a cymbal. When using a TRS cable, the module will support dual-zone pads (i.e., a cymbal pad with a crash and bell or choke feature).
TIP: When connecting your pads to the module, use the included velcro cable straps to secure them to the Surge’s drum rack. This will keep everything neat and ensure that the cables don’t get tangled up.
Connect the Surge to your computer
Connecting your Surge kit to a computer is straightforward. All you need is a USB A- B cable to connect it. The Surge is class-compliant on both Mac and PC, so no additional driver software is necessary. All you need to do is set it up as a MIDI device inside your DAW and start playing!
Update the Surge’s drum module settings
Once everything is set up and connected, you’ll want to update the module settings. This includes the Utility settings (i.e., sensitivity, threshold), Kit settings, and Pad settings. Since each drummer has their own playstyle, it may take a little bit of time to update everything. Be sure to check out their support page and video below for more information!
Kit settings
The Kit settings include things such as the EQ, reverb, and volume. To change these settings, press the Kit button, then press the Page/Select button until you get to the setting you wish to change. Once selected, use the left and right arrow buttons to adjust the setting as necessary. Please note that changing the reverb will affect the entire kit, song, and any external MIDI device’s output sound that’s connected.
Kit settings you can adjust
- VOL: Kit volume
- REV: Kit reverb
- EQH: EQ for high frequencies
- EQM: EQ for mid frequencies
- EQL: EQ for low frequencies
Pad settings
The Pad settings allow you to change the pad’s sample, volume, panning, and pitch. You can also change the MIDI note number if you’re using the Surge along with an external synth or virtual instrument.
- Hit the pad whose settings you want to adjust. Alternatively, press the pad’s button located on the module.
- Press the Voice button, then press the Page/Select button until you get to the setting you wish to change. Once selected, use the left and right arrow buttons to adjust the setting as necessary.
Pad settings you can adjust
- NUM/H-C**: Pad voice (drum sound)
- VOL: Pad volume
- PAN: Pad panning
- PIT: Pad pitch
- REV: Pad reverb
- MID: MIDI note.
- P-S: Pad song switch. This will adjust whether or not the selected song starts playing when you hit that particular pad.
- P-N***: Pad song number. If the P-S is turned on, this will select the song number that will play will play when the selected pad is hit.
How to save your Surge kit settings
While you can’t overwrite any of the factory kits, you can save updated kits into a User slot. All you need to do is press Save, use the left and right arrow to select the User slot where you want the kit, then press Save one more time.
Utility settings
The Utility settings allow you to change things such as the sensitivity, threshold, and crosstalk of individual pads. These settings are essential to adjust since every drummer’s technique is different. If you’re having triggering issues, these are the first things to look at, as well.
- Hit the pad whose settings you want to adjust. Alternatively, press the pad’s button located on the module.
- Press the Voice button, then press the Page/Select button until you get to the setting you wish to change. Once selected, use the left and right arrow buttons to adjust the setting as necessary.
Utility settings you can adjust
- SEN (Sensitivity): Changes the responsiveness of a pad when you hit it. The higher the value, the less forcefully you need to play to generate a loud hit.
- THR (Threshold): Changes how hard you have to hit the pad to generate a sound. The higher the value, the harder you have to hit it.
- CRO (Crosstalk): Determines the “ghost” triggering of a pad when an adjacent pad is hit. If you hit a pad and it’s triggering others, you’ll want to increase it.
- CUR (Velocity curve): Controls the pad’s dynamic response based on how hard you hit the pad. Check out the Owner’s Manual for a list of the velocity curves.
- R-S (Rim sensitivity): Controls the responsiveness of a pad’s rim when you hit it.
- S-S (Hi-Hat “splash” sensitivity): Controls how responsive the hi-hat “splash” effect is when you hit the pedal. The splash effect is when you quickly close and open the hi-hat pedal.
- LOC (Local Mode): Changes whether or not the pads will trigger the module’s sounds. It should be set to ON if you’re playing around, want to use the module’s sounds, and aren’t connected to a computer or external MIDI device.
- GM (General MIDI Mode): If this is turned on, the module will use generic MIDI percussion sounds. The module will also be set to MIDI channel 10. GM should be set to ON when using it with anything else connected via MIDI.
Additional resources
Related Articles
When you need help, Sweetwater has the answers!
Our knowledge base contains over 28,000 expertly written tech articles that will give you answers and help you get the most out of your gear. Our pro musicians and gear experts update content daily to keep you informed and on your way. Best of all, it’s totally FREE, and it’s just another reason that you get more at Sweetwater.com.

