
Focusrite Clarett Series Quickstart Guide
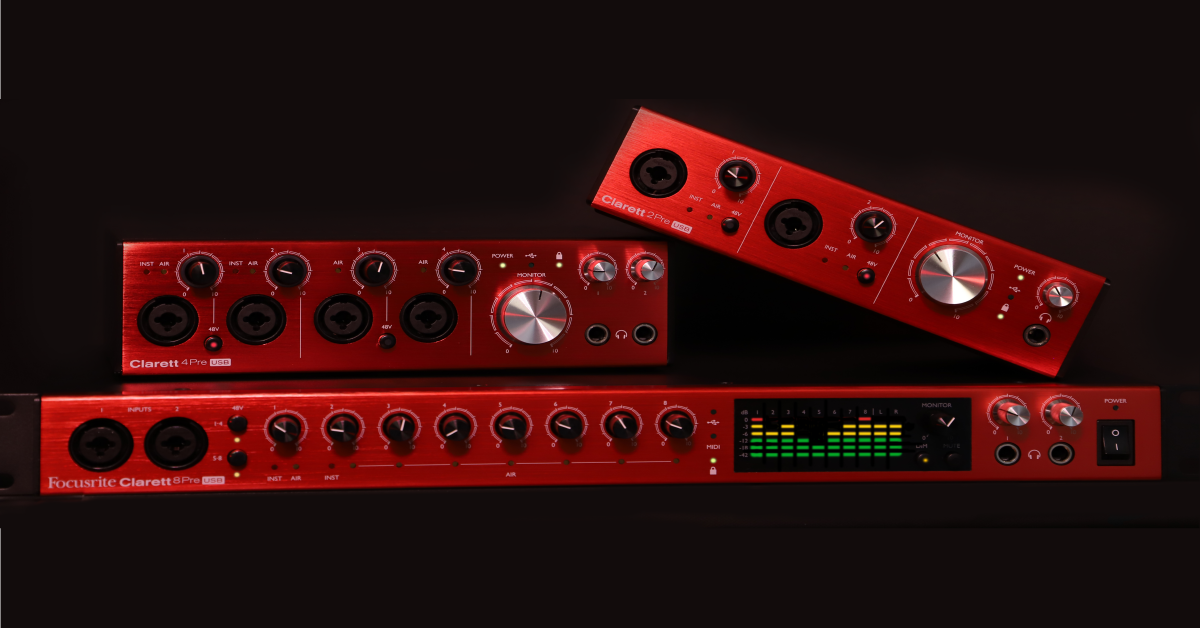
In this guide, we will show you how to get started with a Focusrite Clarett interface. That means we’ll walk you through how to register, connect, and use the interface within Focusrite Control. We will also talk about how to pair the interface using the iOS application. Read the sections below to get started.
Register the Clarett
Before you can start recording with your new interface, there are a few steps you need to take. You’ll need to register the unit, which allows you to get free plug-ins, download the appropriate drivers, and update the firmware.
The Focusrite Clarett interfaces include free bundled software and plug-ins. To get licenses for the software, you must register your interface on the Focusrite website using the included bundle code and serial number. Once registered, you’ll get access to the registration codes and download links. Follow the steps below to register your Clarett.
- Log into your Focusrite account. If you haven’t created an account yet, create one here.
- On your account home page, click Register A New Product and select your Clarett interface.
- Fill out the information, including the bundle code and serial number located on the card that came with your interface, then click Submit. The serial number is also listed on the bottom of the device.
- Once registered, click My Software on the top of the Focusrite page to download and register the bundled software.
Download and Install Focusrite Control 2
After registration, the next step is to download and install Focusrite Control 2 for your OS. All of the necessary drivers are included in the installer, so there is only one file to download. Follow these steps to download and install Focusrite Control.
- Visit the Focusrite download page and select your Clarett interface.
- Click the Software box and download Focusrite Control for your OS.
- Go to your Downloads folder and run the Focusrite Control installer.
- Windows (PC) Users: Double-click the .exe file to begin the installation process.
- Mac Users: Double-click the .dmg file, then double-click the .pkg to begin the installation process.
- Follow the on-screen instructions to complete the installation, then reboot the computer once completed.
Are you using an iOS device?
Focusrite Control 2 is also available for iOS devices. To get the app, simply go to the App Store, then search for and download Focusrite Control 2.
Clarett Setup and Connections
Once you’ve registered the device and downloaded the latest version of Focusrite Control, the next step is to connect the Clarett to your computer, set it as your computer’s default playback and recording device, then set up the routing within Focusrite Control.
Connect to a Computer
Connecting a Clarett series interface is very simple. Plug the power supply in and connect the USB cable to the computer. While you can connect the interface to a USB hub, we highly recommend connecting it directly to your computer to ensure the best connectivity and performance. Follow these steps to get connected.
- Plug the power supply in, connect one of the included USB cables from the Clarett to your computer, then power it on. If your computer has a USB-C connection, use the included USB-C to C cable; if not, use the included USB-C to A.
- Navigate to your OS sound settings page and set it as the default input and output device.
- Windows (PC) users: Right-click the sound icon on the Windows taskbar, select Sounds, then click the Playback tab. Locate and select the Focusrite, click Set Default, then click OK to close the menu. Follow the same procedure in the Recording tab.
- Mac users: Click the Apple icon from the Menu Bar and select System Preferences. Click Sound, then select the Focusrite under the Input and Output tabs.
Windows on Arm compatibility
Focusrite Clarett+ USB-C interfaces are fully compatible with Windows on Arm PCs. Just make sure to install the latest Focusrite Control.
You cannot currently use Clarett Thunderbolt interfaces with Windows on Arm PCs, however, as both Thunderbolt and PCIe are not compatible. Check out our Windows on Arm Compatibility guide to learn more.
Pairing the Clarett With an iOS Device
If you own an iOS device, you can use Focusrite Control remotely using the iOS app. This is particularly handy if, for example, a vocalist is in a recording booth and needs to control input and headphone output levels on the fly. Follow these steps to pair with an iOS device.
- Download and install Focusrite Control from the App Store.
- Launch the Focusrite Control app on your computer, then launch the app on your iOS device.
- Follow the on-screen instructions to complete pairing. Ensure that both the computer and iOS devices are on the same WiFi network, or else it won’t show up.
- Select the computer listed on the iOS app, click Device Settings on the computer’s application, then click Approve next to the iOS device listed.
Is the interface not showing up?
If the interface, computer, or iOS device isn’t being recognized, it’s more than likely an error with your WiFi settings. For more information, follow this troubleshooting guide.

Pairing with an iOS device
Using Focusrite Control 2
Focusrite Control 2 is the standalone application where you can edit the routing, create custom mixes, adjust device settings, and, if controlling it via an iOS device, manage iOS connections. After launching Focusrite Control 2 for the first time, you may be prompted to update the firmware. Follow the on-screen update instructions, then proceed to the home screen.
What’s that clicking sound?
When changing the input level signal from Line to Inst, or when engaging or disengaging the AIR preamps, you’ll hear a clicking sound from the interface. Don’t worry! That’s just the internal circuitry switching over.
Related Articles
When you need help, Sweetwater has the answers!
Our knowledge base contains over 28,000 expertly written tech articles that will give you answers and help you get the most out of your gear. Our pro musicians and gear experts update content daily to keep you informed and on your way. Best of all, it’s totally FREE, and it’s just another reason that you get more at Sweetwater.com.

