
Elektron Model:Samples Quickstart Guide
Getting started with the Elektron Model:Samples
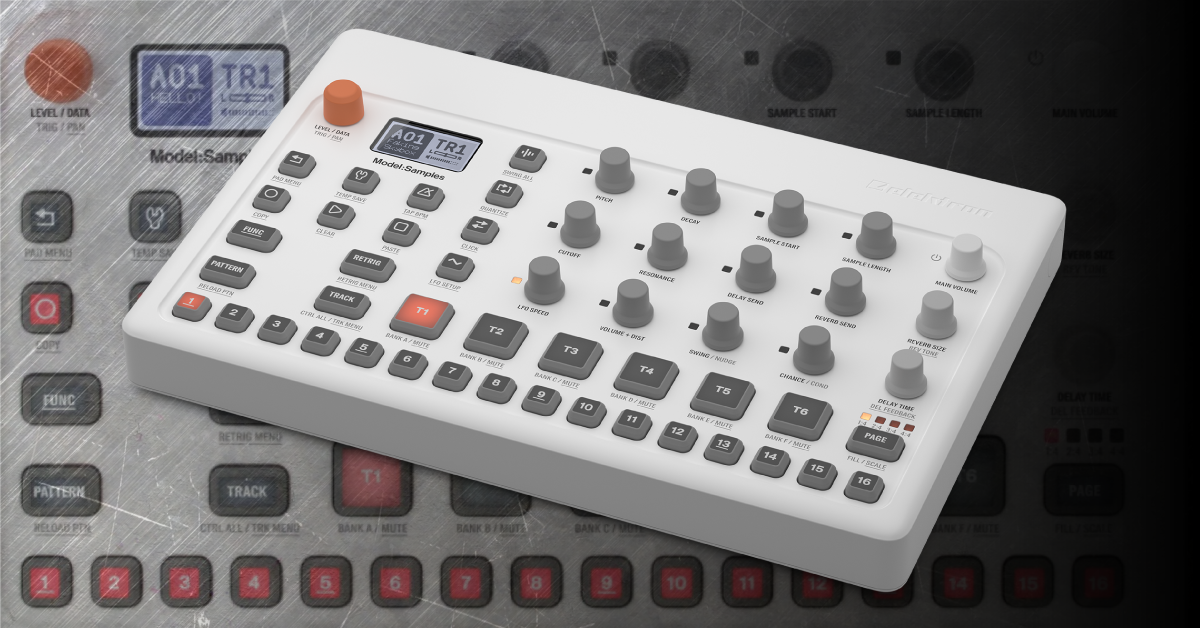
The Elektron Model:Samples is a great drum sequencer to add to your synth rig. That’s why in this article, we’ll show you how to register, set up, and use the Model: Samples for the first time. Follow the sections below to get started.
Register the Model:Samples
Before we start creating some music, the first thing you’ll want to do is register the Model:Samples with Elektron. After you register the drum sequencer, you’ll get an extended three-year warranty, as well as full support from Elektron on the off chance that the device encounters a bug. Follow the steps below to register the Model:Samples.
- Log in to your Elektron account. If you don’t have one, you can create it here.
- Once you’re logged in, navigate to the Person icon at the top right of the page, click My Registered Products, then enter the Model:Samples’ serial number.
- The serial number is found both on the bottom of the unit and on the side of the box.
- Follow the on-screen instructions to complete the registration process.
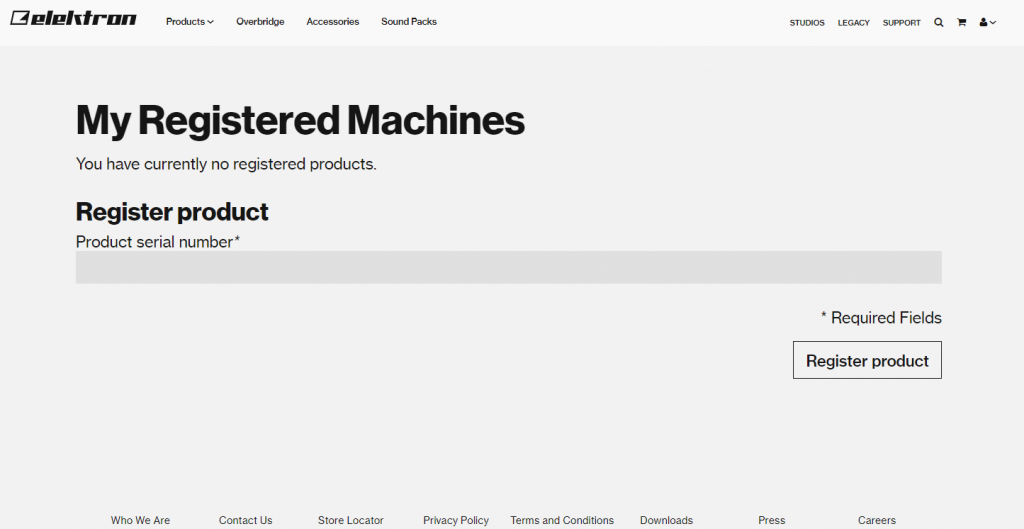
Click the image to register your Elektron Model:Samples
Navigating the drum sequencer
Elektron’s Model:Samples drum sequencer comprises three primary sections: The Effects, Tracks and triggers, and Utility. All three areas play an essential role in creating your music. Elektron has made it easy to navigate through global and sample options so that you can adjust parameters on the fly.
TIP: Holding the FUNC button will access the submenus, which you’ll need to do from time to time. You’ll be able to tell if the pad/knob has a submenu by seeing if it has underlined gray text underneath the primary function.
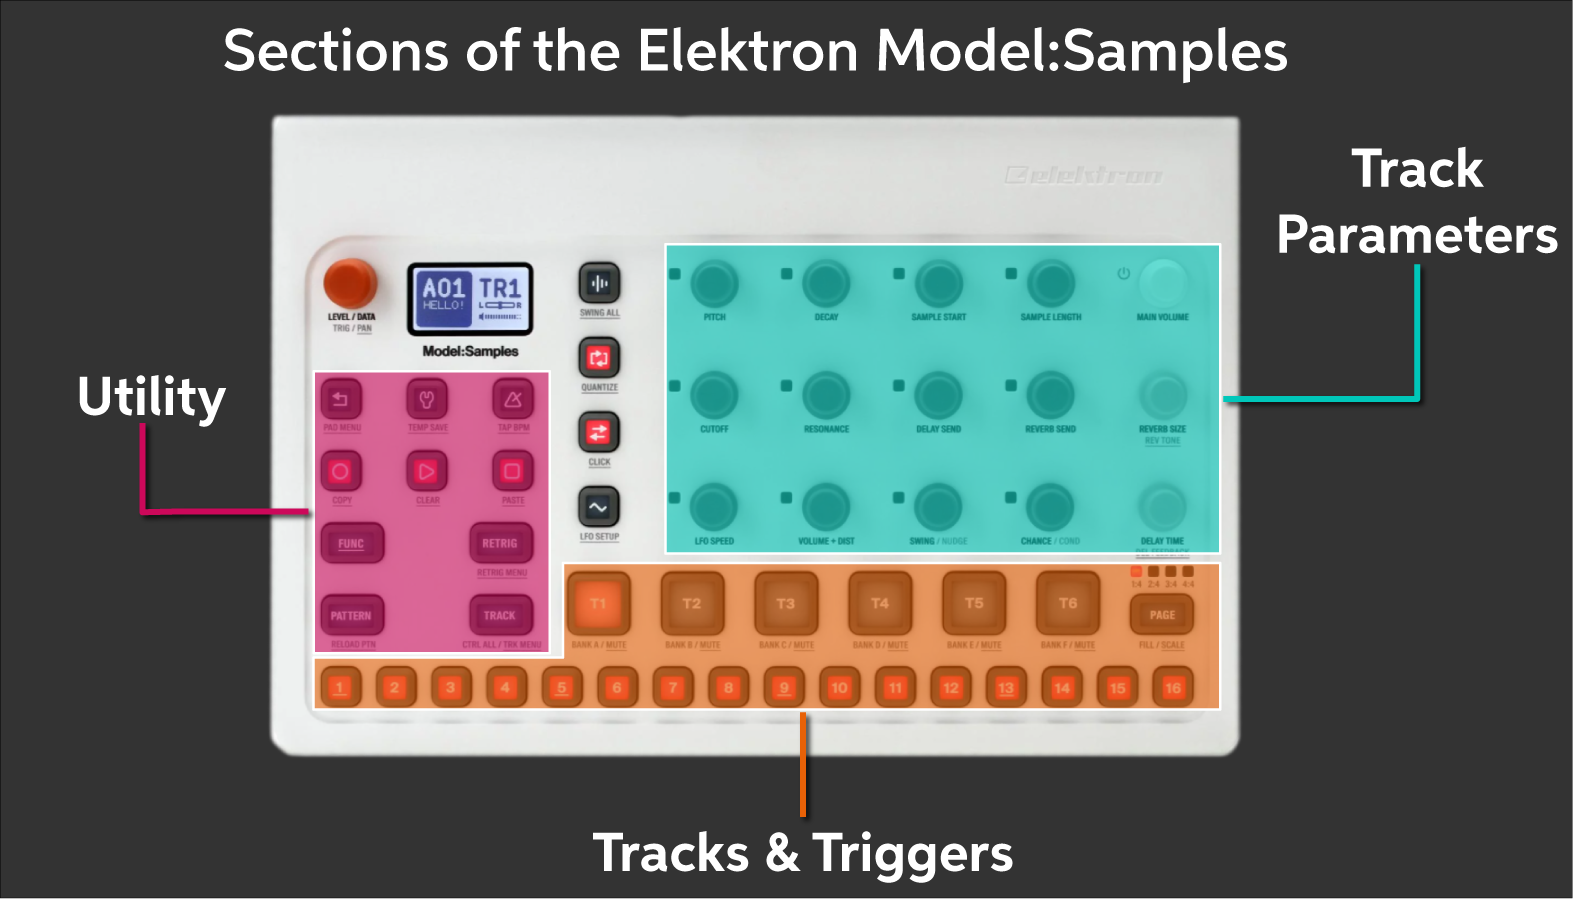
Sections of the Elektron Model:Samples
Track Parameters
The Track Parameters section on the Model:Samples has 12 basic parameters (dark gray knobs), two master parameters (Light gray knobs), and is pretty straightforward for monophonic synthesis. Each sample currently loaded can be altered independently, then saved for later use.
- Holding the FUNC pad while adjusting a track parameter will adjust it to an exact value (i.e., 0-32-64-128). Not holding it will allow you to fine-tune the parameter.
- Holding the TRACK pad while adjusting the track parameters will make a global change of that parameter. This means all tracks will be altered, instead of just the one.
- Check out the Parameter section of the Model:Samples manual for detailed information on how each parameter affects the sample.
Model:Samples Tutorial: Sound Design
Tracks and Triggers
The Tracks (T1-T6) are where the samples are loaded to. The Triggers (1-16) are the buttons that are used when grid recording or live recording. While there are only 16 steps visible, you can program up to 64 steps per pattern!
- Use the T 1-6 pads to select the track (sample). Those pads are velocity sensitive. Use the 1-16 step pads to play the selected sample at a fixed velocity.
- You can change how dramatic the fixed velocity is.
- Hold the FUNC pad+the BACK pad to enter the Pad menu.
- Use the orange data wheel and press to adjust velocity. If you don’t hear any sound or if it’s really quiet, check the FIX and VDep and make sure that they’re at a high enough value.
Utility
The Utility section of the Model:Samples is pretty self-explanatory. It’s where all of the transport and metronome controls are, and also where you’ll access options such as menus and submenus.
- Hold the FUNC pad to access secondary functions or menus. If there is light gray, underlined text below the pad/knob, it has a secondary menu or function.
- Press the WRENCH pad to navigate to the Config menu. It’s where you can adjust various global settings (i.e., MIDI channel routing, audio output, USB controls), rename the pattern, project, adjust MIDI and volume controls, back up and perform firmware updates (via Sysex).
How to record a beat using the Model:Samples
Now that you know where everything is and know the basics of how they work, it’s time to get creative. You have two ways of recording: Grid or Live. It’s pretty self-explanatory. Grid recording is where you manually enter each step, whereas you’ll perform live while in Live recording mode. Here’s the Model:Samples project workflow.

Workflow of the Elektron Model:Samples
Change a sample
Before we start recording, let’s change the samples first. Elektron made it straightforward, so follow these steps to change the sample.
- Press the Track (sample) pad you want to replace.
- Press the WAVE pad (the pad at the very top where you can ‘Swing All’) to access the sample libraries.
- Use the orange DATA knob to scroll through the samples. You can select one and press the pad to preview it.
- Once you’ve found a sample you like, press the DATA knob to load it, then use the BACK pad to go back to the main screen.
Record the drums
Let’s start recording! We’ll create a new pattern from scratch, change the length of the pattern, and then record Tracks in both Grid mode as well as Live record mode.
- Press Pattern, T 1-6, then one of the 16 step buttons.
- You have four seconds to select the T 1-6. If nothing is selected, you’ll have to go through the operation again.
- Press the Track you want to record first, then hold FUNC and press the PAGE pad to adjust the pattern’s length.
Grid record mode
TIP: Hold the Trigger pad where the sample is playing, then use the T button to adjust the velocity. Alternatively, use the orange DATA knob.
- To enter Grid record mode, press the Record pad.
- Next, hold the Track pad and press T 1-6 to select the sample.
- Enter the steps one at a time. You can preview the performance while playing back, too. This makes it easier to add or remove steps.
- Press the Record pad to stop recording.
Live record mode
TIP: Press and hold record, then press the play pad two times to enable or disable quantization.
- If you want a click track, press and hold FUNC and the REVERSE pads, then use the orange DATA knob to enable the click.
- Press and hold the Record pad, then press Play to begin recording.
- Use the 1-16 Trigger pads to record pitched samples or press the Track pad for fixed pitch.
- Press Record twice, then Stop to finish recording.
Model:Samples Tutorial – Getting Started
Related content
Sweetwater Synth Clips with Daniel Fisher
Additional resources

Elektron Model:Samples User Manual
Model:Samples Tutorial – Sequencer Part 1
Model:Samples Tutorial – Naming and Saving
Model:Samples Tutorial – Sequencer Part 2
Model:Samples Tutorial – Sample Locks
When you need help, Sweetwater has the answers!
Our knowledge base contains over 28,000 expertly written tech articles that will give you answers and help you get the most out of your gear. Our pro musicians and gear experts update content daily to keep you informed and on your way. Best of all, it’s totally FREE, and it’s just another reason that you get more at Sweetwater.com.


Offer applies only to single-receipt qualifying purchases. Select manufacturers may require that only the manufacturer’s products qualify towards the minimum purchase amount needed to be eligible for promotional financing. Otherwise, an invoice that meets the minimum purchase amount and contains at least one qualifying manufacturer product is eligible for promotional financing. No interest will be charged on promo purchase balance, and equal monthly payments are required on promo purchase until it is paid in full. The payments equal the amount financed divided by the number of months in the promo period, rounded up to the next whole dollar. These payments may be higher than the payments that would be required if this purchase was a non-promo purchase. During the last month(s) of the promo period the required monthly payment may be reduced due to the prior months’ rounding. Regular account terms apply to non-promo purchases. New Accounts as of 07/31/2025: Purchase APR is 34.99%. Penalty APR is 39.99%. Min Interest Charge is $2. Existing cardholders: See your credit card agreement terms. Subject to credit approval.
Offer applies only to single-receipt qualifying purchases. No interest will be charged on the promo balance if you pay it off, in full, within the promo period. If you do not, interest will be charged on the promo balance from the purchase date. The required minimum monthly payments may or may not pay off the promo balance before the end of the promo period, depending on purchase amount, promo length and payment allocation. Regular account terms apply to non-promo purchases and, after promo period ends, to the promo balance. New Accounts as of 07/31/2025: Purchase APR is 34.99%. Penalty APR is 39.99%. Min Interest Charge is $2. Existing cardholders: See your credit card agreement terms. Subject to credit approval.
The estimated required monthly payment shown which excludes taxes and delivery equals the amount financed divided by the number of months in the promo period, rounded up to the next cent. During the last month(s) of the promo period the required monthly payment may be reduced due to this rounding. These payments apply only with the financing offer shown. If you make these payments by the due date each month, you should pay off this amount financed within the promo period, if it is the only balance you are paying off. If you have other balances on your account, this payment will be added to any other minimum monthly payments.
Applies only to select items from this manufacturer. Ask your Sweetwater Sales Engineer for more details.