
Akai MPC3 OS Quickstart Guide
Akai has released MPC3 firmware, which is a game changer, as it has built-in Native Instruments functionality and has completely overhauled the UI. This truly unlocks creativity anywhere you go, so in this guide, we will show you the ins and outs of using it on your Akai MPC device. This article only scratches the surface, so check out the MPC3 manual for more information!
Before We Begin
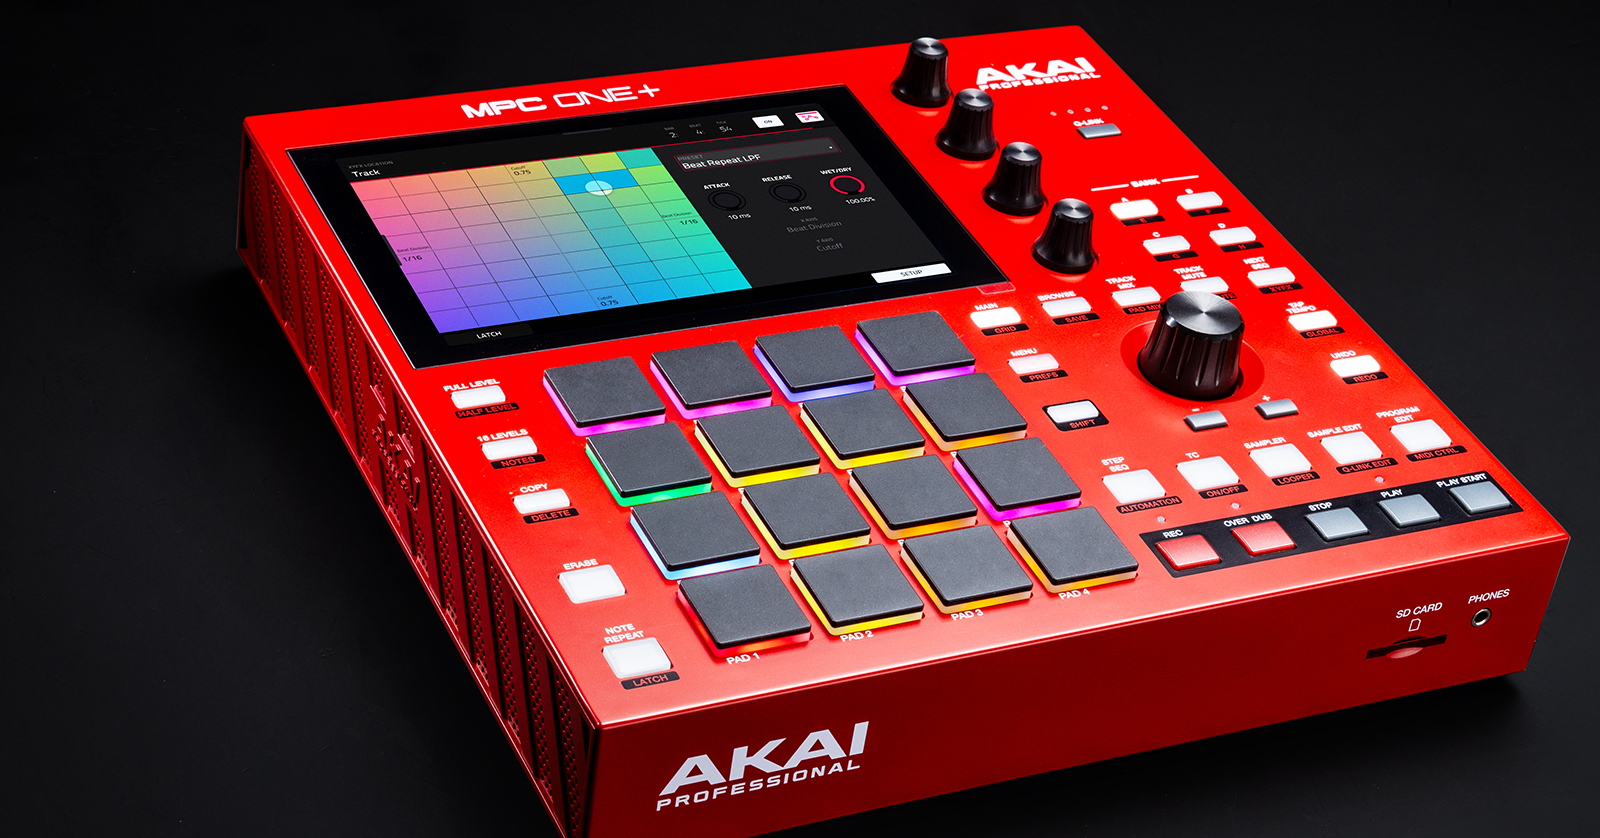
We will be using an Akai MPC One in this guide, but functionality and navigation are the same across the entire MPC line.
Navigation
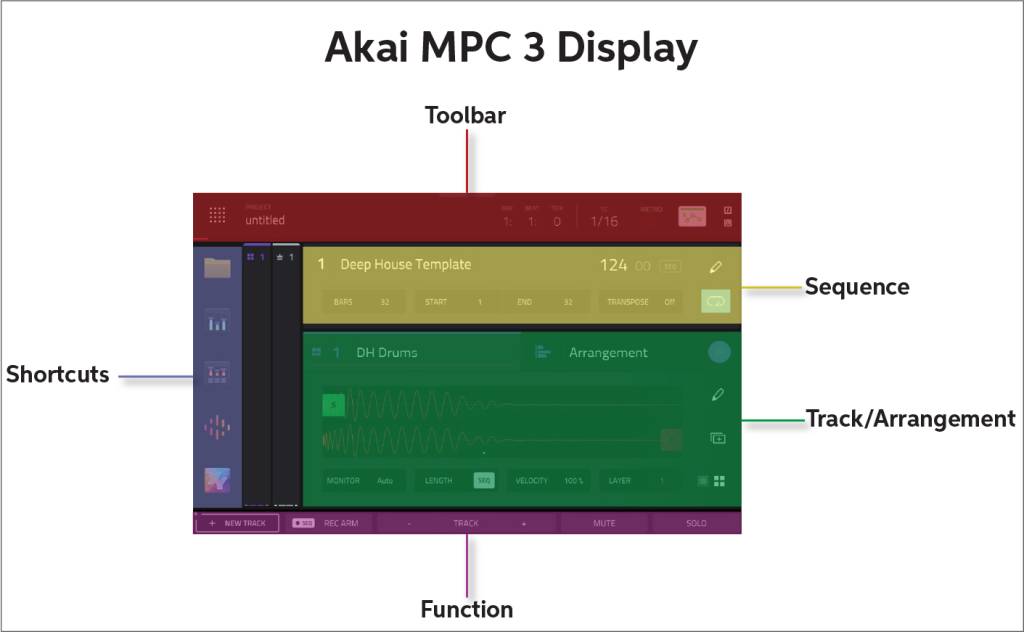
You can break down the MPC3 display into six sections: Toolbar, Shortcuts, Function, Track/Arrangement View, Sequence, and Mixer Strips.
Sections of MPC
Toolbar
The Toolbar shows the project name and general project information, such as the metronome, timing correction, bar and beat, and MIDI monitoring.
Shortcuts
Shortcuts are self-explanatory: they let you navigate up to five of your most used or favorite menus. You can even customize them to suit your needs. To do so, press the MENU button or the PREFERENCES icon at the top-left corner of the screen, and then drag the icon to the sidebar.
Function
This area houses specific actions associated with the screen you’re currently on. For example, the Main screen has the record, track selection, mute, and solo actions, and the Mixer screen includes volume, sends effects, and I/O actions.
Track/Arrangement View
This section is where you will change and manage your tracks and arrange your project.
Sequence
This section shows the information on the currently loaded sequence. You can change the length, the tempo, the location, and the transpositions here.
- Use the main knob or double-tap the respective function to change its value.
Mixer Strips
The Mixer Strips section, also called the XL Channel Strip, is where you will see the sample and main outputs. You can also add channel effects and adjust the Sends and the I/O from here.
Create a Project
Though the GUI has been overhauled in the MPC3 update, creating a project couldn’t be easier. Like previous versions, when you turn on your MPC, you will be greeted by the Project screen. You can load demos, open recently saved projects, or create something new. This guide will show you how to make a basic project.
- From the Demo screen, press NEW PROJECT. You will then enter the Main screen.
- You can also create a new project by pressing the PREFERENCES icon (located in the upper-left corner of the display) or the MENU button. The NEW PROJECT button is located at the bottom of the page.
- The Preferences menu is where you will also save and open projects.
Create a Track
Now that you’ve created the project, it’s time to add some tracks. MPC3 uses the same track types as previous versions: audio, drum, plugin, keygroup, MIDI, and CV.
To add a track, tap + NEW TRACK and choose the track type. If you want to add multiple tracks of the same type (e.g., audio tracks), tap + NEW TRACK andtap ADVANCED. You can then use the encoder to highlight your desired track type. Tap DO IT to create the tracks.
- You can add up to eight layers on an audio or drum track. Press LAYER, and then use the main knob to change between layers.
Drum Tracks
When you create a drum track, all 16 slots will be empty. You can either load a preset sound or kit or record live samples from a connected audio source.
When you select BROWSE, you can load anything from the Drums or Samples folders. If you choose RECORD, you will be taken to a recording screen where you can configure various recording settings.
Plugin Tracks
When you create a plugin track, it will default to a factory preset. To change it, double-tap or hold the plug-in name. To open the plug-in, tap the image located next to the plug-in name.
- Press the diamond-shaped Soundsicon to view factory preset instruments and any instruments you downloaded and activated during the firmware-update process. Press the PREFERENCES or MENU button if you don’t see the Sounds icon in the shortcuts.
Recording Tracks
Now that we’ve created a project, let’s focus on how to work with tracks on the MPC3 firmware.
- Select the track you wish to record.
- Adjust the sample’s level using the top touch-sensitive knob.
- Alternatively, expand the XL Channel Strip and drag the fader line up and down.
- Tap BARS. Use the main knob to change the pattern length. You can manually enter it by double-tapping or holding BARS.
- Press RECORD, then press PLAY. You will then get a four-bar count-in before it starts recording. After it has reached the length of the pattern set, the pattern will loop automatically and enter RECORD OVERDUBmode. To stop recording, press the RECORD button.
Editing Audio Tracks
You can edit the start and end points by dragging the green S and red E tabs. You can also double-tap the waveform to edit it in further detail. This includes cutting, looping, reversing, adding effects, etc.
Edit and Save Projects
After you’ve recorded some tracks, you can edit and arrange everything to your liking through the Arrangement page.
- Tap the Arrangement tab on the Main screen, then double-tap its window. This will pull up the Arrangement window. By default, it will show the current project’s MIDI grid (Grid view).
- From here, you can add and delete notes and adjust note length and placement.
- Pinch in and out on the display to zoom in and out. This is perfect for when you need to adjust fine details on a specific track.
- Press the Arrange icon at the top of the Arrangement window to work on the project’s arrangement.
- Once you’re finished with your project, press the PREFERENCES icon or the MENU button, press SAVE, and choose Project or Project As.
MPC3 Overview
Akai Pro MPC3 with Native Instruments Integration Overview
Related Articles
When you need help, Sweetwater has the answers!
Our knowledge base contains over 28,000 expertly written tech articles that will give you answers and help you get the most out of your gear. Our pro musicians and gear experts update content daily to keep you informed and on your way. Best of all, it’s totally FREE, and it’s just another reason that you get more at Sweetwater.com.


Offer applies only to single-receipt qualifying purchases. Select manufacturers may require that only the manufacturer’s products qualify towards the minimum purchase amount needed to be eligible for promotional financing. Otherwise, an invoice that meets the minimum purchase amount and contains at least one qualifying manufacturer product is eligible for promotional financing. No interest will be charged on promo purchase balance, and equal monthly payments are required on promo purchase until it is paid in full. The payments equal the amount financed divided by the number of months in the promo period, rounded up to the next whole dollar. These payments may be higher than the payments that would be required if this purchase was a non-promo purchase. During the last month(s) of the promo period the required monthly payment may be reduced due to the prior months’ rounding. Regular account terms apply to non-promo purchases. New Accounts as of 07/31/2025: Purchase APR is 34.99%. Penalty APR is 39.99%. Min Interest Charge is $2. Existing cardholders: See your credit card agreement terms. Subject to credit approval.
Offer applies only to single-receipt qualifying purchases. No interest will be charged on the promo balance if you pay it off, in full, within the promo period. If you do not, interest will be charged on the promo balance from the purchase date. The required minimum monthly payments may or may not pay off the promo balance before the end of the promo period, depending on purchase amount, promo length and payment allocation. Regular account terms apply to non-promo purchases and, after promo period ends, to the promo balance. New Accounts as of 07/31/2025: Purchase APR is 34.99%. Penalty APR is 39.99%. Min Interest Charge is $2. Existing cardholders: See your credit card agreement terms. Subject to credit approval.
The estimated required monthly payment shown which excludes taxes and delivery equals the amount financed divided by the number of months in the promo period, rounded up to the next cent. During the last month(s) of the promo period the required monthly payment may be reduced due to this rounding. These payments apply only with the financing offer shown. If you make these payments by the due date each month, you should pay off this amount financed within the promo period, if it is the only balance you are paying off. If you have other balances on your account, this payment will be added to any other minimum monthly payments.
Applies only to select items from this manufacturer. Ask your Sweetwater Sales Engineer for more details.