
Akai MPC One G2 Quickstart Guide

In this guide, we will show you how to get up and running with the Akai MPC One G2 in no time. This means you’ll learn how to register and navigate the hardware connections. Follow the sections below to get started.
Register the MPC One G2
Before we start, the first thing you’ll need to do is create an account with Akai and register the MPC One G2 to your account. When you register your device, you’ll gain access to the MPC software, drivers, and a premium collection of sounds. Follow these steps to register your device and then continue to Setup and connections.
- Log in to your inMusic account. If you don’t have one, click Create Account, then fill out the necessary information.
- On your account home page, click REGISTER NEW PRODUCT and enter the serial number, which is located on the bottom of the unit, at the back of the MPC One G2 Quickstart Guide, and on the side of the box.
- Click CHECK SERIAL, fill out the required information, then click REGISTER YOUR PRODUCT.
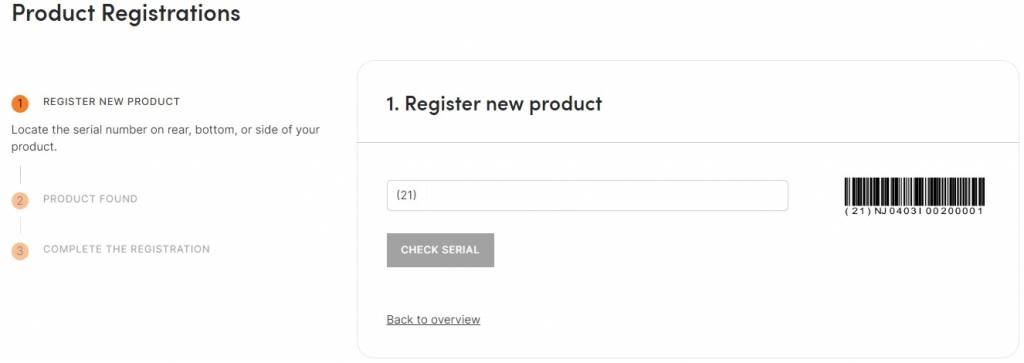
Click the image to register your Akai MPC One G2
Update the Firmware
Once the MPC One G2 is registered, the next step is to update its firmware. Updating the firmware before use will ensure you’re running on the latest version right out of the box! Check out our MPC Firmware Update Guide to learn more.
Hardware Connections
Now that your MPC One G2 is registered with Akai, let’s walk you through the different types of connections available on the device. There are quite a few options available to connect external gear like analog synths, MIDI devices, and even external hard drives. Depending on the gear you’re connecting, no additional setup is required.
Ethernet
The Ethernet connection allows you to use Ableton Link, sync with other devices, and get a better network connection with the Akai Network Driver. You can enable and disable this through the Preferences menu.
- Go to the MPC One G2 home screen, and press Preferences located at the bottom of the display.
- Tap Ethernet, and then tap the Enabled box to turn it on or off. You can also select how the MPC One G2 connects to the network by using the Address Method dropdown.
- If it’s set to Manual, you will need to enter the IP Address, Subnet Mask, Gateway, and DNS.
USB
The MPC One G2 has one USB-A and one USB-C port.
The USB-C connection allows you to connect the MPC One G2 to a USB 3.0 port on your computer. You can send both MIDI and audio to and from the hardware using this port.
The USB-A connection not only allows you to send and receive audio and MIDI data from your computer, you can connect USB external storage devices to access song and project files. Class-compliant USB audio interfaces can even be connected to the USB-A port.
Inputs
The ¼-inch TRS inputs are for connecting an audio device such as a drum machine, synthesizer. If you have an ⅛-inch to ¼-inch cable, you can also connect mobile devices for recording samples. When you create an audio track, you can create a stereo track, mono track, or a resampled (internally routed) track, which means it will record whatever comes out of the outputs.
MIDI
The MIDI ports allow you to connect an external MIDI controller or drum machine via five-pin MIDI cables. Once connected, you can assign the keys/pads from your MIDI controller to functions on the MPC One G2. It also has a MIDI learn feature, which is particularly useful in live applications, if for example, you want to control a filter on the fly.
- To update the MIDI In and Out port configuration, go to Preferences and choose MIDI/Sync.
CV/Gate
These connections allow you to send analog control messages to external synthesizers and sequencers. To enable the CV outputs, go to the Main page and press the MIDI tab on the touchscreen. Next, press CV, then select the CV output your device is connected to.
- The CV outputs accept ⅛inch (3.5mm) TRS cables. Mono ⅛-inch (3.5mm) TS cables are also compatible.
External Storage
While the MPC One G2 has a 64GB capacity for user data, you can use a USB thumb drive, external hard drives, and also SD or SDHC cards for additional space. Akai recommends you format the external storage device to exFAT. However, you can also format it to FAT32, NTFS, EXT4, or HFS+. If this is your first time formatting, be sure to check out our articles on how to do format external devices on PC and Mac.
Navigating the MPC One G2 Controls
Like its counterparts, the MPC One G2 has plenty of controls that you can use to navigate the hardware, as well as the MPC DAW Software. Each button allows you to access specific menus. When holding the Shift button, the same buttons give you access to even more. For a deep dive on which button controls which menu, be sure to check out the User Manual.
Q-Link Knobs
The Q-Link knobs are located to the right of the touchscreen. These are fully customizable, so you can assign each knob to control pretty much any macro control you want. Q-Link knobs also control parameters such as scrubbing tracks, changing the tempo, and adjusting the level of selected programs.
- You can create four banks of custom knobs by holding the Shift button and press the Sample Edit button.
- Switch between banks by pressing the Q-Link button.
- Edit the Q-Link parameter assignments by going to Menu, and then tapping Q-Link Edit on the touchscreen.
Getting Started on the MPC One G2 | Getting Started
Getting Started on the MPC One G2 | Loading Sounds
Getting Started on the MPC One G2 | Making a Beat
Getting Started on the MPC One G2 | Sampling
Related Articles
When you need help, Sweetwater has the answers!
Our knowledge base contains over 28,000 expertly written tech articles that will give you answers and help you get the most out of your gear. Our pro musicians and gear experts update content daily to keep you informed and on your way. Best of all, it’s totally FREE, and it’s just another reason that you get more at Sweetwater.com.


Offer applies only to single-receipt qualifying purchases. Select manufacturers may require that only the manufacturer’s products qualify towards the minimum purchase amount needed to be eligible for promotional financing. Otherwise, an invoice that meets the minimum purchase amount and contains at least one qualifying manufacturer product is eligible for promotional financing. No interest will be charged on promo purchase balance, and equal monthly payments are required on promo purchase until it is paid in full. The payments equal the amount financed divided by the number of months in the promo period, rounded up to the next whole dollar. These payments may be higher than the payments that would be required if this purchase was a non-promo purchase. During the last month(s) of the promo period the required monthly payment may be reduced due to the prior months’ rounding. Regular account terms apply to non-promo purchases. New Accounts as of 07/31/2025: Purchase APR is 34.99%. Penalty APR is 39.99%. Min Interest Charge is $2. Existing cardholders: See your credit card agreement terms. Subject to credit approval.
Offer applies only to single-receipt qualifying purchases. No interest will be charged on the promo balance if you pay it off, in full, within the promo period. If you do not, interest will be charged on the promo balance from the purchase date. The required minimum monthly payments may or may not pay off the promo balance before the end of the promo period, depending on purchase amount, promo length and payment allocation. Regular account terms apply to non-promo purchases and, after promo period ends, to the promo balance. New Accounts as of 07/31/2025: Purchase APR is 34.99%. Penalty APR is 39.99%. Min Interest Charge is $2. Existing cardholders: See your credit card agreement terms. Subject to credit approval.
The estimated required monthly payment shown which excludes taxes and delivery equals the amount financed divided by the number of months in the promo period, rounded up to the next cent. During the last month(s) of the promo period the required monthly payment may be reduced due to this rounding. These payments apply only with the financing offer shown. If you make these payments by the due date each month, you should pay off this amount financed within the promo period, if it is the only balance you are paying off. If you have other balances on your account, this payment will be added to any other minimum monthly payments.
Applies only to select items from this manufacturer. Ask your Sweetwater Sales Engineer for more details.