
Akai Professional MPC Live 2 Quickstart Guide
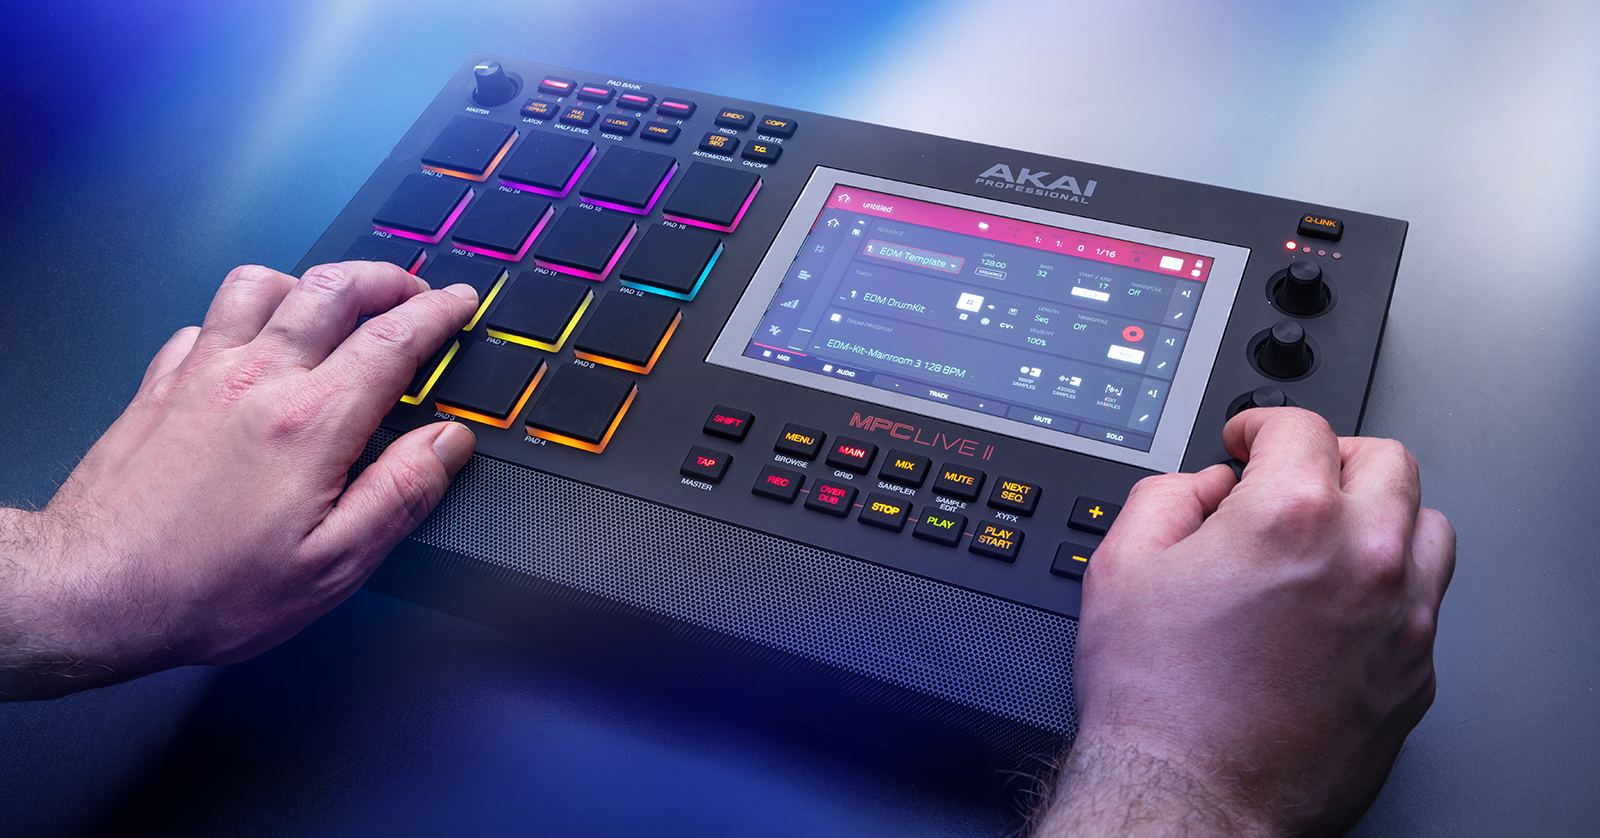
The Akai MPC Live II is a powerful sampler to have at home and onstage. Being rechargeable, it’s also great to have on the road! In this guide, we will show you the basics of how to set up, connect, and create a song.
Setup and Connections
NOTE: The MPC Live II can run up to six hours from its battery before it must be recharged.
Akai has made integrating the MPC Live II into your rig simple. All you need to do is plug in your gear, update the settings on your track, then press record. From CV to audio, there are plenty of options available, so here are a few tips for connecting your gear.
Audio connections
From keyboards and guitars to mixers and drum machines, the MPC Live II has 1/4-inch and RCA connections to connect external gear that accepts line-level signal or phono connections.
- If connecting line-level gear, flip the PHONO/LINE switch to LINE. Conversely, switch to PHONO if connecting something like a turntable or CD player that uses phono cables.
- If you use the phono inputs and your external gear has a grounding wire, be sure to connect that before powering on the MPC Live II. Not doing so can result in a low-level hum.
- Master 1/2 Outputs are the same as Outputs 1 and 2 on the routing page on the MPC Live II.
External hardware
You can connect external controllers such as synths and drum machines via 5-pin MIDI or USB cables and 3.5mm patch cables for CV (control voltage) hardware.
- Use standard 3.5mm cables for single CV connections. If you want to send two CV signals per output, use a 1/8-inch y-cable.
- The MPC Live II accepts bus-powered USB MIDI controllers. However, if your MIDI controller uses an external power supply, we recommend using that instead.
How to sync external MIDI keyboards
To trigger sounds from separate tracks from the MPC Live II using an external MIDI keyboard, you must change the MIDI ports on each track beforehand.
- Press MAIN to enter your project.
- Press Track and use the data wheel to change the track’s number.
- Tap the TRACK icon on the left side of the display (three horizontal bars).
- Select All Ports, then use the main encoder knob to select MPC 1 or MPC 2.
- Be sure the MIDI port matches that of what’s connected! For example, if you have a MIDI Device connected to MIDI Port 2 on the back of the unit, select MPC 2 on the selection screen.
- Press ALL,then use the main encoder knob to change the MIDI port number.
- Press the HOME icon on the left side of the display, locate MIDI CH on the track section, then change it to match the MIDI port number you just assigned.
How to Create a Song
You can break down a song you create on the MPC into four components that are the building blocks for your song: Project, Sequence, Track, and Program.
- Project: As the name implies, the Project is the actual song.
- Sequence: A Sequence is a section of a song (chorus, verse, etc.) that contains all your MIDI and audio tracks.
- Track: Like any other DAW, anything you record is a Track.
- Program: Not to be confused with Tracks, Programs are your sound source. With the MPC, a program can be a sampled instrument, a drum kit, or a plug-in.
Project setup
The MPC Live II already has many project presets, but in this guide, we’ll create a project from scratch to help you understand the basics of navigation.
- When you first turn on the unit, press Empty Project to create a blank project. This will take you to the project window.
- At any time, press the HOME icon on the left side of the display to return to this window.
- Use the Sequence field to change the BPM, sequence length, etc.
- Press the A icon on the right side to pull up the QWERTY keyboard to rename your sequence.
- Press Track 00# and use the main encoder to select the track you want to work with.
- Tap the small icon to the immediate right of the track to choose what type of track it is (e.g., drum pad, keyboard, clip).
- Select the plug-in program, then use the encoder knob to select any plug-in currently loaded in the track.
- Press PLUGIN to switch between plug-ins, and press PRESET to cycle through the selected plug-in’s sound presets.
Recording a sequence
Now that your project is set up, it’s time to start recording! Akai has made it easy to build a song, so you have more time creating and less time stopping, adjusting individual tracks, and starting recording again.
- Press the RECORD button. You will receive a four-beat count-in.
- Once you’ve reached the end of the bars you selected, it will automatically switch to Overdub mode.
- You will see a white bar showing you the progress of the track’s length.
- Use the encoder knob to switch to the next track and start performing. Alternatively, hold the MAIN button, then select the track on the touchscreen display.
- If you want to edit chord progressions, beats, etc., press the RECORD button to stop recording and press the GRID button to bring up the piano roll, where you can adjust things such as transpose, velocity, and length of specific notes.
Saving Projects
TIP: We recommend enabling the MPC Live II autosave function as an extra layer of security.
Saving your projects is the most important thing to do when working with your MPC Live II. If you don’t save and there’s an accidental power outage, or if it loses charge when running on battery power, all your music will be lost. Fortunately, Akai has made the process easy.
To save projects, you only need to press the Folder icon, then press SAVE. If you want to rename your project (e.g., my song_v2), press SAVE AS, then rename your project.
Autosaving projects
While you should always manually save your project, especially after you make significant changes to it, Akai has included an autosave feature that lets you set it and forget it while working.
Press the MENU button, tap the GEAR icon on top of the display, then press PROJECT LOAD/SAVE. From there, you can enable or disable the feature and set the autosave time (five or 10 minutes).
Akai MPC Beats Academy
This Quickstart guide only scratched the surface, so check out the included Owner’s Manual. Akai has also created an in-depth tutorial series, including a tutorial project you can follow to be an MPC Live II master in no time.
When you need help, Sweetwater has the answers!
Our knowledge base contains over 28,000 expertly written tech articles that will give you answers and help you get the most out of your gear. Our pro musicians and gear experts update content daily to keep you informed and on your way. Best of all, it’s totally FREE, and it’s just another reason that you get more at Sweetwater.com.

