
Yamaha Montage Setup Guide
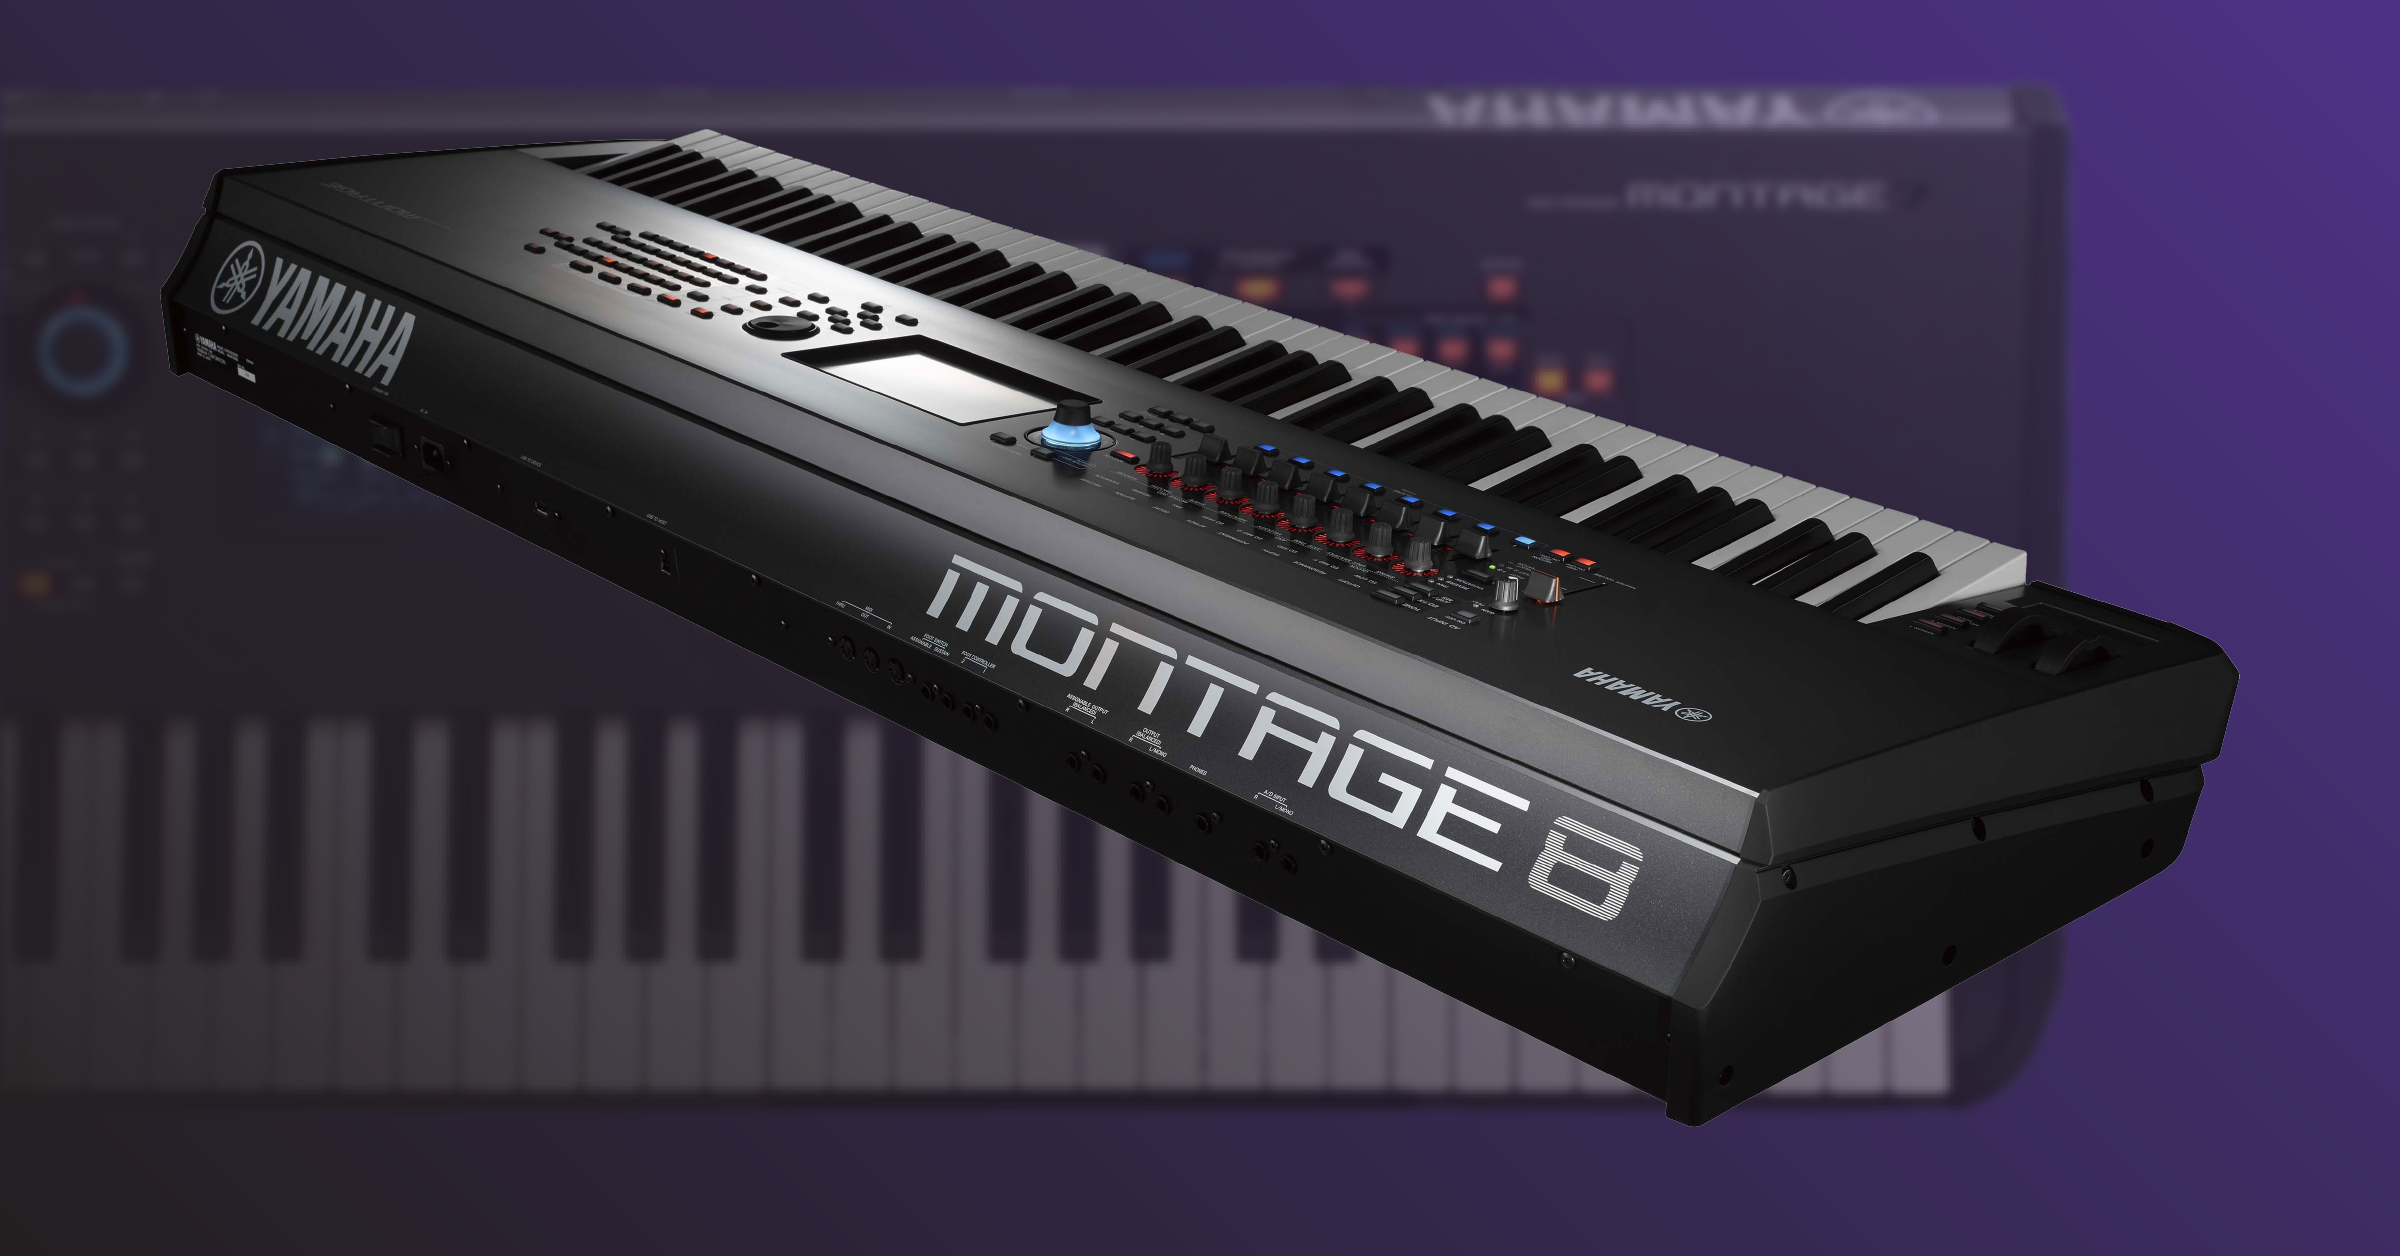
Yamaha Montage: Getting started
We’ve created this setup guide so you can start making music right away with the Yamaha Montage. You’ll learn the Yamaha product registration process, how to navigate the synthesizer, and how to set up the Yamaha Montage for the first time. Follow the sections below to get started.
- Register the Yamaha Montage
- Yamaha Montage setup and configuration
- Navigating the Yamaha Montage
- Select a preset Performance
- Additional resources
Register the Yamaha Montage
Before we dive into setting up your Yamaha Montage, the first thing you’ll need to do is go through the Yamaha registration process. By registering the Montage, you’ll access free sound libraries and a free Cubase AI license. Follow these steps to go through the Yamaha product registration process.
- Log in to your Yamaha account. If you haven’t created one yet, visit the account sign-in page, click New User and fill out the Yamaha registration form.
- From your account page, navigate to Product Registration, and then click Register My Product.
- Fill out all of the necessary information, including the serial number located on the back of the unit, and click Complete Registration.
- Once you’ve gone through the Yamaha product registration process, visit the Montage Sound Library page to download your free sound libraries.
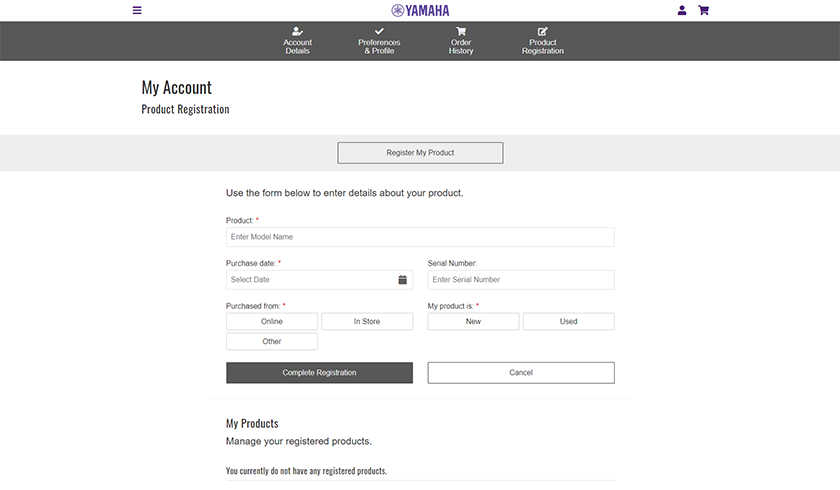
Click here to register your Yamaha Montage.
Yamaha Montage setup and configuration
The ways you can incorporate a Yamaha Montage into your studio or live rig are endless. Setting up is easy as well, so you can start making music sooner. Follow the sections below for instructions on how to calibrate the touch panel, connect audio/MIDI cables, and also connect to a computer and iOS devices.
Calibrate the touch panel
The touch panel will work right away, but you may need to recalibrate it for the best response possible. Without calibrating the touch panel, you may run into issues such as “ghost pressing” or inaccuracy. Follow these steps to calibrate the touch panel.
- Press the Utility button or the cog icon on the touch panel.
- Press Settings, navigate to System and then select Calibrate Touch Panel.
- Touch the white squares that appear to complete the calibration.
Hardware
There are quite a few ways to connect external devices to your Montage. When making any audio connections, be sure the Montage is powered off and have the input gain and master volume turned all the way down. Doing this prevents any sudden pops, which may cause damage to the external gear.
A/D input
You can connect audio equipment such as a microphone, external synthesizer, or CD player via TRS cables. The signal is then sent through the Montage where you can adjust various parameters such as effects, volume, and panning. The audio signal is then sent out along with the selected sound of the Montage.
- Press the A/D INPUT button to enable the input signal.
- Depending on the device connected to the A/D Input, navigate to the Audio I/O tab in the Settings menu to change the input between Mic and Line.
- A/D settings are adjusted via the Audio In routing page within the Monitor Volume menu.
Outputs
There are three types of outputs available on the Yamaha Montage; Main outputs which are for balanced outputs such as monitor speakers, USB outputs, and also balanced Assignable outputs. Assignable and USB outputs are independent of the Mains, which allow you to assign specific parts or instruments to an external audio effect.
- While on the Performance screen, select the part you wish to send to the Assignable output, press Edit, and then change the Part Output from MainL&R to AsgnL&R, AsgnL, or AsgnR.
- Change the Output gain for the Main, Assignable, and USB outputs by going to Audio I/O in the Settings menu.
Footswitch
The Yamaha Montage has four footswitch jacks which you can connect. There are two sets; Assignable/Sustain and Footswitch 1 /2. Depending on which input the footswitch is connected to, you can assign it to control a particular assignable function or also control specific functions for each part.
- It’s recommended to use an FC7 footswitch to control the Super Knob (Footswitch 1 /2 jack) and an FC3, FC4, or FC5 pedal connected to the Assignable/Sustain jack.
- To change Performances with the use of an FC4 or FC5 footswitch, navigate to the MIDI I/O page within the Settings menu, and change FC Assign to Live Set+/-.
- For a full list of which parameters can be controlled by a footswitch, visit the Montage Reference Manual.
MIDI
You can connect the Yamaha Montage to and from external devices such as a synthesizer or keyboard via 5-pin MIDI cables. With MIDI devices connected, you can also split the sound between the Montage and an external synth. Visit the User Manual to learn how to assign each signal to a different output.
- Make sure that the MIDI transmit and receive channels from the external synthesizer or keyboard are set to the same channel on the Montage.
- The MIDI transmit and receive channels are automatically assigned to each part, so MIDI channel 1 will be assigned to Part 1.
- You can turn the MIDI Transmit and Receive off and on within the MIDI I/O page within the settings menu.
Computer
The Montage integrates with your DAW seamlessly. Connecting a USB cable from the device to a computer turns the Montage into an audio interface, transmitting MIDI, so there’s no need to connect the Montage to a MIDI interface. You’ll first need to download the Yamaha driver and Montage Connect from the Montage downloads page. Follow these steps to connect your Montage to a computer. For more information on Montage Connect, visit the User Guide here.
- Download the official Yamaha Steinberg driver for PC or Mac.
- Navigate to your Downloads folder and unzip the compressed folder.
- PC: Right-click the .zip file, select Extract all…, and then click Extract. Open the uncompressed folder, launch the installer, and follow the on-screen instructions.
- Mac: Double-click the .zip file, open the uncompressed folder, launch the installer, and follow the on-screen instructions.
- Press the Utility button or cog icon on the touch panel, press Settings, navigate to MIDI I/O and change MIDI IN/OUT to USB.
- Connect the Montage to your computer, open your favorite DAW, and select the Montage as the default input and output device.
iOS device
IMPORTANT: The Montage must have the latest firmware installed for best connectivity. To learn how to update your firmware, visit our Firmware Update article here.
The Montage can also connect to any iOS device. When connected, you can use the Soundmondo app to upload your saved performances, and even download free performance content. If you have an iOS recording app such as Cubasis or Studio One Remote, you can also record it. Follow these steps to connect your iOS device.
- Download and install the Soundmondo iOS app here.
- Connect a USB cable from the USB HOST port on the Montage to an official Apple Lighting to USB Camera Adapter connected to your iOS device.
- Launch the app to pair the devices. If properly connected, you will see a green and white plus sign on the app.
- If you are using the Montage with a remote DAW, visit their user manual to learn how to connect the device.
Navigating the Yamaha Montage
The Yamaha Montage comprises two primary sections; sound (Performance) selection and sound (Performance) control. Both the Performance selection and Performance control work in tandem with what’s displayed on the touch panel. That means any change you make using the knobs and buttons on the device can also be changed via the touch panel. For more navigation tips, visit Yamaha’s Montage Navigation Tips article.
Performance and Part selection
On the right side of the Yamaha Montage keyboard, you will notice a group of 32 buttons. These are broken down into three sections; Part/Performance selection, Motion Sequencer, and Arpeggiation selection. Most of the buttons also have an alternate function by holding the shift button. For the complete shift function list, visit the user manual here.
- When Performance Control is selected, the first 16 buttons will switch in between Performances loaded on the Montage.
- When pressing the Part Control button, the display will show you all parts in the group of instruments you selected. For example, if you press Part Control, and then press SYN LEAD, the display will show you all sounds which are considered Synth Leads.
- For a full list Motion Sequencer parameters which can be edited, visit the reference guide here.
Performance control
The Yamaha Montage’s left side comprises knobs, faders, and buttons that control different parameters of the selected Performance.
- If something is connected to the A/D IN jack, press the A/D Input button to enable the input signal.
- Use the Super Knob to control multiple parameters which you assign. If you own a Yamaha FC-7 pedal, you can control the Super Knob via the pedal.
- Create a scene (hold Shift and press a Scene button) to create a preset comprised of different parameters such as EQ and mix settings for a specific Performance.
User Interface and Control Panel Tour
Physical Assignable Performance Controls
Navigation via Touchscreen and Buttons
Touchscreen Navigation and Controls
Select a preset Yamaha Montage Performance
There are over 1900 preset sounds (Performances) that come pre-installed on the Yamaha Montage. These performances also have pre-programmed effects that can be altered by adjusting the knobs, faders, and Super Knob. Follow these steps to select a Performance.
- Press the Live Set button to navigate to the library screen.
- In the Page section, press the Up or Down button to change the library (Live Set). Alternatively, you can press the Mute or Solo buttons.
- Press the preset name, and start playing. To get a feel of what can be done, play around with the knobs and faders to get a unique sound.
Additional Yamaha resources
- Montage sound libraries, lessons, and sheet music
- Mastering Montage: Best Practices for Backline
- Yamaha Montage User Manual
- Yamaha Montage Reference Manual
- Montage FAQ
Related Articles
When you need help, Sweetwater has the answers!
Our knowledge base contains over 28,000 expertly written tech articles that will give you answers and help you get the most out of your gear. Our pro musicians and gear experts update content daily to keep you informed and on your way. Best of all, it’s totally FREE, and it’s just another reason that you get more at Sweetwater.com.

