
Understanding DMX
Getting started
In this guide, we’ll show you how to get up and running with DMX lighting. You’ll learn what DMX is and how to configure your lighting rig. Follow the sections below to get started.
What is DMX?
DMX (Digital Multiplex) is a protocol used to control devices such as lights or fog machines. The signal is unidirectional, meaning it only travels in one direction; from the controller or first light, all the way to the last. In its most basic form, DMX is just a protocol for lights, like how MIDI is for keyboards or DAW controllers. To understand what DMX consists of, you need to know about lighting modes, DMX channels, and DMX controllers.
Lighting modes
DMX-compatible products will have different modes of operation such as sound-active mode, 4-channel mode, 7-channel mode, etc. The modes available will vary based on the device and will be explained in your product’s user manual. It is possible to connect a group of DMX fixtures without using a controller if you set them all to sound-active or automatic mode. Since they are all connected to each other, this will allow them to sync up to create an automatic light/effect show.
What is a DMX fixture?
A DMX Fixture is essentially a light or group of lights assigned to one or more channels. How lights respond to the DMX depends on their DMX personality and starting address. Different fixtures have different amounts of channel modes, so refer to the owner’s manual to see which functions are available.
- Channel mode (ie 3-channel, 7-channel) will determine which functions are available. For example, if a light is set to 4-channel mode, only the first four functions of the light fixture can be controlled.
- If you’re setting up a simple lighting rig, use a basic personality to free up the amount of DMX channels available on your DMX controller.
DMX channels
DMX consists of 512 individual channels which are known as a Universe. Each channel or channels are assigned to control different parameters (known as a personality) of the light, such as color, rotation, or strobe, and have data values of 0-255. Think of the data values like a fader on the mixer; the higher the data value, the more intense the function becomes.
What is a DMX address?
A DMX address is just another name for a channel. To control multiple fixtures independently, they must be addressed to a different starting address that is not in the group of channels for another fixture.
- The channel which the fixture is currently set at is known as the address, or more commonly known as the starting address.
- A DMX personality is what a channel or group of channels control the fixture’s parameters.
- Some DMX fixtures may have a DIP switch in order to change the starting address. Our friends at Chauvet have created a DIP Switch Calculator which will show you which positions the DIP switches need to be in for each starting address.
DMX controllers
DMX controllers are the brain of a lighting rig and transmit the DMX messages which trigger the lights. Hardware-only based DMX controllers that don’t connect to a computer have a preset DMX address list which cannot be customized. For example, if you use 3-channel DMX mode on the hardware controller, you’ll be limited to what fixture buttons are preset to.
What are DMX scenes and chases?
The settings that are set on the controller for each fixture can be saved as a Scene for you to easily recall. You can then assign specific scenes to create a sequence to play back which is known as a Chase.
- Some DMX hardware may be limited to 128 or 256 channels such as smaller analog consoles, so be sure to check the controller’s specifications for more information.
- Depending on the product, you can set the first fixture as the Master and others as a Slave without needing to use a DMX controller. You will be limited to the functionality, however.
DMX setup and configuration
In order to assign a specific fixture on your controller to a DMX-compatible product, you will first need to give the device a starting address. The starting address can be determined by the channel that the controller is sending out. For example, on a 16-channel DMX controller, Fixture 1 contains the first 16 channels on which the controller can send control messages. Therefore, the starting address for Fixture 1 is DMX Channel 1. Fixture 2 contains the second bank of 16 channels, so the starting address for Fixture 2 would be DMX Channel 17. Going forward on that idea, Fixture 3 would have a starting address of DMX Channel 33, and so on.
Using a DMX terminator
DMX terminators are connected to the last fixture’s DMX output in your rig. These terminators stop “shadow signal” from bouncing back through your lighting rig. This “shadow signal” can cause your lights to flicker, or just stop working completely. The risk of the signal bouncing back increases with longer cable runs, but even in small setups, it is very good practice to use a terminator.
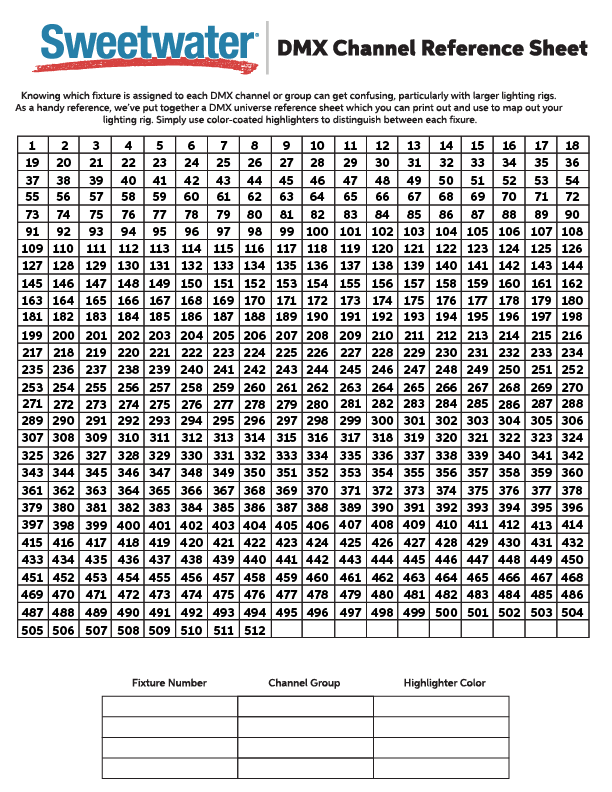
DMX universe reference sheet
Knowing which fixture is assigned to each DMX channel or group can get confusing, so we have created this handy reference sheet that you can print out and use to map out your lighting rig.
Control fixtures independently
To control the parameters of an individual light, you must select the correct lighting mode and assign its DMX starting address. You’ll be able to control it once they’re properly configured. For this example, we will use a 4-channel setup to control two PAR can lights independently using a 16 channel controller. Once configured, practice controlling each individual channel. Try placing the lights so that they mix, allowing you to control their blend and create cool effects.
- Connect the power to your DMX controller and fixtures.
- Connect a DMX cable from the DMX controller to the DMX IN of the first fixture, and a DMX cable from the DMX OUT of the first light to the DMX IN of the second.
- Set both lights to DMX channel mode (for this example, set it to 4-channel mode). Assign the first fixture to Channel 1 and the second to Channel 17.
- Select Fixture 1 on the controller, and use the first four faders to control the first light.
- Select Fixture 2 on the controller, and use the four faders to control the second light.
Control fixtures by group
To control multiple fixtures to operate the same way, you will assign them to the same DMX starting address. This is very useful when you are controlling lights over a large area. Similar to the 4-channel setup example (above), we will control two PAR can lights at the same time, but they’ll operate the same exact way. That means only four faders are used to control any number of lights, so long as they’re assigned to the same starting address.
- Connect the power to your DMX controller and fixtures.
- Connect a DMX cable from the DMX controller to the DMX IN of the first fixture, and a DMX cable from the DMX OUT of the first light to the DMX IN of the second.
- Put both fixtures into DMX channel mode (for this example, set it to 4-channel mode), and then set both fixtures to Channel 1.
- Use the first four faders to control both lights.
Related content
Related Articles
When you need help, Sweetwater has the answers!
Our knowledge base contains over 28,000 expertly written tech articles that will give you answers and help you get the most out of your gear. Our pro musicians and gear experts update content daily to keep you informed and on your way. Best of all, it’s totally FREE, and it’s just another reason that you get more at Sweetwater.com.

