
Sheeran Looper + Quickstart Guide
The Sheeran Looper + is the next-generation portable dual-track looper pedal. The Looper + features Ed Sheeran’s looper workflow. You can start looping right away; let us help you dive into its rich feature set.
- Register with Sheeranloopers.com
- Update the Firmware
- Setup and Connections
- Basic Operation
- Factory Reset
- Sheeran Loopers Instructional Videos
Register with Sheeranloopers.com
Go to sheeranloopers.com/support.html. Follow the instructions under “Register Your Looper” to create an account with Sheeran Loopers’ parent company, inMusic, and register your purchase.
Download the User Guide and More
Back at sheeranloopers.com/support.html, under the Looper + section, click on Learn More.
On the Looper + Support and Downloads page, scroll down and find the links to download the Quickstart Guide and Full User Guide. You’ll need them to learn all the features.
You will need to connect your Looper + to your Mac or Windows PC to upgrade the firmware, to transfer loops and audio files to and from your Looper +, and to back up your loops.
To connect your Looper + to a Mac, you don’t need a custom driver; just plug it in. If you are on a Windows PC, you need to download and install the PC Driver found on the page.
Sheeran Loopers also provides the File Converter app for macOS and Windows to give you a drag-and-drop tool to convert imported loops to the Looper + format of 16-bit 44.1kHz .WAV files.
Update the Firmware
The Looper + requires a “day one” firmware update. New firmware provides bug fixes and may add new features and capabilities to the unit. So when you take your new unit out of the box, don’t skip the firmware update. Follow these instructions, then come back here.
Setup and Connections
Inputs and Outputs
Make sure the unit is turned off and the input and volume knobs are turned all the way down before you connect any cables.

Sheeran Looper + inputs and outputs
Mic. Use this combi jack to attach a microphone with either a 3-pin XLR cable or a 1/4-inch TRS balanced cable.
TIP: The Looper + does not provide 48V phantom power. If you have a condenser microphone, you need an external 48V phantom power supply.
Inst. Connect your guitar or other mono instrument to the (Mono) L input using a 1/4-inch TS instrument cable. If you have a stereo source, connect another cable to the R input.
Main Out. Connect 1/4-inch TRS balanced cables to your amplifier, audio interface, or mixer. If you only need mono output, use the (Mono) L jack.
Ext FS. Connect an external controller with two footswitches (not included) that you can assign to different functions. Learn more in the Looper + User Guide > 4.4.9 Operation > Menu Screen > Assign (page 16).
MIDI In. To control the Looper + with an external MIDI device, connect the included MIDI adapter cable to this 1/8-inch TRS port. The cable provides a standard 5-pin DIN MIDI connector on the other end. Use a MIDI cable to connect this to the MIDI controller. Learn more in the Looper + User Guide > 4.4.10 Operation > Menu Screen > MIDI (page 17) to configure the connection. See the Looper + User Guide > 4.5.4 MIDI Control (page 19) to configure MIDI Clock and for a chart of available MIDI commands.
USB. This connection provides several functions:
- Use a USB cable with a USB-B connector (not included) to connect the Looper + to your Mac or your Windows PC to transfer loop and audio files to and from the Looper +. This requires putting the Looper + in Setup mode. Learn more in the Looper + User Guide > 4.4.12 USB (page 17).
- Use the USB connection to your computer to update the Looper + firmware.
- Over USB, you can use your DAW on your computer to send MIDI controls to the Looper +. Learn more in the Looper + User Guide > 4.4.10 MIDI (page 17). See the Looper + User Guide > 4.5.4 MIDI Control (page 19) to configure MIDI Clock and for a chart of available MIDI commands.
Note: The Sheeran Looper + is not an audio interface. The USB connection can be used to transfer recorded loops as data files and transfer MIDI over USB. To record live audio output from the Sheeran Looper +, connect analog audio cables from the Main Out to an audio interface connected to your computer and your DAW.
DC In. You can power the Looper + with a 9V, 0.5A center-positive power supply, not included.
Power. Use this switch to turn the unit on and off.
Battery power. The Looper + can be powered by four AA batteries. The battery compartment is behind the panel on the underside of the unit.
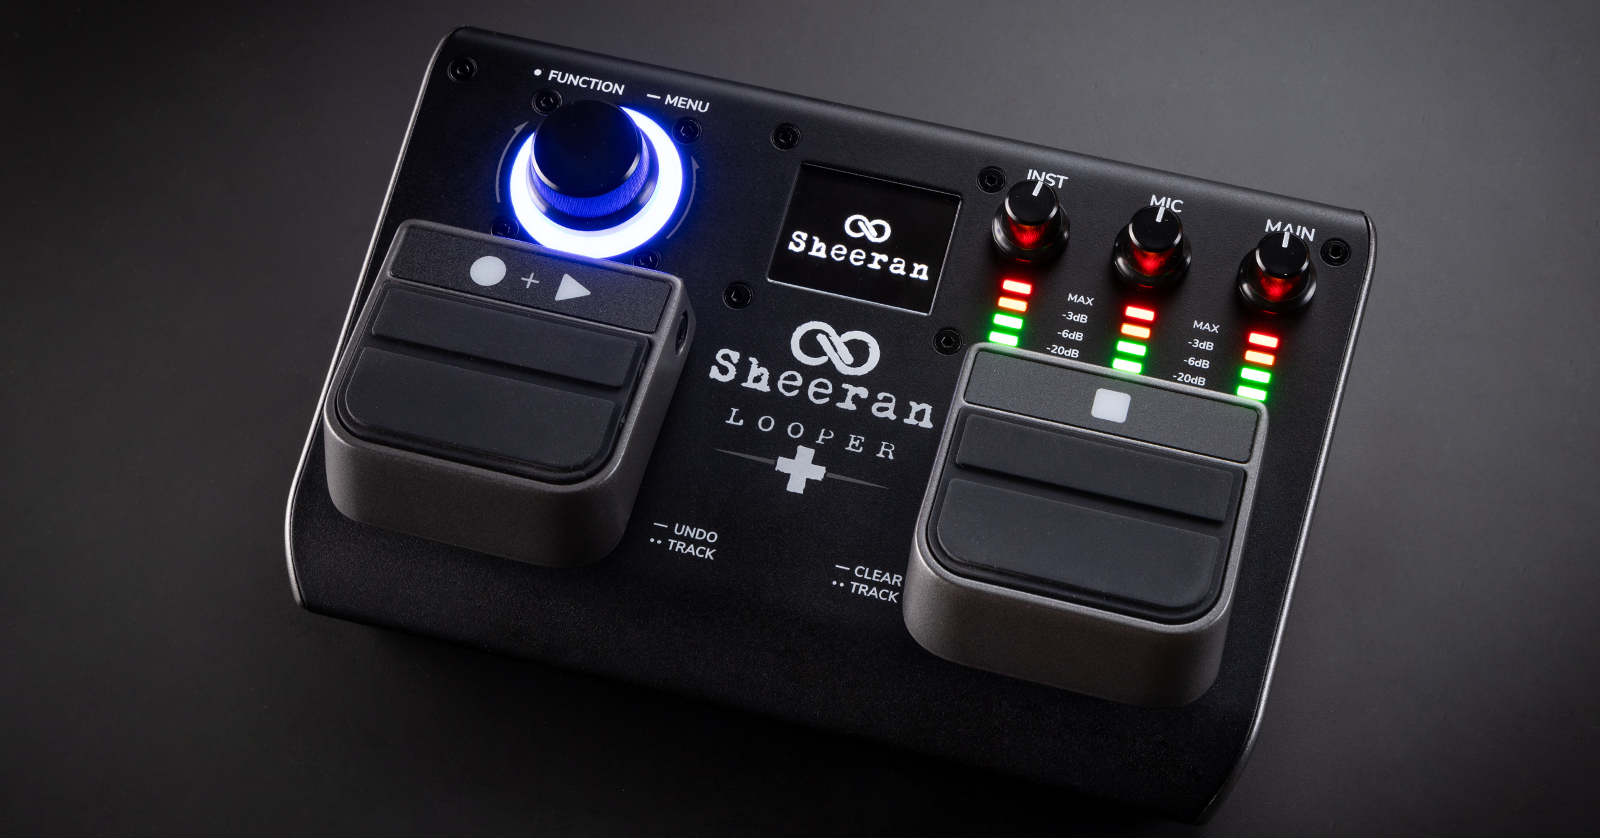
Front Panel
Sheeran Looper + front panel
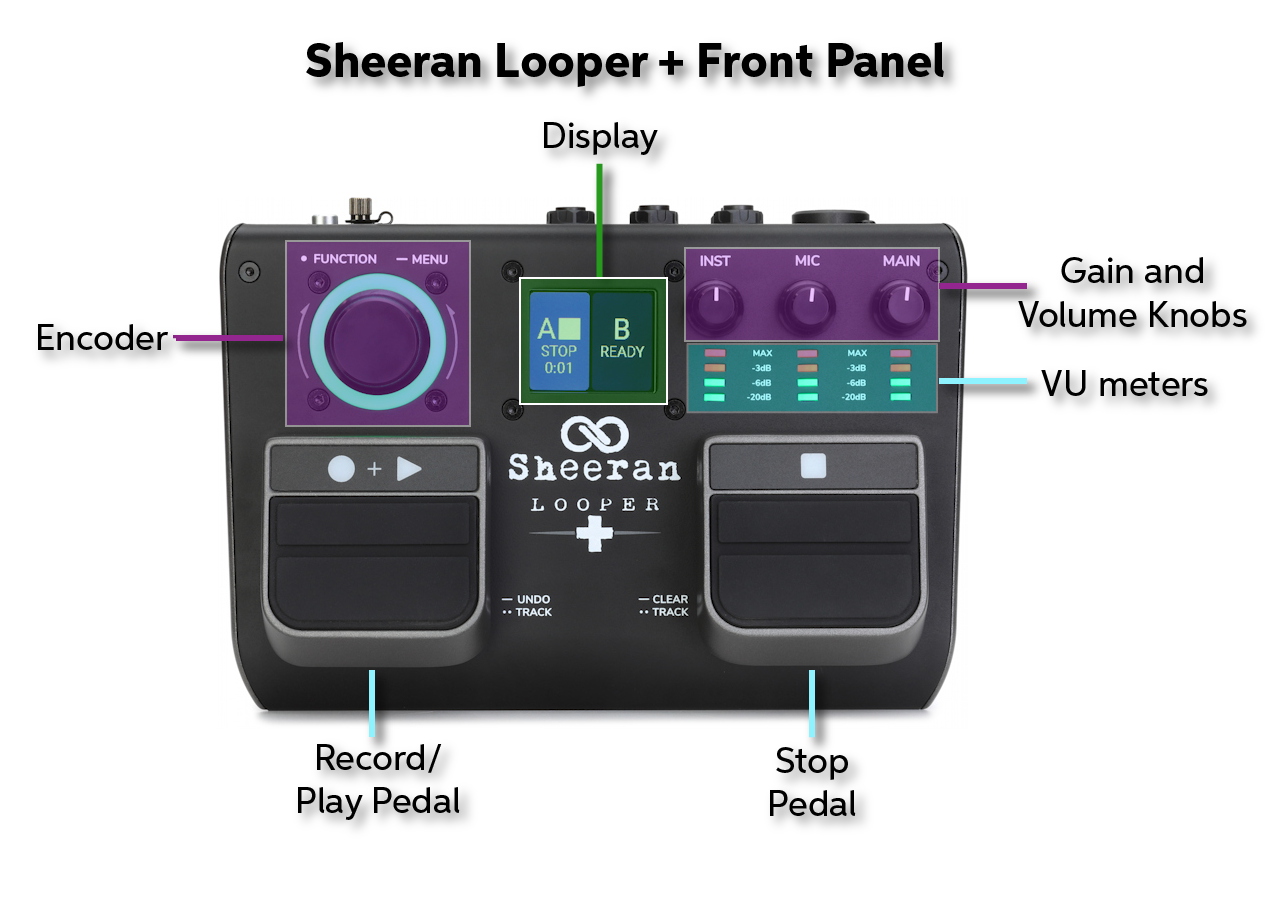
Display. The display changes depending on the context: Record, Overdub, or Playback status and Menu functions. Learn more in the Looper + User Guide > 4.0 Operation (page 9).
Encoder (Navigation Wheel). Press and hold this knob to access the Menu screen. Turn the encoder to scroll through menu options and adjust parameter values of the selected field in the display. Push the encoder again to confirm your selection. The ring around the encoder changes color depending upon the status: red for record, orange for overdub, green for playback, and pulsing green for ready.
Record + Play Pedal
- Press to begin recording a loop.
- Press and hold to Undo audio recorded since the last overdub.
- Press and hold again to Redo and restore that audio.
- Quickly double-press to switch between Track A and Track B when in Multi, Song, or Sync modes.
Stop Pedal
- Press to stop recording, overdubbing, or playing back a loop.
- In Single mode, press and hold to clear all recorded layers of the current loop.
- In Multi, Song, or Sync modes, press and hold to clear all layers of the current loop on the currently selected track.
- Continue to hold the pedal to clear both Track A and Track B layers of the current loop. This cannot be undone.
- In Multi, Song, or Sync modes, when your loop is stopped, quickly double-press this pedal to switch between Track A and Track B.
Inst knob. Adjust the input gain of the instrument connected to the Inst inputs, (Mono) L and R.
Mic knob. Adjust the input gain of the Mic input.
Main knob. Adjust the volume level of the Main outputs.
Meters. Each of the three knobs has its own LED meter. Whether they’re input or output knobs, adjust each knob so that the signal strength reaches the -3db line but never goes “into the red” with the MAX LED lighting up.
Basic Operation
The Sheeran Looper + has a maximum loop length of 90 minutes with two tracks, unlimited layers per loop, and a maximum of 30 minutes of overdubs per loop. It can store 128 loops that add up to a total of three hours.
Basic Looping
In Single mode, you can record and overdub an unlimited number of layers on a single loop track.
Adjust the level of your inputs before you begin, then get ready to play or sing.
The display will show “Ready,” and the encoder ring will pulse green.
- Press the Record + Play pedal. Recording will begin immediately, and the encoder ring will spin with a red color. The display will turn red, showing “REC” and the running length of the loop.
- Press the Record + Play pedal again to end the loop and begin overdubbing. The encoder ring will turn orange. The display will show “DUB +” and display the running length of the loop.
- To finish overdubbing and enter playback, press the Record + Play pedal again. The encoder ring will turn green. The display will show “PLAY.”
To toggle between overdubbing and playback, continue to press the Record + Play pedal.
Using the Logic menu, you can configure whether the Looper + goes to overdub or playback after recording the initial layer. Learn more in the Looper + User Guide > 4.4.7 Operation > Menu > Logic (page 16).
The Four Looper Modes
Single. The standard mode described above.
Multi. Record and play back two looper tracks that are locked to the same length.
Sync. Record and play back two looper tracks where the second track is of the same length as the first or it’s a multiple or division of that length; in other words, even numbers of measures (bars).
Song. Record and play back two independent loops that can be played in sequence, but not simultaneously, such as a verse and a chorus.
Learn more in the Looper + User Guide > 4.3 Looper Modes (page 12).
Change from one Looper Mode to another by pressing the Encoder knob and scrolling to the Mode menu.
Overview of Menu Functions
Press and hold the Encoder knob to bring up the menu functions. Here are some we have not discussed yet.
- Fade. Create a fade-in or fade-out to a track.
- Reverse. Change the playback direction of the loop on the currently selected track.
- Speed. Change a loop’s playback from Normal to 1/2 Speed.
- Save, Load, and Delete. Save and recall loops from the 128 available slots.
- Assign. Change the behavior of the encoder knob’s push function. Configure external footswitches.
- Output. Configure loop audio output to be Mono, Stereo, or Split.
- About. Display the firmware version.
Learn more in the appropriate section under Looper + User Guide > 4.4 Menu Screen (page 14).
Factory Reset
To reset the Sheeran Looper + and erase all user data, do this:
- With the power shut down, press and hold the Encoder knob and the Stop pedal.
- While still holding them down, turn on the power.
- A screen will warn you that resetting will erase all content. Push the Encoder to proceed.
- A second confirmation screen will appear. Turn the Encoder knob to select Yes, then push the Encoder knob to continue.
The unit will restart once the reset is complete.
Sheeran Loopers Instructional Videos
Sheeran Loopers: The Sheeran Looper + Product Overview
Sheeran Loopers: Using the Sheeran Loopers File Converter
Sheeran Looper + Backing Up Loops
Sheeran Loopers: The Sheeran Loopers Story
Related Articles
When you need help, Sweetwater has the answers!
Our knowledge base contains over 28,000 expertly written tech articles that will give you answers and help you get the most out of your gear. Our pro musicians and gear experts update content daily to keep you informed and on your way. Best of all, it’s totally FREE, and it’s just another reason that you get more at Sweetwater.com.


Offer applies only to single-receipt qualifying purchases. Select manufacturers may require that only the manufacturer’s products qualify towards the minimum purchase amount needed to be eligible for promotional financing. Otherwise, an invoice that meets the minimum purchase amount and contains at least one qualifying manufacturer product is eligible for promotional financing. No interest will be charged on promo purchase balance, and equal monthly payments are required on promo purchase until it is paid in full. The payments equal the amount financed divided by the number of months in the promo period, rounded up to the next whole dollar. These payments may be higher than the payments that would be required if this purchase was a non-promo purchase. During the last month(s) of the promo period the required monthly payment may be reduced due to the prior months’ rounding. Regular account terms apply to non-promo purchases. New Accounts as of 07/31/2025: Purchase APR is 34.99%. Penalty APR is 39.99%. Min Interest Charge is $2. Existing cardholders: See your credit card agreement terms. Subject to credit approval.
Offer applies only to single-receipt qualifying purchases. No interest will be charged on the promo balance if you pay it off, in full, within the promo period. If you do not, interest will be charged on the promo balance from the purchase date. The required minimum monthly payments may or may not pay off the promo balance before the end of the promo period, depending on purchase amount, promo length and payment allocation. Regular account terms apply to non-promo purchases and, after promo period ends, to the promo balance. New Accounts as of 07/31/2025: Purchase APR is 34.99%. Penalty APR is 39.99%. Min Interest Charge is $2. Existing cardholders: See your credit card agreement terms. Subject to credit approval.
The estimated required monthly payment shown which excludes taxes and delivery equals the amount financed divided by the number of months in the promo period, rounded up to the next cent. During the last month(s) of the promo period the required monthly payment may be reduced due to this rounding. These payments apply only with the financing offer shown. If you make these payments by the due date each month, you should pay off this amount financed within the promo period, if it is the only balance you are paying off. If you have other balances on your account, this payment will be added to any other minimum monthly payments.
Applies only to select items from this manufacturer. Ask your Sweetwater Sales Engineer for more details.