
Roland TD-17 Quickstart Guide
In this guide, we will show you how to register, set up, and use the Roland TD-17 module. Follow the sections below to get started.
How to register the Roland TD-17
Before you get up and running, the first thing you’ll need to do is register the TD-17 with Roland. After registering the module, you’ll get access to Roland’s product support, an extended warranty, and training videos, and clinic information. Follow the steps below to register your TD-17.
- Log in to your Roland Backstage account. If you don’t have one yet, you can create one here.
- Roland will then send an account activation email to the registered email address to complete the account creation process.
- Check your spam folder if you don’t see the email.
- On your account home page, click My Gear, and select Register a Product.
- Fill out the required information, including the serial number located on the drum module, and click Register.
- Keep your Sweetwater invoice handy, as you will need to enter the purchase date, method, and Dealer (Sweetwater).
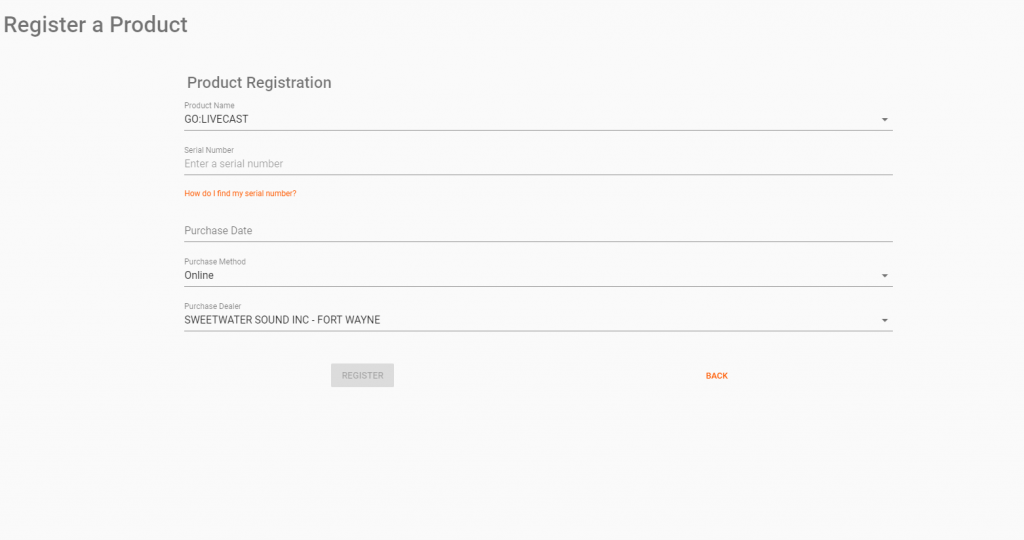
Click the image to register your TD-17
TD-17 setup and connections
All of the drum kits in the TD-17 line are straightforward to assemble and store. Each kit has a slightly different hardware assembly procedure, however. So to make sure everything is set up correctly, be sure to check the included assembly instructions below for more details:
Connecting cables to the module
TIP: Keep the cabling tidy and use velcro straps or zip ties to secure them to the rack. This will also help prevent any tangles.
The TD-17 uses a breakout cable for its cable connections. Each cable is labeled with the pad it’s associated with, so be sure they’re connected to the correct drum or cymbal pad so the right sound is triggered. This is especially true with the hi-hat connections. Also, be sure that the wiring harness is securely connected to the module. If you can wiggle the connector attached to the module, then it’s too loose.
- You can connect two additional pads via the Trigger In jacks on the back of the module using TRS cables. Once connected, you can then go into the module’s sound settings and assign the sample you want.
- If you own the TD-17KVX kit, the Crash 2 jack must be used for a cymbal; not an auxiliary pad.
Connect the TD-17 to your computer
You can connect the TD-17 drum module to your computer to record MIDI data from your drum kit and trigger virtual instruments. You can connect it directly to your computer using a USB A to B cable, or if you wish, you can also connect it using a 5-pin MIDI cable.
If you connect the TD-17 via USB, you’ll need to download and install the latest driver for your OS beforehand. Check out the Roland TD-17 support download page for the latest drivers and firmware available for download.
Pair TD-17 via Bluetooth
One feature that sets the TD-17 apart from the rest is that you can pair it with your mobile device via Bluetooth. Once paired, you can stream audio and if the app supports it, record Bluetooth MIDI! Follow these steps to pair the TD-17. Check out our guides to learn more about setting up Bluetooth devices on Android and iOS devices!
- Press the SETUP button, use the jog wheel to navigate to Bluetooth, then press the ENTER button.
- Press the F1 (PAIRING) button.
- Once you see “Now Pairing…” on the display, enable the Bluetooth feature on your mobile device.
- Pull up the list of nearby Bluetooth devices on your mobile device and select TD-17 AUDIO.
- Press DRUM KIT to exit.
Working with the module
The TD-17 is a powerful drum module with many features, flexibility, and ease of use in mind. Unlike other drum modules where you have to dive through menus, updating settings and changing pad samples are effortless on the TD-17. Even its Practice mode is easy to work with! In this guide, we’ll show you how to create a kit and update its settings, so to learn more about features like the Practice and Coach modes, check out the TD-17 Owner’s Manual.
Customize a kit
- Press the Assign button and highlight the drum you want to edit. You can do so by striking the pad or pressing the PAD SELECTION button.
- Use the up and down arrow buttons to switch between the instrument group selection and individual instrument.
- Use the jog wheel to scroll through and select the instrument. You can preview the sample by striking the pad.
- Use the three FUNCTION buttons under the display to update various settings such as decay, tuning, and pitch.
- The functions differ between instrument groups, so check out the TD-17 data list for a complete list of editable functions for each instrument group.
Import custom samples
You can import custom samples to the module via SD cards (SDHC with a 32GB max capacity). The process is simple, but you will need to format the SD card using the module first before loading the samples onto your SD card.
Format the SD card
IMPORTANT: Formatting SD cards will erase any data currently stored in the card. Be sure to back everything up beforehand.
- Insert the SD card to the TD-17, then press the SETUP button.
- Use the down arrow button to select SD Card, then press F3 (ENTER).
- Navigate to SD Card Format, then press F3 (ENTER) twice to format the SD card.
Import the samples
Once formatted, you can then load the samples from your computer onto the SD card then transfer them to your TD-17 module. If you don’t have an SD card slot on your computer, you’ll need a USB SD card reader.
- Once you’ve loaded your samples to your SD card, insert the SD card back into the TD-17, then press USER SAMPLE.
- Try and keep the sample names short as you won’t be able to see the full file name.
- Highlight Import, then press F3 (ENTER).
- Use the up and down arrow buttons to select the sample you want to import, then press F3 (SELECT).
- Use the jog wheel to select an empty spot, press F3 (EXECUTE), then press ENTER.
- Depending on the sample’s file size, it may take up to 30-45 seconds to import.
Related content
Single Paradiddle Workout with Nick D’Virgillio
How to Use a Click Track to Maximize Live Performance
Related Articles
When you need help, Sweetwater has the answers!
Our knowledge base contains over 28,000 expertly written tech articles that will give you answers and help you get the most out of your gear. Our pro musicians and gear experts update content daily to keep you informed and on your way. Best of all, it’s totally FREE, and it’s just another reason that you get more at Sweetwater.com.


Offer applies only to single-receipt qualifying purchases. Select manufacturers may require that only the manufacturer’s products qualify towards the minimum purchase amount needed to be eligible for promotional financing. Otherwise, an invoice that meets the minimum purchase amount and contains at least one qualifying manufacturer product is eligible for promotional financing. No interest will be charged on promo purchase balance, and equal monthly payments are required on promo purchase until it is paid in full. The payments equal the amount financed divided by the number of months in the promo period, rounded up to the next whole dollar. These payments may be higher than the payments that would be required if this purchase was a non-promo purchase. During the last month(s) of the promo period the required monthly payment may be reduced due to the prior months’ rounding. Regular account terms apply to non-promo purchases. New Accounts as of 07/31/2025: Purchase APR is 34.99%. Penalty APR is 39.99%. Min Interest Charge is $2. Existing cardholders: See your credit card agreement terms. Subject to credit approval.
Offer applies only to single-receipt qualifying purchases. No interest will be charged on the promo balance if you pay it off, in full, within the promo period. If you do not, interest will be charged on the promo balance from the purchase date. The required minimum monthly payments may or may not pay off the promo balance before the end of the promo period, depending on purchase amount, promo length and payment allocation. Regular account terms apply to non-promo purchases and, after promo period ends, to the promo balance. New Accounts as of 07/31/2025: Purchase APR is 34.99%. Penalty APR is 39.99%. Min Interest Charge is $2. Existing cardholders: See your credit card agreement terms. Subject to credit approval.
The estimated required monthly payment shown which excludes taxes and delivery equals the amount financed divided by the number of months in the promo period, rounded up to the next cent. During the last month(s) of the promo period the required monthly payment may be reduced due to this rounding. These payments apply only with the financing offer shown. If you make these payments by the due date each month, you should pay off this amount financed within the promo period, if it is the only balance you are paying off. If you have other balances on your account, this payment will be added to any other minimum monthly payments.
Applies only to select items from this manufacturer. Ask your Sweetwater Sales Engineer for more details.