
macOS Time Machine Backup Guide
In this guide, we will show you how to create a Time Machine backup on macOS 13 Ventura, macOS Sonoma (macOS 14), and macOS Sequoia (macOS 15).
Sweetwater also has Time Machine backup guides for these older versions of macOS:
- macOS 12 Monterey Time Machine Backup Guide
- macOS 10.15 Catalina Time Machine Backup Guide
- macOS 10.14 Mojave Time Machine Backup Guide
- macOS 10.13 High Sierra Time Machine Backup Guide
Let’s get started.
Why use Time Machine?
Time Machine with an external hard drive is like an insurance policy for all your work on your Mac. Time Machine is valuable for everyday incremental file backup. You can recover individual files you have deleted or revert a file to an earlier saved state. With a Time Machine backup, if your Mac fails, you can restore your entire system quickly. If you decide you need to downgrade your Mac to an earlier version of macOS, you can also use a Time Machine backup to restore your apps and data.
TIP: Turn off Time Machine while recording and editing audio and music. Time Machine’s background file copying processes can cause glitches in recordings and will slow down your Mac. Turn Time Machine back on after your session so it can continue backing up your files. For more information, see Sweetwater’s macOS Audio Optimization Guide.
How to back up your Mac
Cloud-based backup
TIP: As with Time Machine, regardless of the backup method, you should turn off all cloud-based backup services while working with your DAW.
Apple provides two services for backing up data, iCloud Drive and Time Machine. They have different purposes. In addition, there are many third-party solutions.
Apple iCloud Drive
Apple’s iCloud and iCloud Drive are not for backing up your entire Mac. iCloud lets you back up photos, documents, messages, and certain kinds of data to Apple’s servers on the internet. You can access these files on multiple Macs, iPhones, iPads, and even Windows PCs and share files among family members. iCloud has many valuable features, but it’s no substitute for Time Machine, which is why Apple offers both. Learn more about Apple iCloud.
This Apple Support article explains how to disable iCloud Drive and get your Desktop and Documents folder back to your startup disk.
Third-party cloud-based backup and file sharing
There are third-party commercial products designed to run in the background and continuously back up your data to the cloud.
Commercial products such as Backblaze, iDrive, and Carbonite will back up all your documents and data on your startup disk, but generally won’t back up your apps or system files. They are useful for “disaster recovery,” enabling you to retrieve all your data if your Mac gets stolen or your home suffers a disaster.
Products such as DropBox, Google Drive, and Microsoft OneDrive are geared toward sharing a folder full of files with different users.
Again, these products provide useful services, but they are no substitute for a local Time Machine backup on an external hard drive.
Local backup with Time Machine
Whereas iCloud only backs up certain documents and data, Time Machine backs up all the files on your Mac, including system files, apps, support files, plug-ins, and sound libraries. Because it backs up the files to a local hard drive, you can use that drive to restore your system rapidly.
If your Time Machine external backup disk is large enough, you can use it to back up your startup disk and other disks attached to your Mac.
Apple Support: Back up your Mac with Time Machine
A Time Machine disk can also be used with Apple Migration Assistant to migrate all your data and apps from an old Mac to a new Mac.
Apple Support: Restore your Mac from a backup
Sometimes musicians find themselves in a bind: they upgrade to a new version of macOS but then discover that they are using audio software that isn’t compatible with the latest macOS. In that case, they will want to downgrade back to the earlier macOS. That’s yet another reason to have a Time Machine backup.
Check out Sweetwater’s macOS Sequoia Operating System Downgrade Guide.
What kind of hard drive do I need?
You need an external hard drive that connects to your Mac via USB or Thunderbolt, and you will want to dedicate the entire drive to Time Machine. Ideally, the drive should be double the capacity of your Mac’s startup disk. To back up multiple disks attached to your Mac, you will need even more capacity. The drive you use for Time Machine doesn’t need to be fast, so a large-capacity traditional spinning hard disk might provide a better value than a solid-state drive (SSD).
For example, if your Mac’s startup disk is 512GB in size, you will want an external hard drive of at least 1TB capacity. External drives with a large-format spinning hard disks are inexpensive, so consider buying a drive with 2TB or 4TB or even larger capacity.
You can connect the drive directly to your Mac or a powered USB hub or dock.
Create a Time Machine Backup
If you have a MacBook, make sure the power adapter is connected.
Connect your new external hard drive to your Mac directly or through a powered USB hub.
Automatically configure a Time Machine backup disk
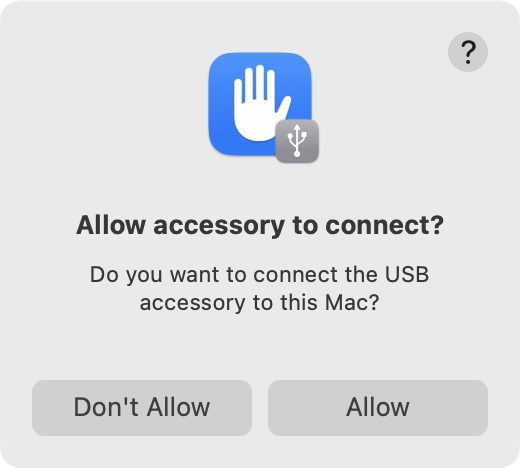
macOS will prompt you for permission the first time you attach any USB or Thunderbolt drive. Click on Allow.
If you have not set up Time Machine before, simply plug in a new external hard disk. A Finder prompt will ask if you want to use the disk as a Time Machine backup.

If you click Yes then Time Machine will reformat your external drive.
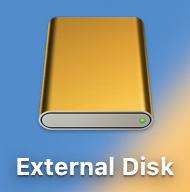
Your disk’s icon will change from orange to green, with the Time Machine icon on it.
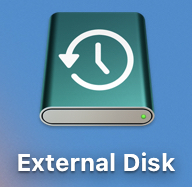
A Time Machine-formatted disk can be recognized in the Finder by its green color with the Time Machine icon
If you get an error message saying that the disk cannot be formatted, go to the Disk Utility section below.
Your first backup will begin.
Once Time Machine begins, a new Time Machine icon will appear in the right corner of your Menu Bar.
Clicking on the Time Machine icon will cause a menu to drop down. The options in the menu will change depending on the context. In this example, we see that the backup has just started. It’s only 0.2% done, and 57.0 MB have been copied.
IMPORTANT: Depending on the size of the files on your startup disk, the first backup could take a long time, even several hours. Be sure to leave your Mac running until the backup is complete.
Manually configure a Time Machine backup disk
If the automatic configuration doesn’t work, or you need to set up a new drive for Time Machine, you can configure it in System Settings.
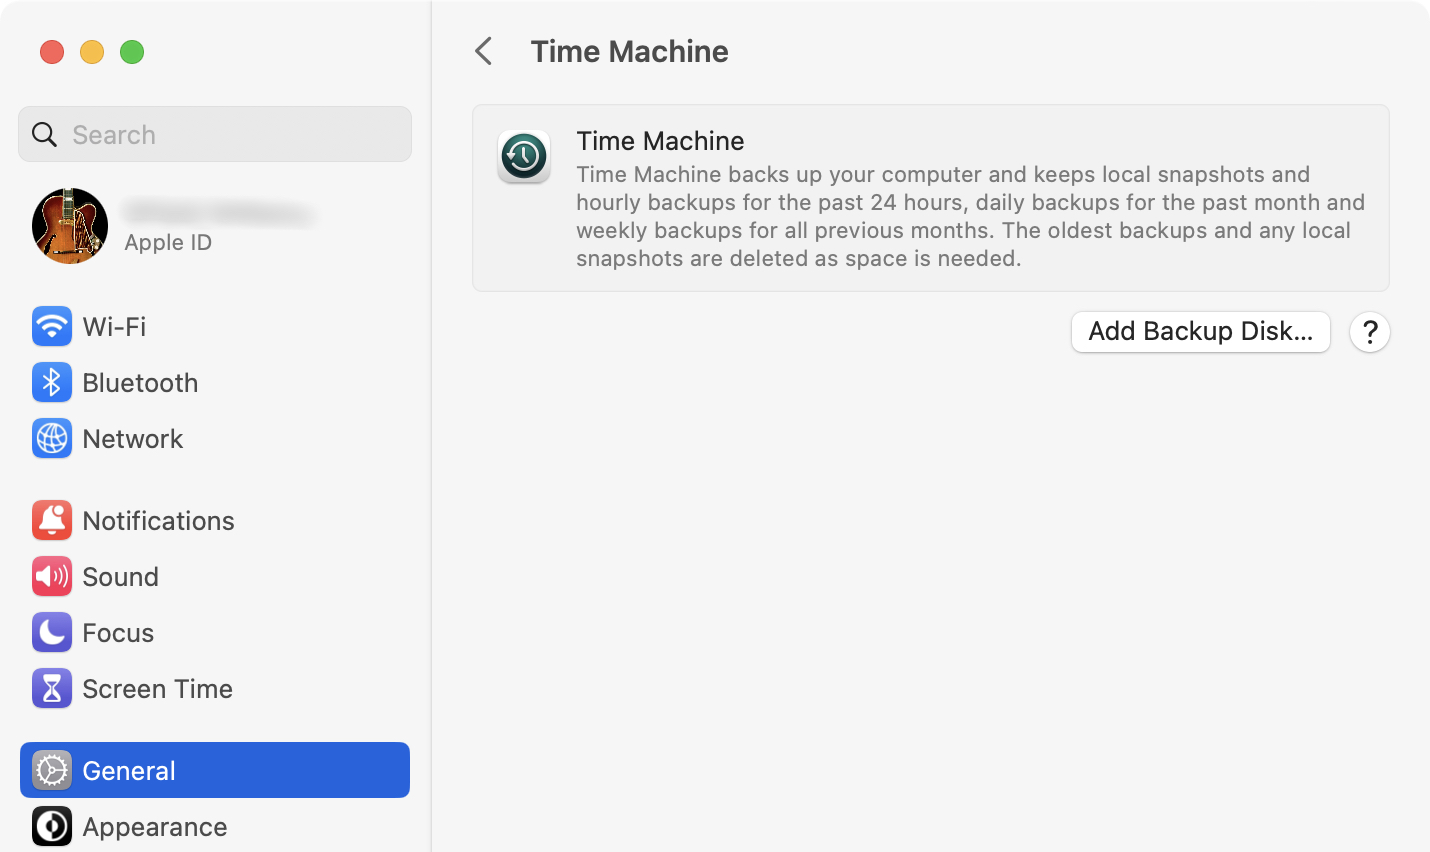
Go to System Settings > General > Time Machine. Click on Add Backup Disk…
Select the disk you want to convert to a Time Machine backup disk. Click Set up Disk…

You have the option of encrypting the Time Machine disk. If you choose this, only you or someone who knows your password will be able to restore your data. Click the button to turn off Encrypt Backup if you don’t want it.
For Disk Usage Limit, select None.
Click Done.
Time Machine will format your disk. It will then appear in the Time Machine pane in System Settings

Leave your Mac running until the backup is complete.
Working with Time Machine
Now that you’ve got your backup, go to Apple Support and learn how Time Machine performs incremental backups and how to restore individual files.
- Apple Support: Back up your files with Time Machine on Mac
- Apple Support: Restore items backed up with Time Machine on Mac
Disk Utility
If Time Machine gave you an error message that it could not format your external hard drive, try reformatting it in Disk Utility.
Go to /Applications/Utilities/Disk Utility

- Choose View > Show All Devices.
- In the pane on the left, select your external hard drive. You want to select the entire drive, not a volume lower down in its hierarchy.
- Click the Erase button.
- Click the Scheme pop-up menu, then choose GUID Partition Map.
- Click the Format pop-up menu, and choose APFS.
- Enter a name.
- Click Erase, then click Done.
- Go back to the Manually configure a Time Machine backup disk section above.
Time Machine should now be able to convert your external drive to a Time Machine backup.
For more information on working with Disk Utility, check out Apple Support: Disk Utility User Guide.
macOS Support Resources
Apple released macOS Sequoia on September 16, 2024.
For musicians, audio engineers and content creators, Sweetwater has created a comprehensive series of SweetCare support articles about macOS Sequoia, along with earlier versions of macOS.
We have guides for Microsoft Windows 10 and 11 as well.
Check out these resources, and search our Knowledge Base for more.
Related Articles
When you need help, Sweetwater has the answers!
Our knowledge base contains over 28,000 expertly written tech articles that will give you answers and help you get the most out of your gear. Our pro musicians and gear experts update content daily to keep you informed and on your way. Best of all, it’s totally FREE, and it’s just another reason that you get more at Sweetwater.com.


Offer applies only to single-receipt qualifying purchases. Select manufacturers may require that only the manufacturer’s products qualify towards the minimum purchase amount needed to be eligible for promotional financing. Otherwise, an invoice that meets the minimum purchase amount and contains at least one qualifying manufacturer product is eligible for promotional financing. No interest will be charged on promo purchase balance, and equal monthly payments are required on promo purchase until it is paid in full. The payments equal the amount financed divided by the number of months in the promo period, rounded up to the next whole dollar. These payments may be higher than the payments that would be required if this purchase was a non-promo purchase. During the last month(s) of the promo period the required monthly payment may be reduced due to the prior months’ rounding. Regular account terms apply to non-promo purchases. New Accounts as of 07/31/2025: Purchase APR is 34.99%. Penalty APR is 39.99%. Min Interest Charge is $2. Existing cardholders: See your credit card agreement terms. Subject to credit approval.
Offer applies only to single-receipt qualifying purchases. No interest will be charged on the promo balance if you pay it off, in full, within the promo period. If you do not, interest will be charged on the promo balance from the purchase date. The required minimum monthly payments may or may not pay off the promo balance before the end of the promo period, depending on purchase amount, promo length and payment allocation. Regular account terms apply to non-promo purchases and, after promo period ends, to the promo balance. New Accounts as of 07/31/2025: Purchase APR is 34.99%. Penalty APR is 39.99%. Min Interest Charge is $2. Existing cardholders: See your credit card agreement terms. Subject to credit approval.
The estimated required monthly payment shown which excludes taxes and delivery equals the amount financed divided by the number of months in the promo period, rounded up to the next cent. During the last month(s) of the promo period the required monthly payment may be reduced due to this rounding. These payments apply only with the financing offer shown. If you make these payments by the due date each month, you should pay off this amount financed within the promo period, if it is the only balance you are paying off. If you have other balances on your account, this payment will be added to any other minimum monthly payments.
Applies only to select items from this manufacturer. Ask your Sweetwater Sales Engineer for more details.