
How to Bounce Tracks in Pro Tools
You’ve finished your mix in Pro Tools, and now you need to create a final stereo version of your mix. Once you’re done with the mix — the song sounds perfect, the fade is smooth, any unneeded tracks are muted, and everything is to your satisfaction — it’s time to create the mix that you can share, whether it’s an MP3, a 44.1k/16-bit file to burn to a CD, or a high resolution 96/24-bit mix that will go to the mastering engineer.
What is bouncing?
There are multiple meanings for the phrase bouncing when it comes to finishing music tracks. It can describe any of these:
- Consolidating tracks — flattening tracks to make an edited/comped track into a composite track
- Exporting individual tracks as .wav files
- Bouncing a final mix (or bouncing to disk)
Highlight the song
In the Edit window, place the cursor at the beginning of the section you want to bounce (usually immediately before the first note), and then, holding the Shift key, click to select the end of the song (after the fade ends or the last note or reverb dies out). The selected area is the length of the file that will be bounced.
In the example pictured, the piano track was used to select, though any track in the window can be used. Notice that there’s a fade on the Submaster track; the selected area extends past the end of the fade, so that none of the audio is clipped off.

Step 1: Select length of bounce in Edit window.
Bounce to disk
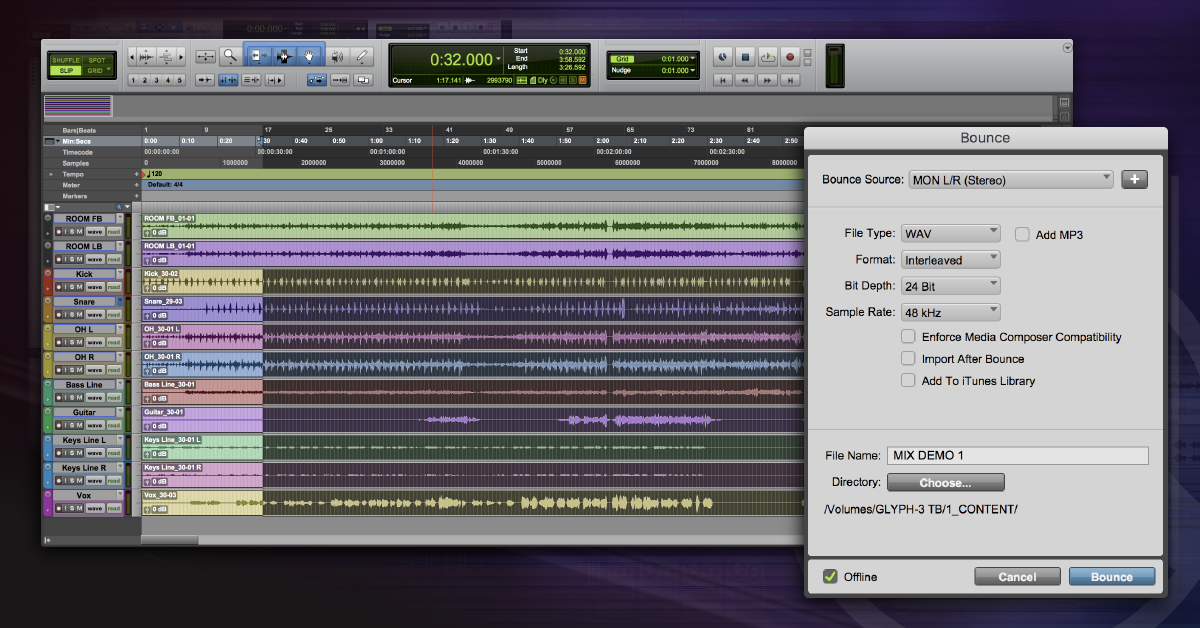
From the File menu, choose File > Bounce to > Disk… or Option+Command+B to open the Bounce window.

Export options
There are a number of options to choose from in the Bounce window:

- Bounce Source: To bounce the mix as you’ve been hearing it, choose the source you’ve been listening to (typically the main output — A 1-2).
- File Type: The bounced file can be saved as a WAV file, an AIFF file, or as an MP3.
- Format: It can be saved as a Mono file (with all tracks summed), Multiple Mono, or Interleaved. If you choose Multiple Mono, the left and right channels are separate mono tracks, while with Interleaved tracks, the result is a single stereo audio file. As a bonus, the bounced track can be saved simultaneously as a WAV file and as an MP3; if you need to have both high resolution and MP3 versions of a mix, click the Add MP3 box.
- Bit Depth: When bouncing to disk, the files can be saved as 16-bit, 24-bit, or 32-bit float, though MP3s are restricted to 16-bit.
- Which bit depth you choose depends in large part on the next step for the mix; if you’re simply burning a reference to email, then you’ll most likely bounce an MP3, which is limited to 16-bit. If you’re burning a final CD using the bounced file with no other processing, a 16-bit .wav file at 44.1kHz will be fine. If, however, you’re planning on mastering or doing other processing to the file, a higher bit depth — either 24- or 32-bit — will give you better results.
- Sample Rate: The same thinking applies when choosing a sample rate. If the file will be used with no other processing, a 44.1kHz sample rate will be fine. If you’ll be mastering the file, 48kHz or 96kHz will yield better results (though the file will be larger).
- Bounce Online or Offline: If you bounce online, Pro Tools will bounce the track in real time; if you select the Offline box, the mix will typically bounce faster than real time. If you choose to bounce offline, you won’t be able to hear the mix as it’s bounced. If you choose online bounce, you’ll have one last opportunity to listen to the mix as it plays.
- We recommend bouncing online; every chance you have to check your mix again is a chance to catch (and correct) an issue. However, if you’re bouncing multiple versions of a mix, the offline bounce is much faster.
- File Name: In most cases, the exported file should be the name of the song, with any additional information you may need — perhaps mix revision numbers, vocal up (or down) mixes — whatever will help you find a specific bounced track again.
- Directory: Choose a directory where the bounced file will be placed. If you’re working on multiple songs for an album project, you might want to create a directory named for the artist and/or album title. If you’re only working on a single song, you may be able to bounce it into the Pro Tools session folder for that song. In any case, the goal is for you to be able to find a specific bounced mix after it’s created.
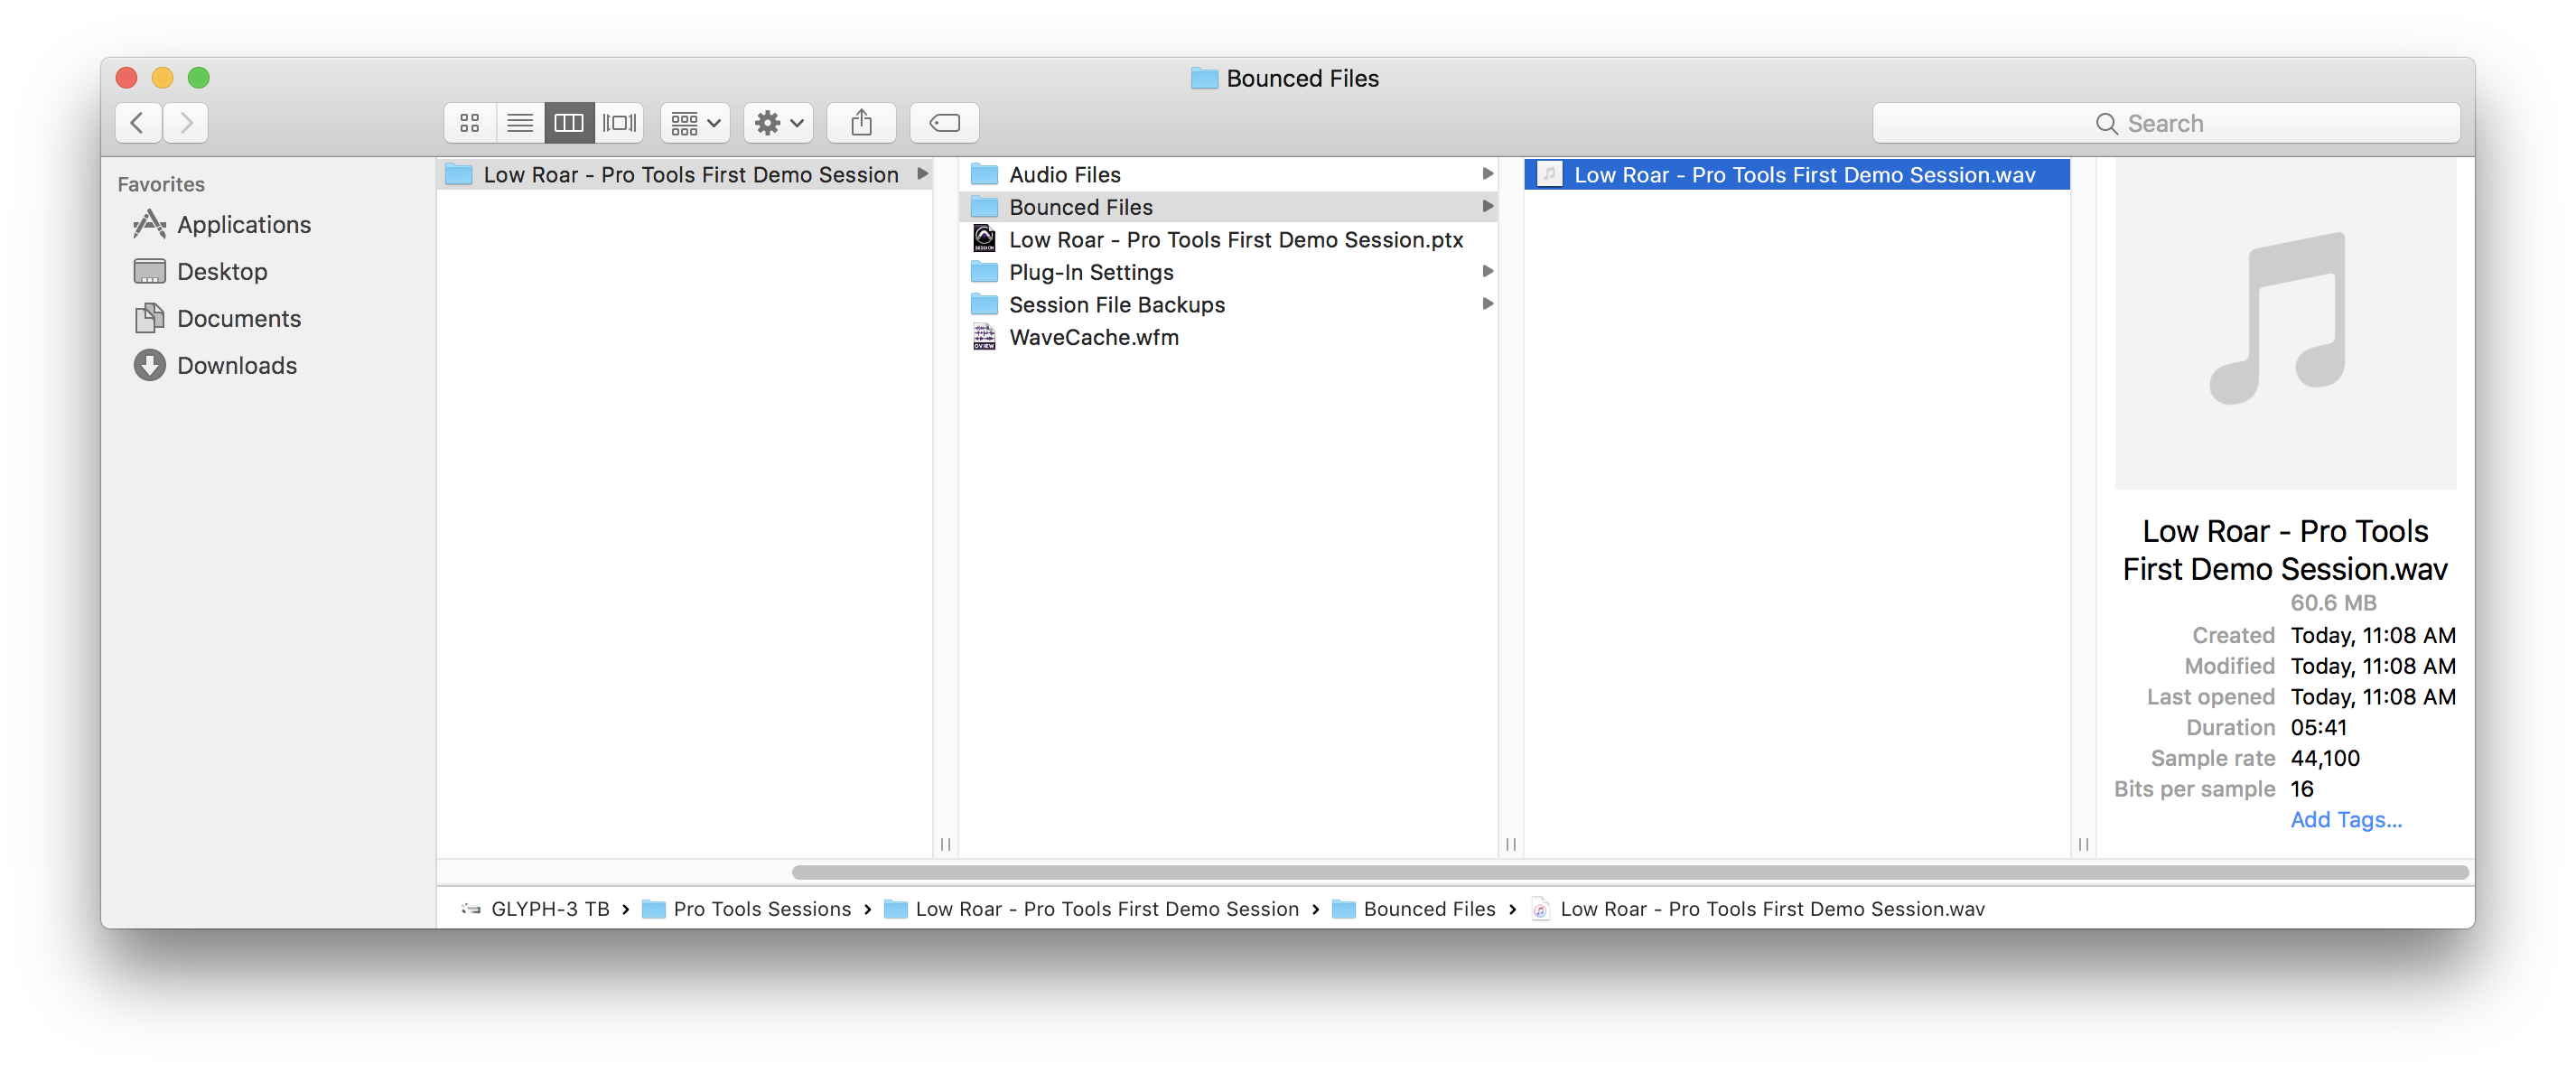
Pro Tools Bounced Files Directory
Bounce
Click Bounce to begin the export. Once the progress bar disappears from the screen, your final mix file is complete. That’s how you bounce a mix to disk.
Related Articles
When you need help, Sweetwater has the answers!
Our knowledge base contains over 28,000 expertly written tech articles that will give you answers and help you get the most out of your gear. Our pro musicians and gear experts update content daily to keep you informed and on your way. Best of all, it’s totally FREE, and it’s just another reason that you get more at Sweetwater.com.

