
How Do I install My Native Instruments Komplete Content to an External Drive?

Overview
When you’re installing Native Instruments Komplete, you’ll have the option during the install process to install the content (such as the sound libraries) to an external drive. In this guide, we will show you how to do that on Mac and PC. Follow the sections below to get started.
- Installing Komplete content to an external drive
- How to relocate Komplete content to a different location
Installing Komplete content to an external drive
TIP: If you’re installing the Native Instruments Komplete content to a blank hard drive, be sure that it’s formatted! For more information, check out our articles on how to format an external hard drive for Mac and PC.
Shop All External Hard Drives 💾
Native Instruments Komplete content, particularly sound libraries, can take up a lot of space, so we recommend installing that content to a dedicated external hard drive. Once you’ve downloaded and activated your Native Instruments product, you can select where the software is downloaded, standalone software location (if applicable), content location, and if you’re a Windows user, the VST plug-in location.
- Download and install Native Access, then log in using your Native Instruments account credentials.
- Click the person icon at the top right of the window, then select Preferences.
- Go to the Content Location section, click Browse, then select your external hard drive as the storage location.
- We recommend creating a folder with a unique name like “Native Instruments libraries” so you have your NI content all in one spot. This makes it easier to locate when you link your content.
- Once everything is set to the location you choose, click Install.
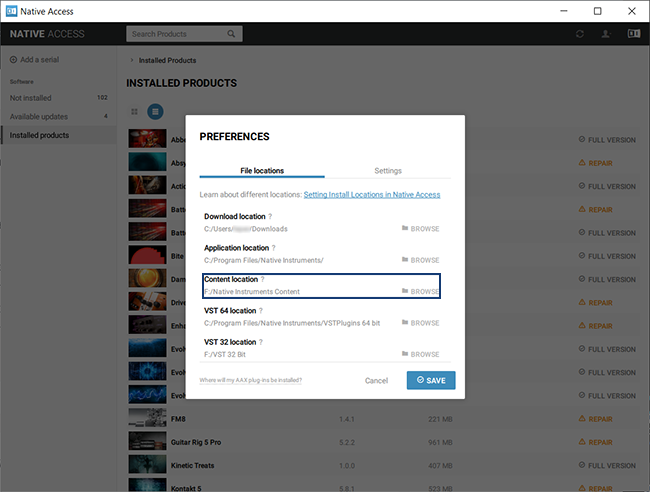
Native Access preferences window
How to relocate Komplete content to a different location
There are times where you may want to move your Komplete libraries to a different location. This could be due to a lack of space on your current drive or if you just got an external hard drive. Luckily, you don’t need to uninstall and reinstall the content. You just need to move your sound libraries to the new location, then update the settings in Native Access.
- Find the sound library (or libraries) you want to move, then copy and paste the content to the new location.
- Launch Native Access and find your product and click Installed Content. You should see a yellow exclamation point with the word REPAIR next to it.
- Click REPAIR, then on the next window, click Browse, select the location where the library now resides, then click Relocate.
- Once the process is complete, go back to Installed Content. It should now say FULL VERSION.
- If you still see REPAIR, verify that all of the content has been moved.
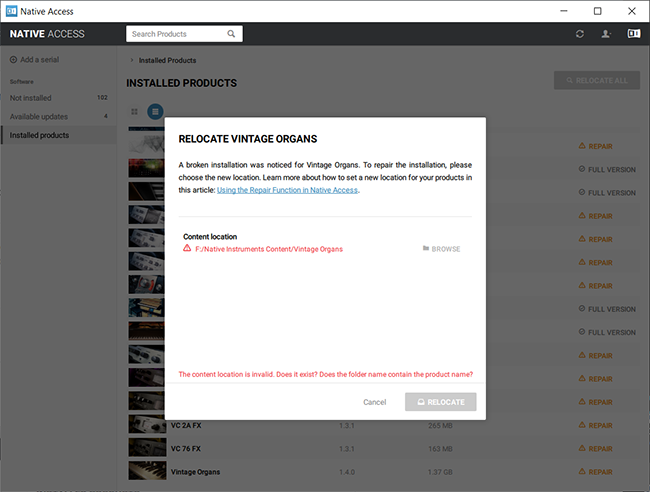
Native Access library relocation window
Additional resources
- How to Move Native Instruments Software or Libraries to Another Location on the Computer
- Which Applications do the KOMPLETE Content Products Belong To?
- Installation Help Solution Wizard
Related Articles
When you need help, Sweetwater has the answers!
Our knowledge base contains over 28,000 expertly written tech articles that will give you answers and help you get the most out of your gear. Our pro musicians and gear experts update content daily to keep you informed and on your way. Best of all, it’s totally FREE, and it’s just another reason that you get more at Sweetwater.com.

