
Eventide H9000 Quickstart Guide
Congratulations on your new Eventide H9000 Harmonizer, the culmination of Eventide’s more than 50 years of innovation in audio digital signal processing.
Whether you have an Eventide H9000 or H9000R, or you are installing the Dante, MADI, or Pro Tools HD DigiLink expansion boards, here’s the information you need to get up and running.
This guide refers to the Version 2.0 firmware for the H9000.
- Register with Eventide and Download the Emote App
- The H9000 Emote Editor/Librarian and Plug-in
- Update the H9000 Firmware
- Inputs, Outputs, and Connections
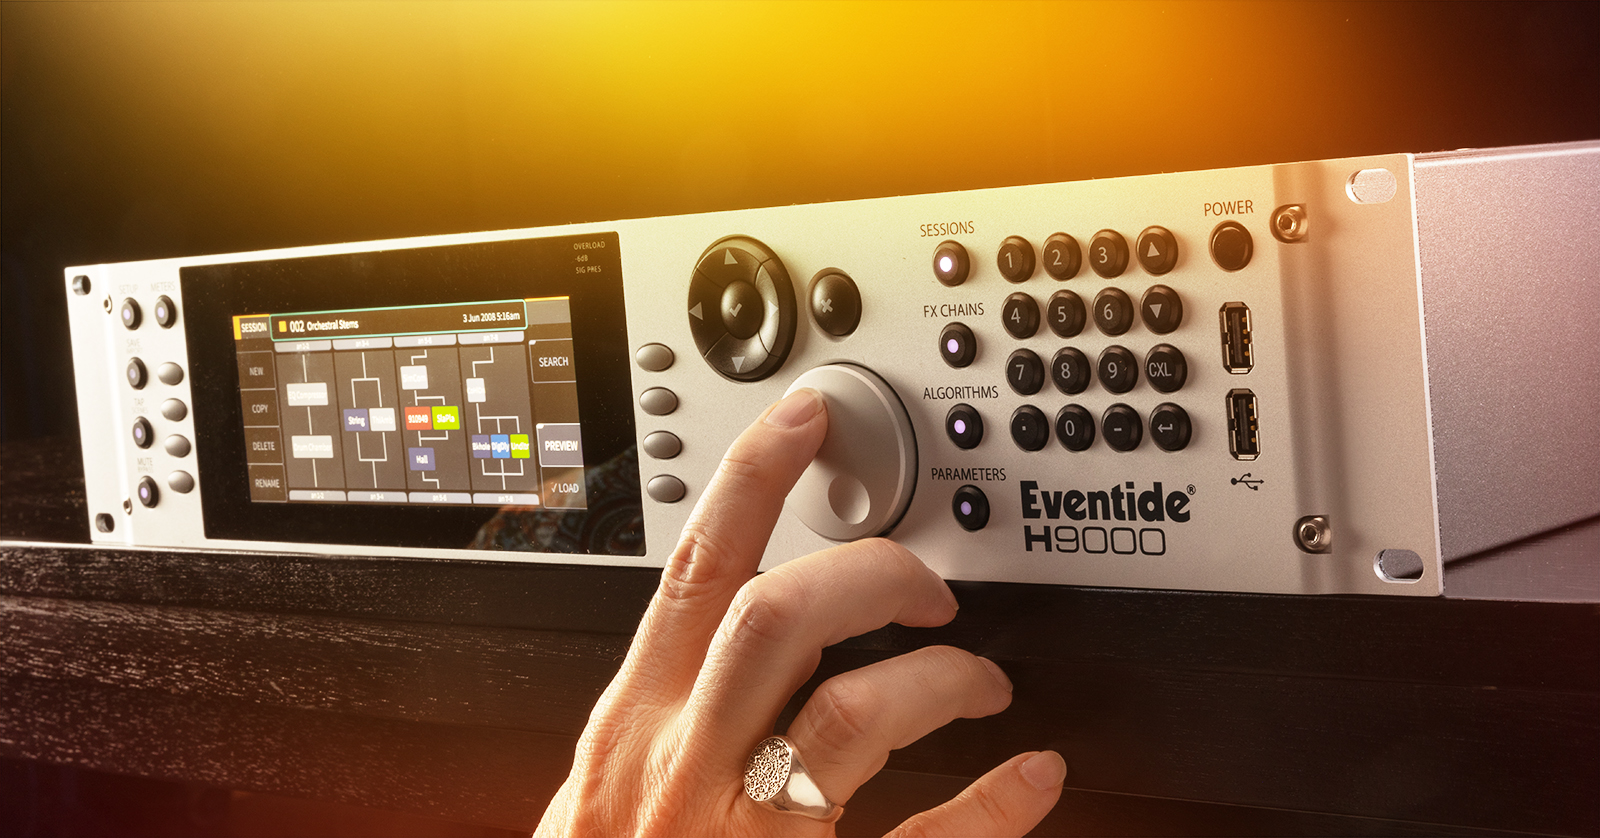
- Using the H9000 with Its Front-panel Controls
Register with Eventide and download the Emote app
Register your purchase at the Eventide website. Create a new account if you need one.
After you register your purchase, go to your account page and download and install the Eventide Emote app for Mac and Windows PC.
If you are on Windows, then download and install the Apple Bonjour Print Services for Windows to enable the Emote app to connect to the H9000. Also download and install the Windows USB Audio Driver for H9000.
Make sure to download the H9000 User Guide, as well.
The H9000 Emote Editor/Librarian and Plug-in
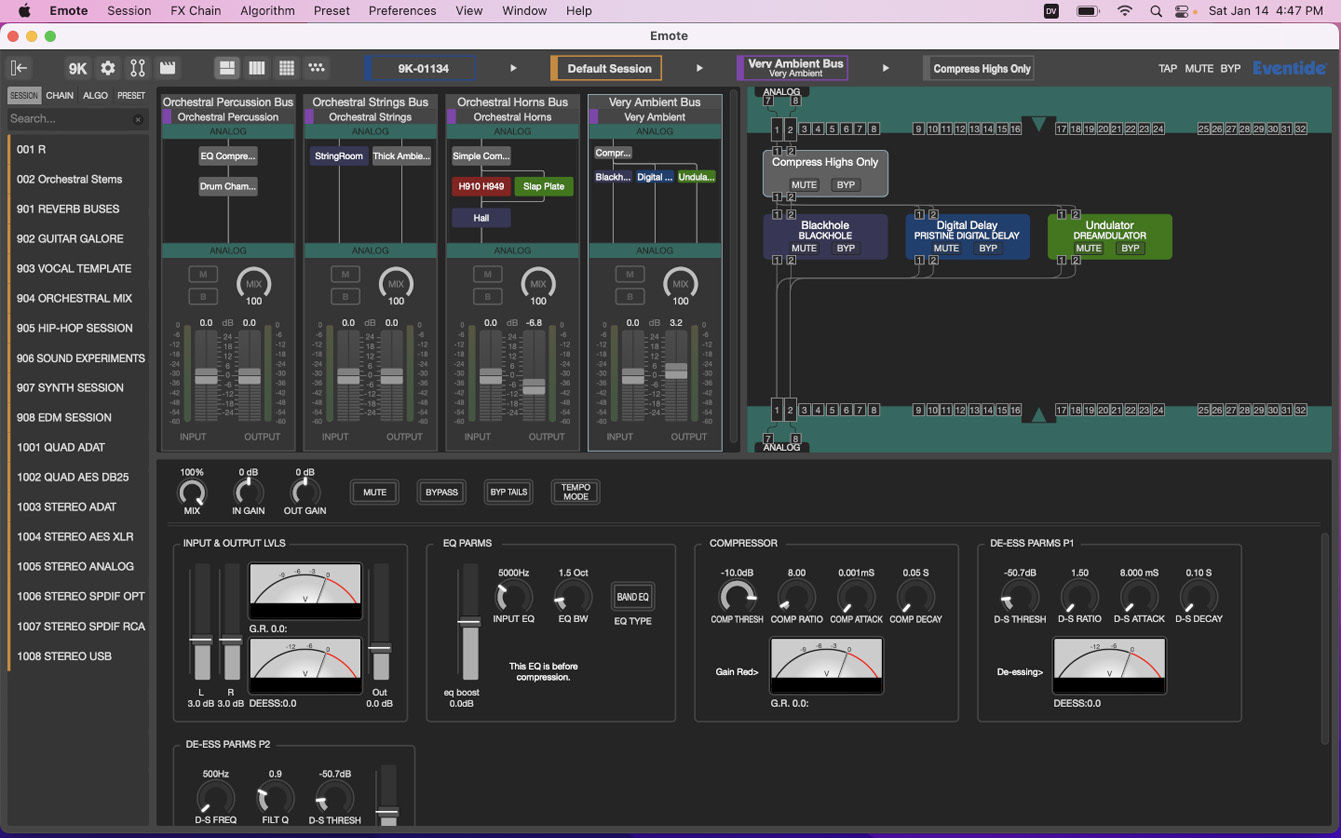
The H9000 has a large display and front-panel controls, but, to get the most out of its flexibility and power, you will want to use the Emote app.
The H9000R is identical in function to the H9000, but it does not have a front panel with controls or a display. You can access all its functions conveniently from the Emote app.
TIP: The Eventide Emote app requires an Ethernet cable, LAN, or Wi-Fi connection to your Mac or Windows PC. The Emote app does not use the USB connection.
Emote also comes as a plug-in for AAX, AU, VST, and VST3, enabling you to automate effects parameters from your DAW.
Update the H9000 Firmware
Firmware Version 2.1.10
In October, 2024, Eventide released Firmware Version 2.1.10, which upgrades all effects algorithms to support sample rates up to 96kHz. The update adds a new suite of three vocal harmonizer and tuning algorithms, and brings over several algorithms from the H90 pedal.
Use the Emote app to see if there is a firmware update available for the H9000 or H9000R and install it. This way, you will get the latest operating system, algorithms, effects, and features.
Here’s our SweetCare article on getting started with the Emote app.
Inputs, Outputs, and Connections
The H9000 provides virtually every common format of digital and analog audio input and output and can accommodate three optional interface cards to enable more. You can install the H9000 in your rack and cable up every connection method in use in your studio. Then you can route signals through the H9000 between any connected inputs and outputs using the H9000’s front-panel controls or the Emote app.
Other ports on the H9000 provide synchronization, real-time control of parameters over MIDI, and connection to the Emote app.
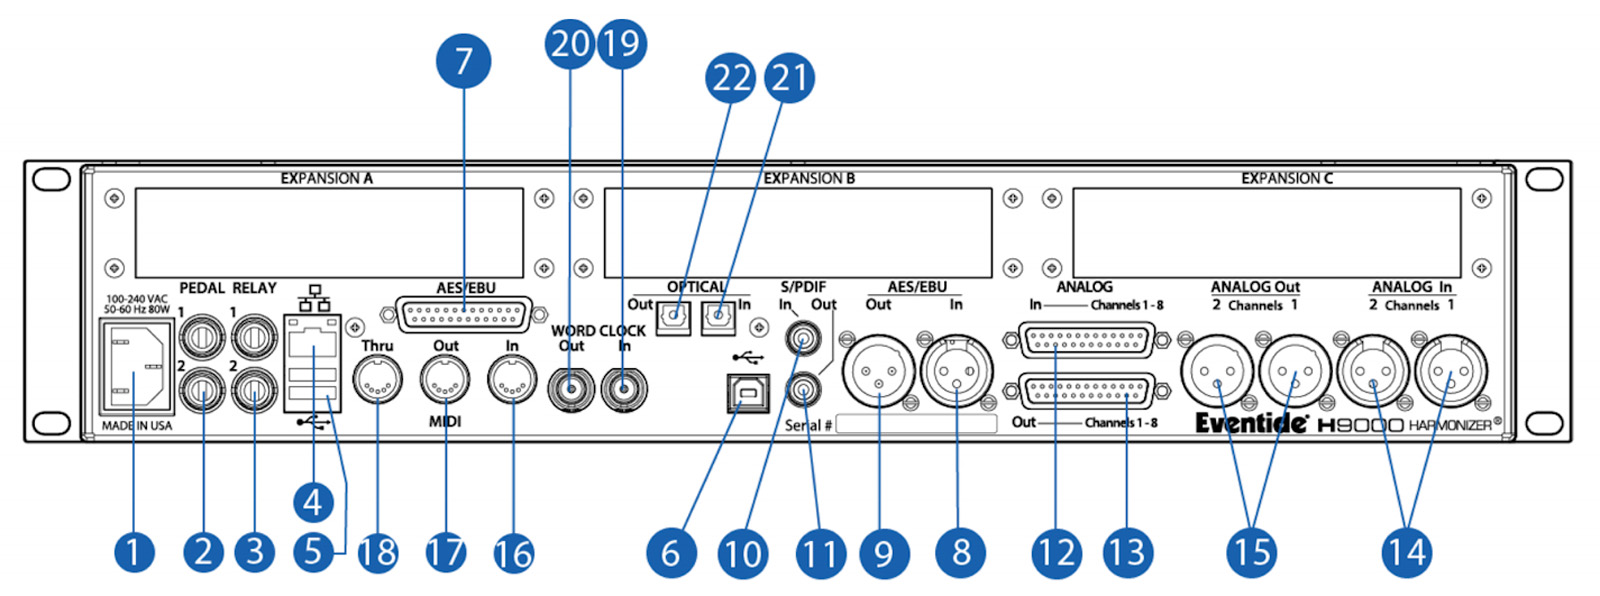
Numbers reference the chart above:
1. Power Connector: will automatically work from 100VAC to 240VAC, 50Hz–60Hz.
Analog audio
- 12 and 13. Analog, DB-25
- Connect 8 channels of balanced analog audio input and output.
- 14 and 15. Analog, XLR (2 channels)
- Balanced analog audio inputs and outputs, which are duplicates of the first two channels on the DB-25 connector.
Digital audio
Note that, while you can connect cables for all of these, only one digital audio source can be active at a time. Choose which one to activate in the H9000 Setup menu.
- 8 and 9. AES/EBU, XLR
- 2-channel AES/EBU input and output using AES/EBU–rated cables with XLR connectors.
- 21 and 22. Optical Input and Output, TOSLink
- Send and receive either 8 channels of ADAT or 2 channels of S/PDIF digital audio.
USB digital audio
- 6. USB-B
- Connect to your Mac or Windows PC, allowing you to use the H9000 as an outboard effects processor for your DAW and as a 16×16 channel audio interface.
MIDI control, sync, and computer connection
- 2. Pedal (x2), 1/4-inch TRS
- Connect a variety of external control devices: expression pedals, footswitches, and control voltages.
- 3. Relay (x2), 1/4-inch connector
- Will allow the H9000 to close external circuits. This function has not been implemented and is waiting for a future update.
- 4. Ethernet
- 5. USB-A (x2)
- The rear-panel USB-A ports provide the same three functions as the front-panel USB-A ports:
- Connect a USB thumb drive to save presets or perform an offline firmware update.
- Attach the included USB Wi-Fi adapter to connect to your LAN or internal Wi-Fi access point for connecting to the Emote app. (This Wi-Fi connection does not transmit audio.)
- Connect a USB MIDI controller to adjust effects parameters in real time.
- The rear-panel USB-A ports provide the same three functions as the front-panel USB-A ports:
- 16, 17, and 18. MIDI In, Out and Thru, DIN-5
- Control various H9000 parameters with MIDI controller hardware or MIDI software and synchronize the H9000’s time-based effects with a MIDI clock signal.
- 19 and 20. Word Clock Input and Output, BNC
- Allows the H9000 to sync its digital system clock to an incoming word clock signal or to sync other devices to the H9000’s word clock output.
Expansion cards
- 23. Expansion A, B, C
You can use cards in any combination, for example, two MADI cards and one Dante card.
Using the H9000 with Its Front-panel Controls
TIP: When you power on the H9000, it takes 2 minutes 15 seconds to boot up before it begins to function.
Here are some basic operations to get you started.
H9000 effects hierarchy

The H9000’s signal processing is organized into:
- Sessions
- FX Chains
- Algorithms
- Parameters
Each of these has a dedicated button to the left of the numeric keypad.
A Session groups together as many as four simultaneously available FX Chains. Each FX Chain is composed of multiple Algorithms (there are over 1,600), which have signal routing paths assigned to them within the FX Chain. Each Algorithm has numerous controls and parameters, and most Algorithms come with numerous factory presets.
Long-press the front-panel Tap button to bring up the Scenes screen. Scenes are series of sequenced program changes, enabling you to step through different preconfigured states. You can create your own Scenes for use in a live concert or theatrical production.
Press the Sessions button. On the display, you will see a list of preset Sessions.
Navigating with the H9000 front-panel controls
To the left and right of the display are two rows of four Soft Keys, which will display different functions depending on the context. For example, in this mode you can create a New Session, Copy it, Rename it, Load it, or Preview it.
Depending on context, a Soft Key can have one of two functions. “Normal” keys execute their labeled action when pressed. “Latching” keys change the front-panel display to a different state, bringing up submenus or alternate screens.
You can scroll through the list of Sessions using the Jog Wheel or the Up and Down arrow buttons (in the Cursor Diamond), confirming a selection with the Check Button (Enter)in the center of the Cursor Diamond. Pressing the X button (Cancel)next to the arrow buttons will back you out of the current menu.
With a particular Session open, you can use the buttons in the Cursor Diamond to move within each FX Chain, select individual Algorithms, and edit their Parameters. You can assign different combinations of analog, digital, and USB inputs to each FX Chain and also inputs from the expansion boards if you have them installed.
The Save button brings up an option to save Sessions, FX Chains, and Presets to internal memory or to the included USB thumb drive if it is inserted into one of the front- or rear-panel USB-A ports. Consult the H9000 User Guide Section 5.7. Saving and Importing Data for more information.
Consult the H9000 User Guide Section 5. Front Panel Operation for more information.
H9000 audio routing and metering
As noted above, only one digital audio source can be active at a time. Choose between them in the H9000 Setup menu.
TIP: The H9000 does not perform sample rate conversion. External digital audio connections and the H9000 must both be locked to the same digital clock at the same sample rate.
Pressing the Meters button will permit you to assign input sources for eight three-segment LED meters above the display. The three LEDs indicate the presence of signal (green), a level hitting -6dB (yellow), and overload (red). You can also view more detailed metering within the display screen in that mode, including input and output metering in each of the four FX Chains in the current Session.
Check out the H9000 Emote app
While you can program everything from the front panel of the H9000, you will come to rely on the Emote app, which makes it even easier to create and recall Scenes and Sessions, route audio, sort through the 1,600 algorithms, edit parameters, and more. Check out our guide below.
When you need help, Sweetwater has the answers!
Our knowledge base contains over 28,000 expertly written tech articles that will give you answers and help you get the most out of your gear. Our pro musicians and gear experts update content daily to keep you informed and on your way. Best of all, it’s totally FREE, and it’s just another reason that you get more at Sweetwater.com.


Offer applies only to single-receipt qualifying purchases. Select manufacturers may require that only the manufacturer’s products qualify towards the minimum purchase amount needed to be eligible for promotional financing. Otherwise, an invoice that meets the minimum purchase amount and contains at least one qualifying manufacturer product is eligible for promotional financing. No interest will be charged on promo purchase balance, and equal monthly payments are required on promo purchase until it is paid in full. The payments equal the amount financed divided by the number of months in the promo period, rounded up to the next whole dollar. These payments may be higher than the payments that would be required if this purchase was a non-promo purchase. During the last month(s) of the promo period the required monthly payment may be reduced due to the prior months’ rounding. Regular account terms apply to non-promo purchases. New Accounts as of 07/31/2025: Purchase APR is 34.99%. Penalty APR is 39.99%. Min Interest Charge is $2. Existing cardholders: See your credit card agreement terms. Subject to credit approval.
Offer applies only to single-receipt qualifying purchases. No interest will be charged on the promo balance if you pay it off, in full, within the promo period. If you do not, interest will be charged on the promo balance from the purchase date. The required minimum monthly payments may or may not pay off the promo balance before the end of the promo period, depending on purchase amount, promo length and payment allocation. Regular account terms apply to non-promo purchases and, after promo period ends, to the promo balance. New Accounts as of 07/31/2025: Purchase APR is 34.99%. Penalty APR is 39.99%. Min Interest Charge is $2. Existing cardholders: See your credit card agreement terms. Subject to credit approval.
The estimated required monthly payment shown which excludes taxes and delivery equals the amount financed divided by the number of months in the promo period, rounded up to the next cent. During the last month(s) of the promo period the required monthly payment may be reduced due to this rounding. These payments apply only with the financing offer shown. If you make these payments by the due date each month, you should pay off this amount financed within the promo period, if it is the only balance you are paying off. If you have other balances on your account, this payment will be added to any other minimum monthly payments.
Applies only to select items from this manufacturer. Ask your Sweetwater Sales Engineer for more details.