
Arturia DrumBrute Impact Setup Guide
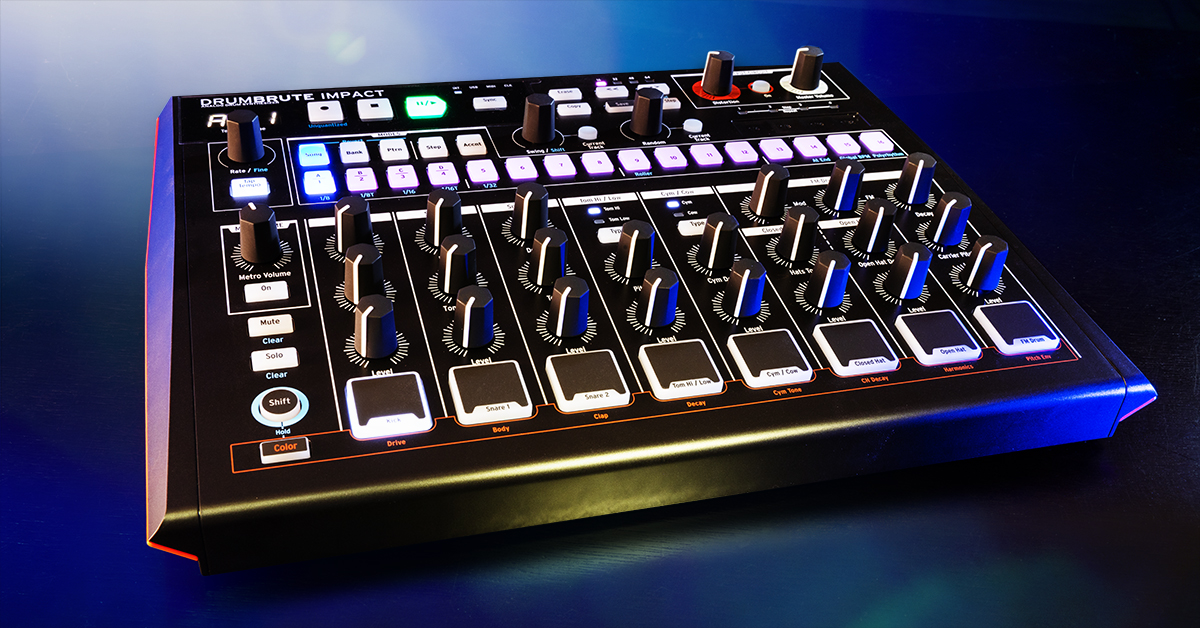
The Impact is a small but powerful drum machine to have in your studio and live rig, so in this guide, we’ll show you how to get up and running with the Arturia DrumBrute Impact. You’ll learn how to register the DrumBrute Impact, download and install Arturia’s MIDI Control Center, and also how to use it for the first time.
We’ve also included some useful videos from our friends at Arturia to get you up and running as well! Follow the sections below to get started.
- Register the DrumBrute Impact
- Download and install MIDI Control Center
- Hardware connections
- How to create a pattern
Register the DrumBrute Impact
While it’s exciting to plug everything in, turn it on, and start playing, the first thing you’ll need to do is register the DrumBrute Impact with Arturia. After registering the device, you’ll get free software bundles and offers exclusive to DrumBrute Impact owners.
- Log in to your Arturia account. If you don’t have an account yet, create one here.
- On your account page, click the green Register New Product button.
- Enter the Serial Number and Unlock Code located on the sticker on the underside of the Arturia DrumBrute Impact.
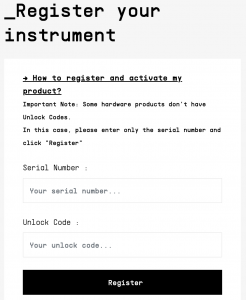
Click the image to register your Arturia DrumBrute Impact
Download and install MIDI Control Center
After registering the DrumBrute Impact, the next thing to do is download and install Arturia’s MIDI Control Central (MCC). MCC allows you to update connection settings, transfer patterns, and most importantly, perform firmware updates. Follow these steps to get the software.
- Download the Arturia MIDI Control Center application here.
- While you’re on that page, download the firmware file if your computer will be offline when you update the firmware.
- Open your Downloads folder, double-click the .exe file (PC) or .pkg file (Mac) installer file, and follow the on-screen instructions.
Update the firmware
Arturia releases firmware updates periodically that often will include new features and also address bugs found in the current version. If you’re connected to the Internet, the process is seamless. However, if your system is offline, you’ll need to download the firmware file from a computer connected to the Internet and then manually install it.
Online firmware update
- Connect the DrumBrute Impact directly to your computer and turn the unit on.
- Do not connect it to a USB hub, as the hub may not provide enough power to transfer data to and from the device.
- Launch MCC. Use the dropdown box located next to Device to select the DrumBrute Impact (top left of the window), then click the Firmware button. If there’s an update, the firmware will automatically be installed.
Offline firmware update
- If you haven’t already, use a computer connected to the Internet, go to the DrumBrute Impact resource page to download the latest firmware file, then transfer it to your offline computer.
- Connect the DrumBrute Impact, launch MCC, then click Upgrade.
- Navigate to the location where you transferred the firmware file, then follow the on-screen prompts.
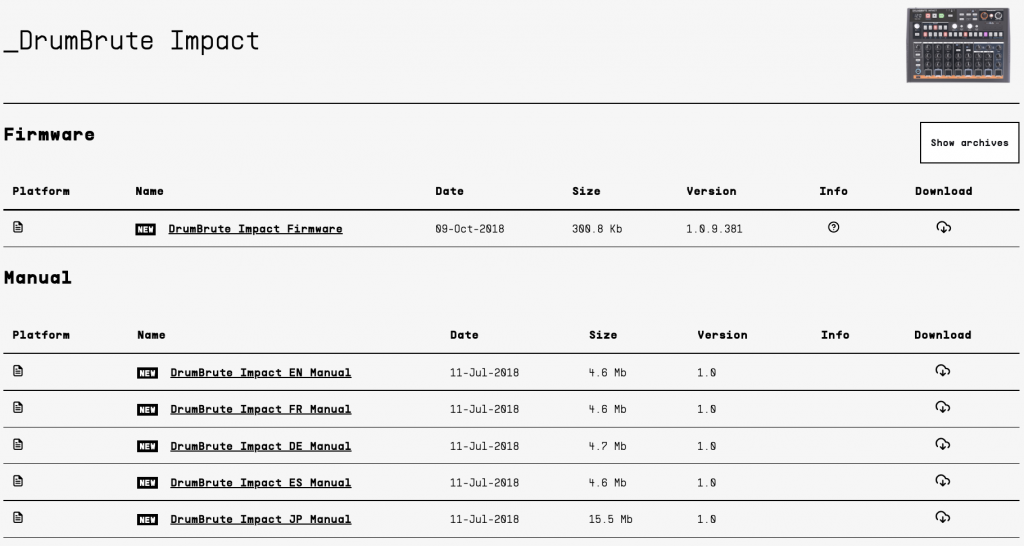
Click the image to MIDI Control Center and DrumBrute Impact firmware
Hardware connections
While the DrumBrute Impact may be small in size, it still has plenty of hardware connectivity to help expand your rig. The connections are straightforward, so here are a few things to note when working with the DrumBrute Impact.
- If connecting to a device using the Clock In/Out jacks, you may need to adjust the PPQ within the Device Settings in MCC, particularly if you’re using an earlier Korg machine. Check out the external device’s Owner’s Manual to learn more!
- When you connect a cable to an Individual Out, that instrument will be removed from both the Mix Output and Headphones, and the Output Circuit distortion will be bypassed.
- If you own an electronic drum kit, you can connect the kit’s MIDI Out to the DrumBrute Impact’s MIDI In to play the Impact’s sounds with your kit. You may need to update the drum kit module settings for MIDI connectivity, so be sure to check out its User Manual for more information.
Tutorials | DrumBrute Impact – Episode 4: Exploring Connections
How to create a pattern
What makes the Arturia DrumBrute Impact so great is its ease of use when creating patterns. You can create 64 patterns, each of which has up to 64 steps. You can create a pattern three different ways: entering steps individually, recording in real-time, or using the looper/roller bar. Depending on what you’re recording, you may choose one method over another, but it’s simple no matter what.
TIP: Change the tempo using the Rate/Fine encoder. If you want to fine-tune the tempo even further, hold the Shift button and use the Rate/Fine encoder.
Step recording
Step recording is the easiest way to program a beat as you’re entering notes one step on one instrument at a time. Step recording is useful if you want a simple pattern or if you want to edit a pattern without needing to re-record (when recording in real time).
- Press the Step button, press the instrument pad you want to record, then use the 16 step buttons to enter the step.
- Press the next instrument button and repeat the procedure.
- If you want to adjust the accent of a specific step, simply press the Accent button and press the step button where you want the accent to be applied.
Record in real time
While step recording is great, recording in real time is excellent if you need to get your ideas down fast. By default, recording in real time will auto-quantize, but you can always turn it off, giving your patterns a bit more human feel to them!
TIP: The instrument pads are velocity sensitive, so if you want accents on specific instruments and steps, simply press the pad harder or softer.
- Press the Record button to record enable the pattern, then press the Play/Pause pad to begin recording.
- Begin finger drumming, and once you’re finished, press the Stop button.
Roller/Step Repeater
The Roller/Step Repeater pad is the best way to record instruments with a repetitive beat, like 16th note hi-hat patterns. You can get very creative because you can change the value while recording (and playing) in real-time.
- Press the Record pad to record enable the pattern, then press the Play/Pause button to begin recording.
- Press and hold both the instrument and note value you want to record.
- Slide your finger back and forth on the Roller/Step Repeater pad to change note values in real-time.
- Once you’re finished, press the Stop button.
Saving your work
Once you’ve created your patterns, you can save them. All you need to do is hold the Save button and press Pattern. We highly recommend that you transfer and back up your work via MIDI Control Center regularly in case something goes wrong — that way you won’t lose all your patterns!
Additional vendor resources
Tutorials | DrumBrute Impact – Episode 1: Sounds and Steps
Tutorials | DrumBrute Impact – Episode 3: Adding Feeling
When you need help, Sweetwater has the answers!
Our knowledge base contains over 28,000 expertly written tech articles that will give you answers and help you get the most out of your gear. Our pro musicians and gear experts update content daily to keep you informed and on your way. Best of all, it’s totally FREE, and it’s just another reason that you get more at Sweetwater.com.


Offer applies only to single-receipt qualifying purchases. Select manufacturers may require that only the manufacturer’s products qualify towards the minimum purchase amount needed to be eligible for promotional financing. Otherwise, an invoice that meets the minimum purchase amount and contains at least one qualifying manufacturer product is eligible for promotional financing. No interest will be charged on promo purchase balance, and equal monthly payments are required on promo purchase until it is paid in full. The payments equal the amount financed divided by the number of months in the promo period, rounded up to the next whole dollar. These payments may be higher than the payments that would be required if this purchase was a non-promo purchase. During the last month(s) of the promo period the required monthly payment may be reduced due to the prior months’ rounding. Regular account terms apply to non-promo purchases. New Accounts as of 07/31/2025: Purchase APR is 34.99%. Penalty APR is 39.99%. Min Interest Charge is $2. Existing cardholders: See your credit card agreement terms. Subject to credit approval.
Offer applies only to single-receipt qualifying purchases. No interest will be charged on the promo balance if you pay it off, in full, within the promo period. If you do not, interest will be charged on the promo balance from the purchase date. The required minimum monthly payments may or may not pay off the promo balance before the end of the promo period, depending on purchase amount, promo length and payment allocation. Regular account terms apply to non-promo purchases and, after promo period ends, to the promo balance. New Accounts as of 07/31/2025: Purchase APR is 34.99%. Penalty APR is 39.99%. Min Interest Charge is $2. Existing cardholders: See your credit card agreement terms. Subject to credit approval.
The estimated required monthly payment shown which excludes taxes and delivery equals the amount financed divided by the number of months in the promo period, rounded up to the next cent. During the last month(s) of the promo period the required monthly payment may be reduced due to this rounding. These payments apply only with the financing offer shown. If you make these payments by the due date each month, you should pay off this amount financed within the promo period, if it is the only balance you are paying off. If you have other balances on your account, this payment will be added to any other minimum monthly payments.
Applies only to select items from this manufacturer. Ask your Sweetwater Sales Engineer for more details.