The human voice. It was the very first instrument. No other musical instrument is capable of such complexity and expression. Now take one voice and multiply it by a dozen, several dozen — or even hundreds — and you end up with a choir that is potentially the most sublime musical source ever.
But how do you mic a choir — an instrument with sometimes hundreds of distinct voices, each with its own sonic characteristics, and an instrument whose source may cover an area as wide as a hundred feet and a vertical span of 10 feet or more? Here are some pointers on techniques that will help you capture the magnificence of a choir, no matter how large or small.
About the author
Lynn Fuston started singing in children’s choirs at the age of four, and he sang all the way through high school in quartets and small ensembles and ended up performing with the 250-voice Texas All-State Choir. In 1978, he went to Nashville and began his recording career, and he has since worked with church choirs, studio choirs, and background vocals on hundreds of albums. He’s recorded choirs varying in size from eight up to 125 singers.
Stereo Mics
The easiest way to mic a small choir (25 voices or fewer) is to use a single stereo mic or a pair of mics. I’ve used coincident (two capsules aligned side by side) stereo mics similar to the RODE NT4 small-diaphragm condenser or the Telefunken AR70 large-diaphragm condenser. The advantage of these stereo mics is that they offer simplicity in setup and great mono compatibility. They also tend to hear the blend exactly as the conductor hears it.
For recording choirs, I’ve frequently used a stereo ribbon, such as the AEA R88 or the Royer SF-24, suspended directly over the conductor’s head to capture the exact blend and balance heard from that position. If the choir members are all similar in distance from the mic, the blend is right, and the performance space sounds good, a stereo ribbon makes a great choice for recording. Moving the mic closer to the choir or farther away allows you to control the ratio of the choir sound to hall or ambience that is captured. The only potential downside to using XY miking with two cardioids, or Blumlein if you are using figure-8 mics, is that it may result in a narrower stereo image. (For more information about these and other stereo miking techniques, check out this article about 7 Stereo Miking Techniques.)
If you want to achieve a wider stereo image, you can move the two mics apart and use the AB method with two spaced mics. The mics can be spaced 2–8 feet apart, depending on the span of the choir. With this technique, the mics will be positioned so that the left mic picks up the left side of the choir and the right mic picks up the right side of the choir. Adjust the mic positions so that the overlap in the mic patterns evenly covers the center of the choir. The cardioid mics mentioned in this article will work well for this technique. To hear what these techniques sound like, listen to the choir recordings included below.
Multiple Mics — by Section or Area
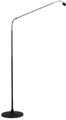
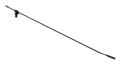
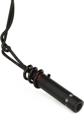
When working with a larger choir (miking an area larger than two mics will accommodate) or if you need more gain before feedback, then more than two mics will probably be required. If you need to have control of the blend of the choir at the mixing desk, then you can use one mic per voice part (four mics for SATB — Soprano, Alto, Tenor, Bass — or three mics for SAT — Soprano, Alto, Tenor). Depending on the size of the choir, you might need more than one mic per section. For situations like this, choir booms like the Earthworks FlexWand 730 or Audix MicroBoom MB5050 are ideal because they are small and unobtrusive yet sound very good and can be easily positioned at choir height. They are also video-friendly because they are black and nearly invisible to a camera when positioned in front of a choir. If you are in a facility where you can permanently rig microphones so that they are not on the stage, then tiny mics like the Audio-Technica PRO 45 or U853R work well, as does the larger Earthworks C30/C-B Hanging Cardioid Gooseneck Microphone, which comes in a black or a white finish.
Pro Tip
In a live setting where you need maximum gain before feedback, get the mics as close to the choir as possible. And put the best singers on the front row, nearest the mics. Usually it’s more important to capture the presence of the choir than to accurately represent every voice in the choir. And politely arrange the singers so that the weakest or worst singers are farther away from the mics. If you have one really loud, out-of-tune singer right in front of the mic, then it won’t matter how many other great singers are standing around them.
When working in a situation like a recording studio, where visibility of the mics is not an issue, then large-diaphragm condensers (LDC) will frequently offer the best sound. Microphones such as the Shure KSM44A or Neumann U 87 Ai are studio classics for good reason, offering low noise and variable patterns. They can be positioned at eye level or higher on large boom stands to pick up the global sound of the choir. For my studio recordings, I would group the voice parts separately with one or two mics on each part (depending on the size of the group) and then add a stereo pair overhead, 6–10 feet in front of the choir and about 8–10 feet up in the air, depending on the size of the room.
Pro Tip
If you are trying to achieve a big audience sound from a small group of singers in a smaller room, try putting cardioid mics behind the choir, pointing away from the singers. This way, they pick up purely ambience and no direct sound. Add that sound in with the close mics, and you’ll be shocked at how great a sonic illusion you can create with a small group in a small space. I typically use ribbons (with the mic pointed so that the choir is standing in the null) or LDCs for this technique.
Ambient Mics
Most people, other than the conductor and the musicians in the orchestra, don’t hear a choir up close. An audience is typically 20+ feet away from a choir, hearing the natural blend of all the voices. That’s why using ambient mics to pick up a choir will sound most like what an audience is accustomed to hearing. Ambient miking is wonderful for recording but not very useful for live sound reinforcement due to feedback susceptibility, unless the live performance is being broadcast or recorded to video. For recording, positioning mics farther back in the hall, like on a balcony rail, can add a sense of space and realism to the close sound of the mics placed near the choir. For ambient miking, getting the mics up high and away from the audience is preferred, due to the noise created by a congregation, like coughs, candy wrappers, babies crying, etc. If you are recording in a flattering sonic space like a cathedral or large auditorium, placing the ambient mics up high also captures the reverberation and the sound of the venue, which can make the difference between a good sound and a glorious one!
Let’s Listen
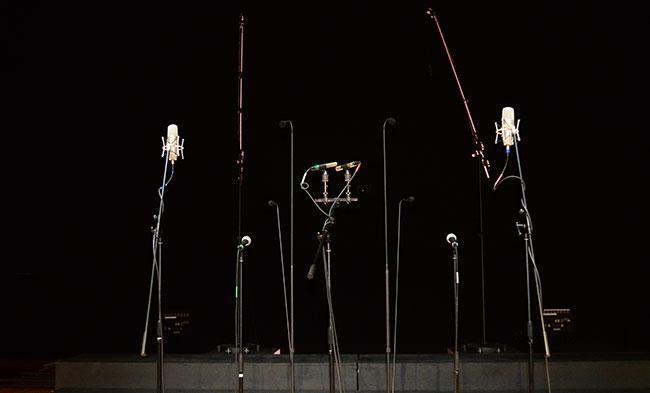
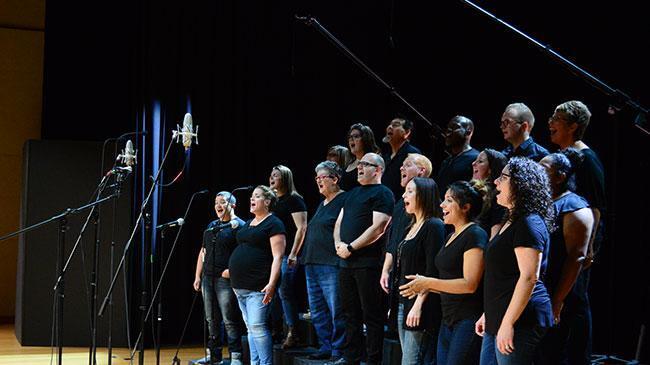
We had a choir from The Pointe Church in Fort Wayne come in to record the song “I Need You Now” by Sweetwater’s own Mike Ross. We positioned the choir on risers on our Performance Theatre stage and recorded them with six pairs of microphones so you can hear what the different mics and mic positions sound like. The microphones are listed below, and each sample will demonstrate one stereo mic pair. Here’s what you will hear in each sample.
- 0:00 – 0:06 – Choir Mics Soloed
- 0:07 – 0:13 – Choir Mics with Reverb
- 0:13 – 0:55 – Choir Mics with Backing Track
These were recorded by Sweetwater’s staff engineer Dave Martin using the Universal Audio Apollo 8p interface. The mic positions are shown in the diagram below.
NOTE: This 12-mic setup was just for demonstration purposes. A configuration with all of these mics simultaneously would never be used in the real world.

Audio-Technica PRO 45
RODE NT5
Earthworks FlexWand 730
Audix MicroBoom MB5050
Shure KSM44A
Shure SM58
No matter what mics will work best for your choir, either recording or live, Sweetwater has the mics you need. Reach out to a Sweetwater Sales Engineer at (800) 222-4700 to find the mics that are right for you.