Whether it’s dialog marred by distracting background noise, a live recording with maddening 60-cycle hum, or a vocal track that assails your ears with digital clipping, trying to resurrect substandard recordings can be a nightmare. And transfers from analog media (vinyl records, magnetic tape, etc.) present their own challenges. The process of removing imperfections is known as audio restoration. In this article, we’ll discuss the audio restoration tools that professionals use, how they are used, and how you can optimize your own projects.
Words of wisdom before we start
No two audio restoration projects are alike, so a technique that works on one may not be effective on another. This makes audio restoration a time-intensive endeavor. So how do you speed up the process? Our advice is to not try. As cliche as it may sound, patience is a virtue. Take your time, and you’ll be rewarded. Finally – and this can’t be stressed enough – be gentle. A heavy-handed approach often results in a finished product that sounds worse than the original.
Tools of the trade
Basic restoration can be performed with the typical tools you already have in your studio: gates/expanders, EQ/filters, and multiband compressors. More complex projects require specialized processors, such as de-clickers, spectral editors, or dialog noise suppressors. On top of that, a top-notch spectrum analyzer is a must.
Noise types and what to do about them
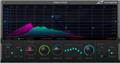
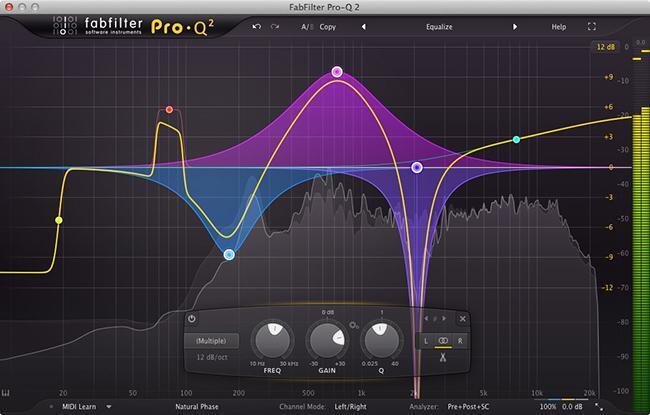
FabFilter Pro-Q 2
Different types of noise require different tools and techniques. Some techniques are near-universal for each type of noise (working most of the time), but remember that audio restoration isn’t an exact science – there are often several ways to solve a problem. That’s why it’s best to tackle your project from multiple directions, then decide which process renders the best sound. Surprisingly, sometimes the simplest solution yields the best outcome. Even if you have an arsenal of advanced processors at your disposal, simply slapping a noise gate on the offending track may achieve your desired result.
Tonal and broadband noise
Tonal noise
Tonal noise is constant and exhibits a fixed frequency. Electrical buzz and 60-cycle hum are examples of tonal noise. Because it occupies a single frequency band, tonal noise is an easy sonic obstacle to conquer. A notch filter is your first line of defense. You’ll need two plug-ins for this: a spectrum analyzer and a linear phase EQ (or an EQ plug-in with a spectrum analyzer such as FabFilter’s Pro-Q 2). First, you need to identify the frequency of the noise. Then, create a notch filter with your EQ that corresponds to the problem frequency. Start with a narrow Q, then widen it until you achieve your desired result. FYI: you may need to repeat this process with the harmonics generated by the original fundamental frequency.
Broadband noise
Broadband noise is a steady-state sound that occupies more than one audio frequency. Continuous background chatter and tape hiss are common types of broadband noise. Because it occupies multiple frequencies, broadband noise is trickier to deal with than tonal noise. Sometimes, you can solve these nuisances with an EQ. For example, if you’re dealing with high-frequency hiss, try using a lowpass filter set at about 8kHz. Adjust the slope until you achieve a natural-sounding result. If you’re dealing with low-frequency rumble, do the same thing with a highpass filter at around 50Hz.
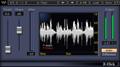
Waves Z-Noise

De-noisers – for when EQ won’t cut it
Sometimes you can’t achieve acceptable results with EQ – the final product sounds muddy, thin, or unnatural. That’s when it’s time to break out the big guns. A de-noiser plug-in, such as Waves Z-Noise or Sonnox DeNoiser, takes a snapshot of the problem sound then uses advanced algorithms to separate the offending noise from your program material. If you’re dealing with hum, Waves X-Hum and Sonnox DeBuzzer are easy-to-use solutions. And in addition to the plug-ins already mentioned, Waves WNS Noise Suppressor is a stellar choice for cleaning up dialog, voice-overs, and interviews. Subtlety is the key when using any de-noiser plug-in. Brute force techniques will create unpleasant “underwater” effects. You’re better off making multiple gentle passes rather than a single aggressive one.
Impulse noises
Snaps, crackles, and pops
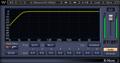
It’s common for audio restoration professionals to transfer analog media onto a digital medium. Like any recording task, you should try to make it right at the source. For example, if you’re working with a vinyl record, disc-wash the physical disc thoroughly using a dedicated cleaning solution and record cleaning apparatus. You should also use a high-quality turntable, stylus, and preamp. That being said, due to their physical limitations, vinyl records generate audible artifacts. Even if you take great pains to create a clean transfer, you’re going to have clicks, crackle, pops, and possibly rumble. That’s where de-clicker and de-crackler plug-ins come into play. De-clickers, such as Waves X-Click and Sonnox DeClicker, eliminate clicks and pops, while De-cracklers, such as Waves X-Crackle, remove rumble and rapid, continuous clicks. Remember, making multiple gentle passes will produce a better result than one forceful pass.
Sonnox Restore Collection
Other common audio irritants
Intermittent background noises
So far, we’ve covered the easy stuff. But with today’s technology, audio restoration professionals can do so much more. We can clean up a dialog track with a dog barking in the background, and we can erase a ringing cell phone in the middle of a quiet acoustic performance. When it comes to tackling unexpected sonic complications, iZotope’s RX is the industry standard. In addition to top-shelf de-noise, de-click, and de-hum processors (and just about every other noise-reduction tool available), RX features a spectrogram that allows you to visually paint away unwanted sounds with a single mouse gesture – it’s like having a photo editor for audio!
RX 6 Spectral Repair
Clipped, badly encoded, and overprocessed recordings
As recording engineers, we know how important gain staging is. Setting the levels too hot can result in clipping and distortion, which (until now) has rendered recordings unusable. iZotope RX’s De-clip module is able to magically remove digital and analog clipping artifacts and restore distorted audio. Along those same lines, proper digital encoding is also vital to achieving optimal sound. Overprocessing, bad sample rate conversion, and poor lossy audio encoding lead to annoying comb filtering, high-frequency chirping, and other unpleasant artifacts. When you’re dealing with these issues, you need Zynaptiq’s Unfilter and Unchirp plug-ins. Unfilter undoes improper filtering, resonance, or excessive equalization, while Unchirp suppresses grating high-pitched artifacts, fixes transient smearing, and restores lost high frequencies.
Zynaptiq Unfilter
Mic bleed and bad acoustics
In the studio, we work hard to isolate instruments properly and create an optimal acoustical environment. That’s what makes a pro recording sound professional. But as any engineer will tell you, not everything is recorded by pros in a professional studio. We often deal with bleed problems from multi-miked sources, bad acoustics, and more. iZotope RX’s De-bleed module effectively separates your main source from the leaked source, resolving mic leakage, click track bleed, and similar issues. When something is captured in a poor-sounding room, the bad acoustics can overpower the recording. That’s when you need RX’s De-reverb module or Zynaptiq’s Unveil plug-in. These processors mitigate bad acoustics, removing unwanted reverberation and bringing your source material into focus.
Zynaptiq Unveil
More useful tips
Whether you’re performing simple vinyl-to-CD digital transfers, cleaning up dialog for movies or broadcast, or committing yourself to serious forensic audio work, audio restoration is grueling. It requires a lot of time and serious attention to detail. Here are a few more things to be mindful of:
- This work is exhausting! Take frequent breaks to give your brain and ears a rest.
- Back up your work frequently. We’ll say it again – back up your work frequently!
- Keep multiple versions and name your files intuitively – you’re going to be hitting every project from a million different directions.
- If you’re performing forensic work, maintain a detailed record of the edits you made to a file and be able to provide a written report upon request. Doing forensic audio restoration may result in you needing to be a professional expert witness in court.
- Don’t assume that you know how a project will turn out – even similar ones will yield unpredictable results.
If you’re just getting into audio restoration, you’ll find that you need a collection of specialized tools to deal with all the audio issues that you’ll face. Having a wide assortment of plug-ins is essential so you might consider buying these bundles, such as the Waves Restoration Bundle, Sonnox Restore Collection, or Zynaptiq Repair Bundle. These are the easiest and most cost-effective way to get the tools you need!
If you have any other questions about audio restoration, give your Sales Engineer a call at (800) 222-4700. They’ll be happy to help you out!