

You’re getting into live sound. There’s a lot to learn, and it can all seem a bit overwhelming at first. This guide will put you on the right path; we’ll cover the basics and provide you with plenty of additional resources. And, of course, your Sweetwater Sales Engineer is always there to help you out. Here’s what we’ll cover in this guide.
- Types of PA Systems
- Signal Flow & Signal Paths
- Gain Staging
- The Mixing Console
- PA Speakers
- Monitoring
- Feedback and How to Avoid it
Types of PA Systems
Before we dive into the nuts and bolts of PA systems, let’s take a look at some of the basic kinds of systems out there. Believe it or not, the vast majority of this guide applies to all of these, albeit to different degrees.
Personal PAs
Any simple PA that’s built for one or possibly two performers counts as a personal PA. These can be as simple as a single powered speaker with a modest onboard mixer and maybe an effect or two, or they can be as sophisticated as mini line-array systems with advanced processing, subwoofers, and more. Personal PAs are great for solo performers and coffee shop gigs.
All-in-one Systems
These rigs are a lot like personal PAs in their simplicity, only they tend to be higher in power than personal PAs and can cover a larger room or area. They usually include a couple of speakers or offer the ability to expand. A lot of all-in-one PA systems look like standard PAs, complete with speaker stands and a detachable mixer. They’re great for small mobile rigs.
Standard PAs
These are the whole enchilada. Mixers, speakers, monitors — the works! The rest of this guide assumes you’re looking at building a standard PA system just like the ones you see anywhere from small clubs to large arenas.
Signal Flow & Signal Paths

One of the first terms you’re likely to come across regularly when learning about PA systems is signal flow. Daunting as it may seem, signal flow is actually a really simple concept. For starters, signal flow is the path that audio follows in a system. Every source (mics, instruments, etc.) has its own unique signal path. Here’s an example:
Talent > Microphone > Mic cable > Mixer > Amplifiers > Speakers > Audience
There can be additional elements in this signal path, especially when you start to add outboard gear, but the concept never changes. If you can’t figure out why you can’t hear something, then trace the signal path from the end back to the source, and you’ll find the problem.
Additional Resources:
Gain Staging

Let’s start off with the term gain. Gain is a measurement of how much a circuit amplifies a signal. Every time there’s an amplifier in the signal path, we call that a gain stage. That doesn’t just include the obvious ones like power amps and preamps, but it also includes every fader on your board, every boost/cut knob on your EQs, and all the input and output volumes of any outboard gear. Basically, every stop along the way of your signal path is another gain stage.
The most important thing to understand about gain staging is that every time you boost signal, you not only add noise from the amplifier’s own circuitry, but you also boost any noise already in the signal. Boost too much and you’ll soon end up with seriously noisy audio.
While gain is associated with boosting a signal, there are amplifiers that simply match gain, which is known as unity gain. Unity gain (labeled “U” on some preamps and faders) is the setting at which the gain stage neither increases nor diminishes the incoming signal. Ideally, you want to set up your signal flow so that there’s only one major gain boost, usually at your preamp or instrument, and only cut from there until you hit your power amps.
Additional Resources:
The Mixing Console

Whether you’re working with the humblest analog desktop mixer or the most extensive digital mixing desk, the primary job of a mixing console remains the same: to take multiple inputs, combine them, and send the combined signal somewhere else (or to multiple places). No matter how complicated it seems, if you remember what we said about signal flow — all signal moves in the same direction — then you’ll be just fine. Another way to think about it: a mixer is like a really big, highly sophisticated series of Y cables with multiple inputs coming together.
Parts of a Mixer
Most mixing consoles have the same basic components, and to know what they are helps a lot with understanding signal flow.
Channel
A channel is the entire path that an input takes to reach outputs and buses such as the master/mix bus (the signal that is sent on to the amp and speakers).
Preamplifier
Each channel has a preamplifier, usually intended for microphone signal. This is the most important gain stage in the mixer since it determines the level of the incoming signal that will be processed, routed, and combined elsewhere in the mixer.
Inserts
Inserts let you put outboard gear directly in line with your input channels. Sometimes you can switch the order of the insert to pre- or post-EQ.
EQ (and Other Processing)
Most mixers have at least a simple EQ in line with each channel, typically right after the preamp. Other processing (largely found on digital mixers) might include various dynamics processing such as compressors, gates, and de-essers.
Auxiliary (Aux) Sends
In live sound, aux sends, which are found on each individual channel, are almost exclusively used for monitor mixing. These knobs act just like faders, only they split off signal to a separate bus (mix) and are sent to dedicated outputs. They’re also sometimes used for outboard processing and effects. Many mixing boards also feature a dedicated aux for onboard effects processing.
Channel Faders
Channel faders are where most of the mixing happens. They’re technically volume controls followed by buffer amplifiers and are generally used to reduce volume, not boost it.
Master Fader
The overall volume of your board is controlled by a master fader, which is pretty much just an output volume knob but on a slider.
Group Faders
If your mixer supports groups and submixes, then you’ll have the option of assigning individual channels to one or more groups. These groups get their own master volume control — a group fader. These make it easy to control drum kits, multi-miked guitar cabinets, groups of similar instruments (strings, brass, vocals), and more.
Master Section
If you’re running a digital mixer or a large, sophisticated analog board, then you’re going to have a master section. This section controls everything else your board can do, including effects processing, master bus processing (e.g., adding compression to the whole mix), setting return volumes for your aux sends, and more. It’s also where you’ll find the channel processing on digital mixers that would be in line on an analog mixer’s individual channels.
Analog vs. Digital Mixers
As we’ve mentioned a few times, mixers come in two basic categories: analog and digital. Although these two types of mixers perform the same essential function, there are a few outstanding differences you should know about. Bearing in mind that there are exceptions to every rule, here’s a brief comparison.
Inputs
- Analog — Inputs correspond directly to individual channels.
- Digital — There may be many more inputs than visible channels on the board.
Channels
- Analog — Each channel has its own set of controls, and all channels are visible at once.
- Digital — Inputs and channels are unrelated. Faders often control multiple channels.
Channel Processing
- Analog — Usually limited to a simple EQ visible on each channel.
- Digital — Many more options, but you can only see a single channel at a time.
Routing
- Analog — Routing is limited by the physical connections to the board. All routing is visible.
- Digital — Highly flexible routing through the master section. Not every channel visible at once.
PA Speakers
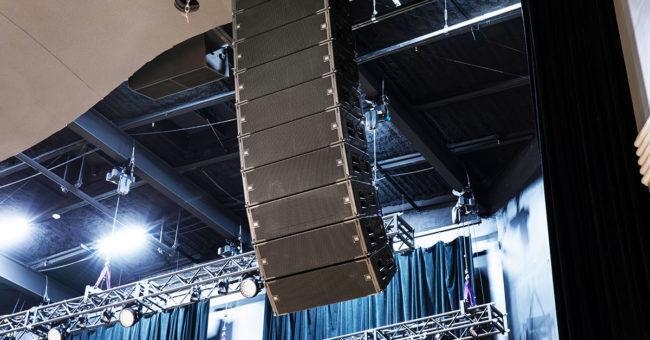
We’ve come at last to the other end of the signal path: speakers. These fall into two categories. First, there are main PA speakers (often called mains). Second, there are stage monitors, which we’ll address next.
There are a lot of different kinds of main PA speakers and a lot of varying elements to them, including the number and configuration of the speakers, their power handling, and more. We have guides that go in depth with all of this, so we’ll stick to the basics here.
Powered and Unpowered PA Speakers
The biggest distinction between powered (also called active) and unpowered (also called passive) speakers is that powered speakers have their own internal amplifiers, whereas unpowered ones don’t. There are serious pros and cons to each. Here’s a quick overview.
Powered/Active
Pros
- No need for external amplifiers
- Make your system easier to design and reconfigure
- May include onboard DSP (EQ, limiting, etc.)
- May include integrated mixer for standalone use
Cons
- Onboard electronics can add noise or fail
- Tend to be more expensive than unpowered equivalents
- Integrated amplifiers can make them heavier
- Must run AC power to each speaker independently
Unpowered/Passive
Pros
- No amplifier to add weight
- Simple design makes them extra durable
- Don’t require power cables for each speaker
- Far less expensive than similar powered models
Cons
- Learning to use power amplifiers can be tricky
- Systems can be slightly more difficult to expand
- Require outboard processing
- One malfunctioning amp can shut down several speakers
An important thing to understand about powered and unpowered PA speakers is that neither is inherently better than the other. It really comes down to personal preference. As long as you have more than enough output for your audience, you’ll be fine.
Monitoring

Assuming you’re dealing with live performers, you’re going to need some kind of monitoring system. After all, performers need to be able to hear themselves onstage; and that’s where stage monitors come in. There are two major branches of live sound monitoring. First, there’s the traditional route, which involves special speakers that sit onstage and point back at the performers. Second, there are personal monitors, which usually involve some form of receiver and headphones. Let’s take a closer look.
Stage Monitors
Commonly referred to as stage wedges, stage monitors typically sit at the front of the stage and point back and up at the performers. In fact, the term stage wedge refers to their distinct triangular shape, which points them up at an angle when set on the stage. Beyond that, stage monitors come in a variety of shapes and sizes, and some general PA speakers (usually powered speakers) have angled sides that let them double as monitors.
Pros
- Inexpensive
- Easy to set up
- Don’t require special equipment
Cons
- Can be the biggest cause of feedback
- Increased stage volume can muddy the mix
- More speakers to haul around
Personal Monitors

For artists who want to cut down stage volume and hear themselves better, personal monitoring systems pose a fantastic alternative to traditional stage monitors. These systems usually contain a distribution method, a receiver (wired or wireless), and headphones (most commonly in-ear monitors, or IEMs for short). There are many pros and cons to personal monitoring systems. Here are some of the big ones.
Pros
- Drastically reduce stage volume
- Put each performer in charge of their levels and, often, their mix
- Less equipment to haul and store
Cons
- More complex system can be complicated to set up
- Failure at any point leaves individual performers with no monitoring
- Can be disorienting for some performers
As with most things that have to do with PA systems, neither option is better, nor are the costs the deciding factor. We recommend examining your needs and figuring out which kind of setup will work the best for you.
Additional Resources:
Feedback and How to Avoid It

In case you don’t know what feedback is, it’s that awful, squealing, shrieking sound that a PA system can make. We’ve all heard it. Thankfully, it is usually avoidable.
Feedback is a loop. Audio from a microphone goes to the mixer, then from the mixer to the speakers, and from the speakers back to the microphone. Because certain frequencies are louder than others, both in the source and as a result of room acoustics, what you hear infinitely amplified is just a narrow band usually somewhere in the upper midrange. Let it go on long enough and this ever-intensifying sound won’t just send your audience running, but it could also totally destroy your PA system.
Sounds scary, right? On the plus side, there’s no reason you should have to worry about it; as long as you take some basic precautions, feedback is easy to avoid. Here are some ways to do it.
- Be careful about positioning your PA speakers. Don’t ever put your PA speakers behind your performers unless you’re using a personal PA that’s specifically designed for this kind of positioning.
- Keep mics pointed away from monitor wedges. Monitor feedback is only slightly less annoying than feedback through the mains and can throw off performers.
- Turn up the volume at the source. The stronger the incoming volume, the less you have to amplify it and the more it drowns out ambient noise, including sound from your speakers.
- Use microphones with tight cardioid pickup patterns. These naturally pick up less sound from all angles but the front.
- Use in-ear monitors. Not only does this take stage wedges out of the equation, it also allows you to decrease the overall volume in the venue since you’re no longer competing with stage volume. A bonus to this is that it actually makes the band easier to hear.
Fighting Feedback
Given the opportunity, it’s always better to avoid feedback than to suppress it. The reason for this is that while merely avoiding feedback doesn’t affect your sound, suppressing feedback, by nature, does. Suppressing feedback means finding the specific problem frequencies that are feeding back and cutting them until they don’t. Here are a couple methods to do that.
Ringing Out the Room
The old-school method of suppressing feedback is known as ringing out the room. The method itself is simple:
- Get a graphic EQ — the more bands, the better.
- Hook up your EQ as the last thing before your speakers.
- With your mics on the stage, slowly turn up your mixer’s volume until you hear feedback. You may need to introduce a small amount of noise (pink noise is best) to the system.
- Find the offensive, ringing frequency band on your EQ and cut it until the feedback stops.
- Turn up the volume until it rings again. Find the next ringing frequency and cut that. Keep repeating this until you either run out of frequency bands or require a lot of gain to instigate feedback. There is no set volume, so you’ll have to rely on a bit of trial and error. Once you have that EQ set, stick it in a locking equipment rack so no one can touch it.
Feedback Suppressors
Also called feedback eliminators, feedback suppressors essentially do the same thing as ringing out the room, only they do it automatically and without potentially damaging your sound. In addition to dedicated feedback suppressor units, you’ll sometimes find feedback suppression software integrated into live sound multiprocessors, powered speakers, and mixing consoles.
While setting up a feedback suppressor is simple and the benefits it brings are super convenient, it does come with some drawbacks. For instance, if it’s always cutting horrible feedback, then it’s arguable to say that it doesn’t constantly affect your sound. And, since you’ll likely never actually hear the feedback your suppressor is cutting, you’ll never be forced to make changes to reduce the feedback in the first place, which means you may not be spending as much time personally overseeing your EQ.
Additional Resources:
Conclusion
We hope this guide has provided you with a comprehensive overview of the fundamentals of live sound. You’ll find lots of additional resources on inSync, and your Sweetwater Sales Engineer is always here to help you, as well. Give them a call at (800) 222-4700
Here are more articles about PA systems that we highly recommend checking out.