
Yamaha FGDP Quickstart Guide

The Yamaha FGDP is a powerful, portable drum machine which is perfect in the studio and on the road, so in this guide, we will show you how to register, set up, and use it for the first time. Follow the sections below to get started. This article will get you up and running, so check out the FGDP-30 and FGDP-50 User Guides to learn more!
Register the Device
Before you start using the FGDP, you must register the device with Yamaha. When you register a device with Yamaha, you will receive many Yamaha Member benefits and gain access to any free software available to FGDP users.
- Go to the Yamaha home page, click the person icon, and fill out your Yamaha account information. If you don’t have an account yet, click Click here to Sign Up, then fill out the necessary information.
- Once you’re logged in, click Register My Product. Fill out the information, including the serial number (located at the bottom of the unit). Click Complete Registration.
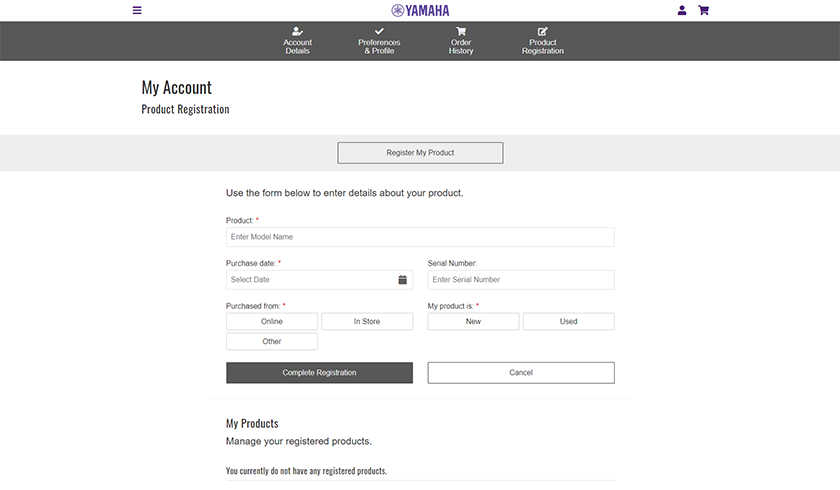
Click the image to register your Yamaha FGDP.
Setup and Connections
NOTE:Make sure you fully charge your FGDP unit before playing. Charging time will take between one and three hours.
You can easily connect your FGDP to your computer or mobile device. With a few connections, you’ll be up and running in no time. Please note that you will need to use the included USB adapter that fits your mobile device!
- iOS users: Connect the included USB cable to the official Apple Camera Adapter’s USB-A port and a USB-C cable to the power adapter.
Download the Driver (Windows PC Only)
The FGDP-30 and FGDP-50 can be fully integrated in your DAW. If you’re a Windows PC user who would like to use it as a controller in your DAW, you must download the dedicated driver before connecting it to your computer. If it’s connected but the driver isn’t installed, your FGDP will not work correctly or may not be recognized by your computer.
Yamaha Rec’n’Share App
One unique thing about the FGDP is that you can use Yamaha’s Rec’n’Share app to record yourself playing with the raw audio coming directly from your FGPD!

Playing the Yamaha FGDP
The Yamaha FGDP controller has an ergonomic design so that all the pads can be played without moving your hands around. The pads are also velocity sensitive, so you can have a dynamic performance. Yamaha has made it easy to navigate, too, so you spend less time menu diving and more time playing!
NOTE:The FGDP-30 uses voice prompts when navigating the menus.
Selecting and Editing a Kit
Selecting and editing a kit on both the FGDP-30 and FGDP-50 is a breeze. With the press of a few buttons, you’ll be up and running in no time!
FGDP-50
The Yamaha FGDP comes with 48 factory preset kits, but you can also create 50 kits of your own. If you own the FGPD-50, you can even import your own audio samples and assign them to any pad.
- Press the KIT buttons and use the – or + button to choose your kit. Press and hold the – or + button to change the kit value by 10.
- Press the < or > button to edit one of the following settings, and press the + or – button to change its value.
- KitEdit: Global kit settings
- PadEdit: Pad-specific settings
- VoiceEdit: Voices (samples) assigned to each pad
- InterlockEdit: Linking pad settings
- Press the Enter button. This will take you to an empty User Kit preset.
- Use the + or – button to change the character and the < or > button to change the cursor position.
- Press Enter twice to save the kit.
FGDP-30
The FGDP-30 has 39 factory preset kits that are fully editable. The voice prompts will guide you through each menu. Here’s how to change the voice (sample) assigned to a specific pad.
TIP:You can change kit settings such as reverb, chorus, and variation by pressing the + or – until you reach Menu 10. Check out the User Guide for kit settings options.
- Press the < or > button beneath the Drumkit button to select your kit.
- Press and hold < or > to continuously scroll. Press and hold both < and > to return to Kit number one.
- Press the < or > button beneath the Gear button until you get to Menu 23 — Kit Voice Category.
- Press the pad whose voice you want to change, then use the + and – buttons to choose the voice category (snare, cymbal, etc.). You will hear the voice category’s name and pad number.
- Check out the User Guide for the specific voice category numbers.
- Press the + or – button to change the voice. When a voice is selected, you will hear a preview.
- You can always go back to the original voice by pressing and holding both the + and – buttons.
How to Save Custom Kits
After creating a custom kit, you can save it for quick recall to your FGDP. Yamaha calls this Registration Memory. Settings that can be saved in Registration Memory include Mixer, Click, Kit (including voices), Trigger, and Utility settings.
FGDP-50
The Yamaha FGDP comes with 48 factory preset kits, but you can also create 50 kits of your own. If you own the FGPD-50, you can even import your own audio samples and assign them to any pad.
- Press and hold I, II, III, or IV until the button flashes to select what memory bank you want to save.
- Press ENTER on the top screen of Registration Bank Mode.
- Use the + and – buttons to choose the kit you want to recall.
- Press ENTER. Edit the name of the Registration Memory Bank.
- Once you rename the bank, press ENTER, then press ENTER again.
FGDP-30
- Press and hold one of the STAR buttons until you hear a voice prompt.
- Press the STAR button associated with the Registration Memory to load it.
Sweetwater – Yamaha FGDP-30 & FGDP-50: Finger drumming Fun on the Run & Beyond
Yamaha Finger Drum Pad “FGDP series” – Product Walkthrough
Related Articles
When you need help, Sweetwater has the answers!
Our knowledge base contains over 28,000 expertly written tech articles that will give you answers and help you get the most out of your gear. Our pro musicians and gear experts update content daily to keep you informed and on your way. Best of all, it’s totally FREE, and it’s just another reason that you get more at Sweetwater.com.

