
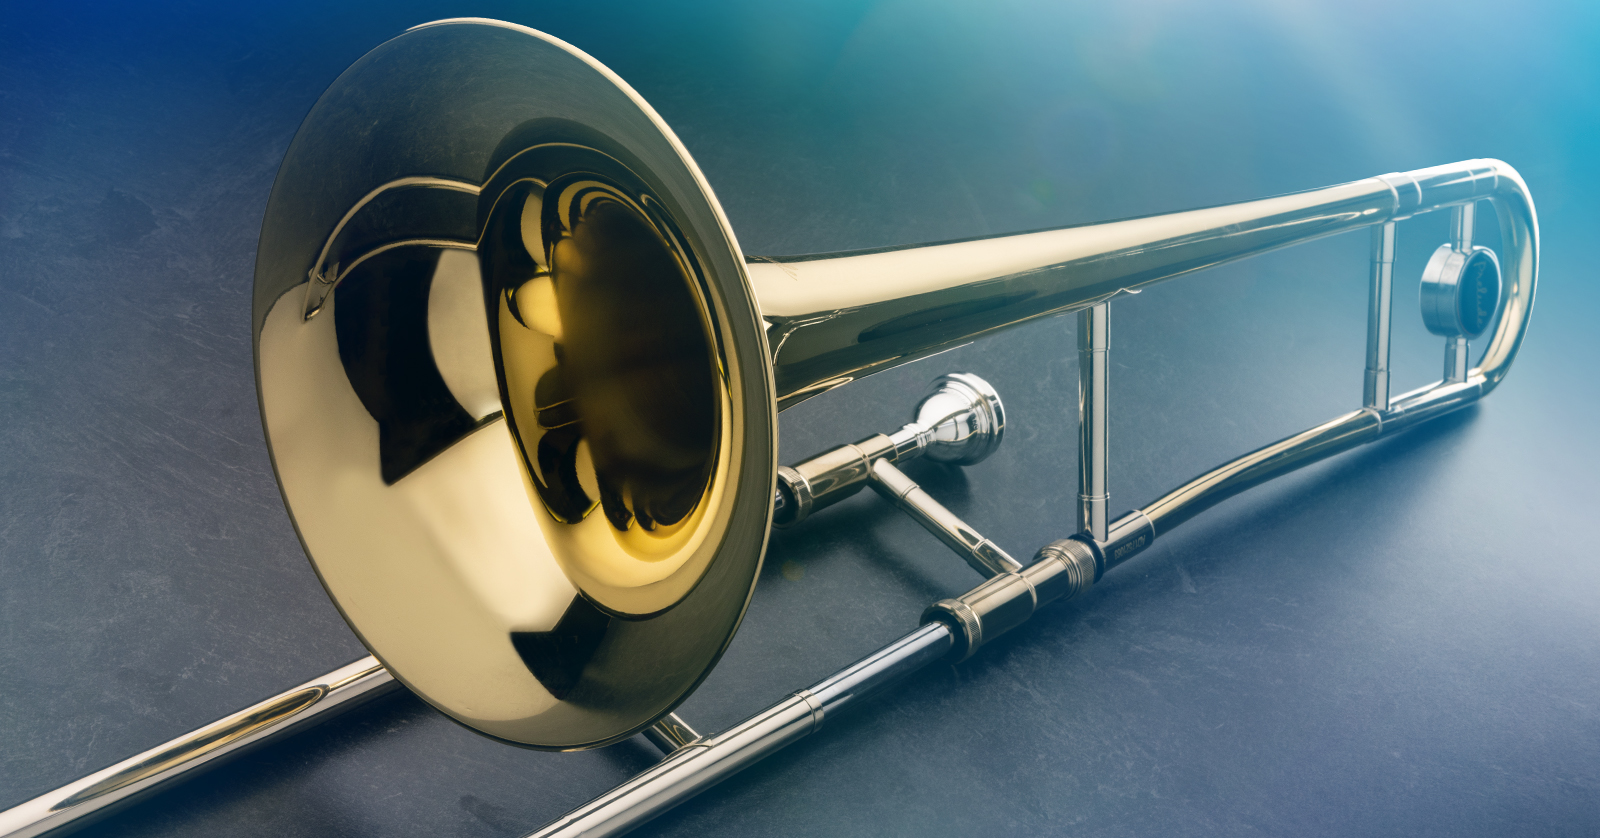
Trombone Quickstart Guide
In this guide, we will show you how to assemble and play the trombone while providing some tips and tricks along the way! Follow the sections below to get started.
- Parts of a Trombone
- How to Assemble a Trombone
- How to Hold a Trombone
- Proper Playing Technique
- Trombone Slide Positioning
IMPORTANT: In all things regarding your new trombone, ask your band director or private teacher to show you how it’s done before you try it at home. As they show you how to play the instrument, they will be able to answer your questions.
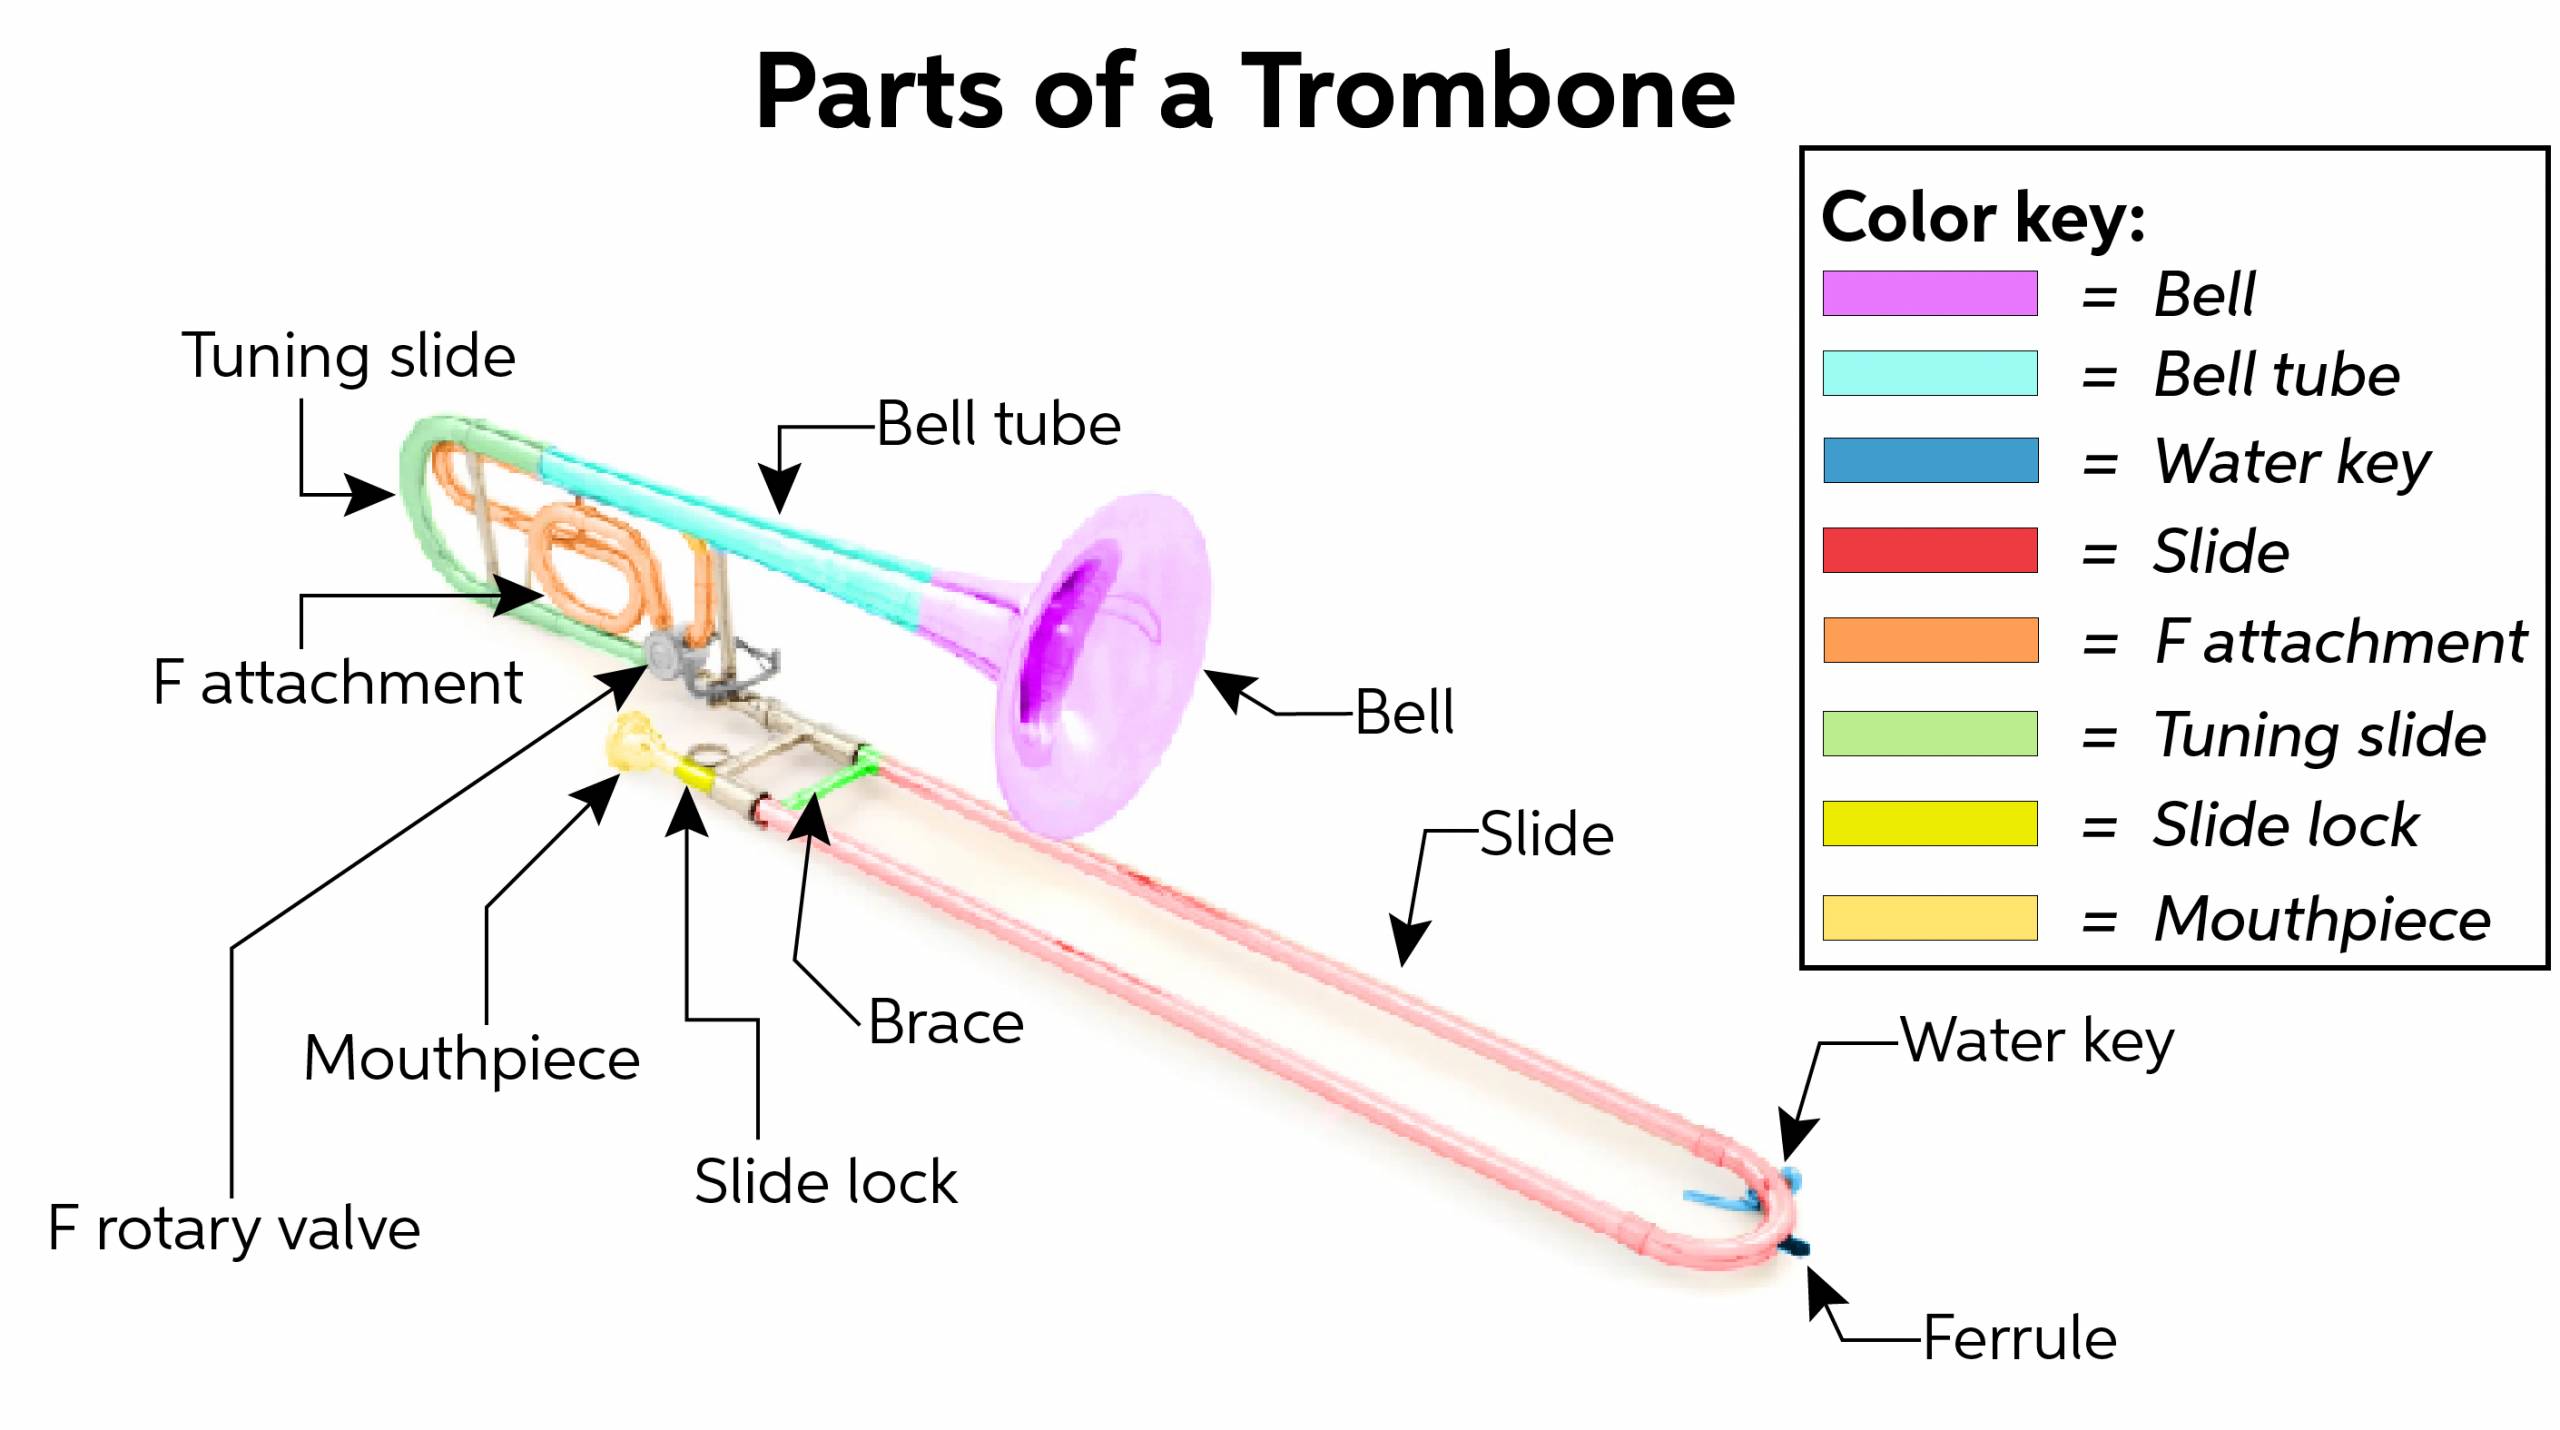
Parts of a Trombone
The trombone is probably the simplest of all wind instruments as it has three primary parts: the slides, the bell, and the mouthpiece. While there are some other pieces that are integral to the trombone, this guide covers the main parts you will operate.
Slides
There are two primary slides on a trombone: the main slide, which you will use to perform, and the tuning slide, which is used to fine-tune the pitch. These work in tandem, especially for beginners.
- Warm up before you perform, as this helps “calibrate” the trombone. If the temperature is too cold or too warm, it can affect the tuning.
- Use brass tuning slide grease on the tuning slide on a weekly basis and ONLY use it on the tuning slide.
- Use specialized trombone slide lubricant for your main slide.
- Do NOT use tuning slide grease on the main slide; it’s made of different compounds and has a thicker consistency.
- When you’re putting your trombone away or placing it on a trombone stand, be sure to engage the slide lock. As the name implies, it will lock your slide and stop it from sliding off your trombone.
- The slide lock is located at the top of the slide near the mouthpiece.
- The second brace is where you will put your fingers when playing the trombone.
Water key (spit valve)
Moisture eventually builds up and will come to a point where your trombone develops a gurgling sound. When this happens, you’ll need to open the spit valve (water key) located at the tip of the main slide, place your mouth over the mouthpiece, and blow puffs through the mouthpiece (don’t buzz!) to force the moisture out.
While moisture most certainly affects tone, there are some unwritten rules you should abide by when playing.
- Empty moisture before and after you play, and only when necessary.
- NEVER empty your spit valve during a quiet part of the song or while someone is talking. There’s nothing more embarrassing than a loud honking sound!
- If you have to empty it at that time, open the spit valve and shake your trombone. While you won’t be able to get rid of all the moisture, it’ll remove enough to get you by.
- Place a small rag or a small plastic container with a sponge on the floor to catch any moisture you’ve emptied.
- It goes without saying, but never empty it if your slide is hovering over someone.
Mouthpiece
The mouthpiece is the part of the trombone you blow into and essentially works as a funnel. Trombone mouthpieces come in many different sizes, materials, shapes, and cup depths. Depending on your playstyle or preference, you may choose one over the other because different specifications can affect the overall tone!
- Deep cupped mouthpieces will produce a darker tone, whereas shallow cupped will have a bright tone. Check out our guide on how cup depth and diameter affect tone, as well as our brass mouthpiece buying guide to learn more!
- If you’re a beginner, we highly recommend not changing mouthpiece size or material, as it takes some time for your mouth to get used to each one.
- Don’t smack the mouthpiece when inserting it into your trombone! Doing so will run the risk of it getting stuck, meaning you’ll need to take it to your local repair shop to get it removed.
- Spray some mouthpiece cleaner or wash the mouthpiece with dish detergent in warm water and wipe it down with a microfiber cloth before you put your trombone away. Not only will this keep it clean, but it will also help sanitize it!
- Use a brass mouthpiece brush every week. This helps clear any deposits and buildup which can affect the airflow.
How to Assemble a Trombone
Assembling a trombone couldn’t be easier. When assembling the trombone, insert the main slide, then tighten the lock nut located on the inner side of the trombone. To disassemble, do the opposite. Here is a video from our friends at Yamaha that shows how easy it is!
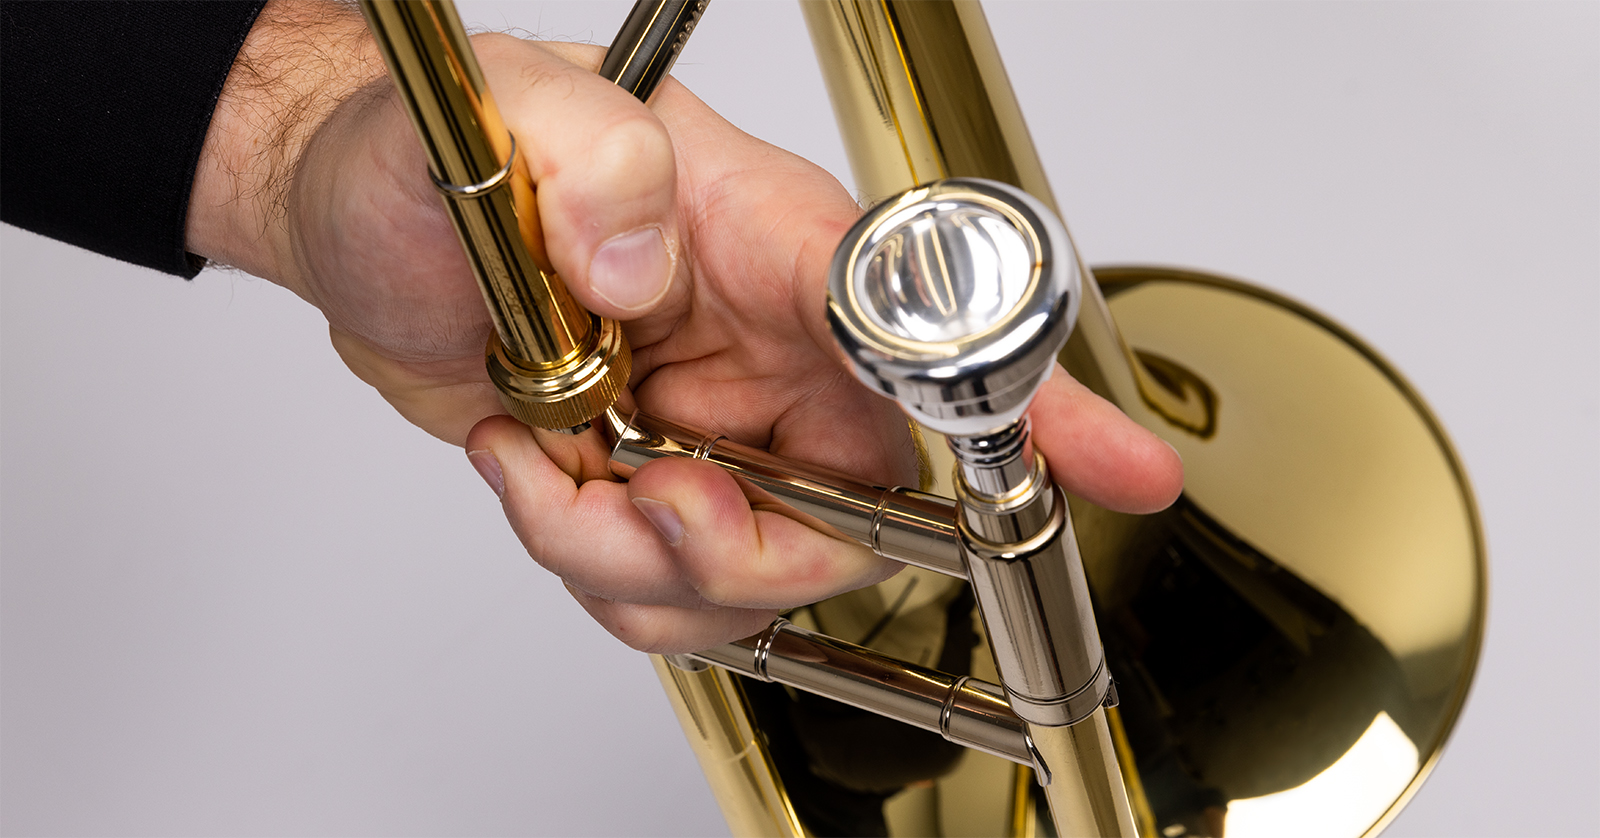
How to Hold a Trombone
Once you know the basic parts of a trombone and how to assemble it, the next step is to learn how to hold a trombone correctly.
- With your left hand, rest your thumb on the crossbar next to the mouthpiece, wrap your middle, ring, and pinky fingers around the support bar underneath the mouthpiece, then rest your index finger on top of the mouthpiece.
- Lift the trombone and rest it on your left shoulder.
- Loosely hold the second brace with your right hand, and use the thumb, index, and middle fingers to control the main slide.
- Relax your right arm and let your fingers do most of the work when playing!


Proper Playing Technique
To get the best sound possible, you need to learn proper playing technique. Poor technique affects the quality of the tone, restricts your movements, and creates bad habits that may be hard to break.
- Relax your shoulders, play loose, and don’t hold your arms tight to your body.
- Sit or stand straight! If you’re slouched over, the bell points toward the floor, so sound can’t project.
- Slouching also leads to a strained tone, which makes it more difficult to sustain notes for longer periods.
- Warm up for a couple minutes before playing. As mentioned above, it helps acclimate the trombone to playing temperature, but it also helps loosen your mouth muscles.
- Consider “mouthpiece buzzing” for a minute. Mouthpiece buzzing means you’re buzzing through your mouthpiece when it’s not inserted in the trombone. This may assist in developing your mouth buzzing as the same note that the horn wants to play.
- The BERP is the perfect accessory to use, as you’ll be able to connect the mouthpiece to your trombone and practice buzzing and right arm muscle memory at the same time!
Trombone Slide Positioning
Unlike trumpets, which use valves, the trombone’s main slide changes the pitch of the note, and there are six primary slide positions you will use. The pitch is not only dependent on the slide position, but on lip tension, as well. The slower you buzz your lips, the lower the pitch will be. Conversely, the faster you buzz your lips, the higher the pitch will be. Check out these videos from our friends at Yamaha to show you how.
Once you’re buzzing your lips the way you need, follow our slide position chart below to start playing! And be sure to watch Yamaha’s video on how to play your first scale.

When you need help, Sweetwater has the answers!
Our knowledge base contains over 28,000 expertly written tech articles that will give you answers and help you get the most out of your gear. Our pro musicians and gear experts update content daily to keep you informed and on your way. Best of all, it’s totally FREE, and it’s just another reason that you get more at Sweetwater.com.


Offer applies only to single-receipt qualifying purchases. Select manufacturers may require that only the manufacturer’s products qualify towards the minimum purchase amount needed to be eligible for promotional financing. Otherwise, an invoice that meets the minimum purchase amount and contains at least one qualifying manufacturer product is eligible for promotional financing. No interest will be charged on promo purchase balance, and equal monthly payments are required on promo purchase until it is paid in full. The payments equal the amount financed divided by the number of months in the promo period, rounded up to the next whole dollar. These payments may be higher than the payments that would be required if this purchase was a non-promo purchase. During the last month(s) of the promo period the required monthly payment may be reduced due to the prior months’ rounding. Regular account terms apply to non-promo purchases. New Accounts as of 07/31/2025: Purchase APR is 34.99%. Penalty APR is 39.99%. Min Interest Charge is $2. Existing cardholders: See your credit card agreement terms. Subject to credit approval.
Offer applies only to single-receipt qualifying purchases. No interest will be charged on the promo balance if you pay it off, in full, within the promo period. If you do not, interest will be charged on the promo balance from the purchase date. The required minimum monthly payments may or may not pay off the promo balance before the end of the promo period, depending on purchase amount, promo length and payment allocation. Regular account terms apply to non-promo purchases and, after promo period ends, to the promo balance. New Accounts as of 07/31/2025: Purchase APR is 34.99%. Penalty APR is 39.99%. Min Interest Charge is $2. Existing cardholders: See your credit card agreement terms. Subject to credit approval.
The estimated required monthly payment shown which excludes taxes and delivery equals the amount financed divided by the number of months in the promo period, rounded up to the next cent. During the last month(s) of the promo period the required monthly payment may be reduced due to this rounding. These payments apply only with the financing offer shown. If you make these payments by the due date each month, you should pay off this amount financed within the promo period, if it is the only balance you are paying off. If you have other balances on your account, this payment will be added to any other minimum monthly payments.
Applies only to select items from this manufacturer. Ask your Sweetwater Sales Engineer for more details.