
T-Rex Binson Echorec Quickstart Guide
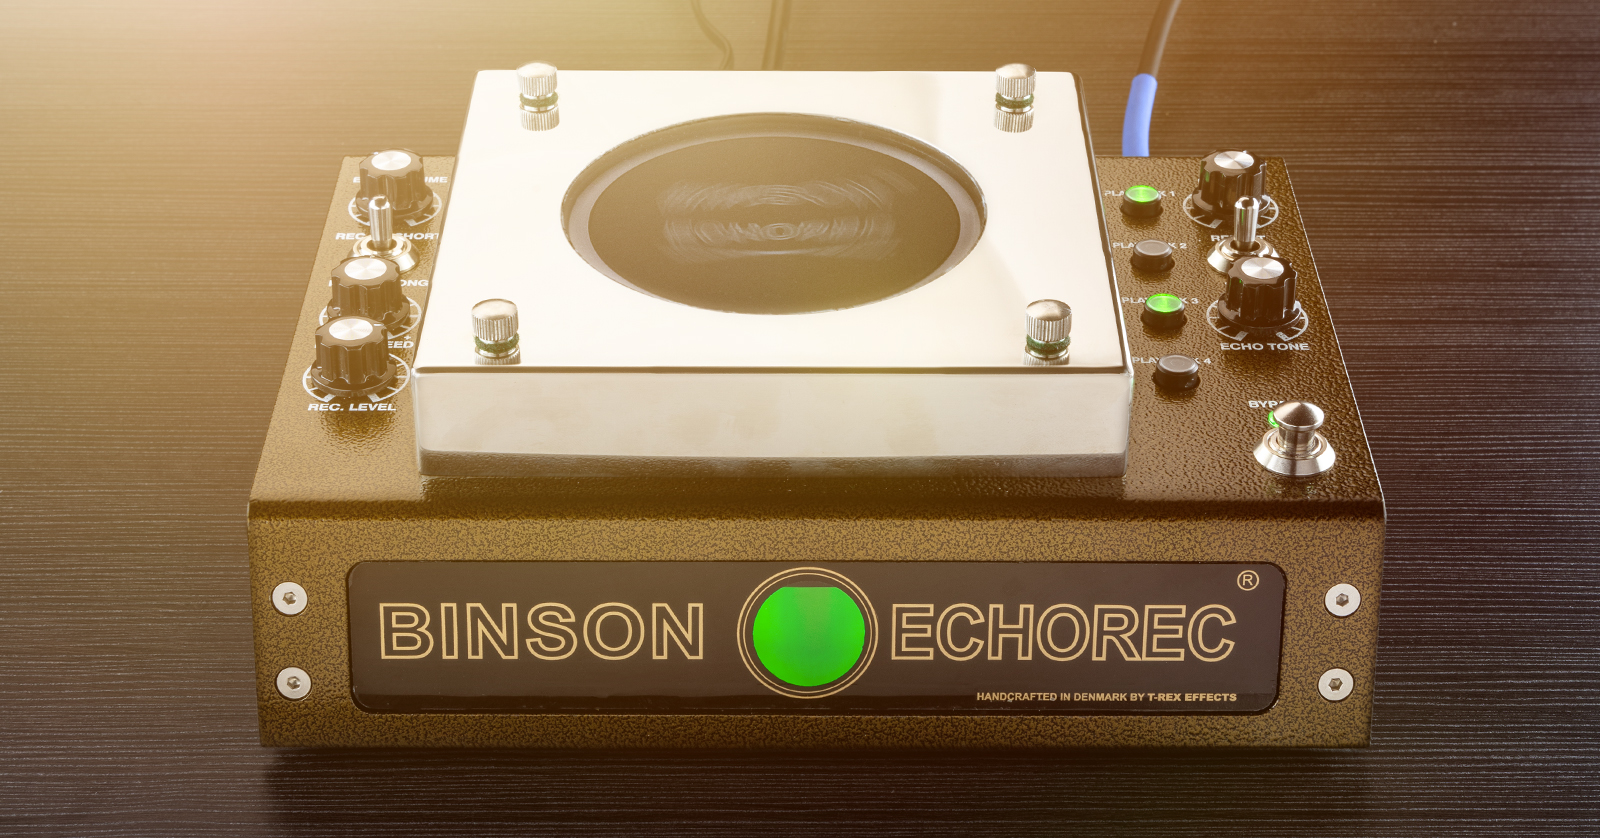
The T-Rex Binson Echorec is a unique device for the 21st century. Not only analog, but also electromechanical, it’s based on the classic Binson echo devices from the 1960s and ’70s.
In this guide, we will show you how to set up the Echorec, explain its basic operation, and refer you to T-Rex’s care and maintenance instructions. Let’s get started.
Setup, Inputs, and Outputs

- Input. Connect a 1/4-inch TS cable for an instrument-level or line-level input. The Echorec can accommodate a wide range of input signal level.
- Balanced Input. Connect a balanced XLR cable for a line-level input.
- Output. Connect a 1/4-inch TS cable for output to an amplifier, a mixer, or an audio interface.
- Balanced Output. Connect a balanced XLR cable for output to a mixer or an audio interface.
- Power Supply connector. Only use the original power supply that comes with the unit.
- Exp. Speed. You can attach a cable to a keyboard-style expression pedal (not included) to manipulate the rotational speed of the Echorec’s drumhead, adjusting the delay time by plus or minus 20%.
- Bypass. If you have the Echorec on a tabletop, you can connect a single momentary footswitch (not included) rather than use the Bypass footswitch on the front panel. See the section Using the Controls below.
- Playback Level. These four recessed trimpots enable adjusting the relative volumes of the four playback heads, explained below. The unit comes with a small flathead screwdriver for this purpose. This is not something you would typically need to adjust.
Magic Eye. The front of the unit has a large circular Magic Eye, which is a light that glows in proportion to the strength of the input signal. You can use this to set the signal level coming from your signal source and going into the Echorec.
Using the Binson Echorec
You can hook up an instrument cable from an electric guitar or your pedalboard into the Echorec and set the levels accordingly.
The original Binson units were not designed as guitar stompboxes, but rather as outboard delay and reverb effects for a mixer, whether live or in a recording studio. T-Rex provides a mono XLR balanced input and output on this model so you can use it as an external effect with any sound source. Adjust the input level accordingly.
How the Echorec Works: Rotating Drum and Tape Heads
TIP: The T-Rex Binson Echorec is an electromechanical device with a rotating drum. In the output signal, you can hear the sound of the rotating drum and perhaps a small “knock” at each revolution even when no input signal is present – just like the original Binson units from the ’60s and ’70s. If you hear this noise, the unit is not malfunctioning.
IMPORTANT! Do not operate the Binson Echorec with the metal cover removed. It is there to protect the mechanism. Only remove the metal cover to clean and oil the mechanism according to the instructions provided by T-Rex.
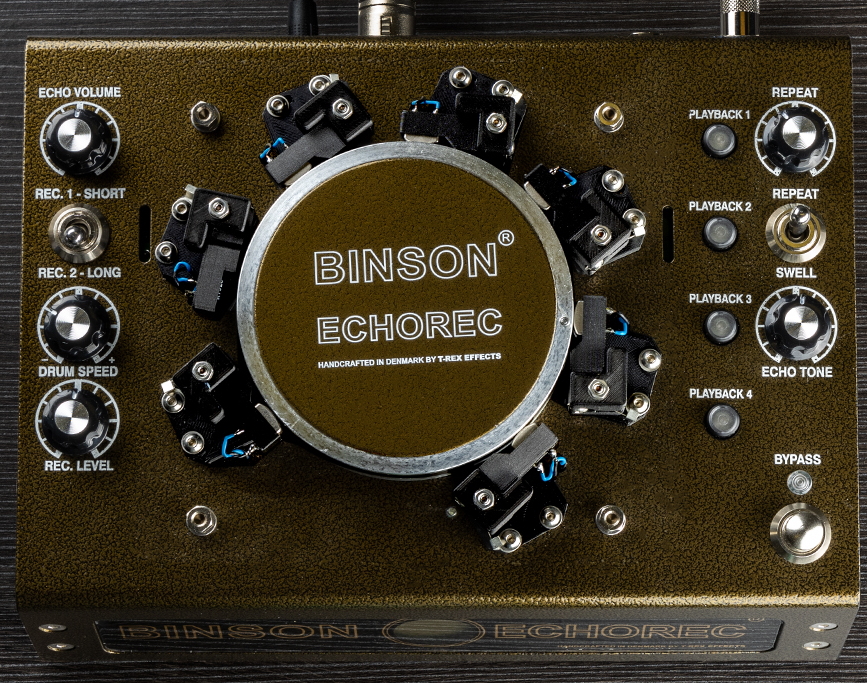
Rather than using analog magnetic recording tape, the T-Rex Binson Echorec utilizes a rotating metal drum with a fixed magnetic wire around its perimeter. Placed around the perimeter alongside are seven fixed magnetic tape heads: two record heads, four playback heads, and one erase head.
The rotating drum and the tape heads are protected by a steel cover plate with a clear plastic window on top. You can see the drum spinning through the plastic cover when the unit is operating.
If you want to have a look at the electromechanical mechanism, make sure the Echorec is not connected to power. Remove the four screws in the top of the steel cover. Lift off the cover to reveal the drum. You can see the seven tape heads positioned around it. Don’t touch anything.
Now carefully put the protective plate back on and secure the four screws.
The delay effect is created by passing the signal to one of two record heads placed at different locations around the perimeter of the rotating drum. The record head records the sound onto the rotating drum’s fixed magnetic wire. The amount of delay is a function of the distance between the record head and the playback head and how fast the drum is rotating. Different amounts of delay, measured in milliseconds, are achieved by choosing between Record Head 1 and Record Head 2, then between one or more of the playback heads, and adjusting the rotational speed of the drum. The number of repeats in the signal is varied by the amount of electromagnetic erasure carried out by the erase head, which erases a bit of the signal with each revolution of the drum. This is controlled by the Repeat knob on the front panel of the unit.
The range of delay times obtainable is between 46ms and 531ms. For more information, consult the chart in the owner’s manual.
Using the Controls

- Rec. Level. Set the input level with this knob. Watch the Magic Eye on the front of the unit, which glows in proportion to the input level. You may need to adjust the signal level coming from your source before it enters the Echorec. You can use a higher Rec. Level setting to achieve a compressed, saturated sound. To achieve the lowest noise, turn up the Rec Level and turn down the Echo Volume knob with an appropriately clean input signal.
- Bypass. The green light will illuminate when you power on the unit. If you hold down the Bypass switch for two seconds, the drum will stop turning, and the unit will be in bypass mode. You can also control this with an external footswitch.
- Drum Speed. This varies the speed of the rotating drum plus or minus 20%, increasing or decreasing the delay time. You can also control this with an expression pedal connected to the back of the unit.
- Record Selector Switch. Choose between Record Head 1, for shorter delay times, and Record Head 2, for longer delay times.
- Echo Volume. Controls the amount of echo signal played back from the revolving drum that is blended with the input signal. The higher the knob is turned, the more mechanical noise from the drum will be audible in the signal – just like on the original Echorecs from the ’60s and ’70s.
- Playback Buttons 1 through 4. Selecting each button turns on a green light and indicates that the signal is being played back from that playback head. By turning the four heads on and off independently, you can obtain different combinations of delay times. If you wish, you can independently adjust the volume level of each playback head using the trimpots on the back of the unit as we explained above.
- Repeat. Controls the number of repeats, which fade out gradually.
- Repeat and Swell Selector Switch.
- In the Repeat position, the device works as an echo machine. When more than one playback head is engaged, the signal level will change; adjust the Repeat knob accordingly.
- In the Swell position, all four playback heads are engaged, though the four individual green lights do not come on. The Binson design uses the Swell mode to obtain more of a “reverb”-type effect, where the four separate playback echoes blend together.
- Echo Tone. Rolls off high frequencies. It is useful to adjust this according to the Drum Speed setting.
T-Rex Binson Echorec Care and Maintenance
As mentioned before, the Echorec is a mechanical device, and it makes a small amount of mechanical noise in its output signal. If the mechanical noise increases, this is an indication that the unit needs to be cleaned.
Cleaning and maintenance consist of cleaning the drum and the magnetic heads and lubricating the drum with the included bottle of Binson oil. Make sure to follow T-Rex’s Maintenance instructions in the unit’s owner’s manual, which is printed out and included in the box.
Please heed T-Rex’s warnings:
- Any modification of the construction will void the warranty!
- Any unauthorized repair, change, or modification will void the warranty!
- It is essential to never modify the heads. They are positioned at the workshop/factory and then sealed.
- Lesson learned from the days of the original Binson Echorec: 99 out of 100 incorrectly working Echorecs could have operated better if the owner had not messed around with heads.
With care, you will get many years of enjoyment from this solidly built unit with its authentic vintage sound. Enjoy.
When you need help, Sweetwater has the answers!
Our knowledge base contains over 28,000 expertly written tech articles that will give you answers and help you get the most out of your gear. Our pro musicians and gear experts update content daily to keep you informed and on your way. Best of all, it’s totally FREE, and it’s just another reason that you get more at Sweetwater.com.

