
How do I set the Tascam DM3200/IFFWDMmkII up for use with Logic Pro?
Note: page numbers refer to pages in the pdf manual for the DM3200. Also, the images in this tutorial were taken from a DM4800. If you see some extra options that are not on your board, that’s why.
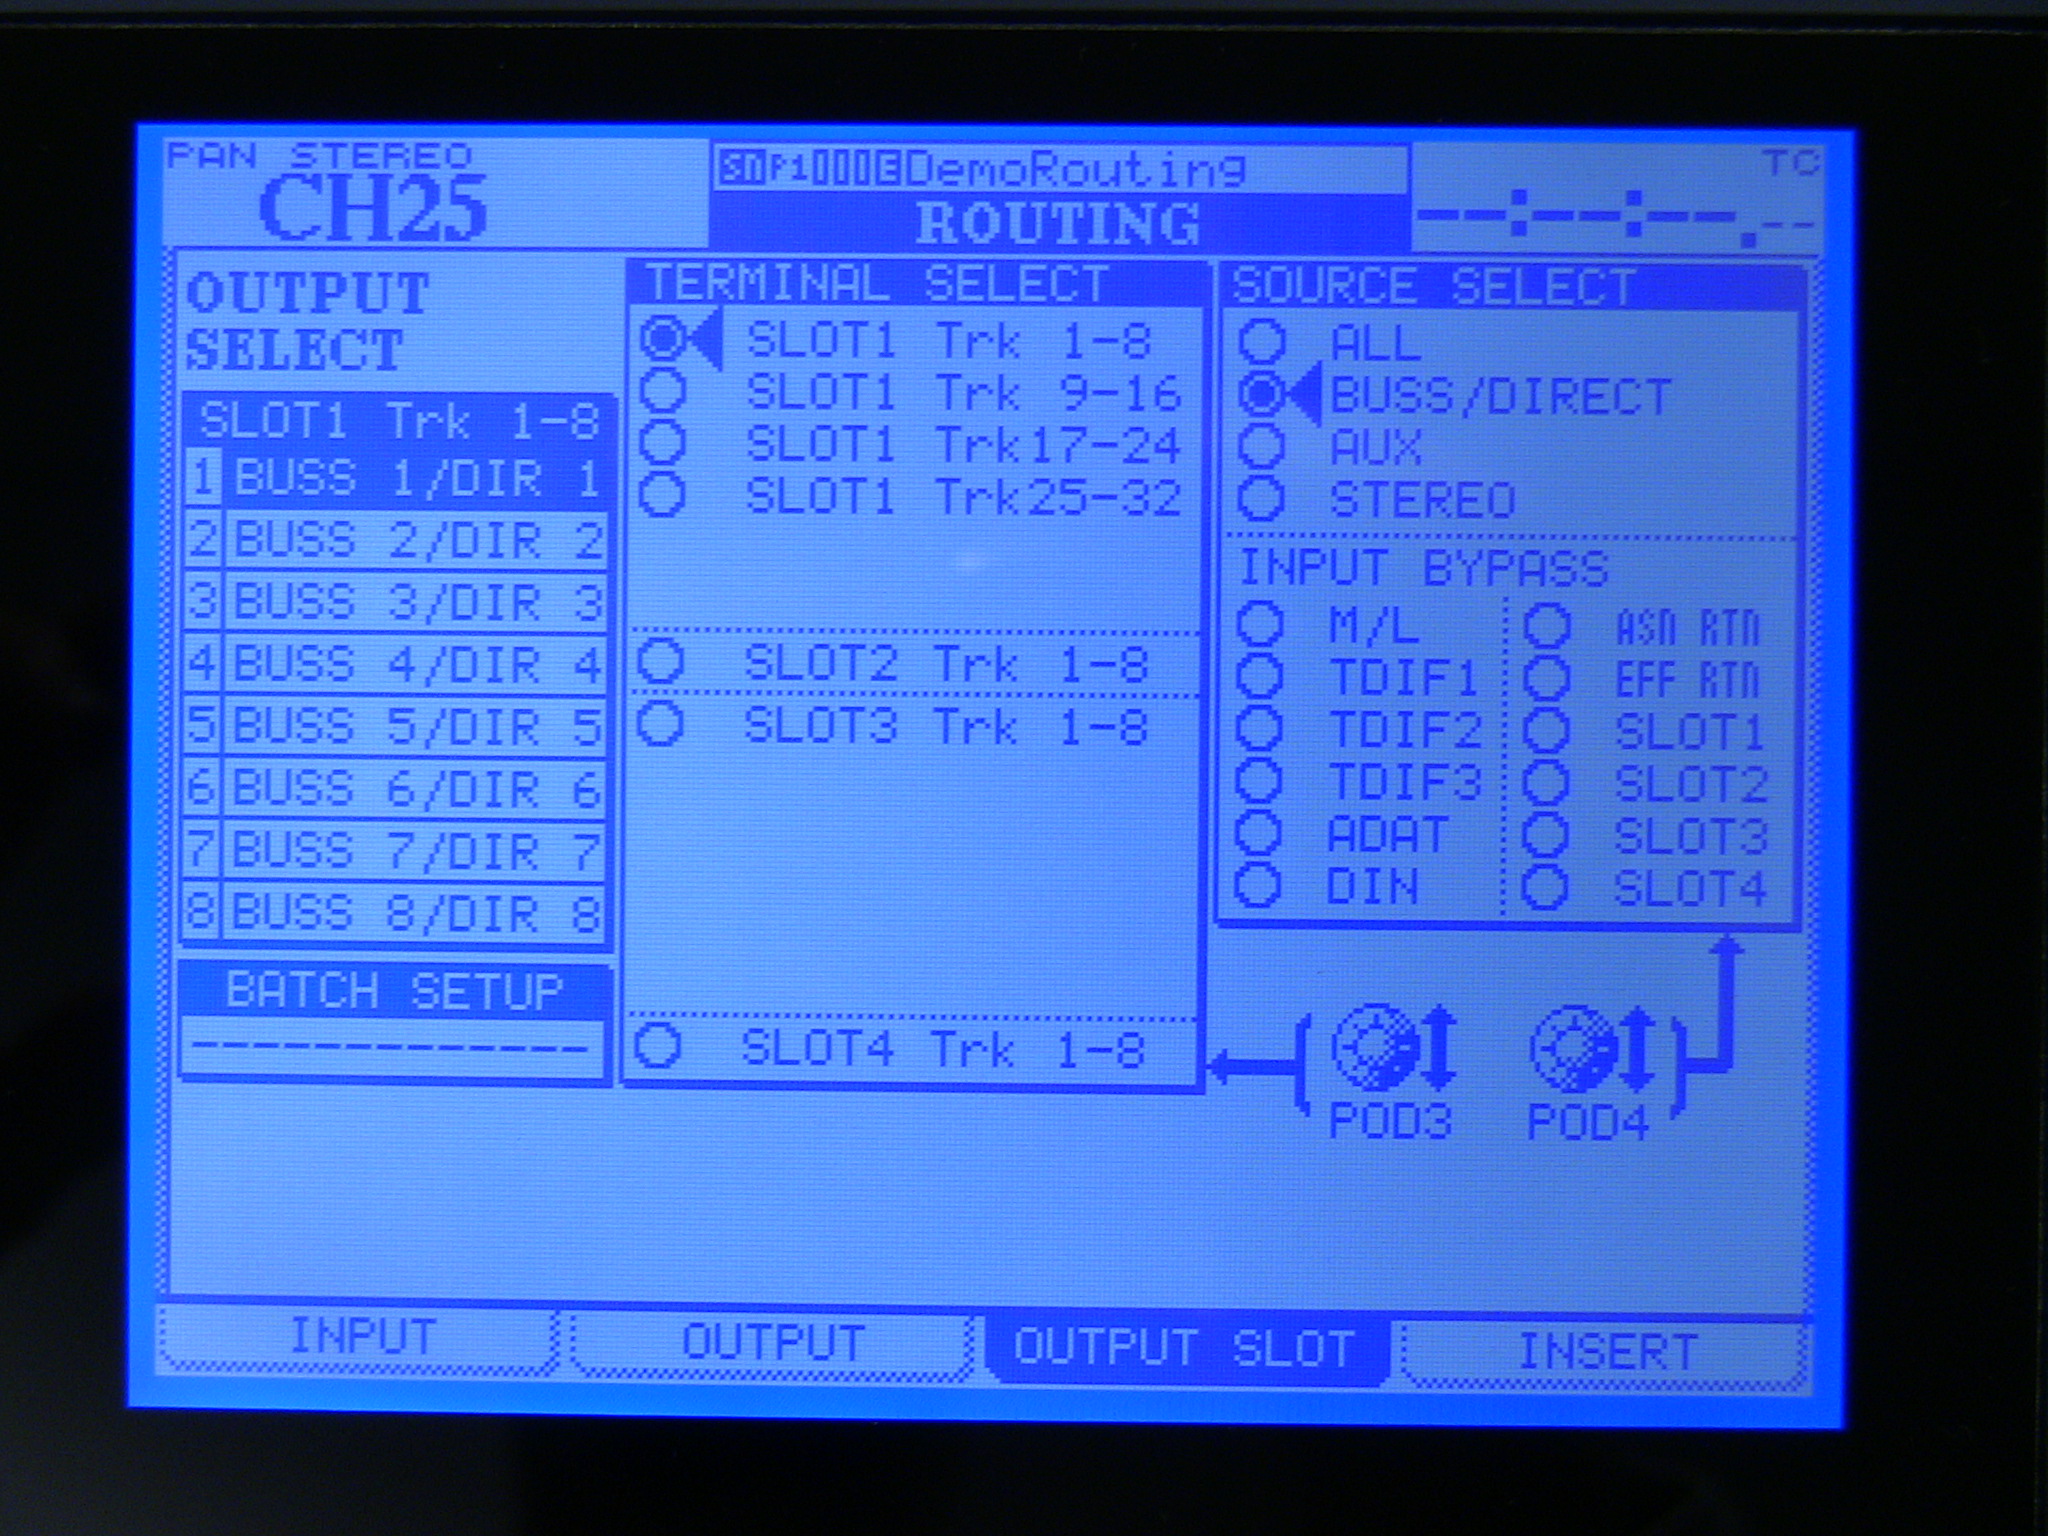
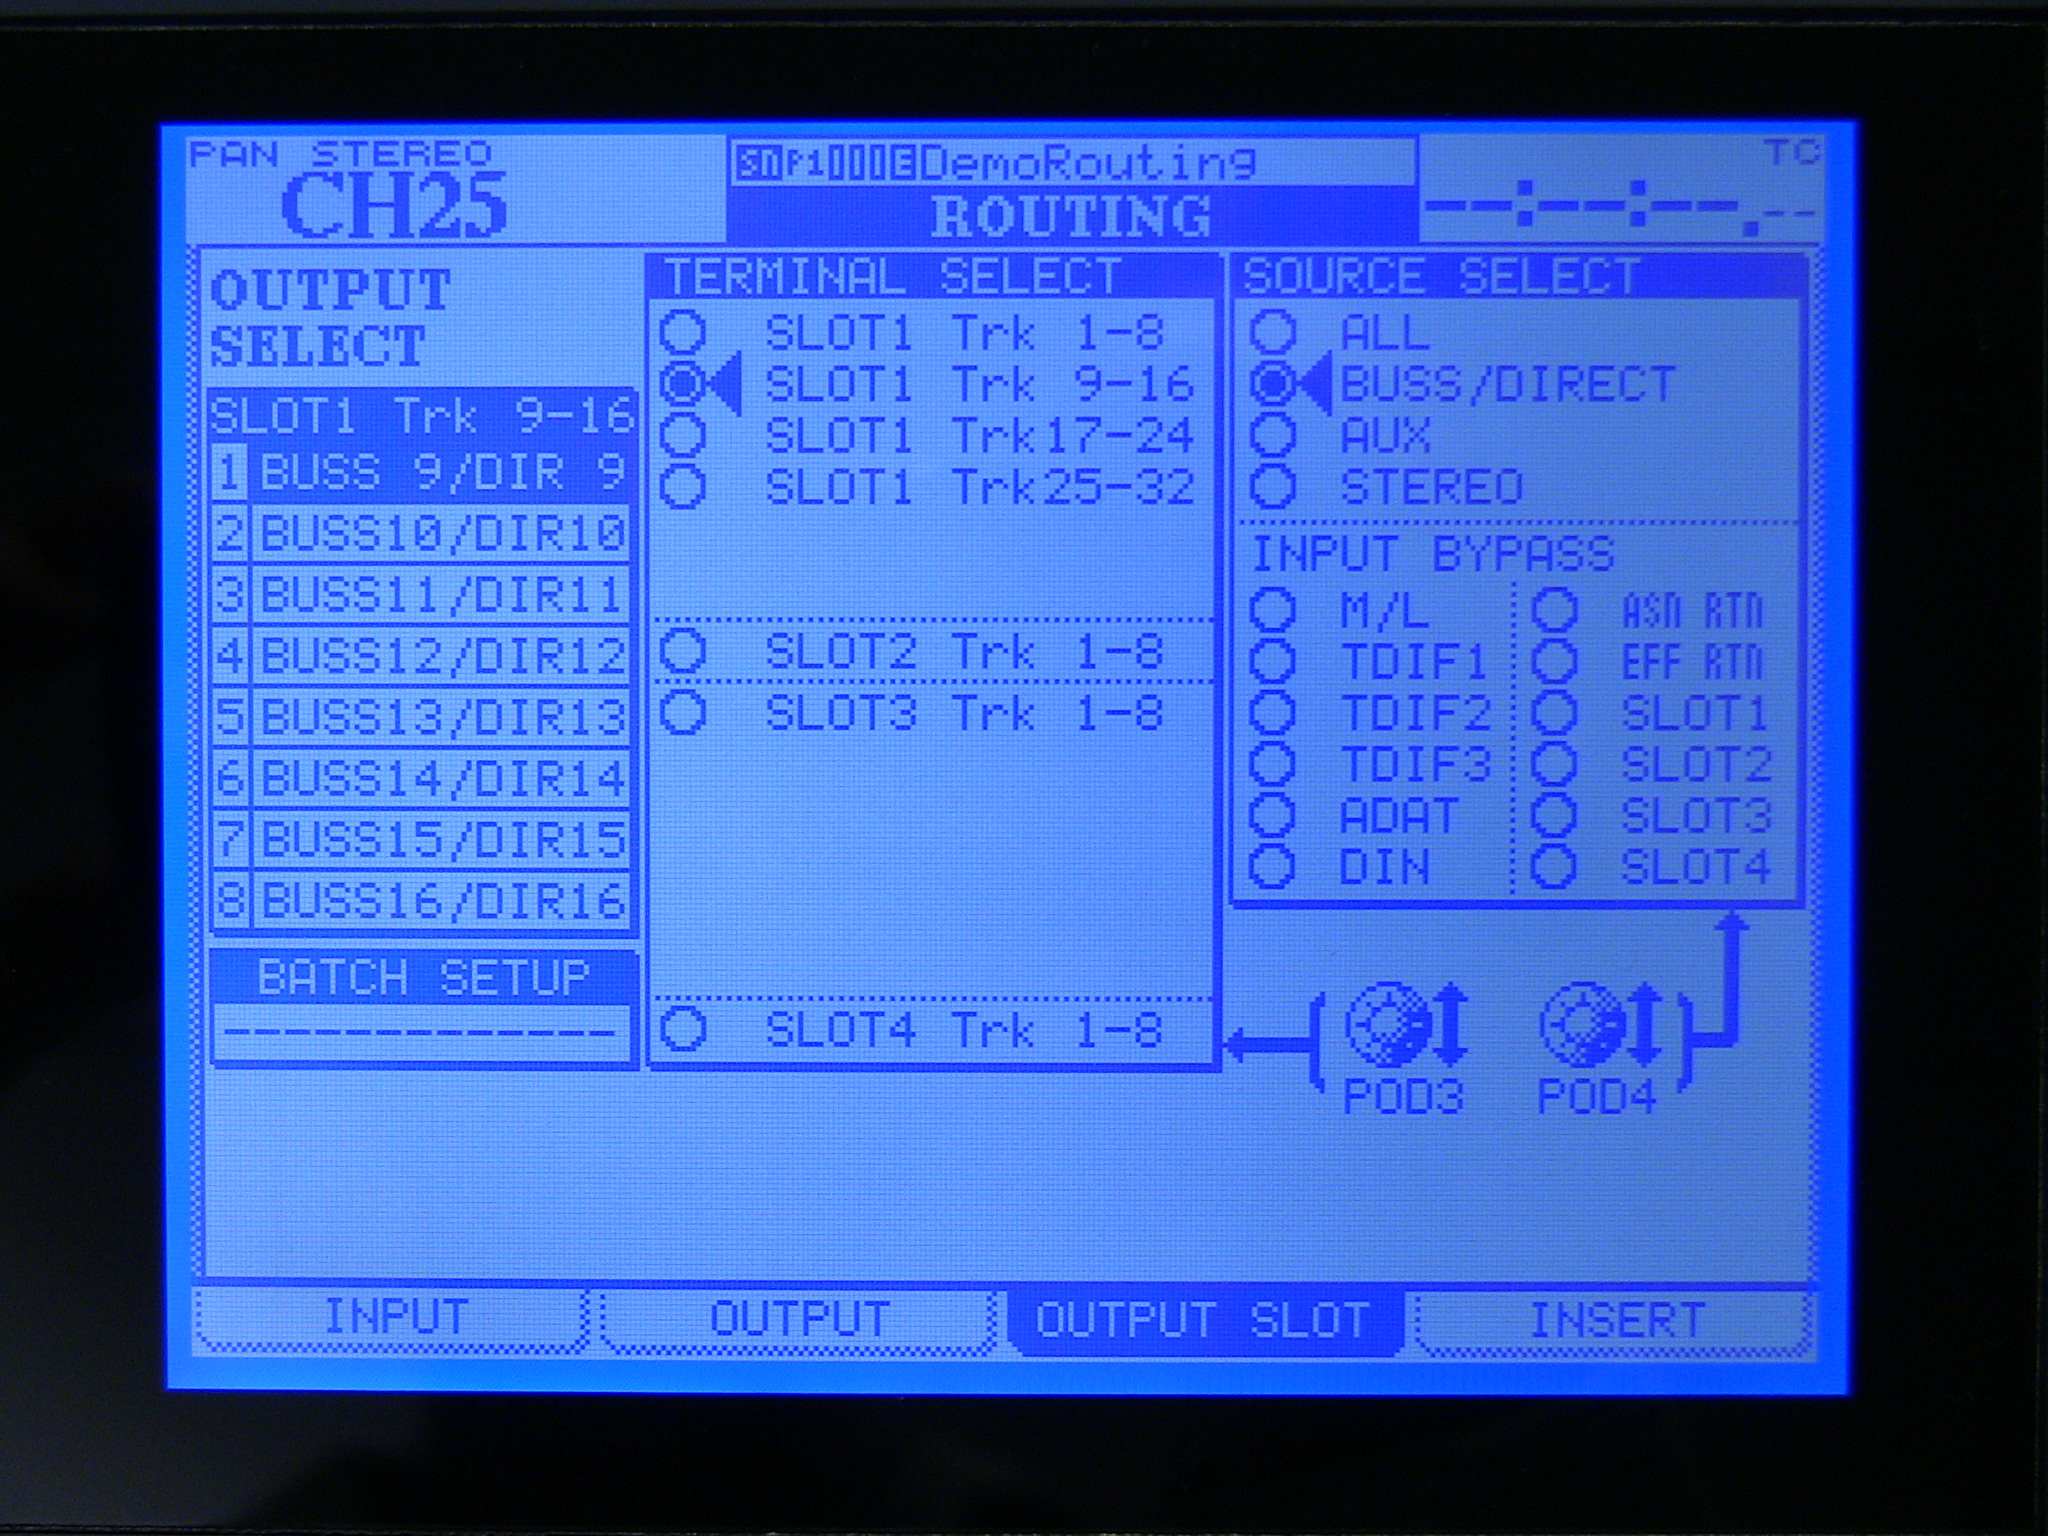
Set the output routing (see p.49):
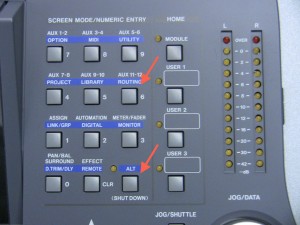
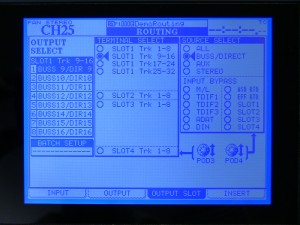
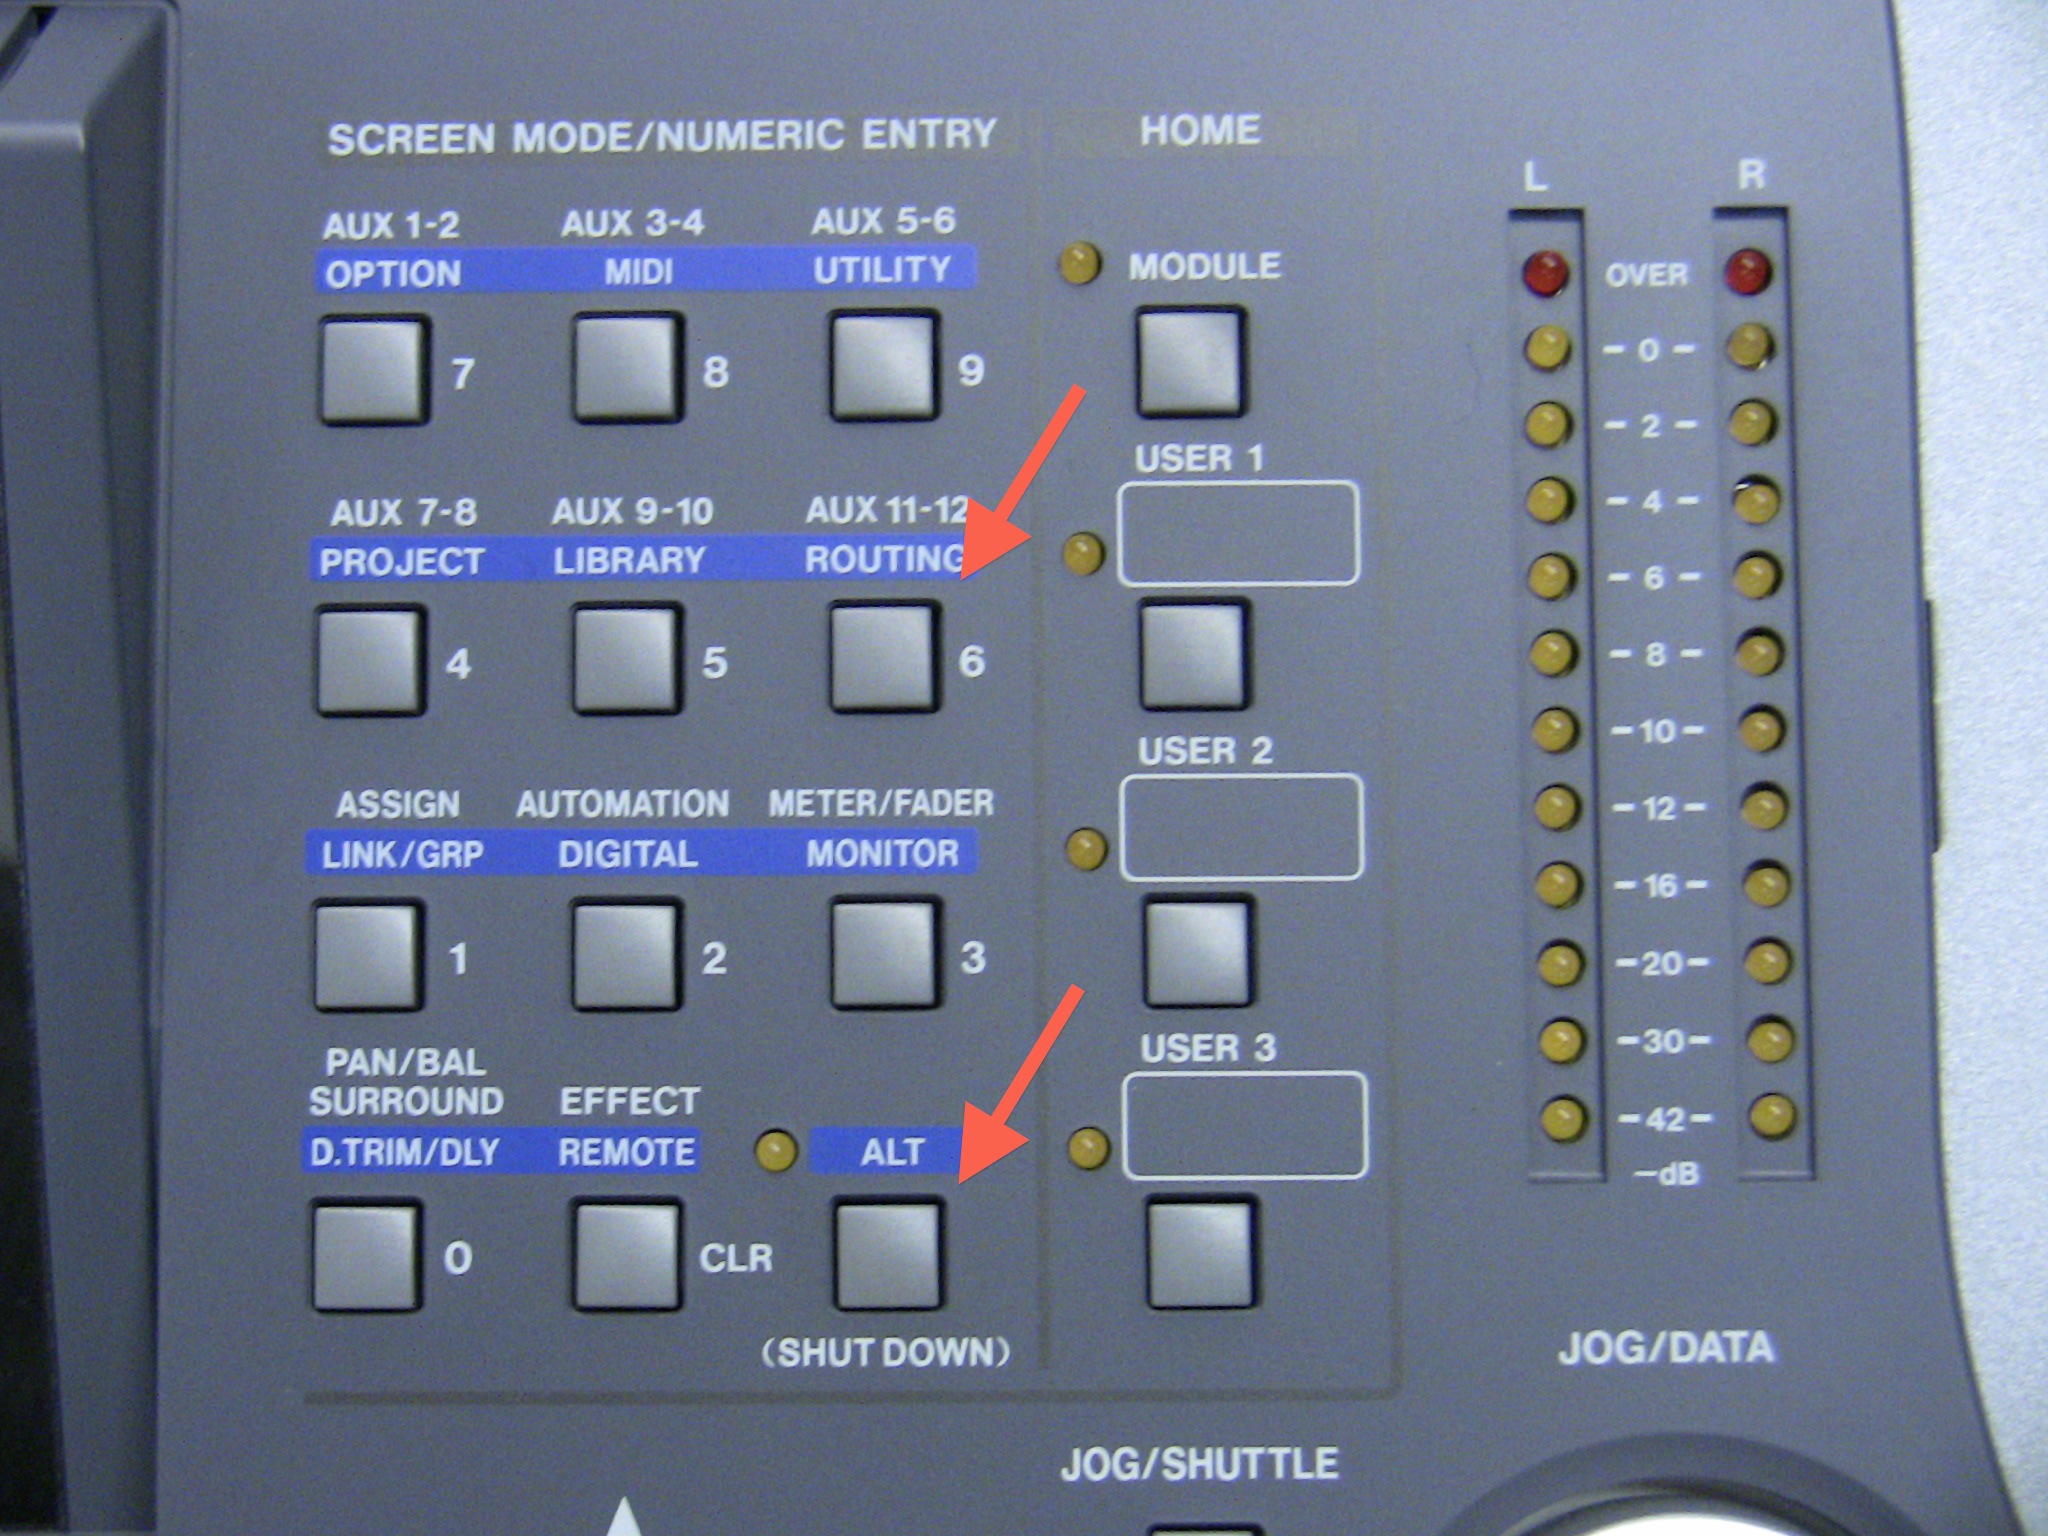
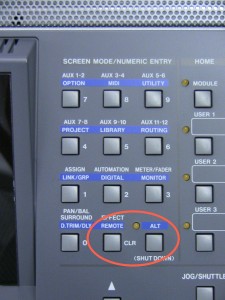
- Go to the Routing>Output Slot screen by holding the Alt button and pressing the Routing button.
- Use Pod 3 knob to select Slot 1 1-8, and use Pod 4 to set Source Select to Buss/Direct.
- Set Outs 1-8 to Buss/Direct 1-8 in order using the arrow keys, data wheel and enter button.
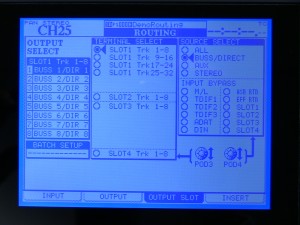
- Do that same thing for 9-16.

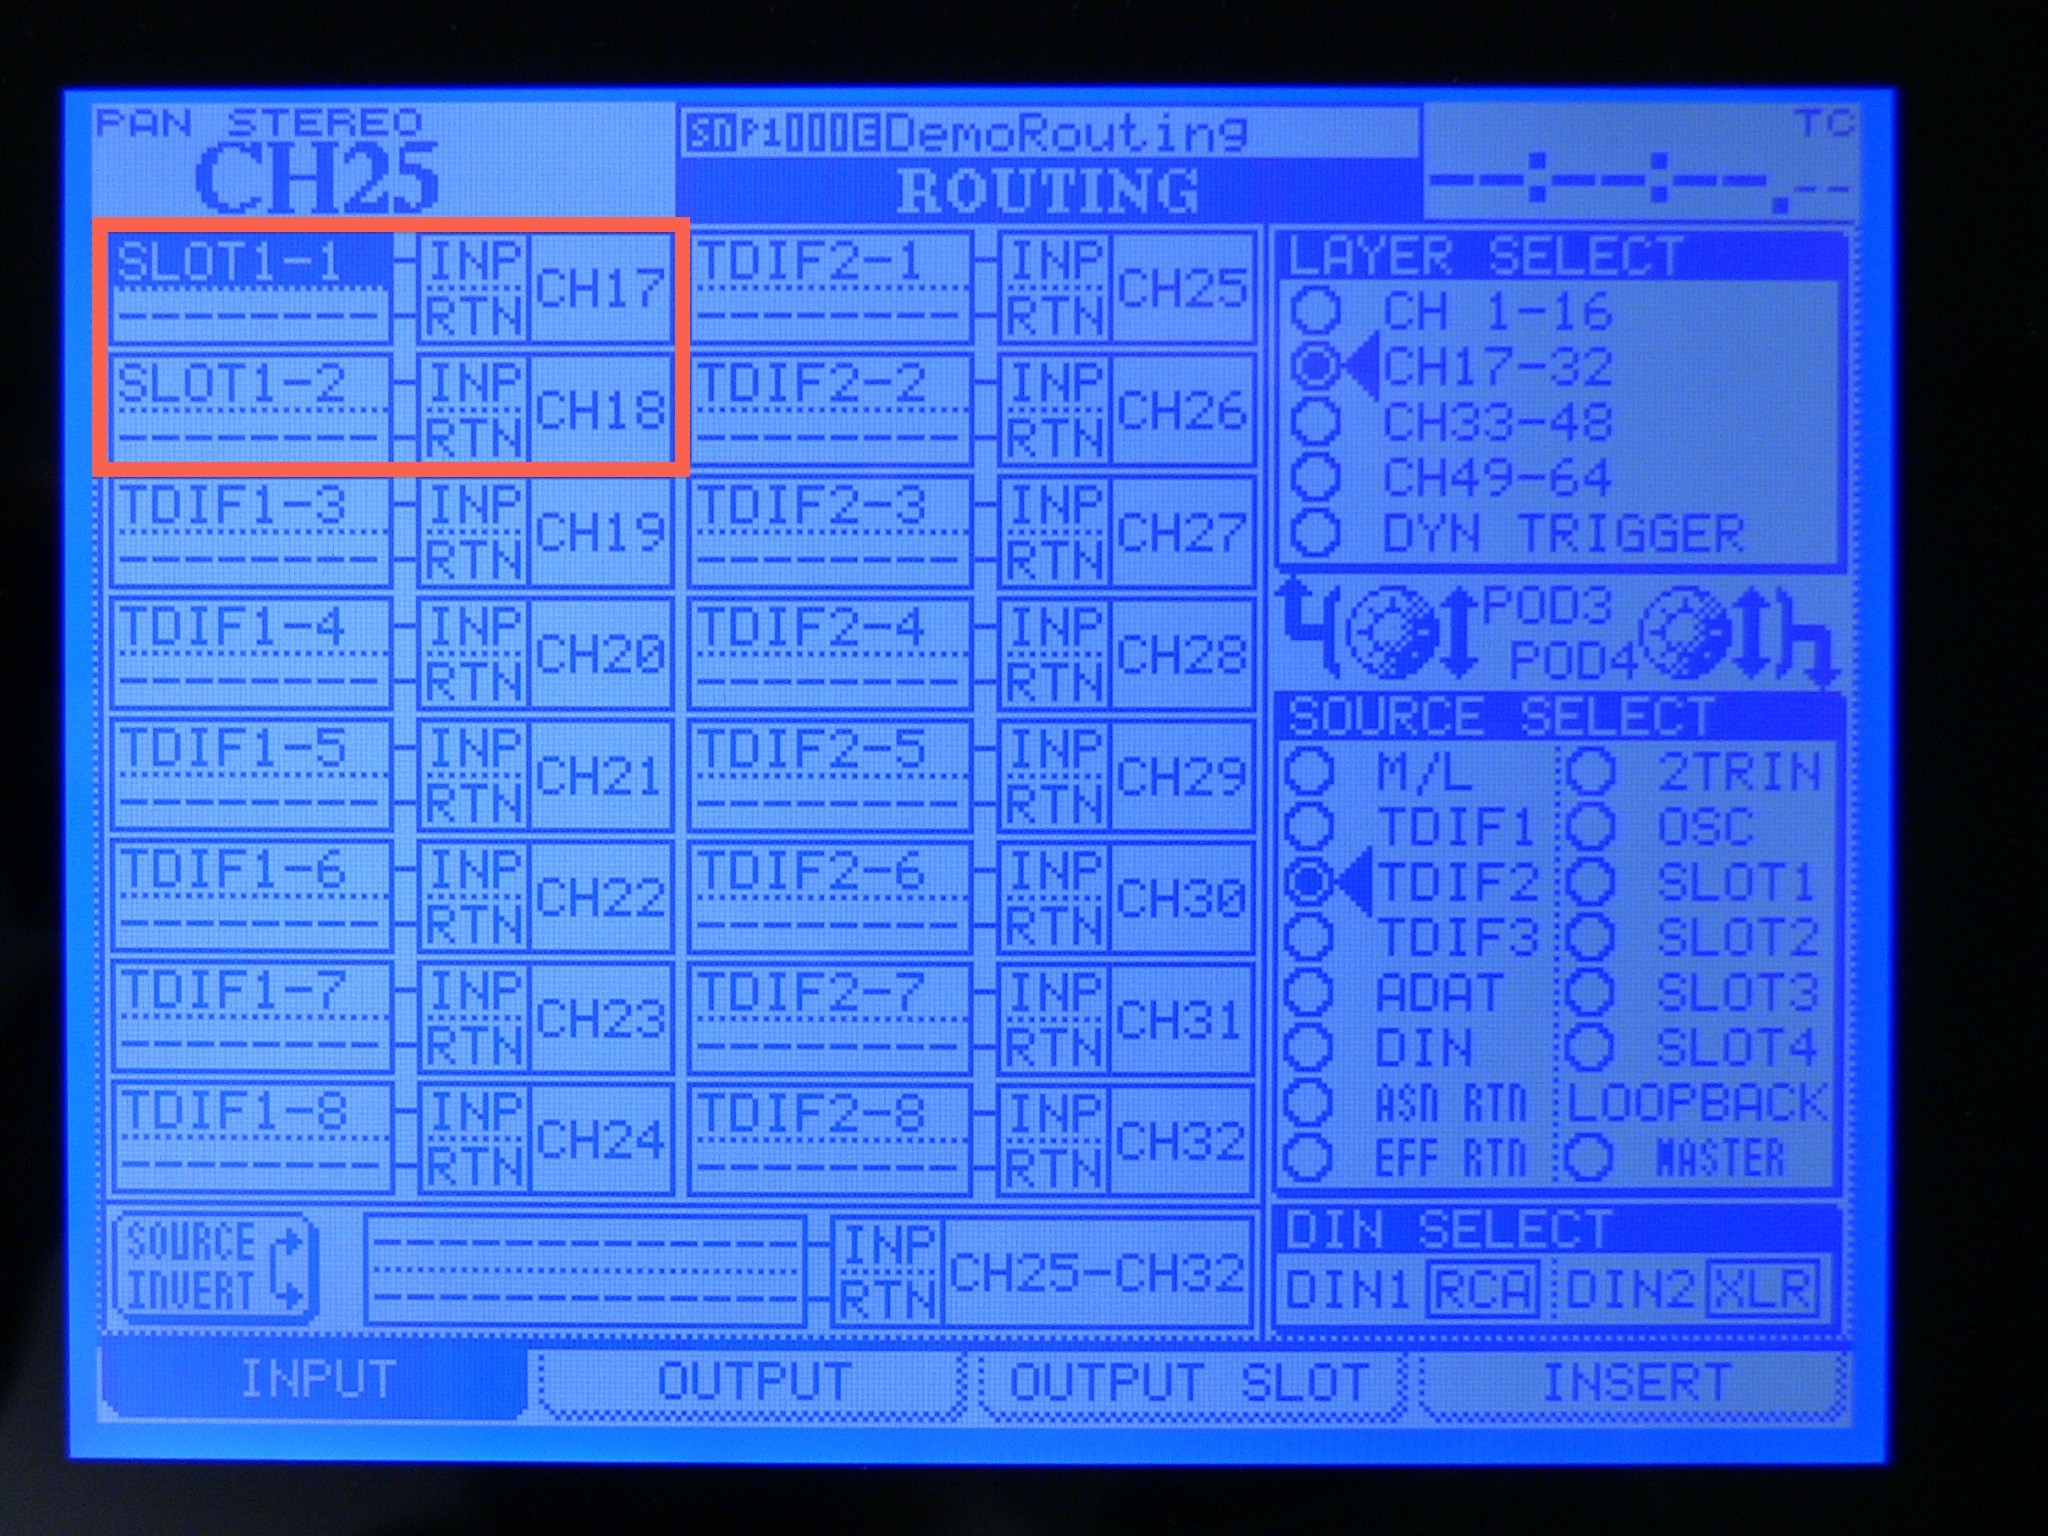
Set at least two inputs to monitor Slot 1 returns (see p.47):
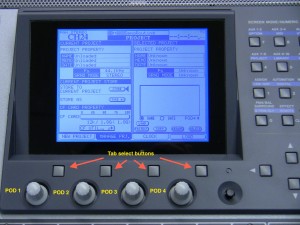
- Go to Routing>Input by pressing the tab button below the Input tab at the bottom of the screen.
- On the DM3200, it’s suggested to start with the FW/Slot returns at channel 17 and up so you don’t waste any of your analog input channels.
- Use the Pod 3 knob to set Layer Select to Ch.17-32.
- Use the Pod 4 knob to set Source Select to Slot 1.
- Use the arrow keys, data wheel and enter button to set INP Ch17 to Slot 1-1 and INP Ch18 to Slot 1-2 (if you want to monitor more than just two channels through the board, for instance to mix in the board rather than mixing in software, you could set up additional inputs on the board to mix additional outputs from Logic).
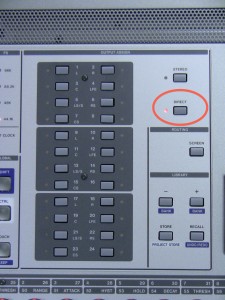
Route your input channels to the Direct outputs (see p.51):
- To the right of the Stereo fader on the board press the Layer Status button for Ch.1-16.
- Press the SEL button above your input channel on the board to select that channel.
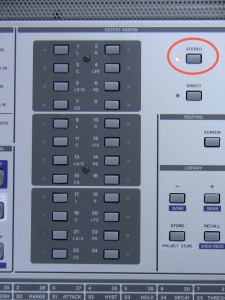
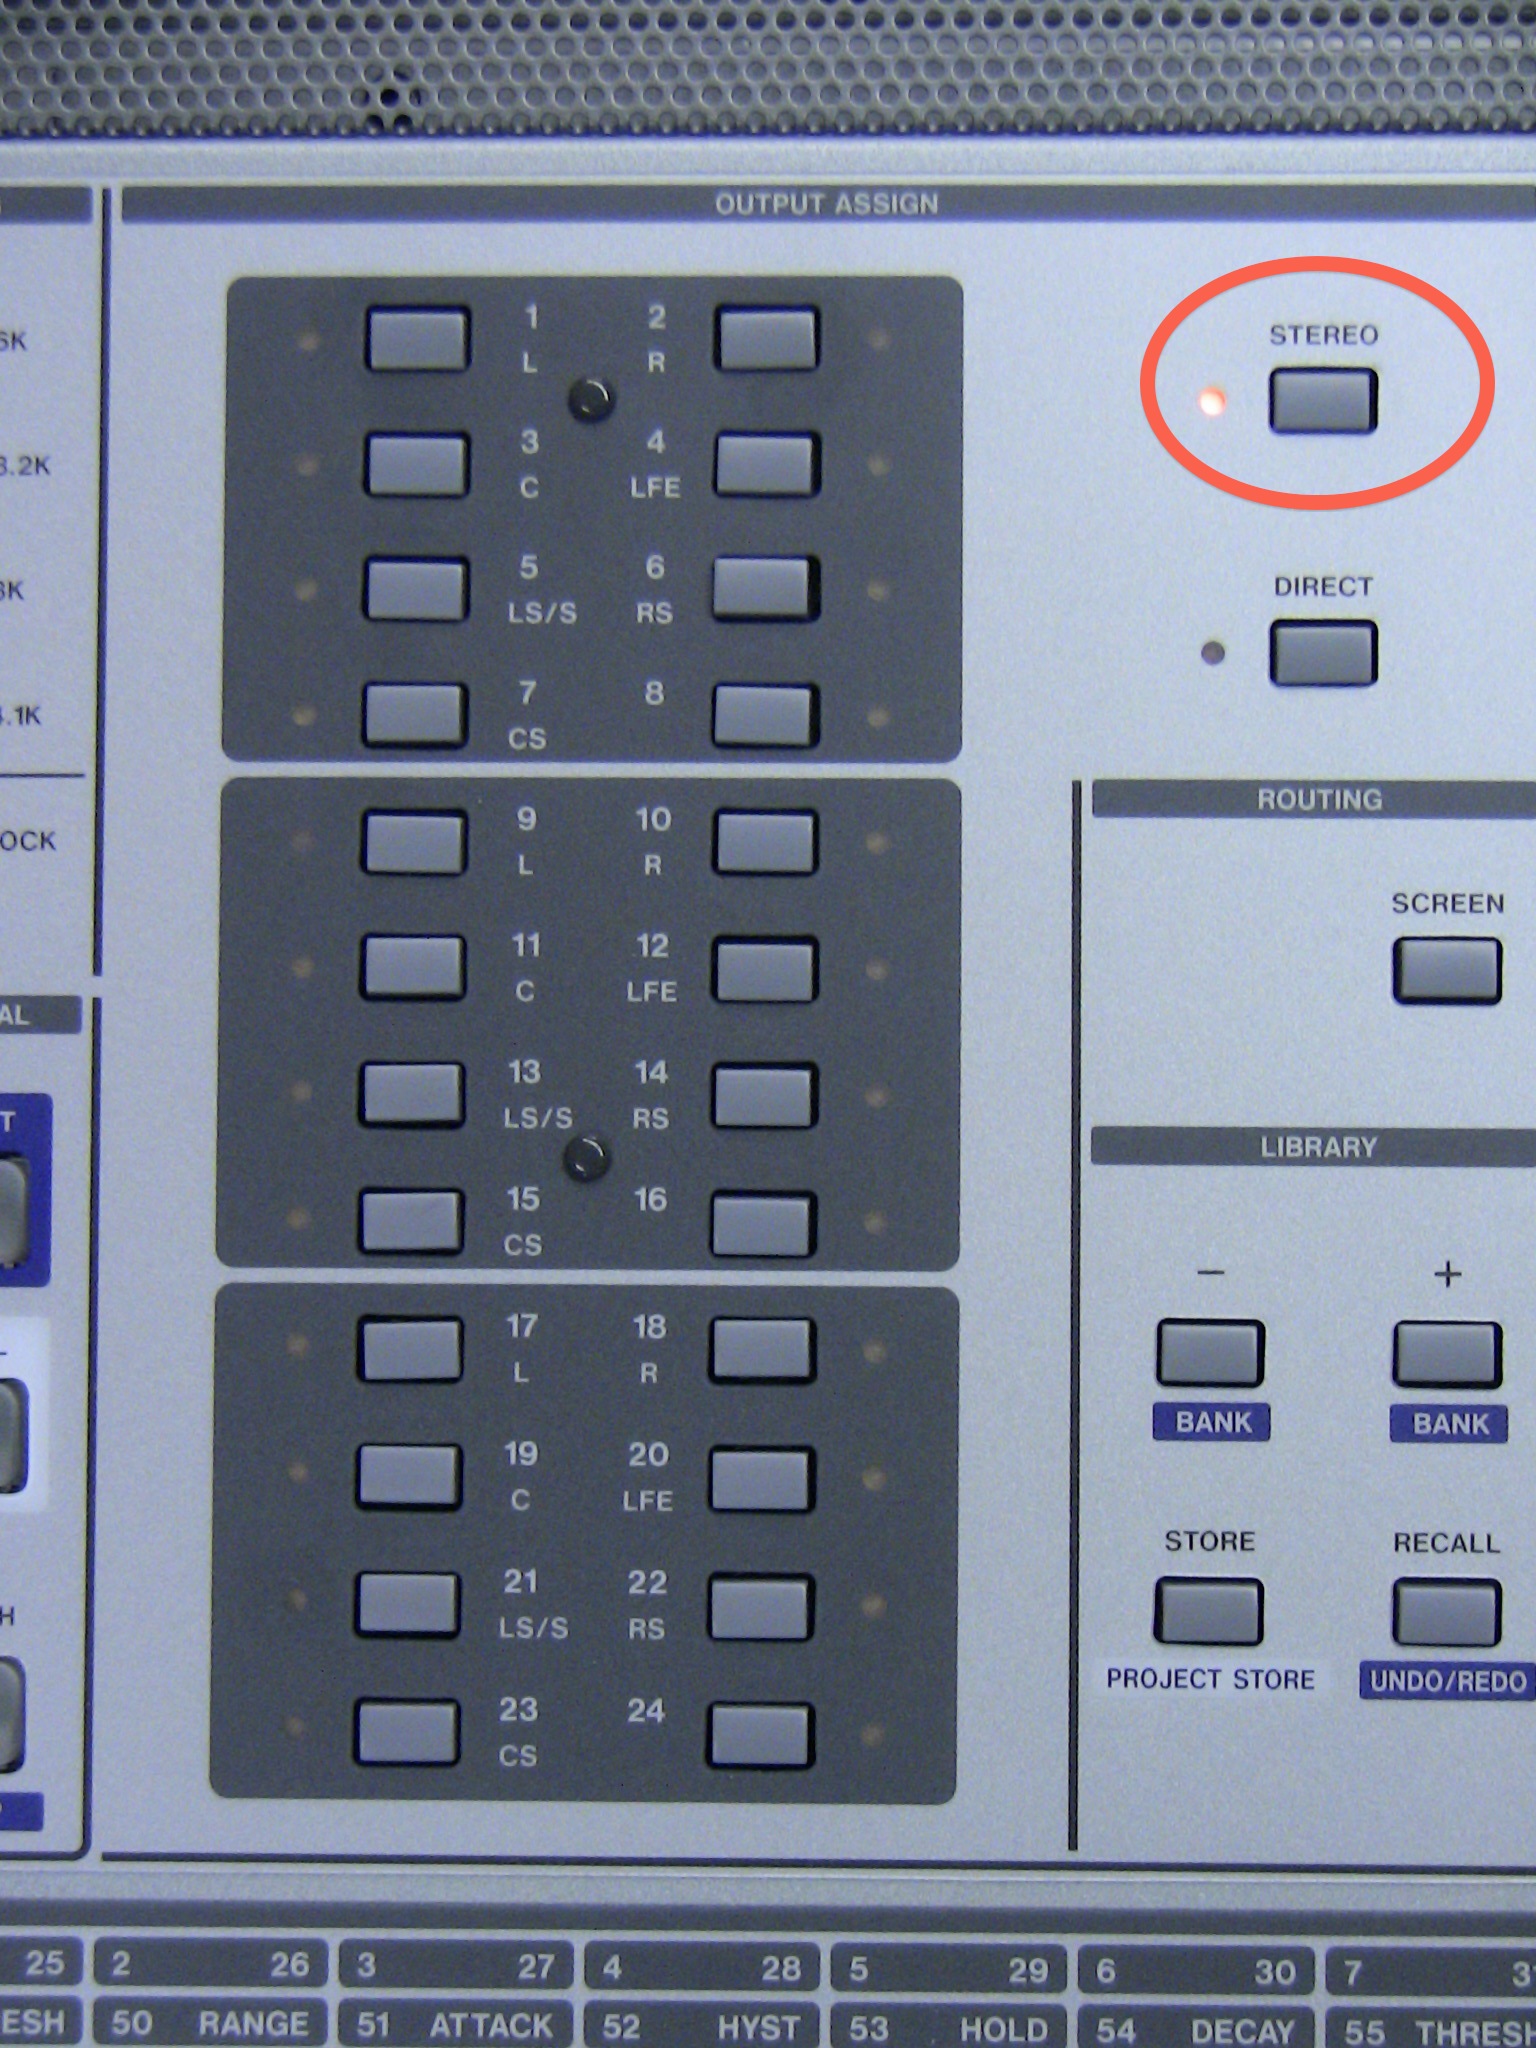
- On the left side of the board, press the Direct button in the Output Assign section, and disable any other assignments in that area (only Direct should be lit up).
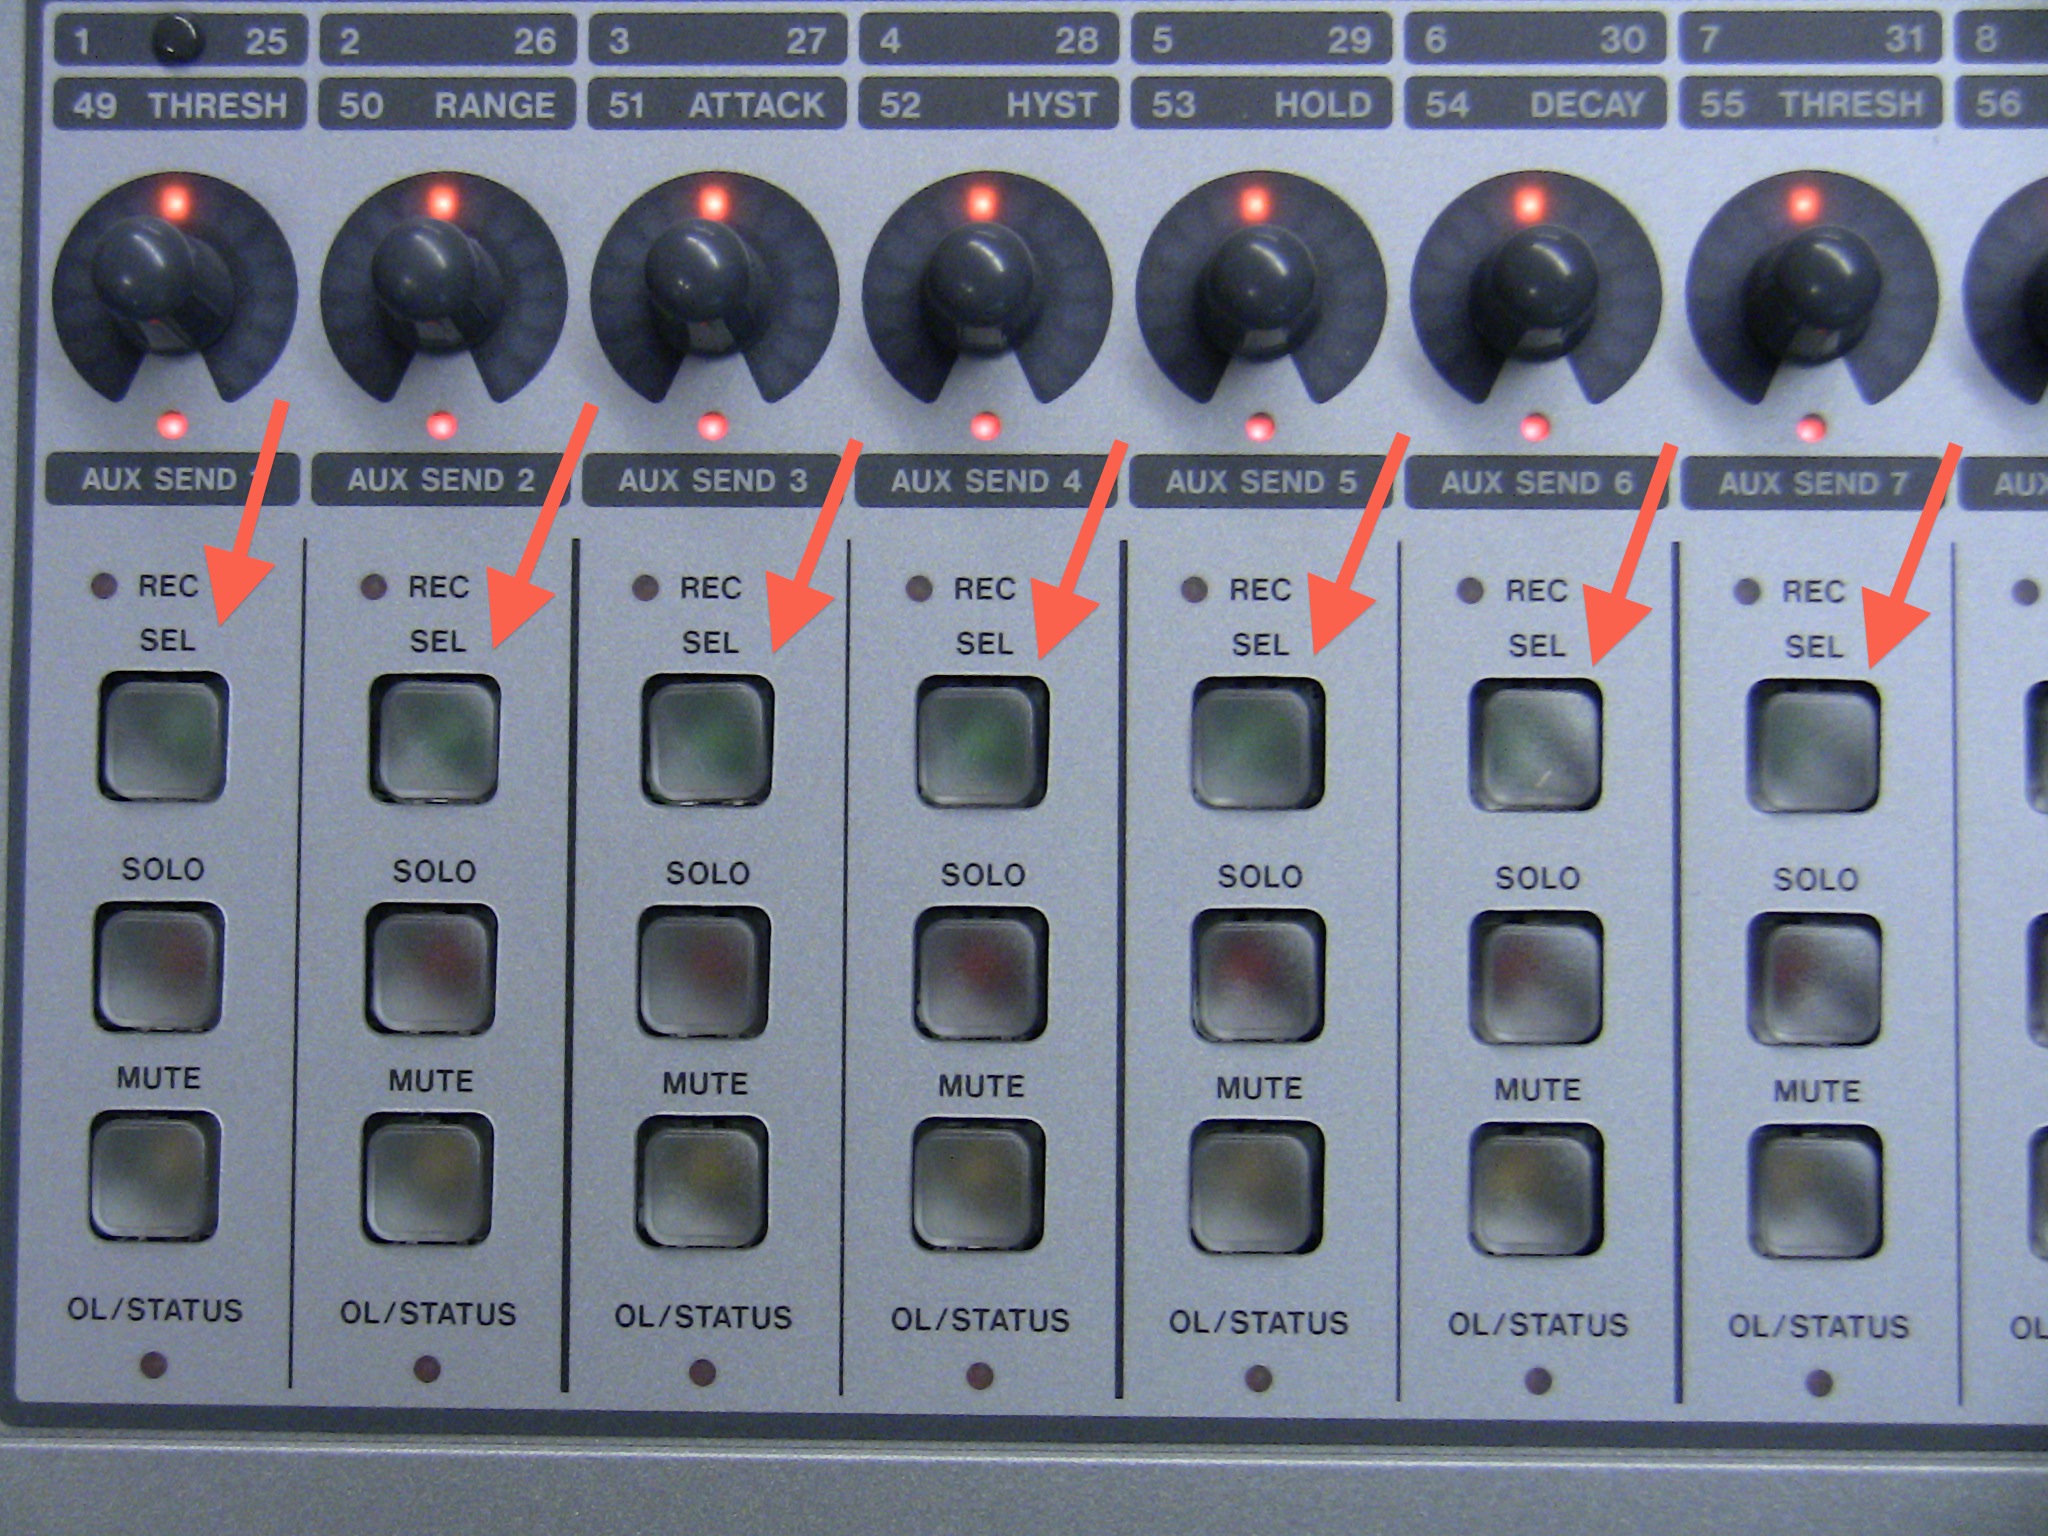
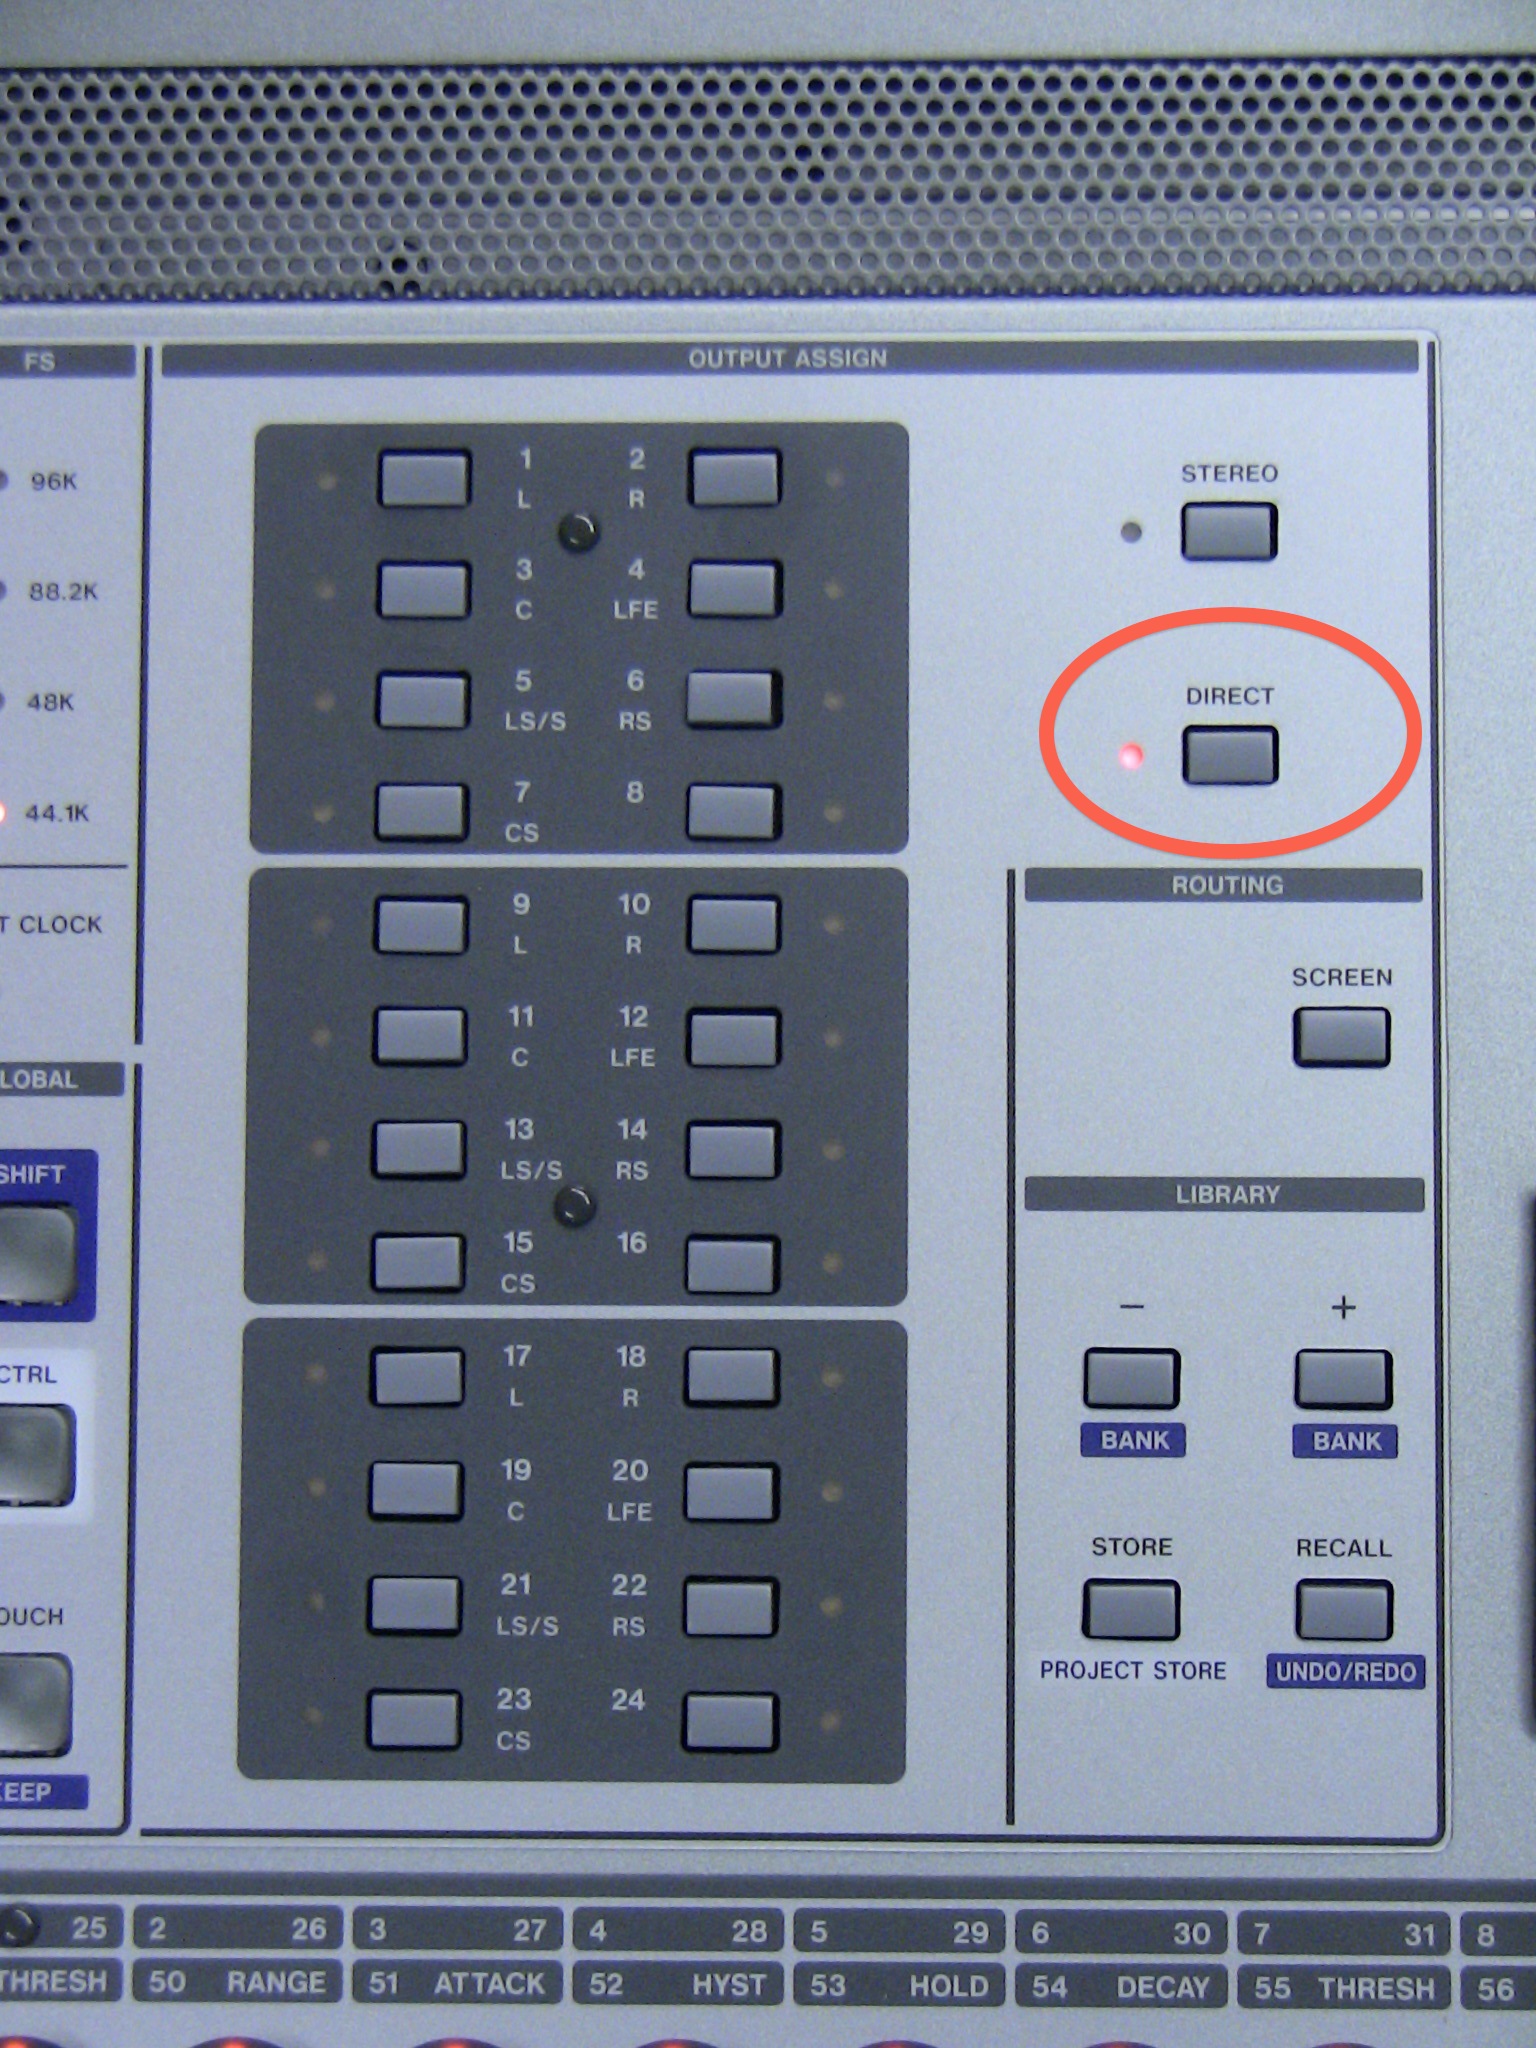
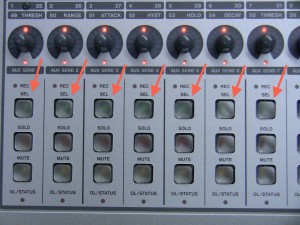
Route the Slot return channels to the Stereo output (see p.51):
- To the right of the Stereo fader on the board press the Layer Status button for Ch.17-32.
- Press the SEL button above Ch.17.
- On the left side of the board, press the Stereo button in the Output Assign section, and disable any other assignments in that area (only Stereo should be lit up).
- Turn the fader on that channel up to 0db and pan it left.
- Do the same things for Ch.18, but pan it right (if you’re mixing in the board, the levels panning and effects on the Slot return channels will be your mix).

In Logic, go to the Logic menu>Preferences>Audio and set the Input Device and Output Device to the Tascam FW card.
On the output of the tracks, set those to the first pair of output choices. Those should show up on Slot 1 ch 1-2, which we set to show up on Ch.17-18 on the board.
If you’d like to do transport and fader control of Logic from the DM3200, here’s a summary of the Macie Control Emulation for Logic:
The DM3200 needs to be connected via USB to the computer.
On the DM3200:
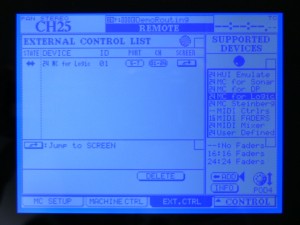
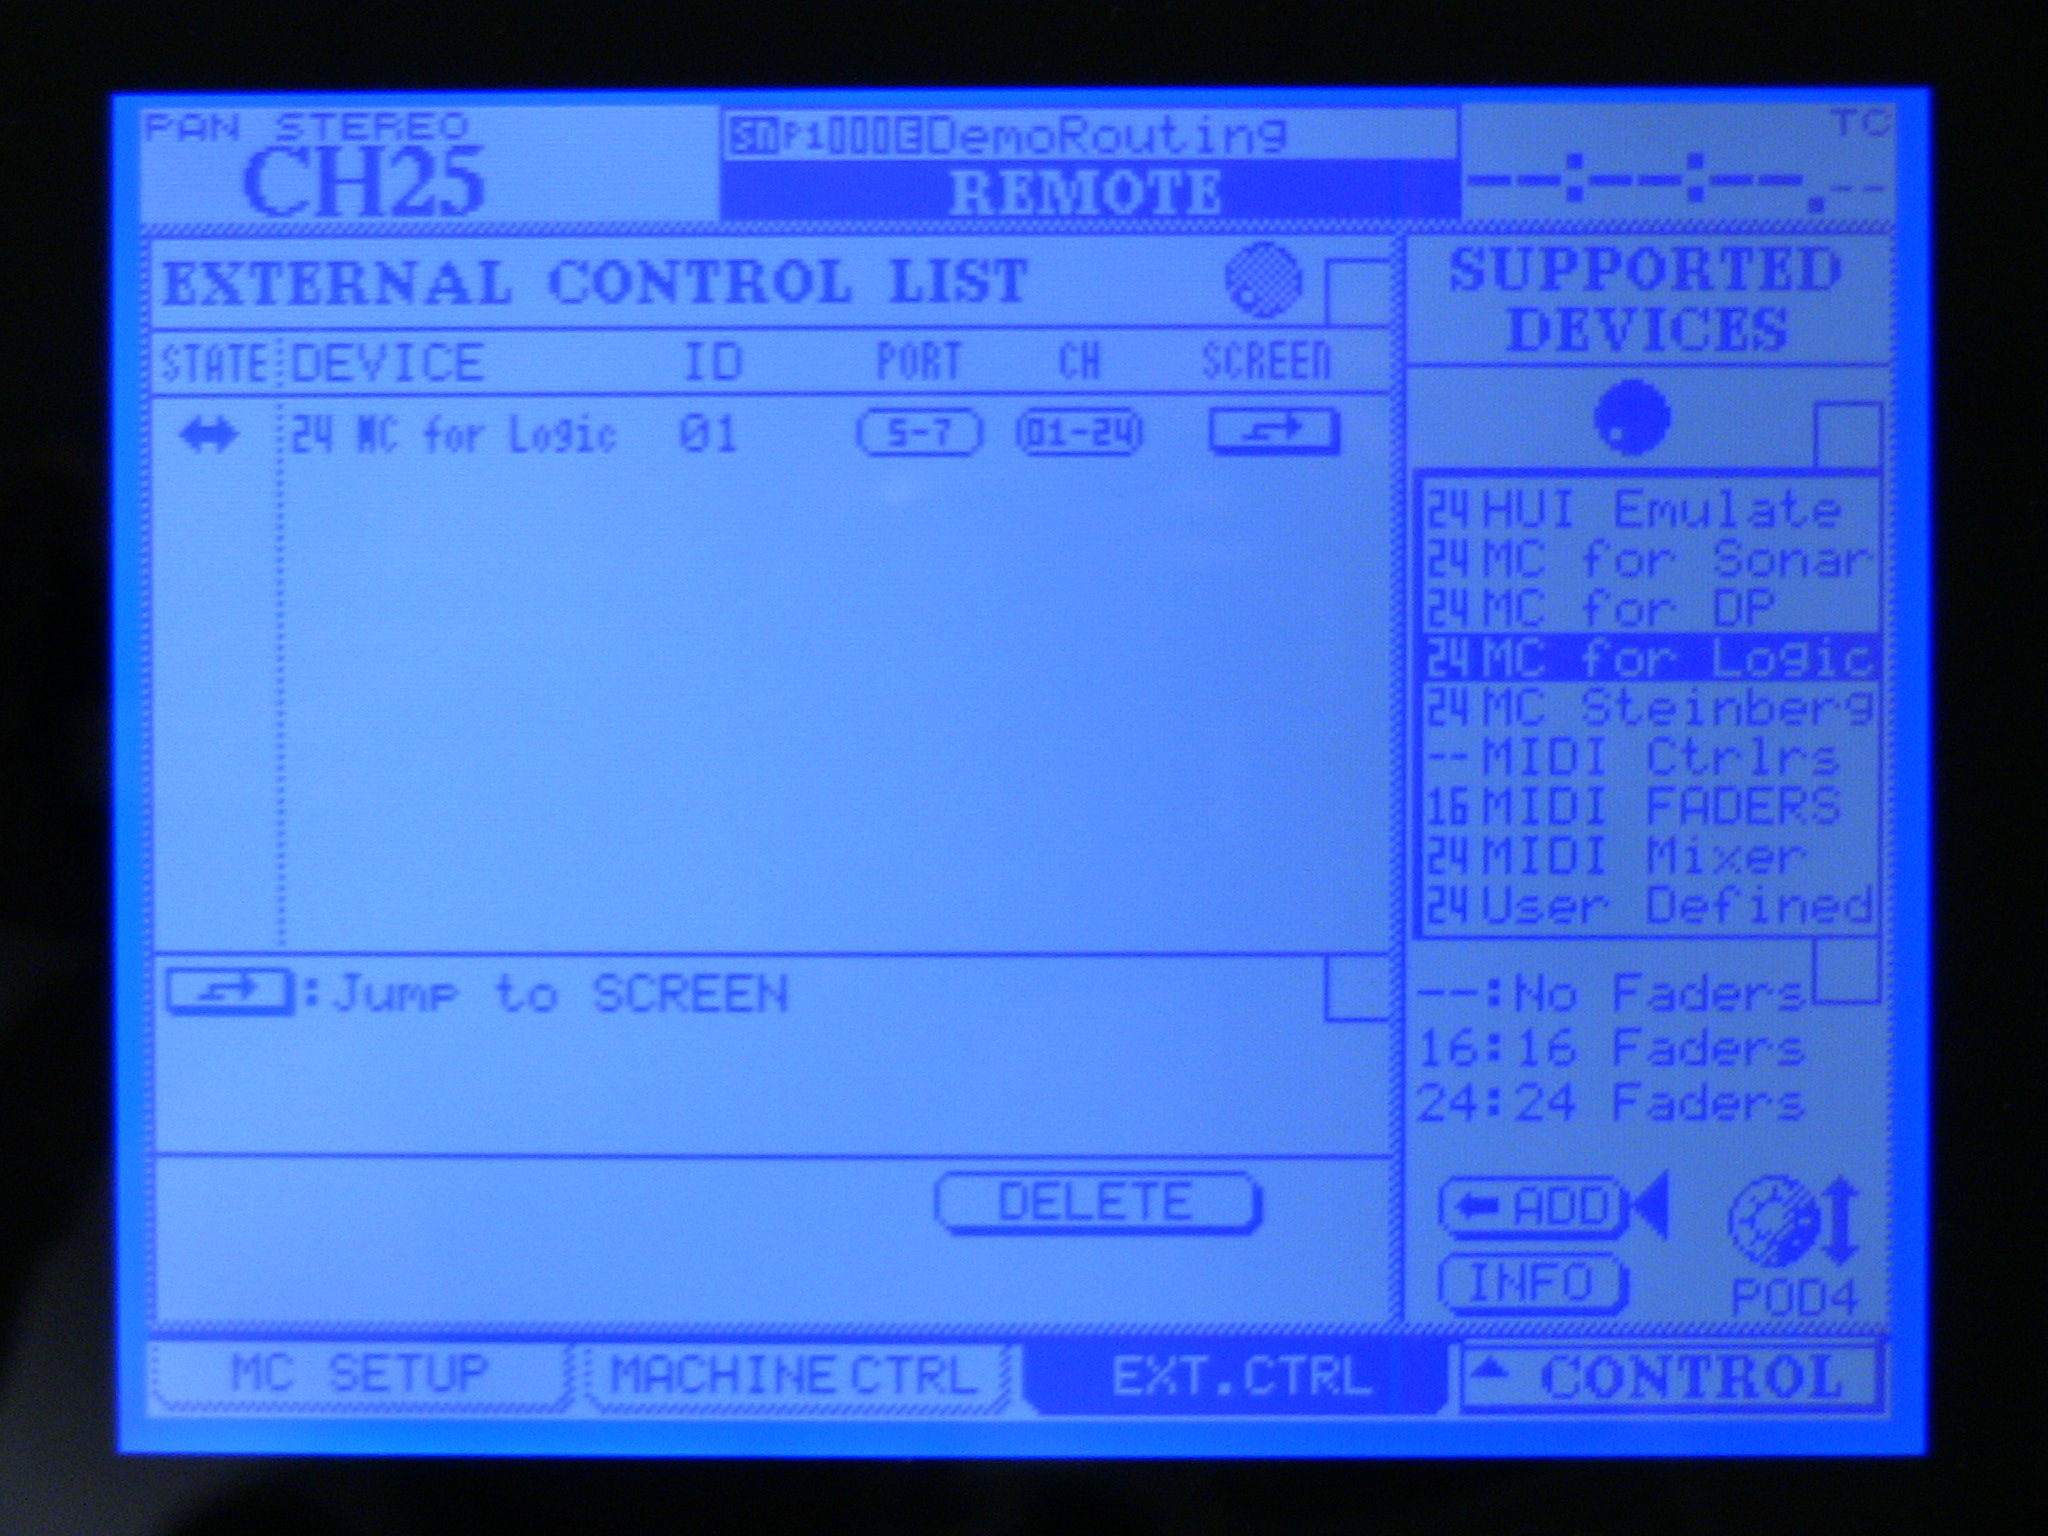
- Go to Remote>Ext.CTRL by holding the Alt button and pressing the Remote button then using the tab select buttons to navigate to the Ext.CTRL tab.
- Add a 16 MC for Logic by using POD 4 to select 16 MC for Logic and pressing the Enter button (the photo below was taken from a DM4800. Your board will say 16 instead of 24).
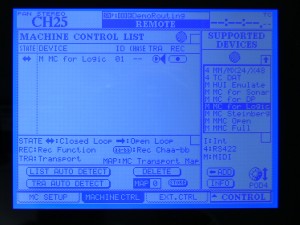
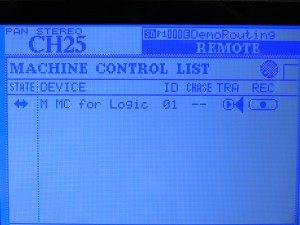
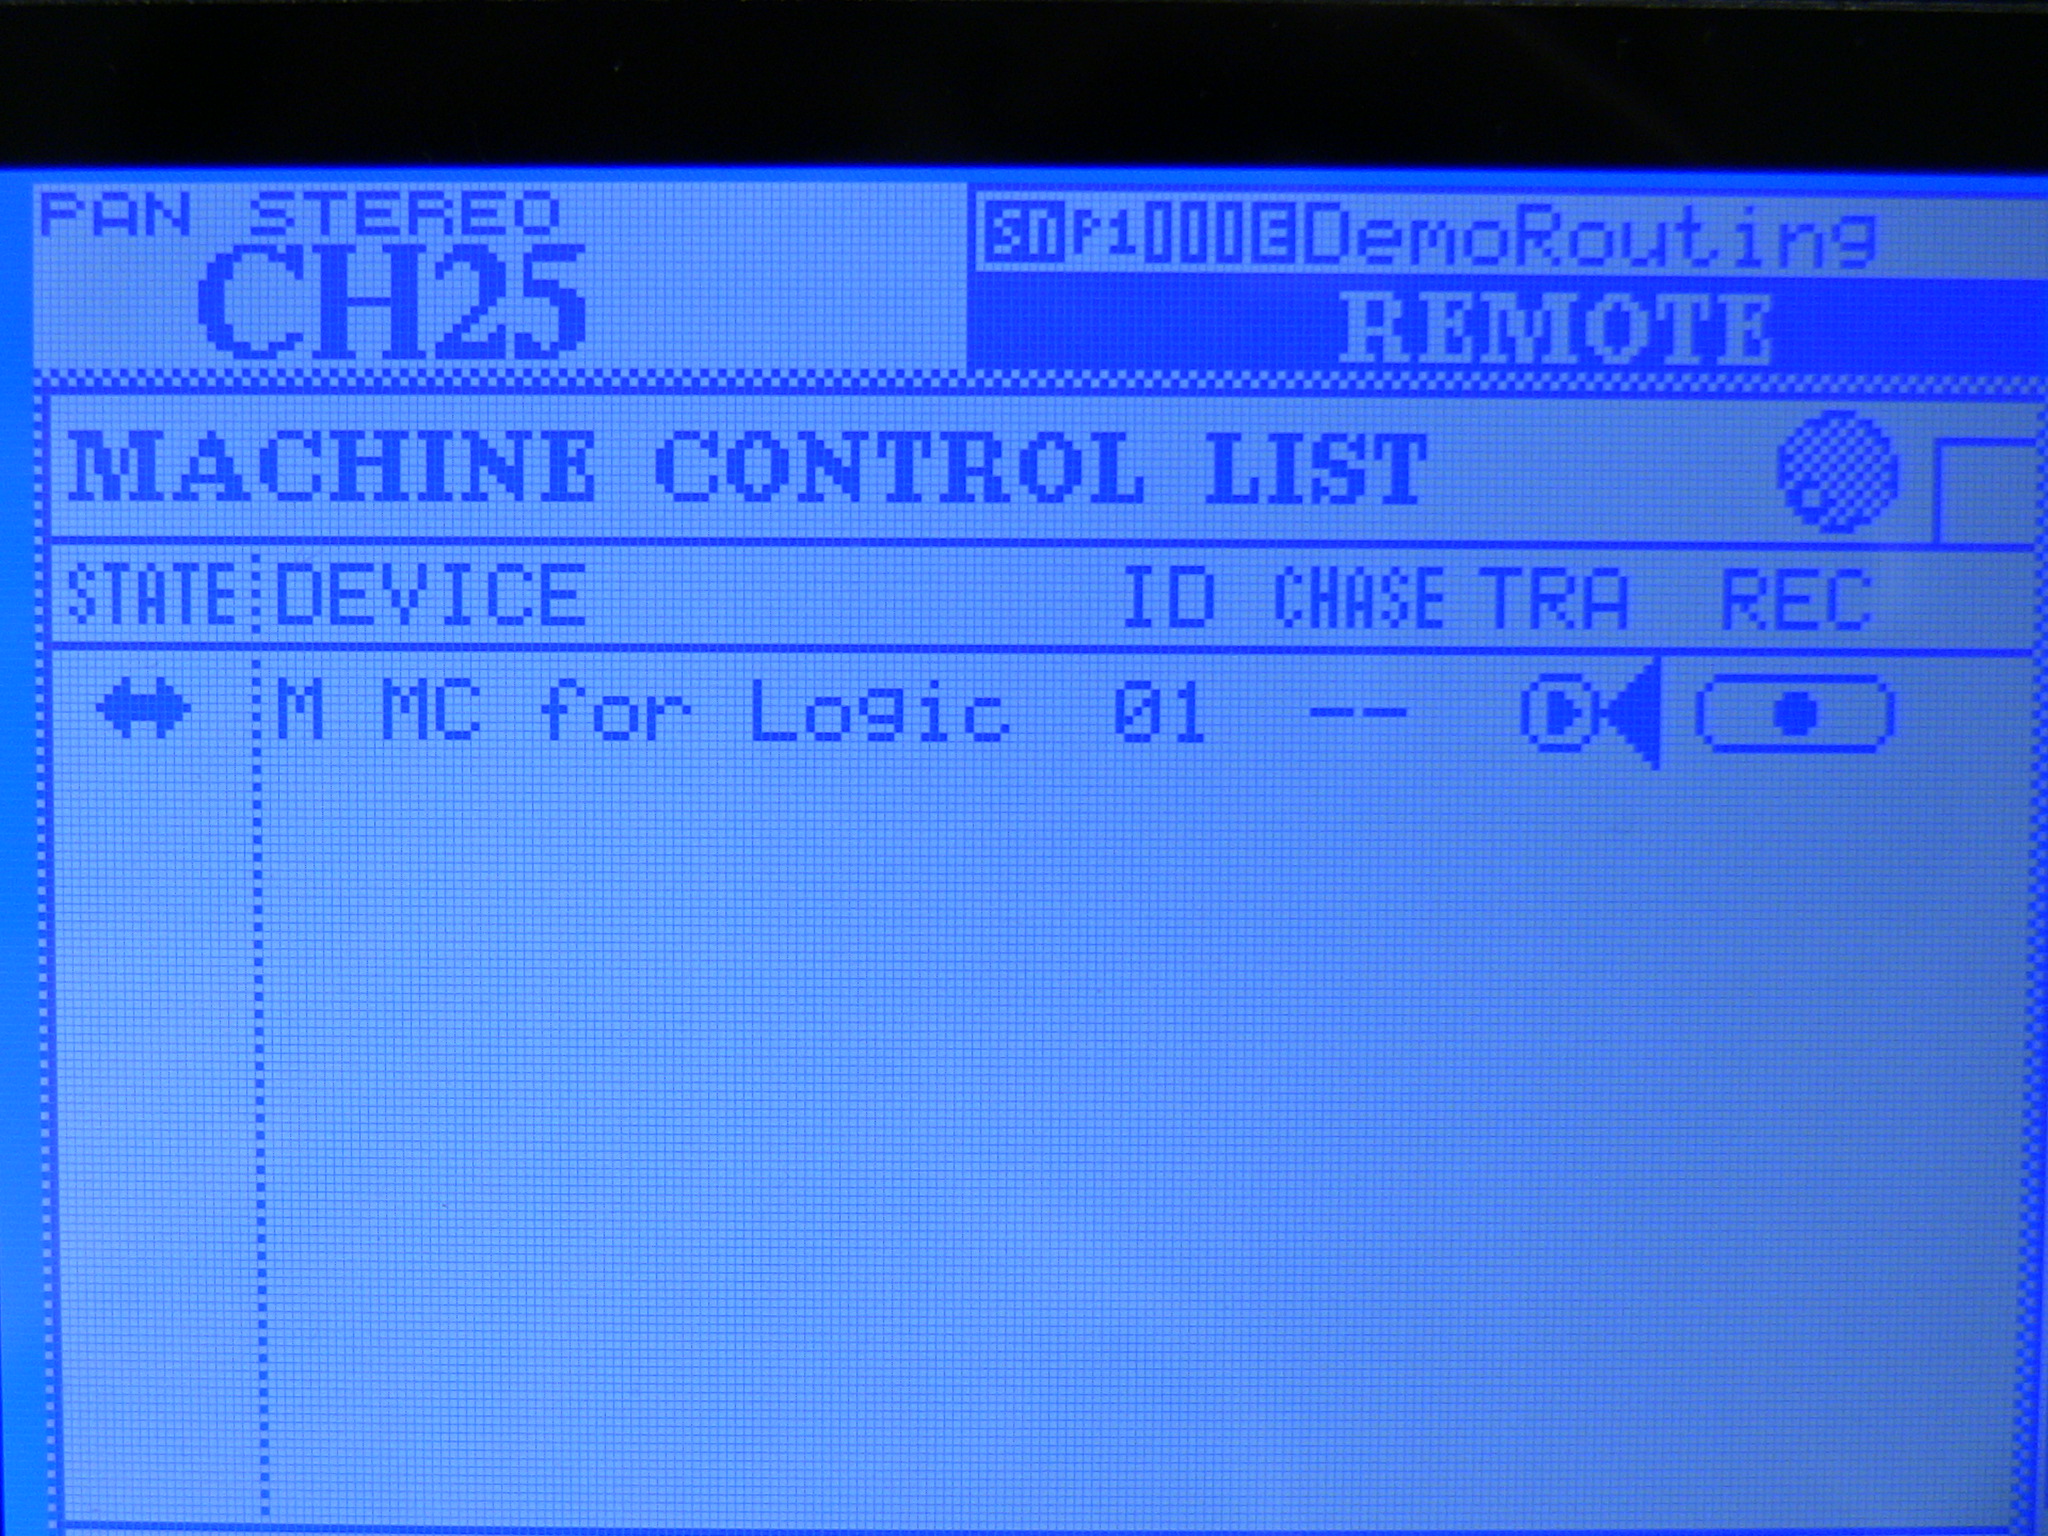
- Go to Remote>Machine.CTRL by pressing the tab button below the Machine CTRL tab.
-
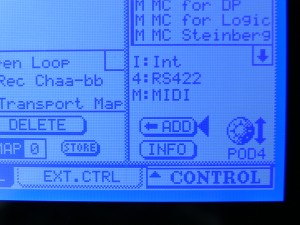
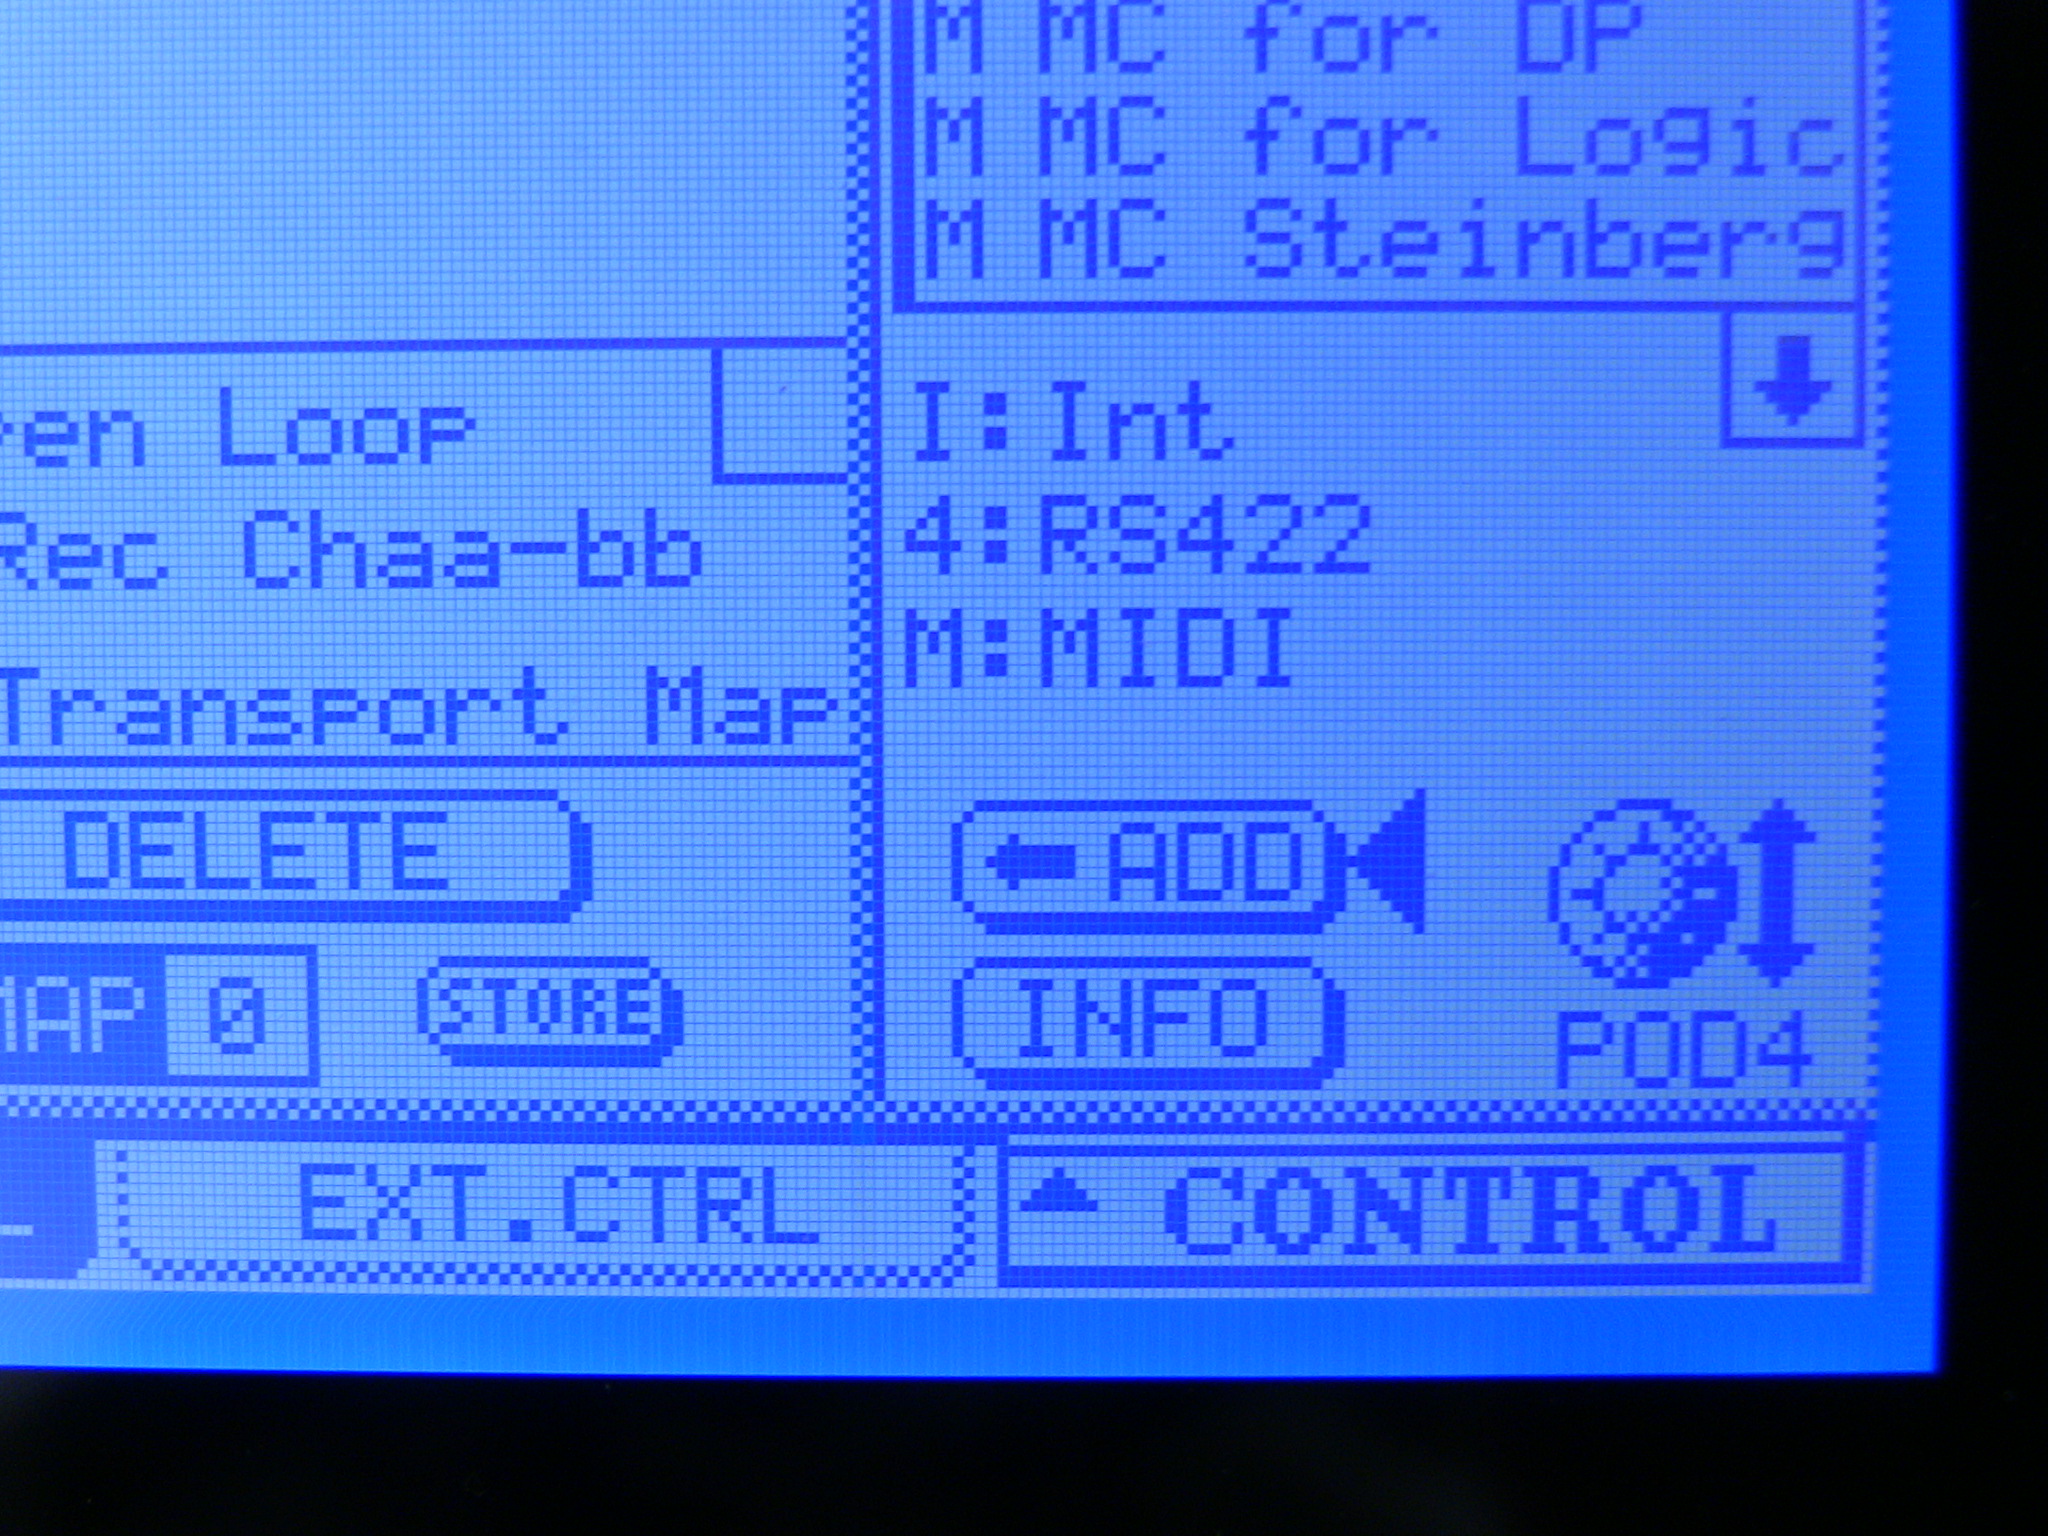
Select M MC for Logic using POD 4. Using the arrow keys, make sure the arrow cursor is next to the ADD button, then press Enter. Then, using the arrow keys, move the cursor next to the TRA option and press the Enter button to enable TRA.


In Logic:
- Go to the Logic menu>Preferences>Control Surfaces>Setup.
- Add a Mackie Control and set it’s MIDI IO ports to Port 5 (or Control Port 1) of the DM3200.
- Add a Mackie Control Extender and set it’s MIDI IO ports to Port 6 (or Control port 2) of the DM3200.
The transport on the DM3200 should work all the time. The Faders and other functions work when the Layer Status on the board, to the right of the Stereo fader, is set to Remote.
When you need help, Sweetwater has the answers!
Our knowledge base contains over 28,000 expertly written tech articles that will give you answers and help you get the most out of your gear. Our pro musicians and gear experts update content daily to keep you informed and on your way. Best of all, it’s totally FREE, and it’s just another reason that you get more at Sweetwater.com.

