
RODE NT1 5th Generation Microphone with USB Quickstart Guide
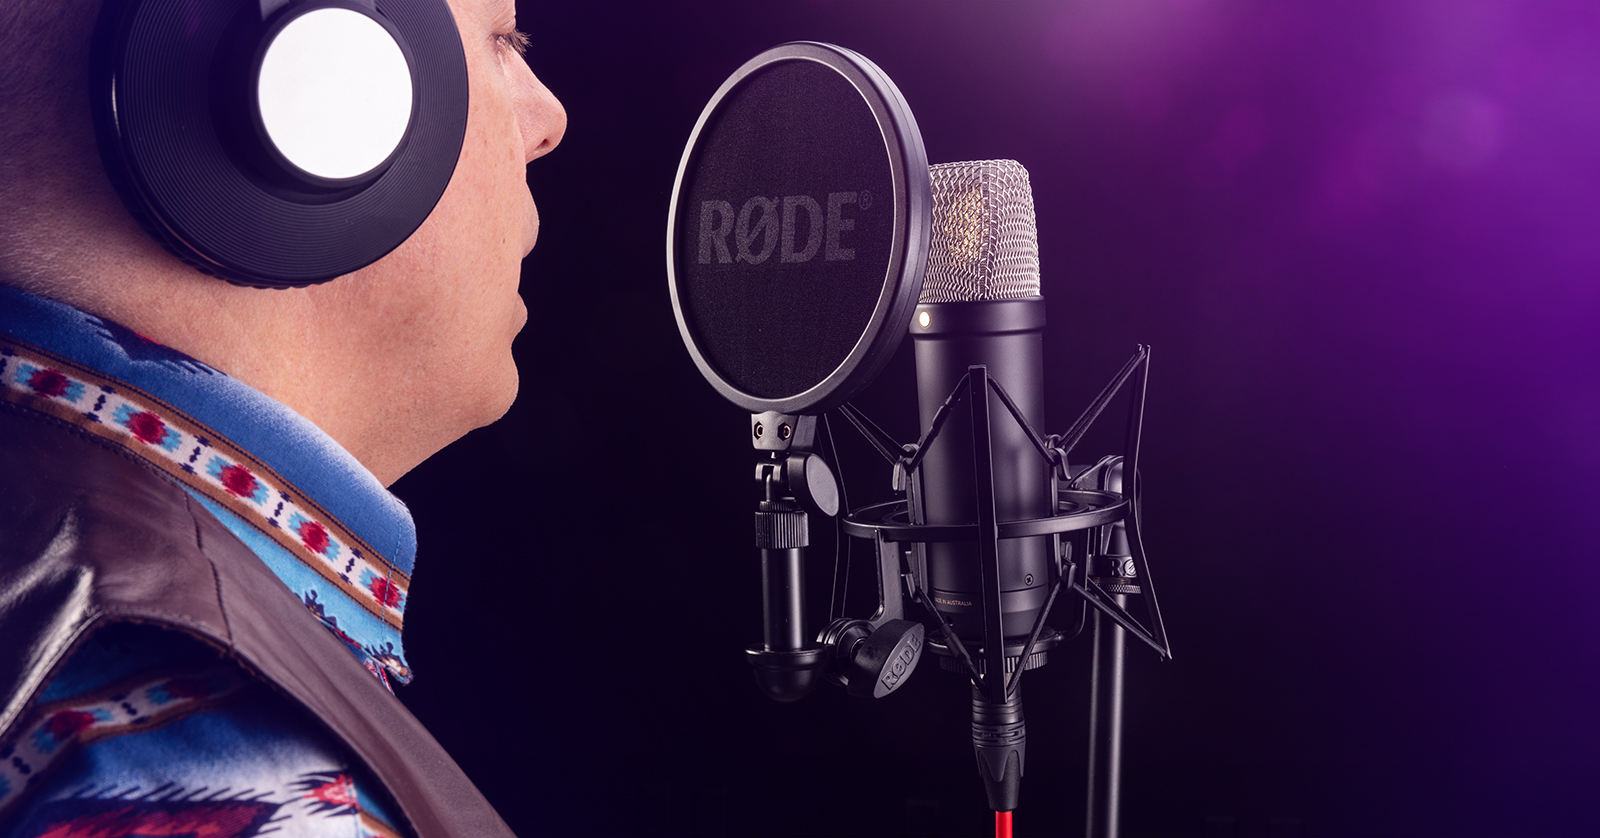
The RODE NT1 5th Generation is the first model of RODE NT1 large-diaphragm condenser microphone that has two modes of operation:
- As a USB microphone with built-in audio effects processing and 32-bit floating-point analog to digital conversion
- As a conventional microphone with a standard XLR cable connection
Here’s how to use either connection.
- Register Your Purchase and Set Up Your Software
- Setting up the RODE NT1 5th Generation
- Recording with the USB Interface
- Using the RODE NT1 5th Generation with the XLR Connection
Register Your Purchase and Set Up Your Software
IMPORTANT: By default, RODE gives you a 1-year warranty. However, if you register your purchase on the RODE website, RODE extends your warranty to 10 years, free of charge.
TIP: Everything you purchase from Sweetwater comes with our 2-year Total Confidence Coverage (TCC) warranty. However, 10 years is better than 2, so please register with RODE today.
Create your RODE account
On your computer, go to www.rode.com/warranty. Create a new account, or log in to your existing account. Follow the instructions to register with your microphone’s serial number.
Install the USB audio driver on your computer
If you are on macOS, the RODE NT1 USB connection is class-compliant and no driver is needed.
If you are on Windows, you need to download and install the RODE Custom ASIO Driver for Windows. Follow the instructions to complete the installation.
Update the RODE NT1 firmware with the RODE Central app
Download and install the Rode Central app for your operating system.
Connect the RODE NT1 to your Mac or Windows PC using the USB-C cable included, with an adapter cable if necessary. Start up the Rode Central app. It will detect the microphone’s USB interface and inform you if it needs a firmware update. Follow the prompts.
Setting up the RODE NT1 5th Generation
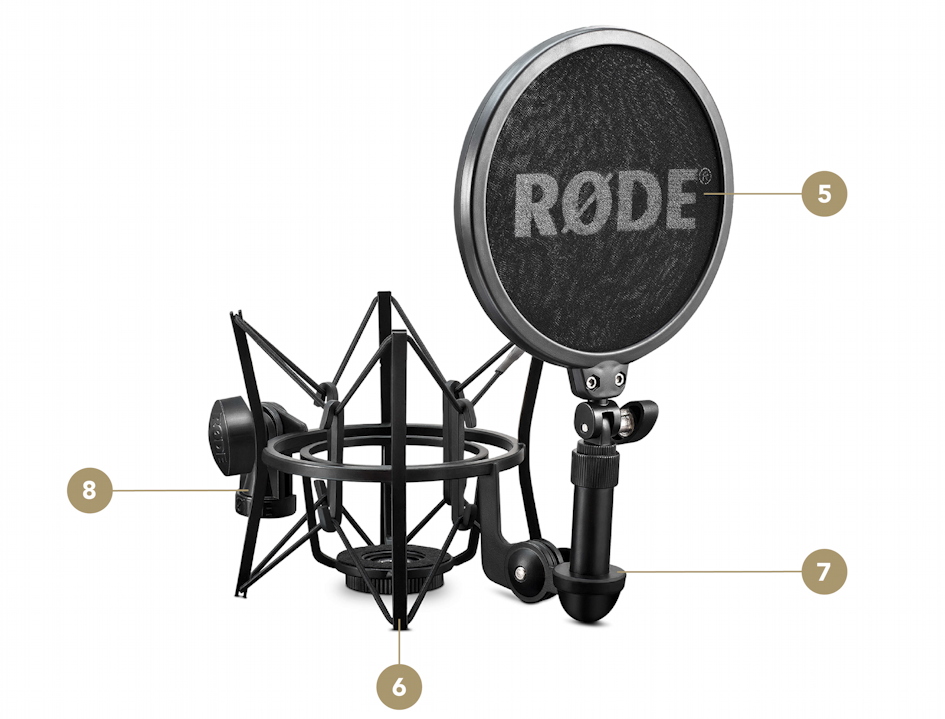
The RODE SM6 Shock Mount
The NT1 5th Generation comes with a RODE SM6 shock mount with a pop filter.
Before you attach the microphone, attach the shock mount to your microphone stand. Thread the microphone stand’s end into the SM6’s stand mount (#8 in the diagram above). You can adjust the angle and orientation of the mount using the tension knob on the stand mount’s joint.
To place the pop filter (#5) on the shock mount, loosen the joint on the pop filter mounting arm (#7) so that its threaded socket faces up. Screw the pop filter into this socket until firmly secured. Once in place, the height of the pop filter can be adjusted using the telescopic arm, as well as its left-to-right orientation and back-and-forth tilt.
Place the NT1 inside the SM6 shock mount and rotate the microphone clockwise to screw it loosely into the base of the mount. Adjust the orientation of the microphone so that the gold dot faces the pop filter, and then tighten the ring beneath the mount while holding the microphone to secure it in place.
TIP: The gold dot represents the front, or the “live” side of the microphone capsule. A singer must face the gold dot to sing into the microphone. When recording an instrument, point the gold dot toward the sound source.
Recording with the USB Interface
With the RODE NT1 5th Generation, you have the option of recording using the microphone’s built-in USB interface rather than using the conventional three-pin XLR output.
Connecting the USB cable
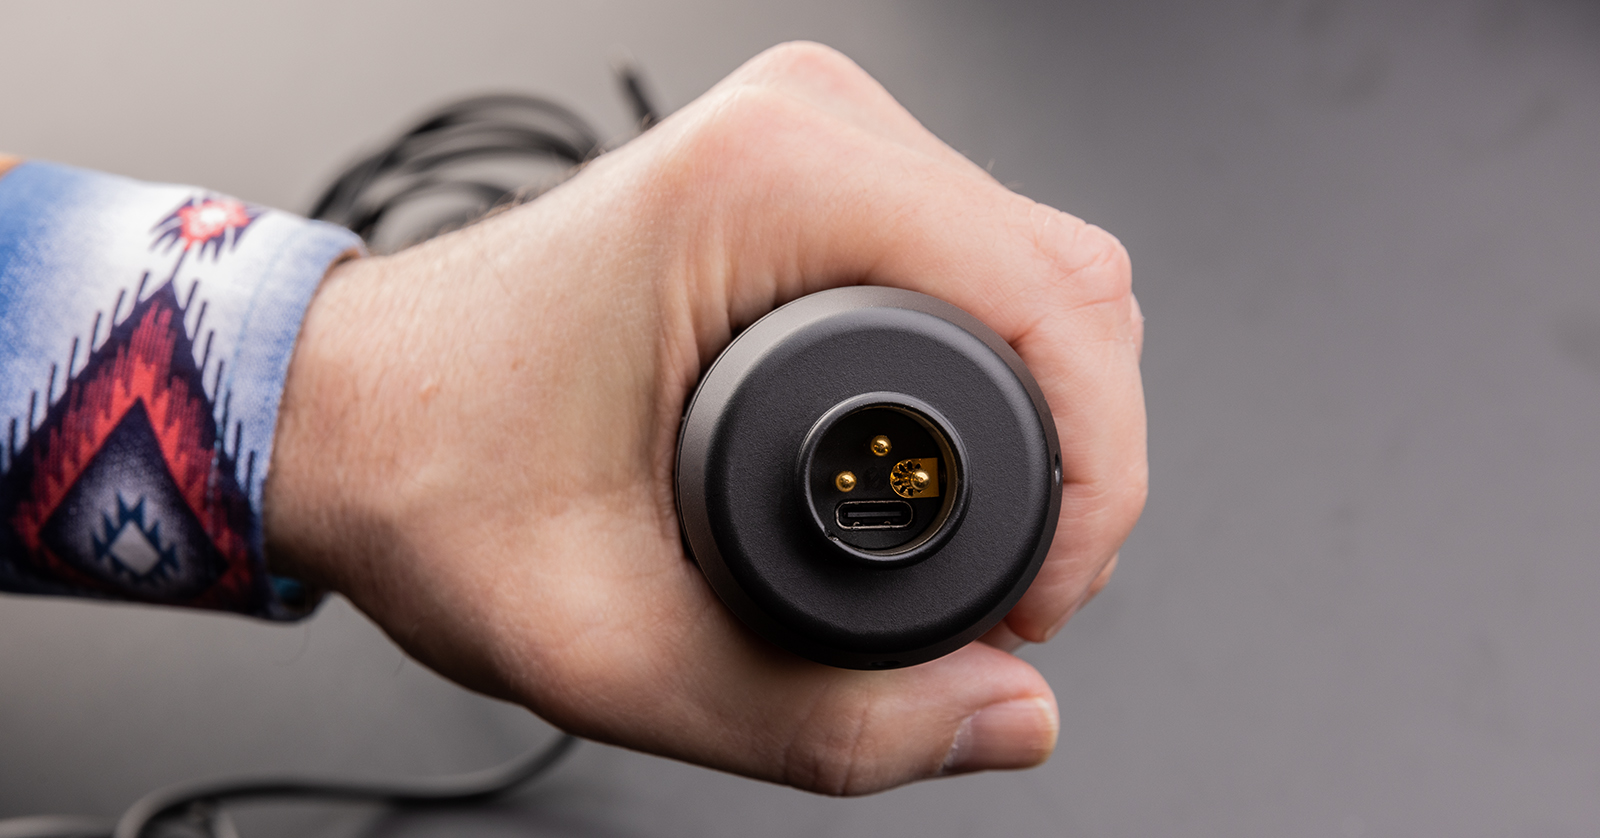
The RODE NT1 5th Generation’s USB port is located inside the XLR connector.
The connection for USB is found inside the base of the microphone, alongside and behind the three-pin XLR connection, and uses a USB-C plug. Use the supplied USB-C cable.
Have a look at the base of the microphone, and locate the USB-C jack. Carefully insert the USB-C plug into the jack, taking care not to bend the pins of the XLR connection.
Connecting the RODE NT1 5th Generation to your Computer
As we explained above, if you are on Windows, you first need to install the RODE Custom ASIO Driver for Windows.
You can connect the USB-C cable from the RODE microphone directly to your Mac or Windows PC. This will provide power to the condenser microphone and to its USB interface, as well as receiving the digital audio signal.
However, because the RODE NT1 5th generation has no headphone output, you also need your usual audio interface connected to your computer for monitoring the microphone’s signal. It’s always best to connect your audio interface directly to your computer.
RODE reports that up to eight RODE NT1 5th Generation USB mics can be used simultaneously with one computer. If you use multiple mics, you will want to connect them to a powered USB-C hub which is in turn connected to your computer.
When you have your mic connected over USB, you can go to macOS System Settings or Windows Settings and select the RODE as the input source. Consult the owner’s manual for your DAW to learn how to select and set up the RODE as the input source, while using your audio interface for monitoring and playback.
Here is RODE’s short how-to video:
Recording in 32-bit floating point audio
If you are recording in a DAW configured to record 32-bit floating-point audio, the RODE NT1 5th Generation does not require setting a gain knob or otherwise adjusting an input level. Regardless of the sound source or its sound pressure level (SPL), simply record the signal. After recording a track is done, you can adjust the gain or normalize the track to bring up the volume as needed.
Consult your DAW’s documentation to confirm that it supports 32-bit floating-point audio, and set it to record in that mode.
Recording in lower resolution
If your DAW does not support 32-bit floating-point audio, or you choose to record a project with a lower bit depth, you will need to do a sound check and set the input gain in software before you record in order to set the recording at an optimal level.
Using the RODE NT1 5th Generation’s Built-in Effects
The USB audio interface built into the RODE NT1 5th Generation provides onboard DSP effects, including compression, highpass filter, noise gate, and the Aphex Aural Exciter and Big Bottom effects. They can be accessed using these RODE software apps for Mac and Windows PC:
- RODE Central for Mac and Windows
- RODE Connect for Mac and Windows
- Unify for Windows (Beta version for Mac)
Download and install these apps from this link. Follow the instructions provided with each app.
Using the built-in DSP effects requires using the apps to change the RODE NT1’s bit depth and sample rate to 24-bit, 48kHz. This means that when you choose these effects, you are no longer working in 32-bit floating point.
Here’s RODE’s brief tutorial on working with these effects:
Using the RODE NT1 5th Generation with the XLR Connection
Rather than using the USB connection, you can use the RODE NT1 5th Generation in the conventional fashion. By connecting an XLR microphone cable, the microphone functions as an analog condenser microphone.
Connect the XLR cable to an input on a mixer or an audio interface and enable phantom power.
Set the input gain on the mixer or audio interface as you would with any other condenser microphone.
The NT1 comes with a small blue rubber plastic ring. This is useful when using the XLR connection method with a cable that doesn’t snugly fit into the XLR connector. Simply place the ring into the XLR socket, then push it into place with a cable. This will ensure a tight fit with any cable.
Here’s RODE’s tutorial on using the mic with the XLR connection:
Related Articles
When you need help, Sweetwater has the answers!
Our knowledge base contains over 28,000 expertly written tech articles that will give you answers and help you get the most out of your gear. Our pro musicians and gear experts update content daily to keep you informed and on your way. Best of all, it’s totally FREE, and it’s just another reason that you get more at Sweetwater.com.

