
PreSonus Studio Series Quickstart Guide
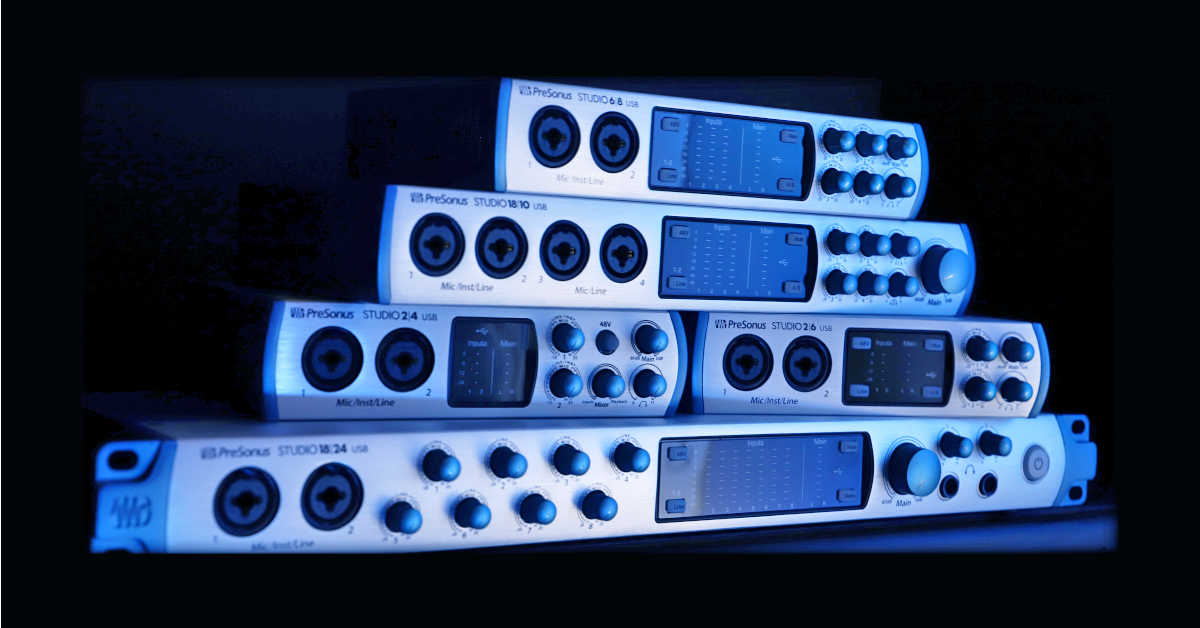
In this guide, we will show you how to get up and running with a PreSonus Studio series interface. That means we’ll walk you through how to register, connect everything, and use the interface within Universal Control. Read the sections below to get started.
Register the interface
Before you can start recording with your new interface, there are a few things you need to do. You’ll need to register the device, which will give you access to a free copy of Studio One Artist, as well as bonus plug-ins, download the appropriate drivers, and update the firmware.
- Log into your PreSonus account. If you haven’t created an account, create one here.
- On your account home page, click Register a Product, then select Hardware in the Choose product type… dropdown box.
- Enter the purchase date and serial number located on the bottom of your interface, then click Register.
- Once registered, click My Products on the top of the PreSonus page, then click Software under My Products to download and register the software.
Learn more about how to register, download, and install Studio One Artist!
Download and install Universal Control
After registration, the next step is to download and install Universal Control for your OS. All of the drivers are included in the installer, so there is only one file you’ll need to download. Studio series interfaces are class-compliant on Mac, so no additional drivers are necessary. Follow these steps to download and install Universal Control.
- Click the Hardware tab in the My Products section of your account, click View More Details under your interface, then click Download Installer.
- If you need to download Universal Control for a different OS, click View Other Systems.
- Go to your Downloads folder and run the Universal Control installer.
- Windows (PC) Users: Double-click the .exe file to begin the installation process.
- Mac Users: Double-click the .dmg file, then double-click the .pkg to begin the installation process.
What drivers should I install?
If you’re using Windows, you will be prompted to select which drivers you’d like to install. Uncheck all of the boxes except for Studio USB (if you own a Studio 192, check that box), then continue to complete the installation.
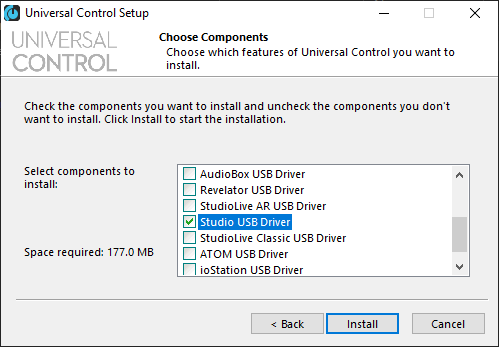
Select the Studio USB Driver
Setup and connections
After you’ve registered the device and downloaded the latest version of Universal Control, the next step is to connect the Studio interface to your computer. You’ll need to set it as your computer’s default playback and recording device, then make any necessary changes to settings like sample rate or buffer size.
Connecting the interface
Connecting a Studio series interface is simple. Plug the power supply in, connect the USB cable to the computer, then turn it on. While you can connect the interface to a USB hub, we highly recommend connecting it directly to the computer to ensure the best connectivity and performance. Follow these steps to get connected.
- Connect your gear and speakers to the Studio series interface.
- Navigate to your OS sound settings and set the interface as the default input and output device.
- PC: Right-click the Speaker icon on the Windows taskbar, select Sounds, then click the Playback tab. Locate and select the interface, click Set Default, then click OK to close the menu. Do the same in the Recording tab.
- Mac: Click the Apple icon from the Menu Bar and select System Preferences. Click Sound, then select the PreSonus under the Input and Output tabs.
- Play some a video or some music, and slowly turn the volume until it’s at a safe listening level.
- Open your DAW, navigate to its sound settings, and set the PreSonus Studio interface as your primary recording and playback device.
Connecting external hardware
If you have a piece of external gear you need to connect, such as a MIDI controller or mic preamp, now is a good time to do so. Find your interface listed below for specific connections.
Studio 1810: MIDI, ADAT, S/PDIF
Studio 2|4: MIDI
Studio 1824: MIDI, ADAT, S/PDIF
Studio 2|6: MIDI
Studio 6|8: MIDI and S/PDIF (DB-9 breakout cable)
Studio 192: ADAT, S/PDIF
MIDI
- Connect a 5-pin MIDI cable from the MIDI Out port on your MIDI device to the MIDI In port of the Studio interface.
- Suppose you’re wanting to trigger external MIDI synths from tracks playing inside your DAW. In that case, you will also need to connect a 5-pin MIDI cable from the MIDI Out port on the Studio interface to the MIDI In port of your synthesizer.
S/PDIF and ADAT
- Connect an ADAT or S/PDIF cable from the OUT port of the external device to the IN port of the Studio interface.
- If you need to send audio out to an external device, like a stereo, connect an ADAT or S/PDIF cable from the OUT port of the Studio interface to the IN of the external device. You will also need to set the clock to EXTERNAL within Universal Control.
Using Universal Control
Universal Control is the standalone application for PreSonus hardware. When you first launch Universal Control, you may be prompted to complete a firmware update before continuing. Once the firmware is up to date, you can update settings such as the buffer size, sample rate, clock source, and for Windows users, enable or disable loopback functionality.
Sample rate
You can change the sample rate from 44.1 kHz to 192 kHz. You’ll get higher resolution audio when setting it to a higher sample rate, but your computer will have to work harder, and the file size will be larger.
Block Size
More commonly known as buffer size, this adjusts the amount of latency. Lower buffer sizes will reduce latency, but like sample rate, it will put more strain on your system. If you begin to hear audio artifacts like pops or clicks, raise the buffer size.
Loopback (Windows users only)
The loopback function allows you to record the audio output of another application while recording an input simultaneously. For example, if you want to record audio from a video into your DAW while also recording your guitar, you’d enable the Loopback function. Make sure you have the monitoring turned off, or else you’ll get very loud feedback!
Clock Source
If you have a Studio 6|8, Studio 1810, or Studio 1818, you can change the clock source between internal and external (ADAT, SPDIF). If you’re only using the interface, keep this set to internal. If you have an external mic preamp connected via SPDIF or ADAT cable, change the setting to external.
Related content
5 Tips for Better Mixes
Getting the Most from Your Home Studio Gear

Learn more about optimizing your Windows 10 computer for music production!
Learn More
Learn more about optimizing your Mac computer for music production!
Learn MoreAdditional resources
When you need help, Sweetwater has the answers!
Our knowledge base contains over 28,000 expertly written tech articles that will give you answers and help you get the most out of your gear. Our pro musicians and gear experts update content daily to keep you informed and on your way. Best of all, it’s totally FREE, and it’s just another reason that you get more at Sweetwater.com.

