
Korg Volca FM 2 Quickstart Guide
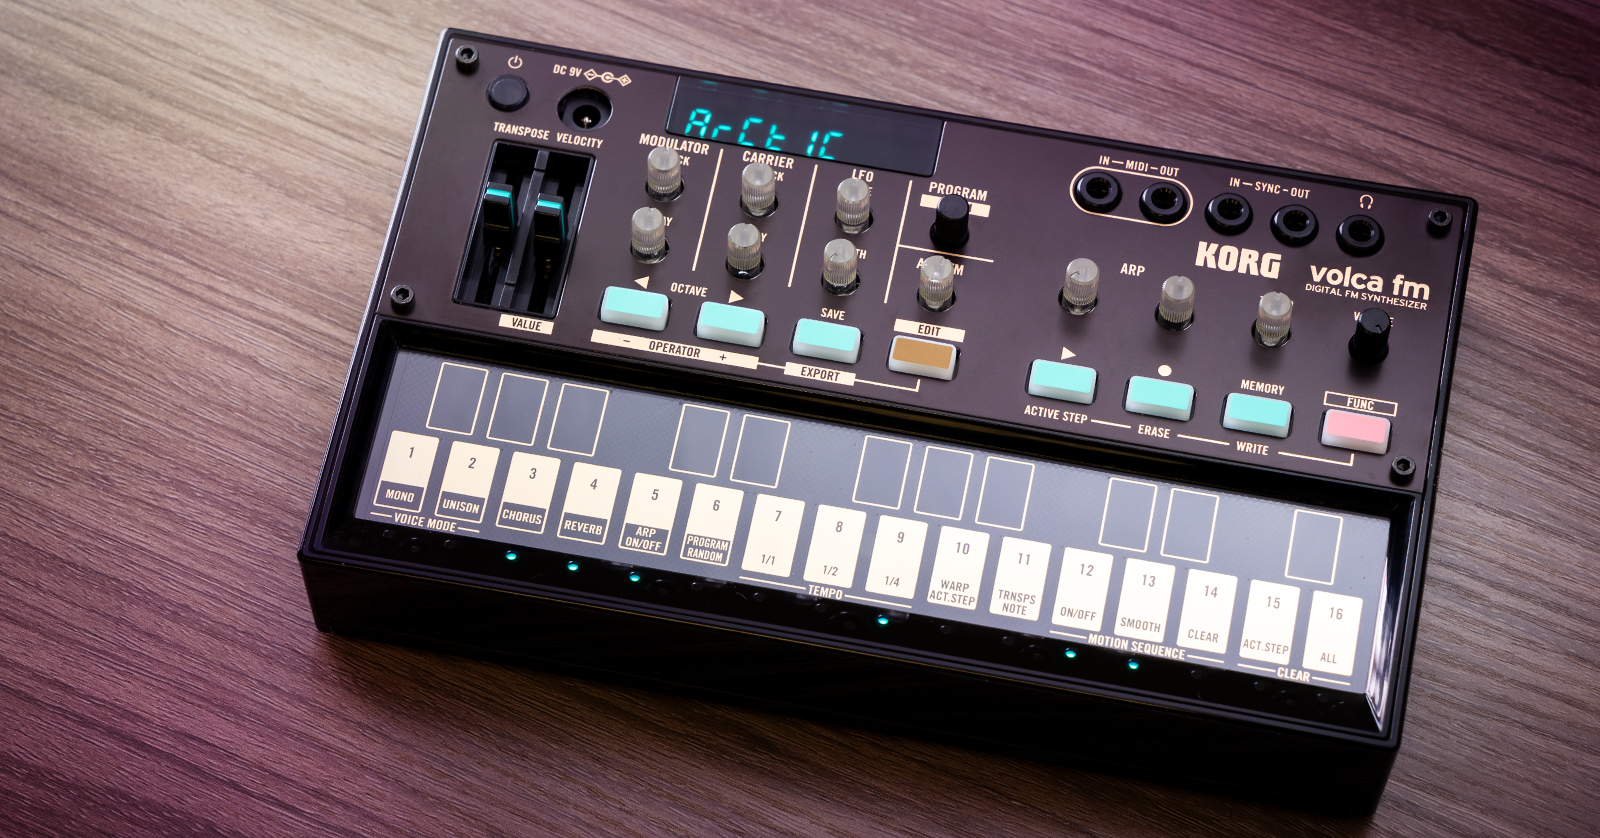
The Volca FM2 is a portable and powerful FM synthesizer to have in your synth setup, so in this guide, we will teach you how to use the Korg Volca FM2 for the first time. Be sure to check out its Owner’s Manual for more information! Follow the sections below to get started.
Notes on Power
Before getting started, there are a few things to take note of when powering your Korg Volca FM2.
- If you want to use a power supply with the FM2, you must use the Korg Volca power supply. A generic power supply may damage the unit.
- The Volca FM2 has two different battery modes: nickel-hybrid and alkaline. Depending on the batteries you use, you may need to change the mode. This is because alkaline and nickel-hybrid batteries discharge at different rates, so the unit must know to compensate correctly.
- To switch the battery mode, press and hold the FUNC button while powering on the unit, then press the 2 key. If the LED is lit, nickel-hybrid (bAtt nH) will be selected. If it’s off, the mode will be set to alkaline (bAtt AL).
- Don’t mix battery types (nickel-hybrid with alkaline)!
Register the Volca FM2
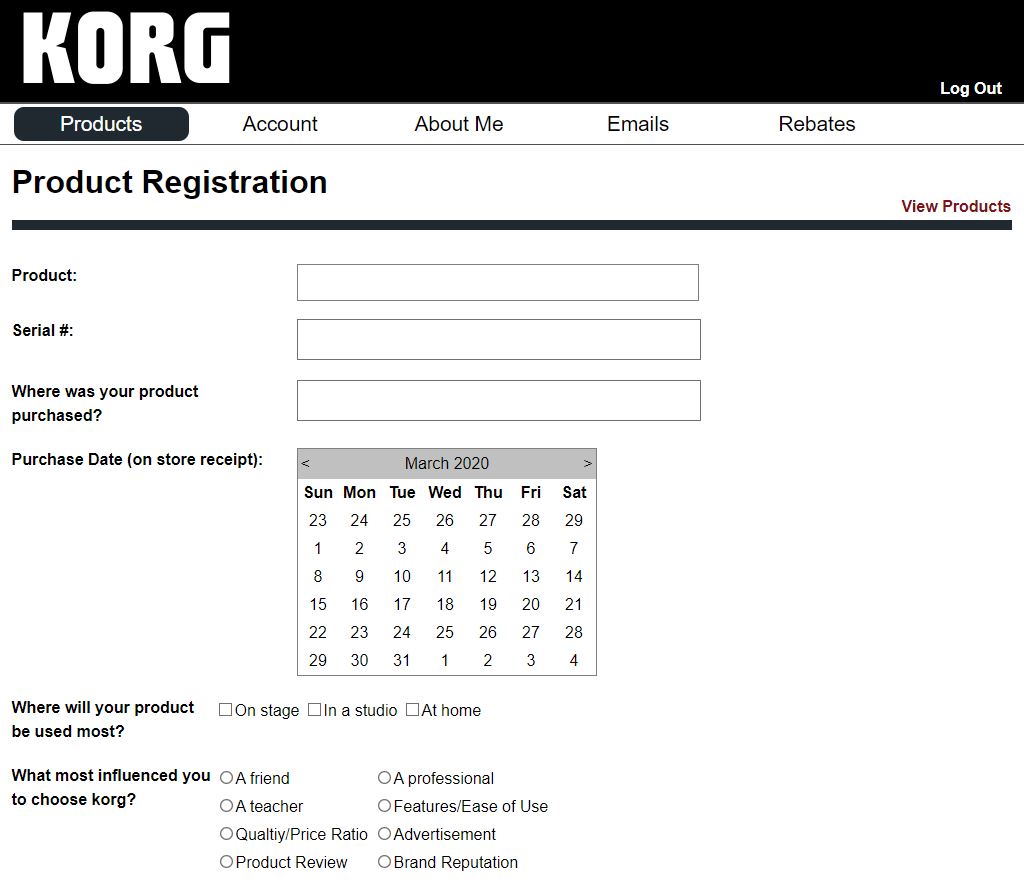
When you first open the box, keep in mind you must register the FM2 with Korg within the first 90 days of purchase. Once registered, Korg will extend your warranty for an extra year, and you will also receive a free software product bundle.
- Go to the Korg product registration page. Create or log in to your Korg account.
- On your account page, click Register a Product, fill out the required information, then click Save.
- Keep your Sweetwater invoice handy, as you must enter your purchase date.
Register the Software Bundle
When you purchase any Korg synth product, you will receive licenses for virtual instruments, plug-ins, Reason Studios’ Reason Lite, and access to TuneCore.
You must go to the Korg License Center page, enter the bundle code number on the card in the box, and click Submit. Once complete, you’ll receive licenses and activation instructions for each piece of software.
Create a Preset
At its core, the Korg Volca FM2 is a 6-voice, 6-operator digital FM synthesizer. While it already has plenty of great presets, you can also manipulate plenty of controls and create unique sounds!
TIP: Refer to the handy card Korg included in the packaging to view the Parameter List Guide and FM synthesis algorithms.
- Use the PROGRAM knob to change presets. Press the EDIT button and use the PROGRAM knob to edit specific parameters in the preset.
- Use the ALGRTM knob to change the FM algorithm.
- In Play mode, the VELOCITY slider affects the global velocity. Press EDIT and use the VELOCITY slider to edit synthesis parameters.
- Press the SAVE button once you’re happy with the sound you created.
Export programs and sequences
You can export programs and sequences from the Volca FM2 to another Volca FM device by connecting it from the Sync OUT jack to the receiving Volca’s Sync IN jack using the included 1/8-inch MIDI cable.
The following can be exported: the currently selected program (Crnt PGM), all programs (ALL PGM), the currently selected sequence (Crnt SEQ), all sequences (ALL SEQ), or all programs and all sequences (CLOnE).
- Press the EDIT button, followed by the SAVE button. The button should begin to blink.
- Use the PROGRAM knob to select what you want to export, then press the SAVE button to start the export process.
- The button will light up during the export process. Once complete, the SAVE button will begin blinking again.
How to Record a Pattern
One great feature of the Volca FM2 is the ability to record sequences. It can even record Motion Sequences, meaning it will record any knob or slider operation while being played back! Think of it like automation in your DAW.
- Press the REC button to record arm (record enable) the FM2. The button will begin blinking.
- Press PLAY to begin recording. Alternatively, you can start performing to begin recording.
- If you press REC while in playback mode, the recording will start from the point you pressed the button.
Step Recording (Active Step)
When recording in real time, your sequence will be automatically quantized. If you prefer to be more accurate with your sequence, you can record individual steps while in Active Step mode. One great thing about this is that you can manually edit prerecorded sequences if you need to fine-tune them.
You simply need to press the FUNC and PLAY buttons. The LEDs beneath the 16 keys correlate with the steps in your sequence, so if the LED is lit, the step is active. When it’s off, it’s disabled.
Motion Sequence
NOTE: Motion Sequence will record all clear knobs (MOD, CARRIER, LFO, ALGRTM), along with the Transpose and Velocity sliders. The tempo cannot be modified.
When Motion Sequence is turned on, you can record any movement from a slider or knob. It’s simple to use, too! After one cycle of the sequence playback, Motion Sequence recording will automatically be deactivated.
- Press the FUNC button and press the 12 key to toggle it on or off. Pressing the FUNC button followed by the 13 key will enable smoothing, allowing smooth parameter changes during each sequence step.
- Press PLAY. Start moving those knobs and sliders!
- If you are unhappy with the result, press the FUNC button and the 14 key to clear all Motion Sequence adjustments.
Related Articles
When you need help, Sweetwater has the answers!
Our knowledge base contains over 28,000 expertly written tech articles that will give you answers and help you get the most out of your gear. Our pro musicians and gear experts update content daily to keep you informed and on your way. Best of all, it’s totally FREE, and it’s just another reason that you get more at Sweetwater.com.

