
Getting Started with Omnisphere 2
If this is your first time with Omnisphere 2, you’re in the right place. In this article, we’ll help you navigate the plug-in, load the sample library, and show you how to work with the settings to create custom sounds. Follow the sections below to get started.
Getting started with Omnisphere 2
Omnisphere 2 is a virtual instrument that is used for both studio and live performance applications. After it is registered and installed, you can either launch the desktop app or load it as a virtual instrument track inside your DAW. All of the functions work the same as a plug-in and in standalone mode. Standalone mode is useful if you want to create a custom patch or use it as a synth in live situations. If you need to record, however, load it as a virtual instrument track in your DAW.
How to link the Omnisphere STEAM folder
When opening the application for the first time, you will be prompted to link the STEAM folder, which is where the factory patch (sound) libraries are. If the STEAM folder isn’t linked to Omnisphere, you will be unable to load or play any sounds. Follow these steps to link the STEAM folder.
- Launch the Omnisphere standalone app, or load it as a virtual instrument.
- Click OK when you see the window saying “STEAM Folder not found. Would you like to locate it?”
- Navigate to the directory you installed the library during the installation process.
- Windows: The default STEAM folder location is C:\ProgramData\Spectrasonics.
- Mac: The default STEAM folder location is Macintosh HD/Users/Username/Library/Application/Support/Spectrasonics.
- Select the STEAM folder, then click OK.
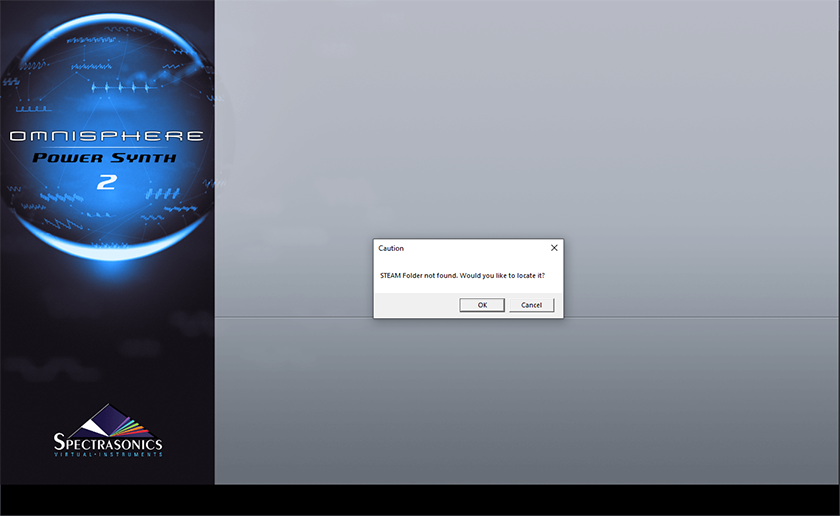
Navigate to the location where the STEAM library is when this message appears.
Setting up external hardware
If you’re using an external MIDI controller and audio interface with Omnisphere, now is a great time to set it up. Make sure to select the audio and MIDI devices. First, you’ll need to connect the controller to your computer, then configure it in Omnisphere. Follow these steps to select and change hardware settings.
- Navigate to the View menu on the top left of the window, then click Settings.
- Select your audio interface, sample rate, and buffer size. Enable the output channels you are using as well.
- Click Test to verify it’s passing signal.
- If you’re using a MIDI controller, enable the MIDI inputs you will be using.

Learn more about getting started with MIDI keyboards!
Hardware profiles
You can set up some hardware synths for complete control of the software via a Hardware Profile. Just click the HW dropdown box located at the top of the window and select your synth. For detailed instructions on how to link your hardware synth, visit the setup guides here.
Working with MIDI
The MIDI features in Omnisphere 2 are straightforward to work within standalone mode. Just turn your MIDI controller on, set it up in Omnisphere, and start playing. There are also a few additional options you can adjust for a much smoother workflow. Follow these steps to set up a MIDI controller.
- Connect a MIDI controller to your computer via USB or MIDI, then launch Omnisphere 2.
- Click View on the top left-hand corner of the window, then navigate to Settings.
- Locate the Active MIDI Inputs section and make sure that your MIDI controller is listed and has a checkmark next to it.
- You can also customize which MIDI inputs will trigger the samples.
How to set up MIDI Learn functions
If your MIDI device has additional faders, knobs, or buttons, you can assign them to different parameters using MIDI learn. Just right-click the setting you want to adjust, then begin moving the knob, fader, or button to assign it. To save these changes as a preset, navigate to UTILITY, MIDI Learn and Automation, then click Save Preset.
Using Omnisphere 2
Now that you know how to load the preset patch libraries and set up external hardware with Omnisphere 2, we’ll now explain how to navigate the software and create and load custom patches and projects.
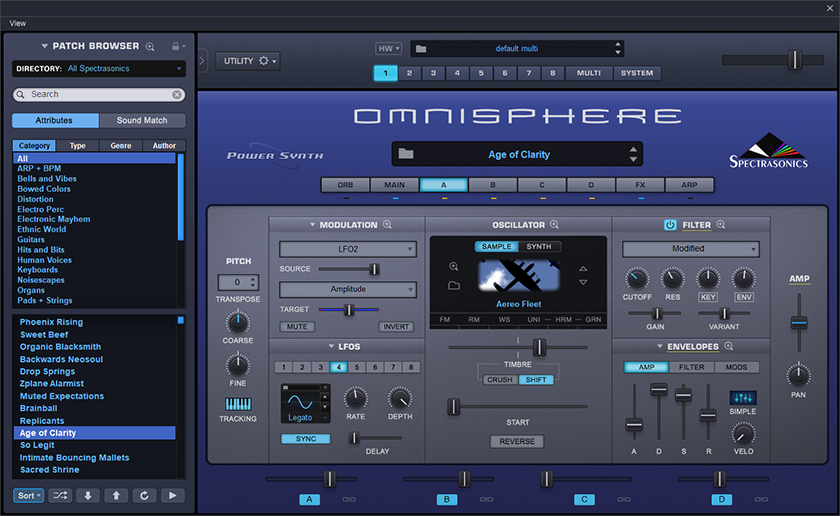
How to navigate Omnisphere
The plug-in has three main sections; Browser, Main, and Layers. When you first launch Omnisphere, a sawtooth wave is loaded, which you can tweak or load a factory preset patch. These sections are for things like changing how the patch sounds or layering multiple samples.
Browser
The Browser section is where you will preview and load samples. You can also filter patches or sort them by different categories, complexities, moods, or genres.
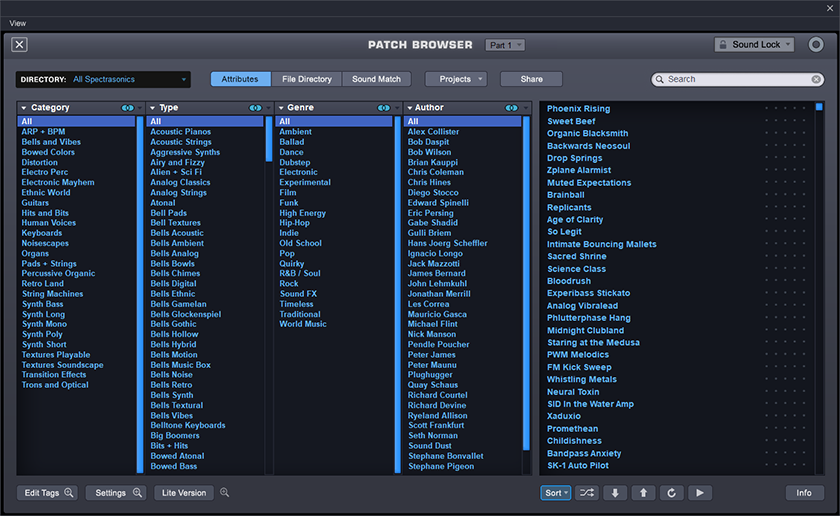
Browser window
Main
The Main section of Omnisphere is for making global changes to a patch such as the filter, resonance, or MIDI channel. Changing the MIDI channel for a patch is particularly useful if you want to layer and trigger multiple samples at once.
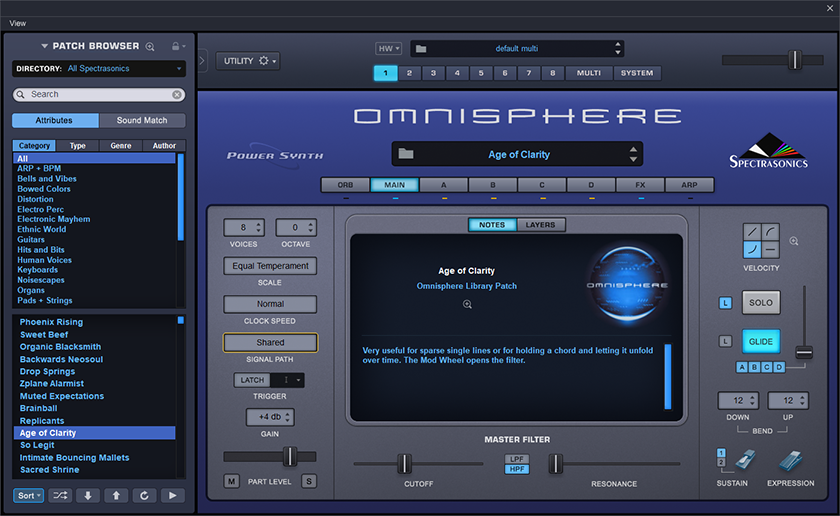
Main window
Layers
In the Layers window, you can modify settings like oscillation, pitch controls, and modulation to fine-tune a patch and also select, link, and solo multiple layers. For more details, visit the user manual.
Browser window
How to create, save, and load patches
It’s easy to create and load patches in Omnisphere 2. Once the STEAM folder is linked, you can load preset patches or create and import your own. Follow these steps to create and load patches.
Creating patches
When you launch Omnisphere, a sawtooth wave is loaded. Adjust the Main, FX, and ARP tabs settings until you find the sound you like.
- For more in-depth information on the synthesis controls, visit the video tutorials here.
Saving patches
- Click UTILITY, then click Save Patch As…
- Rename the patch, then click Save.
Loading patches
- Click the DIRECTORY dropdown box, navigate to User Directories, then click User.
- Double-click the patch to load it.
Importing custom audio files
For even further customization of patches, import your own .PCM, .AIF, or .WAV files. In the OSCILLATOR section, click Sample, then click the folder icon. Lastly, drag and drop the audio file.
How to create and load projects
Projects allow you to recall a custom collection of patches. They’re handy when you need to recall specific patches on the fly without navigating through the entire Omnisphere library. Follow these steps to create and load a project.
Create a project
- Click MULTI BROWSER in the top left corner of the screen to enter Full Browser mode.
- Click the Projects dropdown box, select Create Project, then name the project.
- Select the sound(s) you want to add to the project while you’re still in the Full Browser window.
- Click the Projects dropdown box, then click the name of your project located at the bottom of the dropdown box.
Loading a project
- Click MULTI BROWSER in the top left corner of the screen and enter Full Browser mode.
- Click the Projects dropdown box, then click Show Projects.
- Single-click the project you wish to load which appears in the project list on the left.
Related content
Learn more about plug-in compatibility for your OS and DAW!
Learn More
Learn more about effective file management for music production!
Learn MoreAdditional resources
Advanced Browser
Live Mode
Latch and Trigger Modes
Stack Mode
When you need help, Sweetwater has the answers!
Our knowledge base contains over 28,000 expertly written tech articles that will give you answers and help you get the most out of your gear. Our pro musicians and gear experts update content daily to keep you informed and on your way. Best of all, it’s totally FREE, and it’s just another reason that you get more at Sweetwater.com.


Offer applies only to single-receipt qualifying purchases. Select manufacturers may require that only the manufacturer’s products qualify towards the minimum purchase amount needed to be eligible for promotional financing. Otherwise, an invoice that meets the minimum purchase amount and contains at least one qualifying manufacturer product is eligible for promotional financing. No interest will be charged on promo purchase balance, and equal monthly payments are required on promo purchase until it is paid in full. The payments equal the amount financed divided by the number of months in the promo period, rounded up to the next whole dollar. These payments may be higher than the payments that would be required if this purchase was a non-promo purchase. During the last month(s) of the promo period the required monthly payment may be reduced due to the prior months’ rounding. Regular account terms apply to non-promo purchases. New Accounts as of 07/31/2025: Purchase APR is 34.99%. Penalty APR is 39.99%. Min Interest Charge is $2. Existing cardholders: See your credit card agreement terms. Subject to credit approval.
Offer applies only to single-receipt qualifying purchases. No interest will be charged on the promo balance if you pay it off, in full, within the promo period. If you do not, interest will be charged on the promo balance from the purchase date. The required minimum monthly payments may or may not pay off the promo balance before the end of the promo period, depending on purchase amount, promo length and payment allocation. Regular account terms apply to non-promo purchases and, after promo period ends, to the promo balance. New Accounts as of 07/31/2025: Purchase APR is 34.99%. Penalty APR is 39.99%. Min Interest Charge is $2. Existing cardholders: See your credit card agreement terms. Subject to credit approval.
The estimated required monthly payment shown which excludes taxes and delivery equals the amount financed divided by the number of months in the promo period, rounded up to the next cent. During the last month(s) of the promo period the required monthly payment may be reduced due to this rounding. These payments apply only with the financing offer shown. If you make these payments by the due date each month, you should pay off this amount financed within the promo period, if it is the only balance you are paying off. If you have other balances on your account, this payment will be added to any other minimum monthly payments.
Applies only to select items from this manufacturer. Ask your Sweetwater Sales Engineer for more details.